|
|
Purpose
|
Steps
|
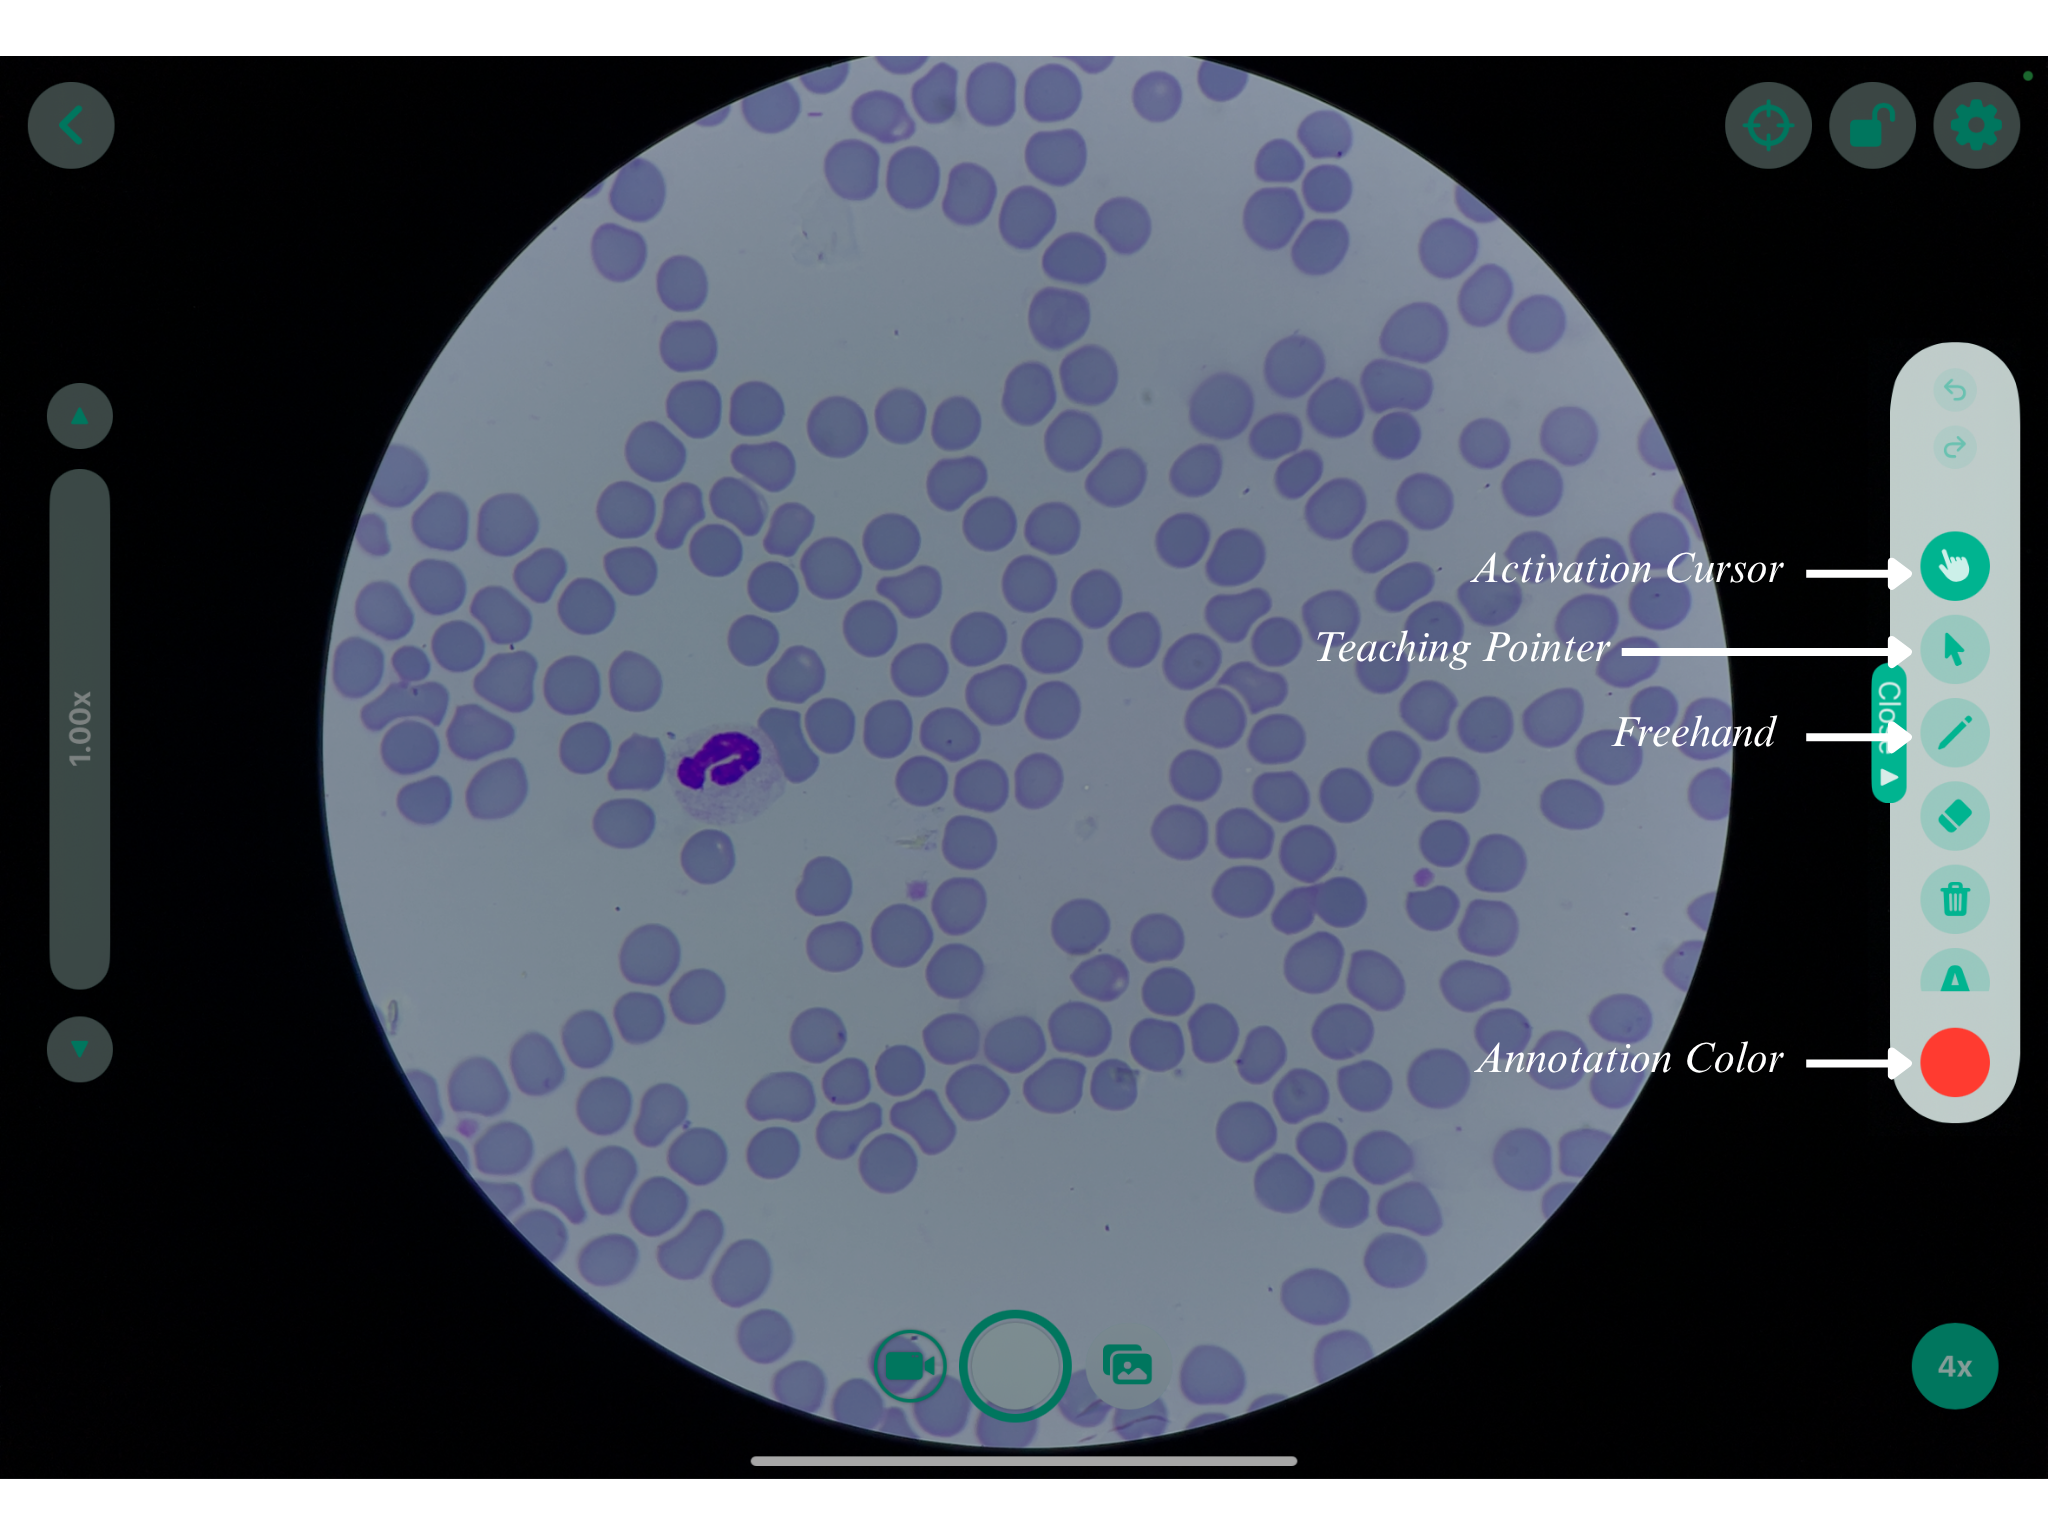
Activation Cursor ( ) )
|
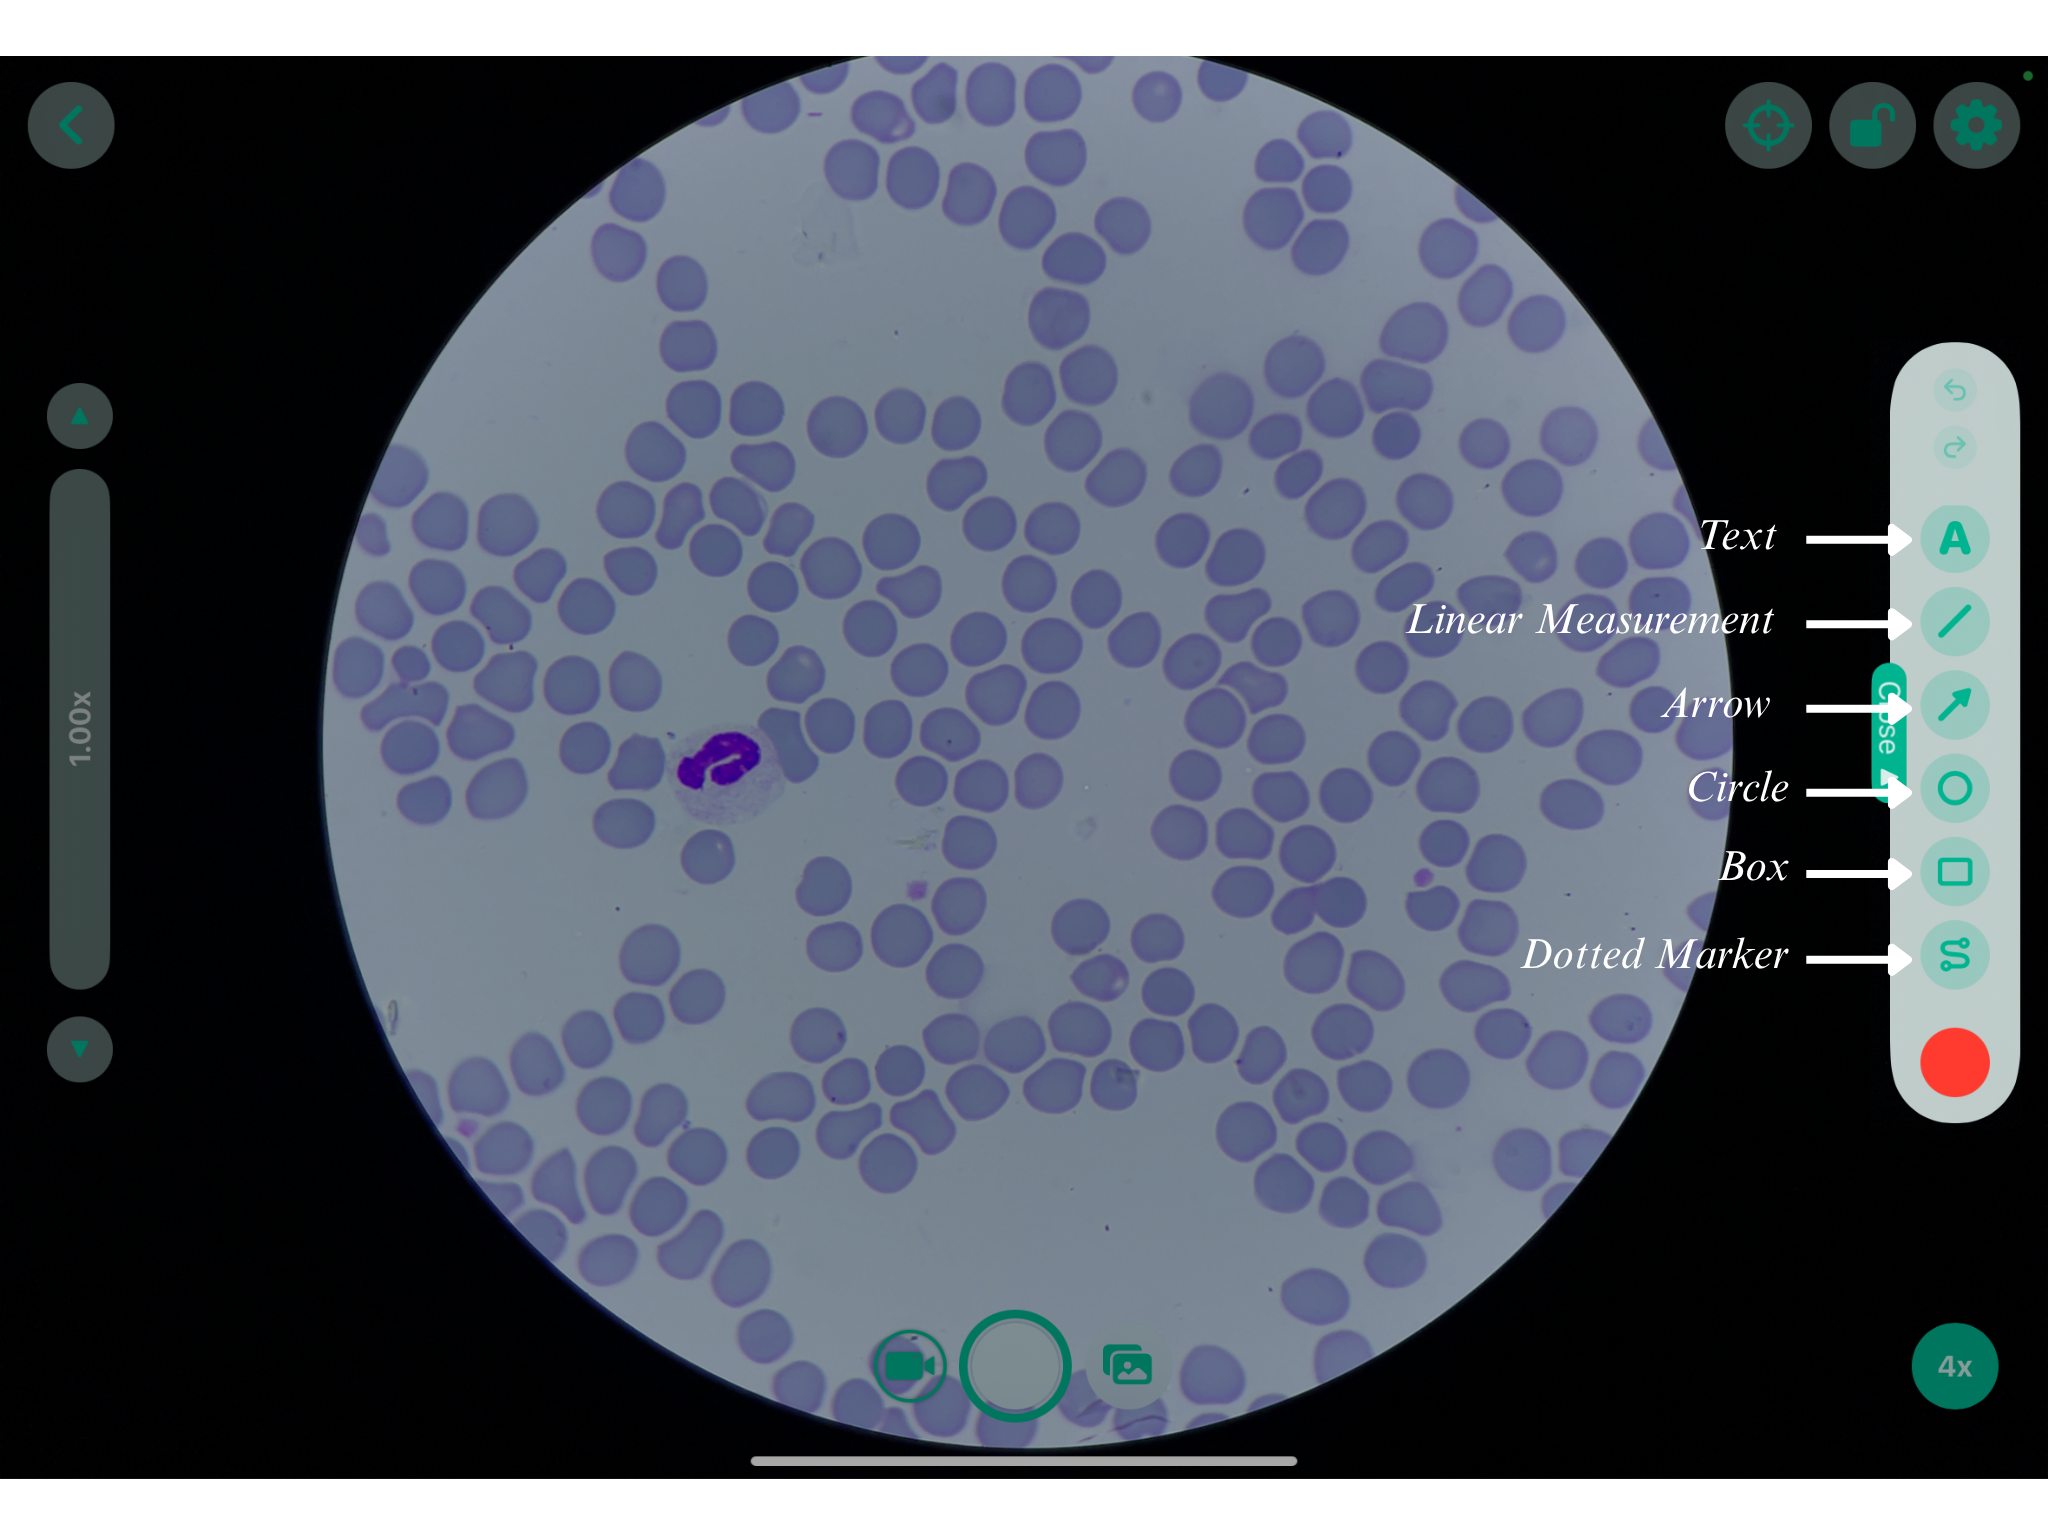
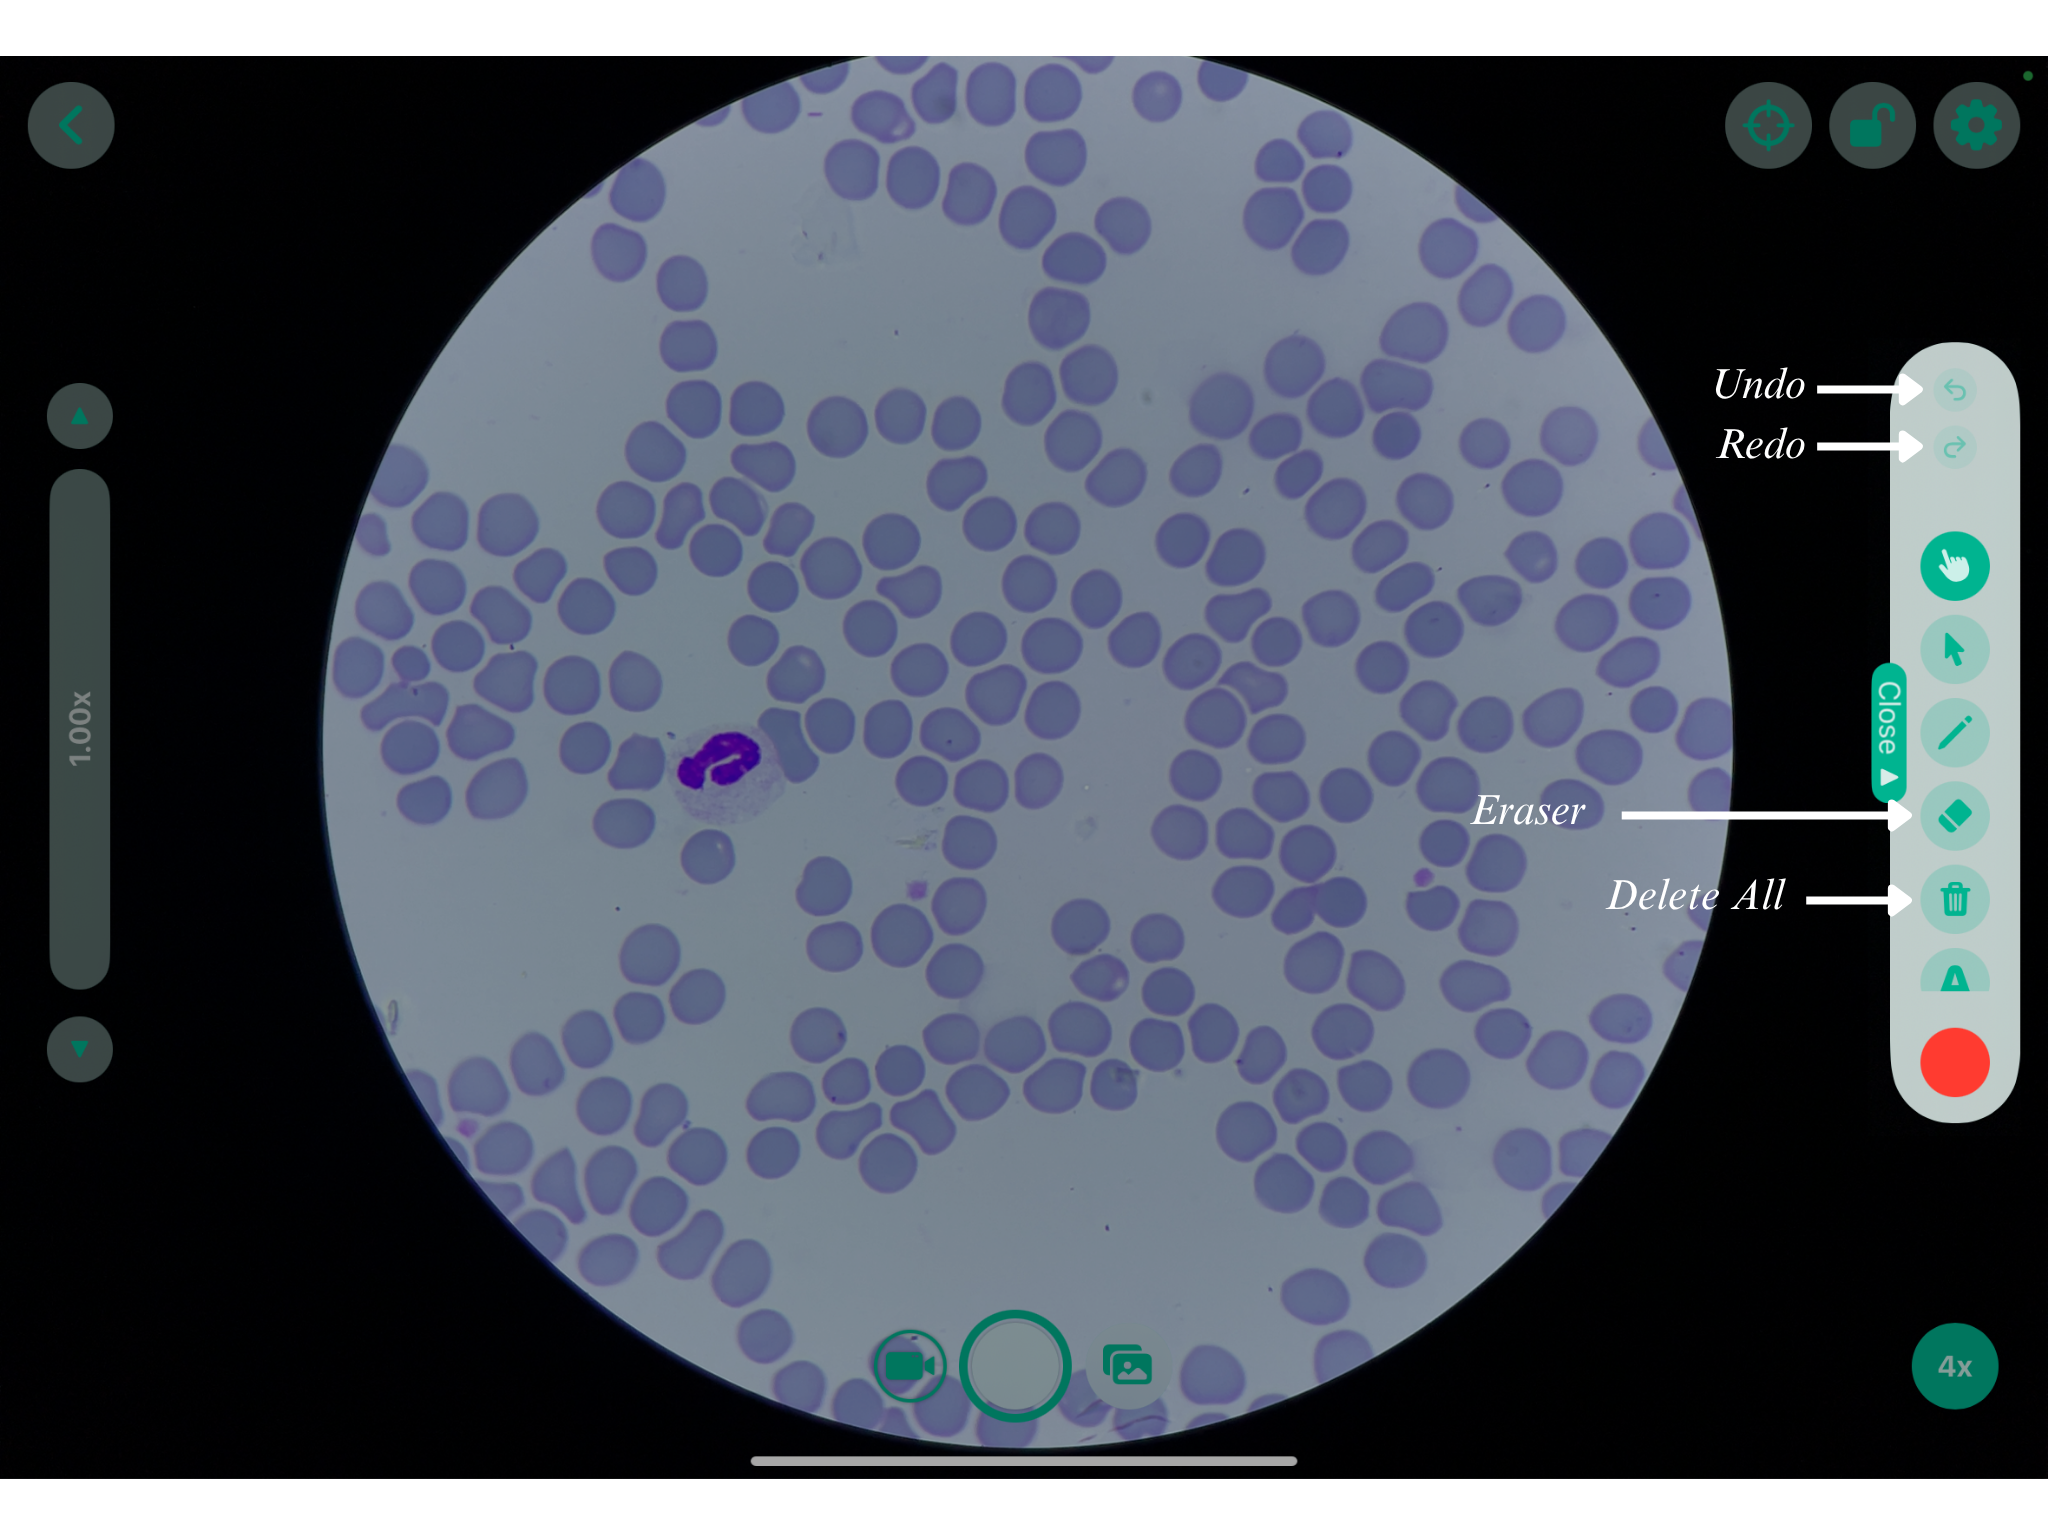
Enables or disables the annotation and marking tools on the live microscopic view.
|
-
Select the Activation Cursor () in the Open Drawer.
-
Use the annotation tools when enabled.
|
Teaching Pointer ( ) )
|
Highlights specific cells, structures, or areas on the live microscopic view for teaching, demonstrations, and discussions.
|
-
Select the Teaching Pointer ().
-
Place the pointer on the required area.
-
Press and drag to reposition it.
-
Use up to four Teaching Pointers simultaneously.
-
|
Freehand ( ) )
|
Draws freehand annotations on the microscopic image.
|
-
Select the Pencil icon () from the annotation tools in the Open Drawer.
-
Use your finger or stylus to draw the required annotation directly on the image.
-
Long-press or double-tap the Freehand tool to open the Line Width settings and adjust the thickness of the annotation.
-
To change the annotation color, select the red dot ( ) in the drawer and choose the required color. ) in the drawer and choose the required color.
|
Line\Arrow ( ) )
|
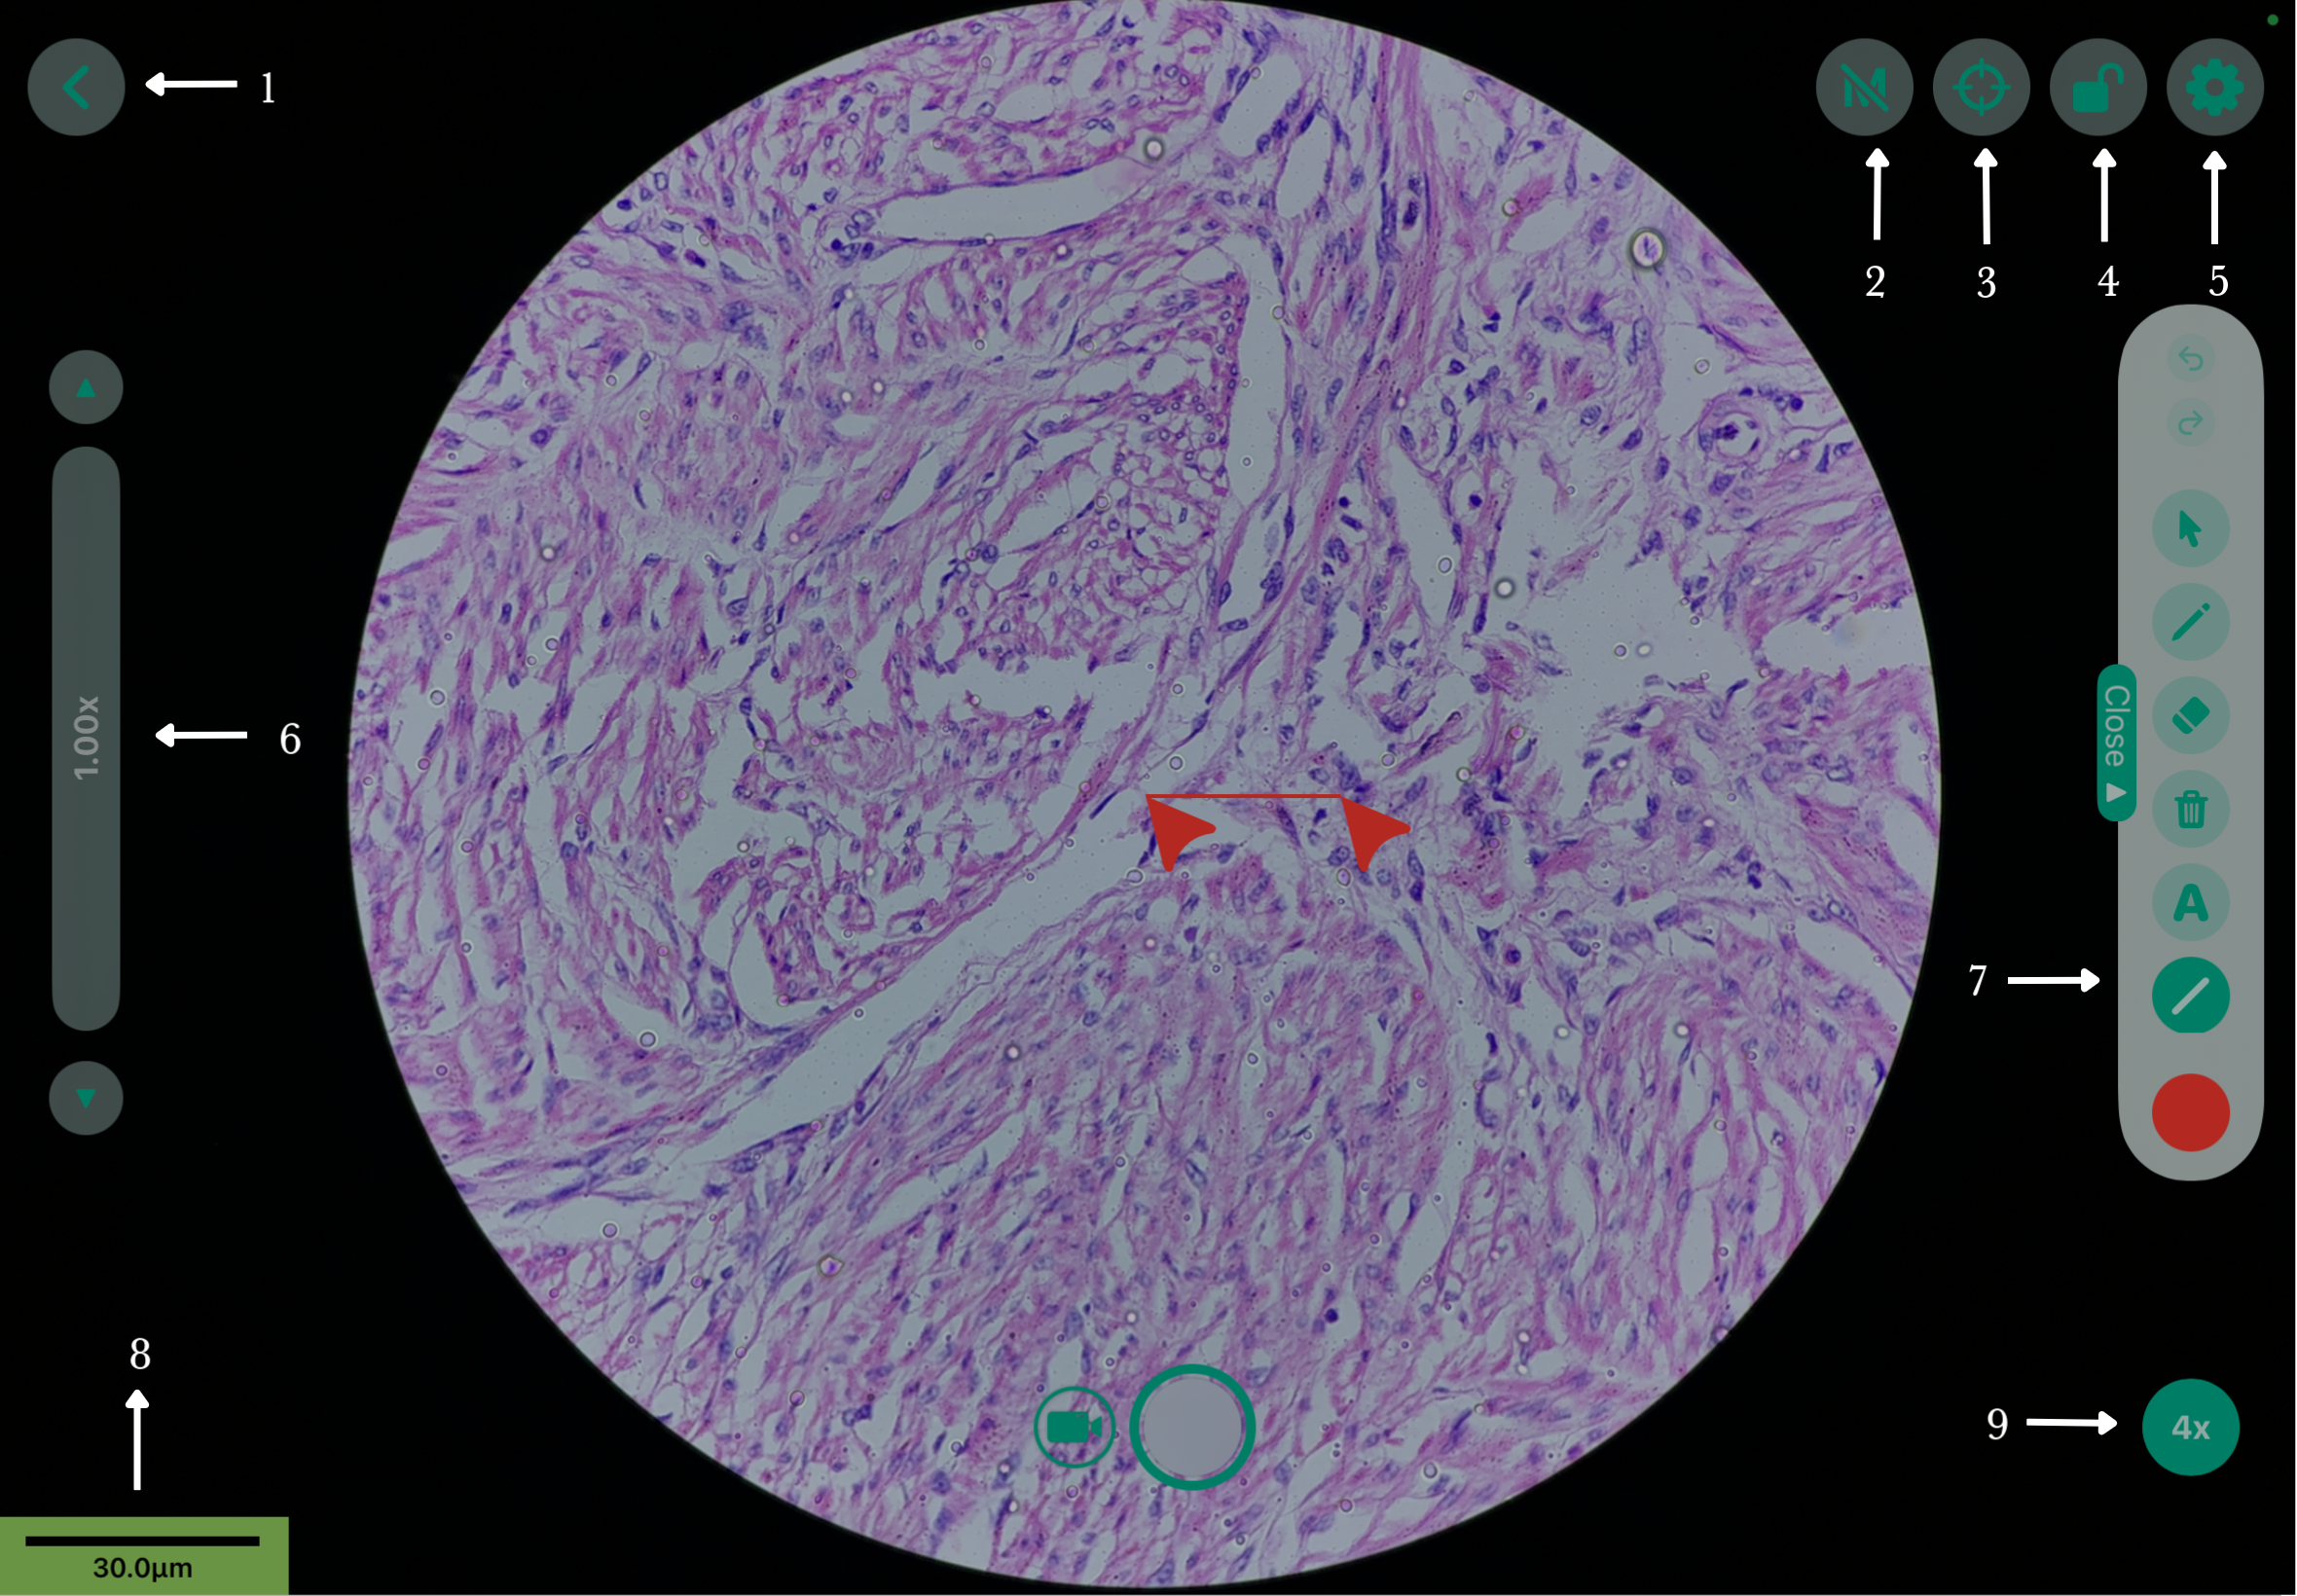
Draws a straight line or arrow to indicate a specific region or measure a distance.
|
-
Select the Line/Arrow icon () to place a line on the microscopic image.
-
-
Drag the handles at either end of the line to adjust its length and position.
-
The measurement displayed near the line indicates the distance represented by the line. Drag the line to reposition it as required.
-
To hide the measurement, select the M icon to turn the measurement display off.
|
Text ( ) )
|
Adds labels, notes, or other text directly to the microscopic image.
|
-
Select the Text (A) icon to open the Custom Text dialog box.
-
Enter the required label or note in the text field.
-
Select Set to place the text annotation on the viewing area.
-
Position the text at the required location on the image.
|
Circle (O)
|
Highlights a specific region using a circular annotation.
|
-
Select the Circle icon (O) to create a circle on the image.
-
Drag the available handles to adjust the size of the circle.
-
Select the Circle tool again to access additional options, such as Line Width, Lock, and Radius.
-
Enter the required radius, if applicable, and select Set to apply the value.
-
Once the circle is locked, adjust the pointer size as required.
|
Box ( ) )
|
Highlights a rectangular region of interest.
|
-
Select the Box icon () to create a rectangular annotation.
-
Drag the available handles to adjust the height and width of the box.
-
-
Enter the required measurements and select Set to apply them.
-
Use the available options to adjust the Line Width or lock the shape in place.
|
Dotted Marker ( ) )
|
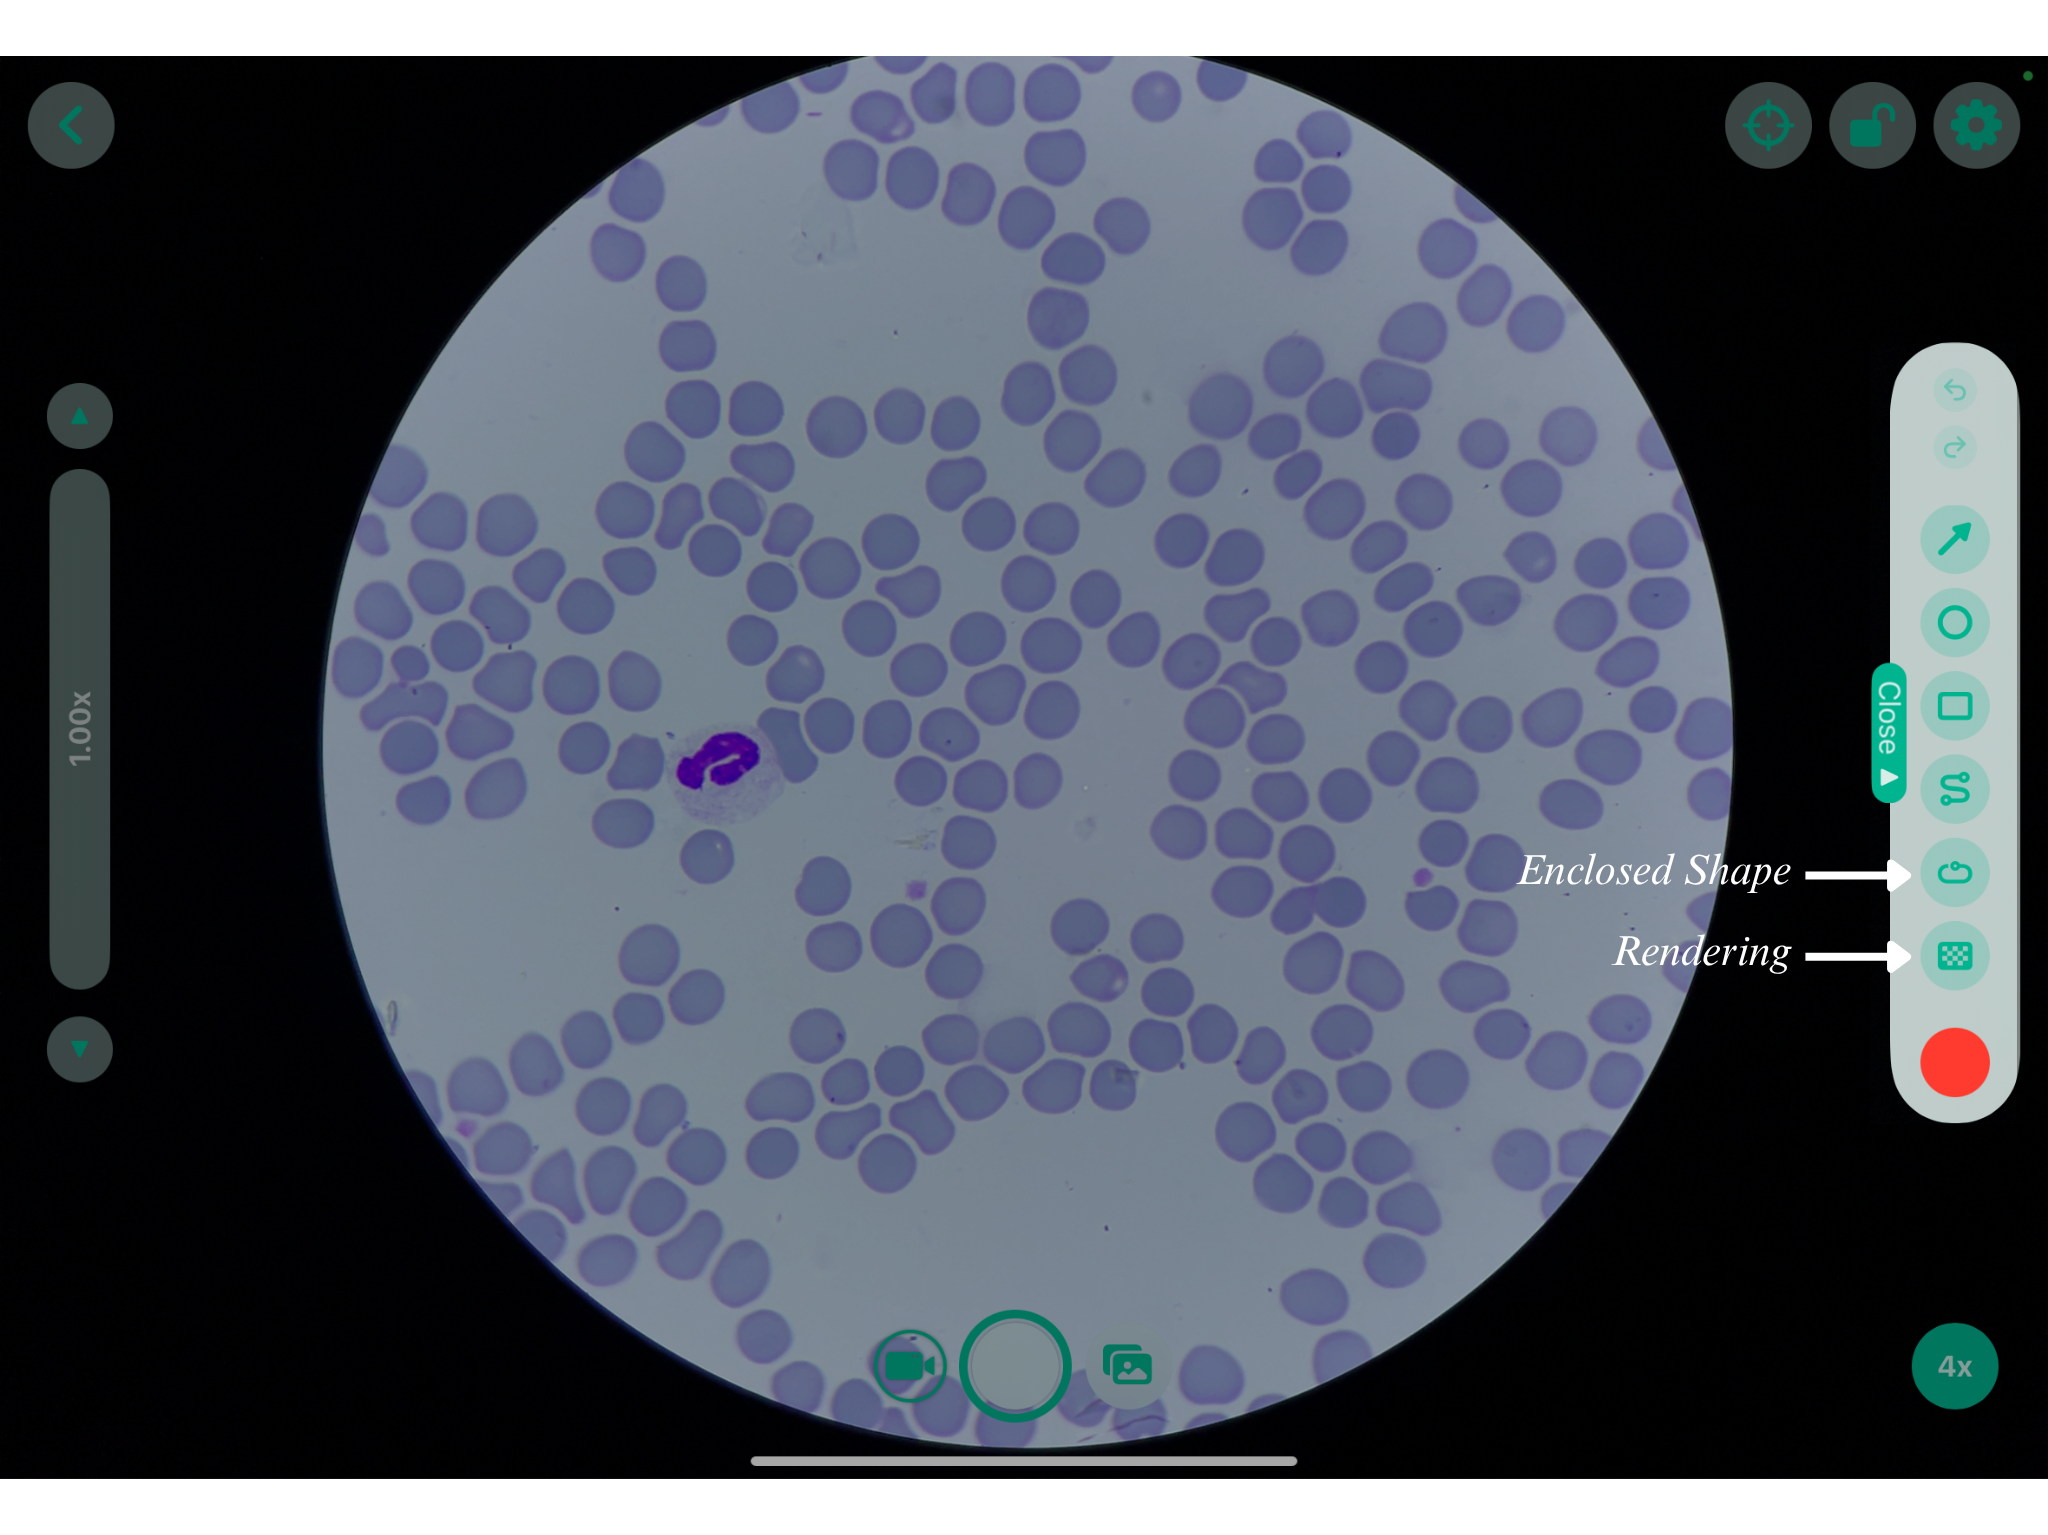
Marks a specific area using a series of dots.
|
-
Select the S icon () to activate the Dotted Marker tool.
-
Place the dotted marker on the required region of the microscopic image.
-
|
Enclosed Shape ( ) )
|
Creates a closed annotation by automatically connecting the endpoint to the starting point.
|
-
Select the Enclosed Shape icon () in the Open Drawer.
-
Draw the required shape around the region of interest.
-
When you finish drawing, the tool automatically connects the endpoint to the starting point with a straight line, creating a closed shape.
-
Adjust the shape or its properties using the available annotation controls, if required.
|
Rendering ( ) )
|
Rendering permanently applies annotations and markings to the current image so that they are included when the image is saved or exported.
|
-
-
Select the Rendering icon to apply and save the current annotations and markings to the image.
-
After rendering, the annotations and markings appear as part of the saved or exported image.
|
Annotation Color
|
The annotation color can be customized to make different annotations easier to identify and distinguish on the slide.
|
-
In the Open Drawer on the right side of the screen.
-
Select the red dot () color indicator in the drawer.
-
A color selection menu appears with available options such as Grid, Spectrum, and Sliders for selecting a color.
|
 ) in the dock at the bottom of the screen and tap on it to launch the Cilika application.
 )
) 
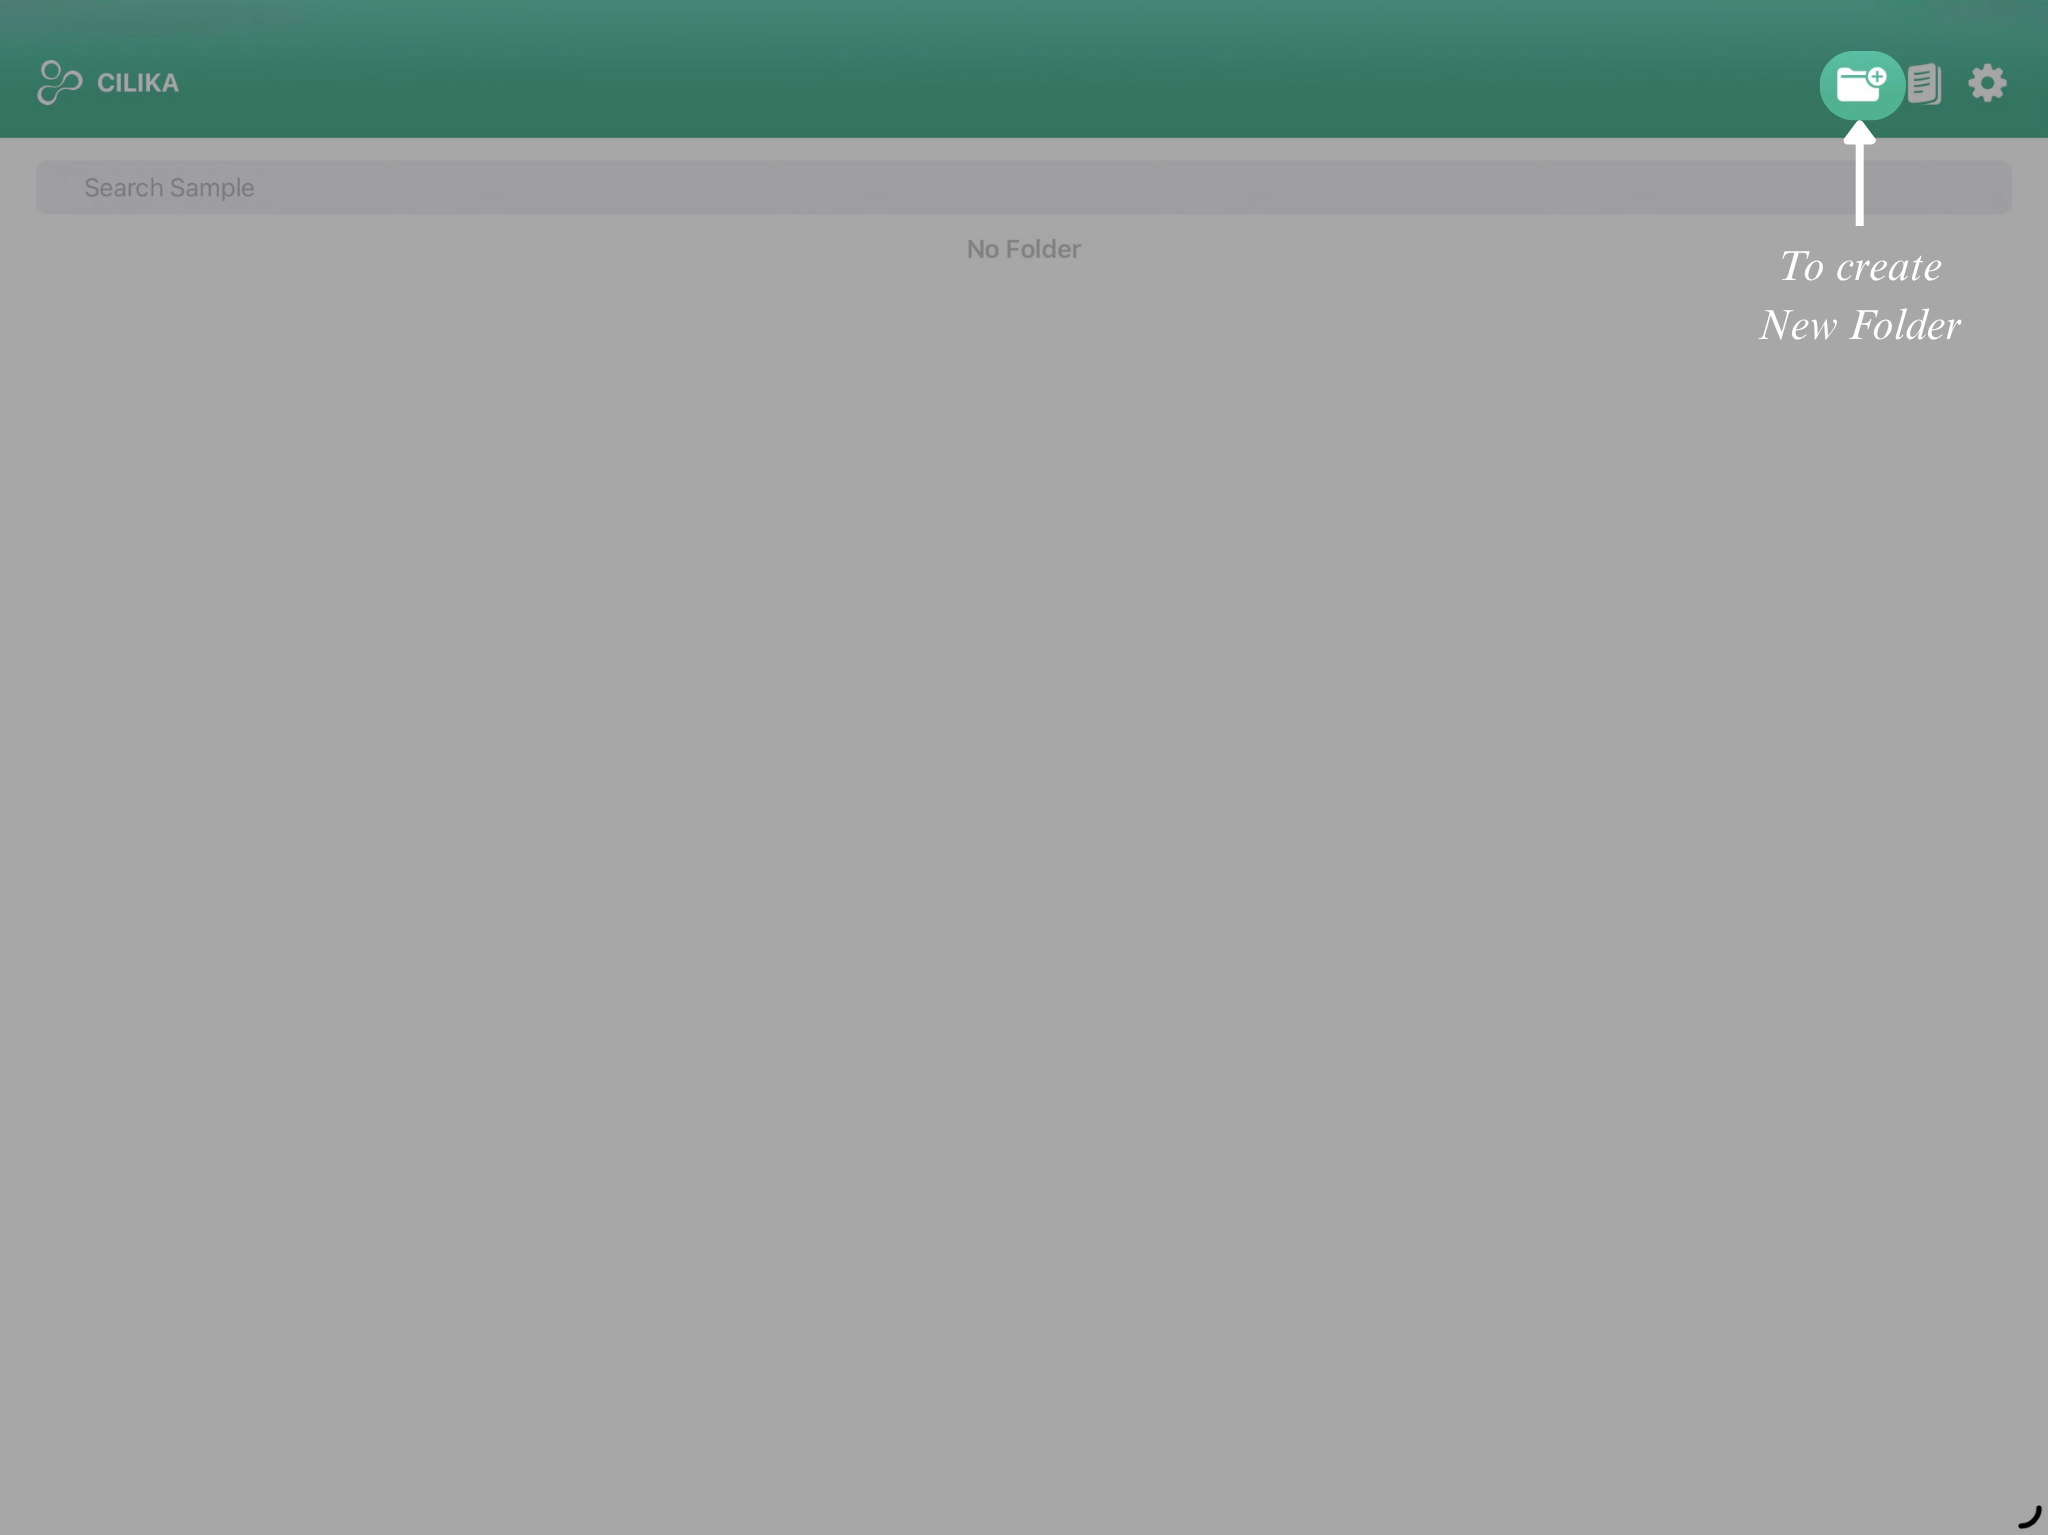
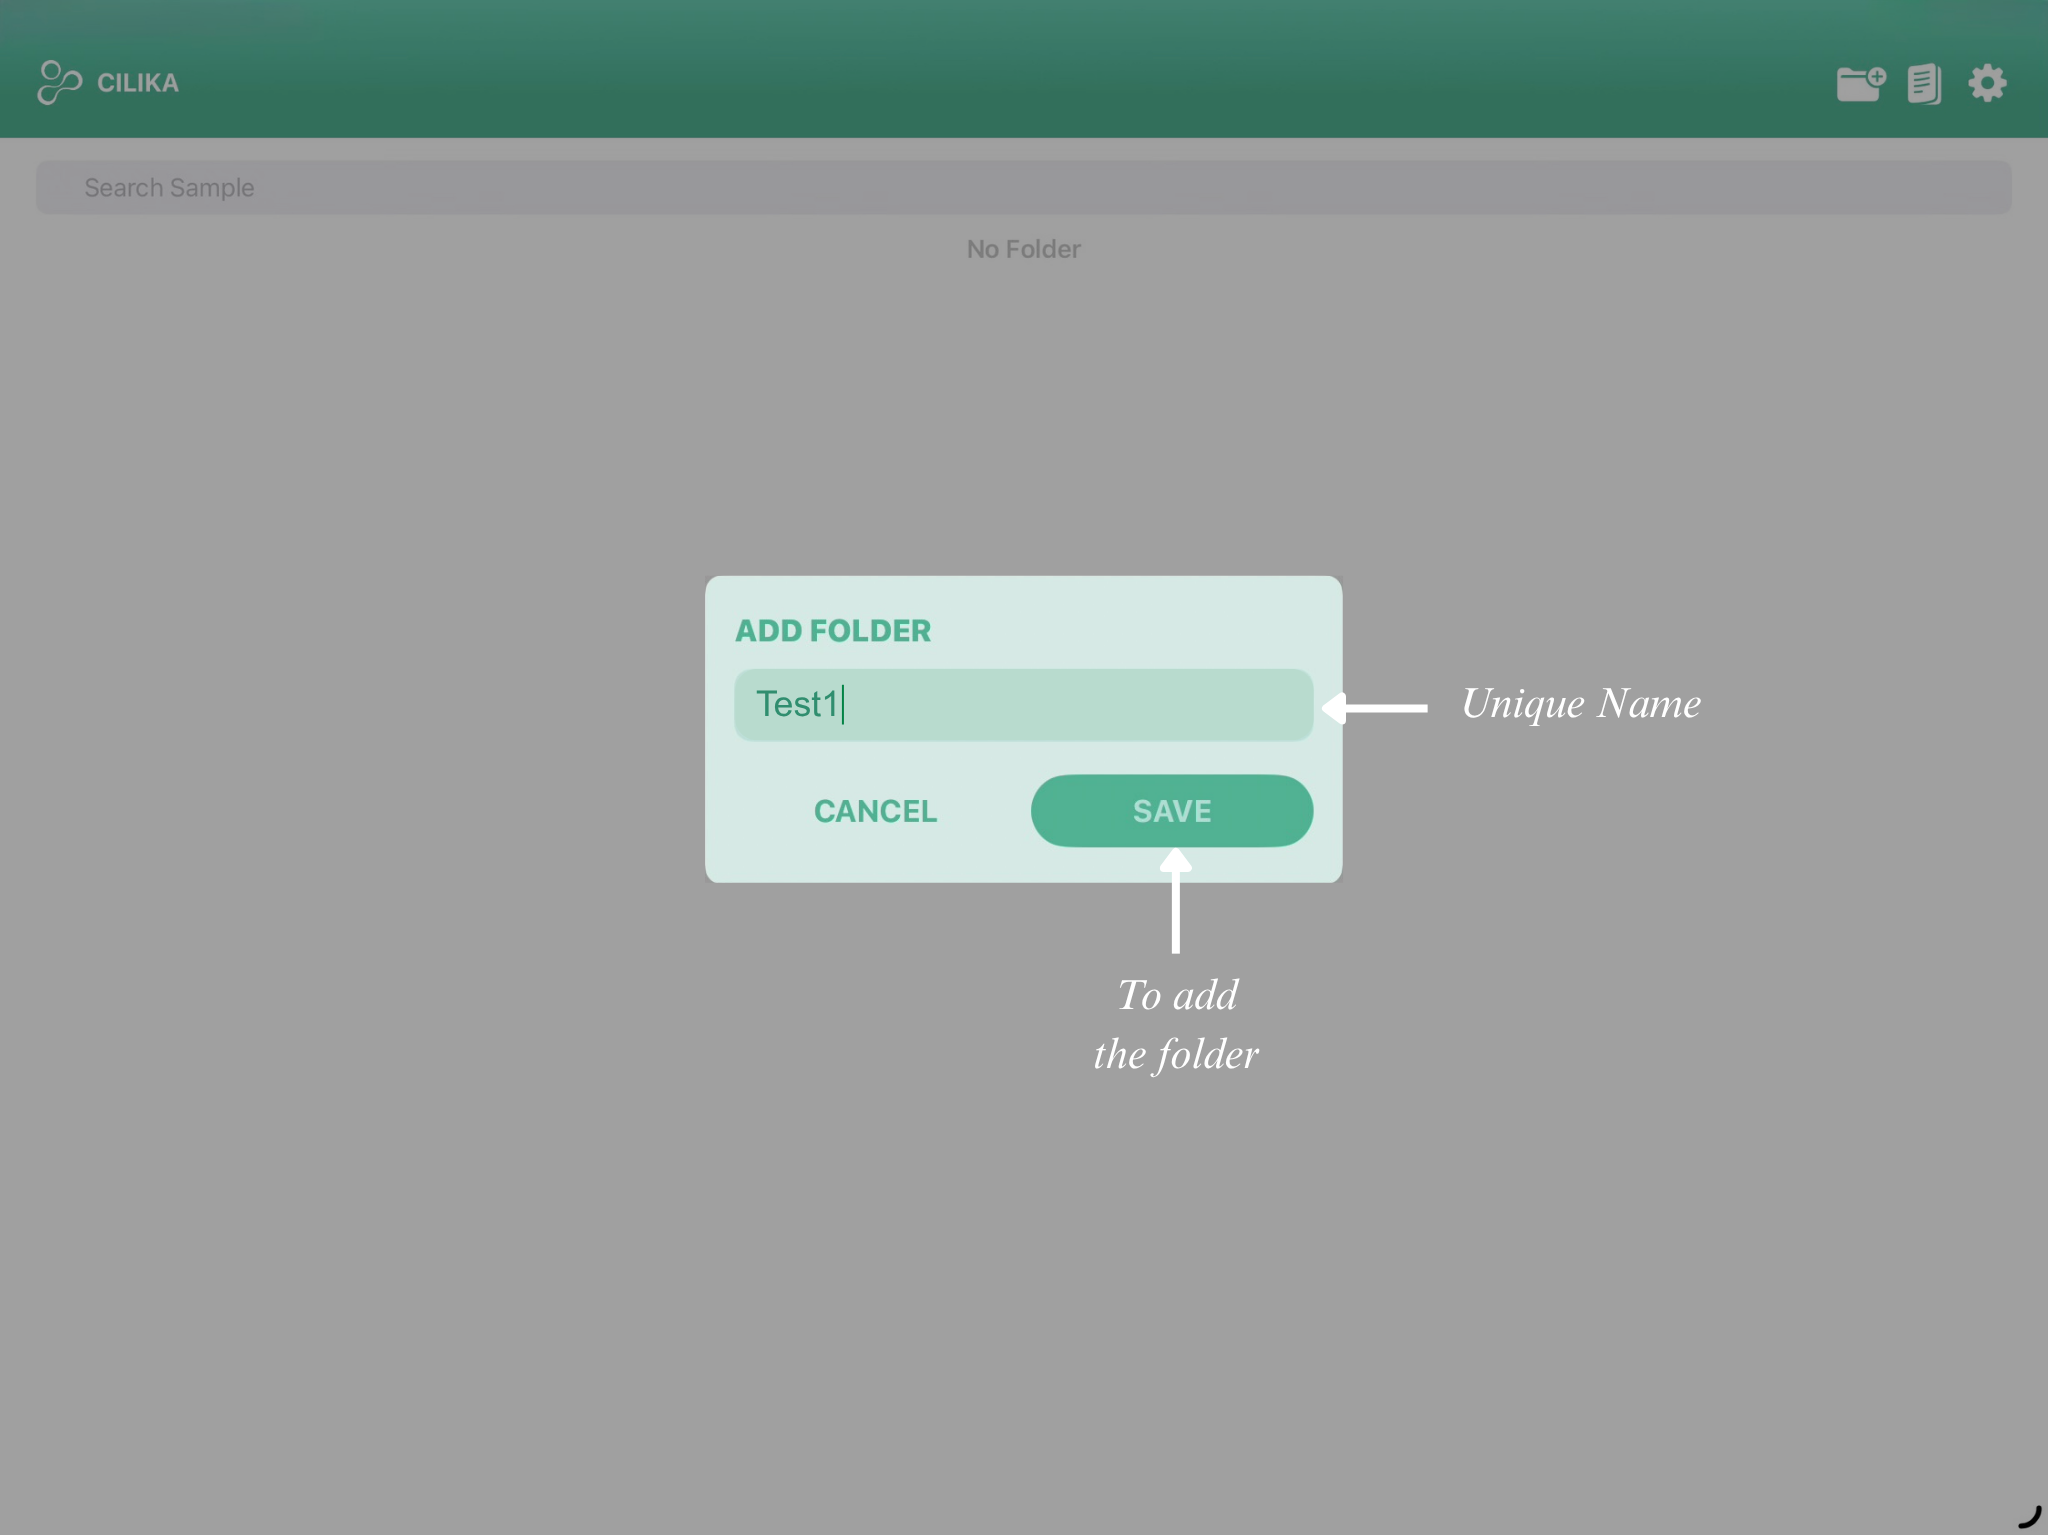
 )
) )
)

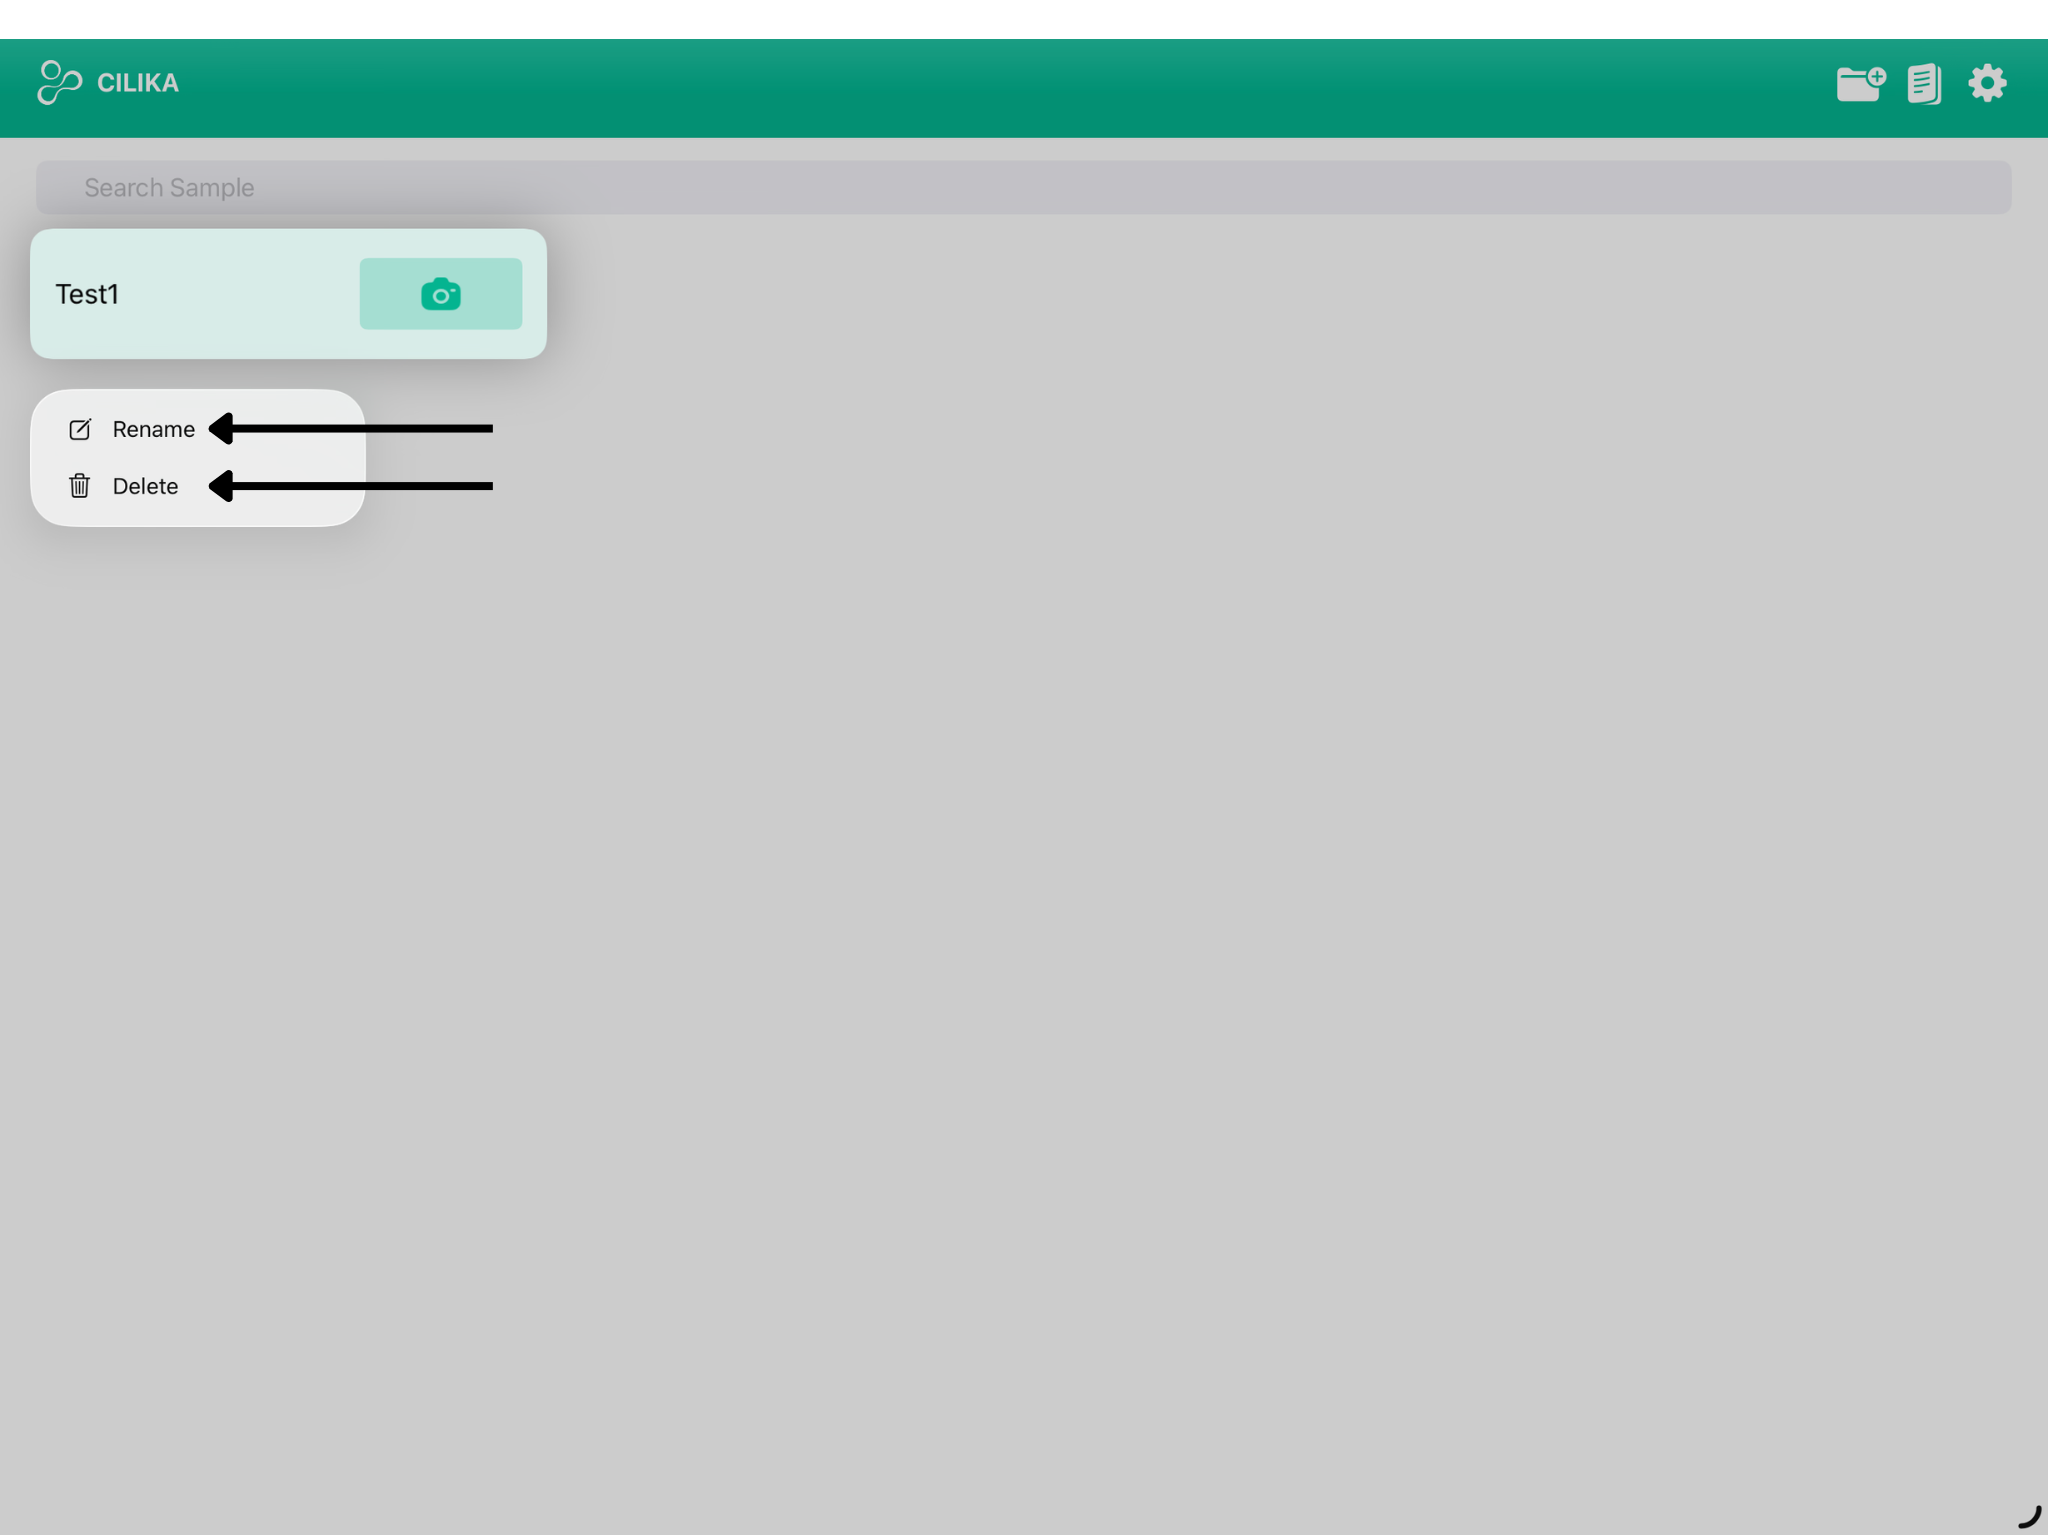
 ) located on the folder beside the folder name.
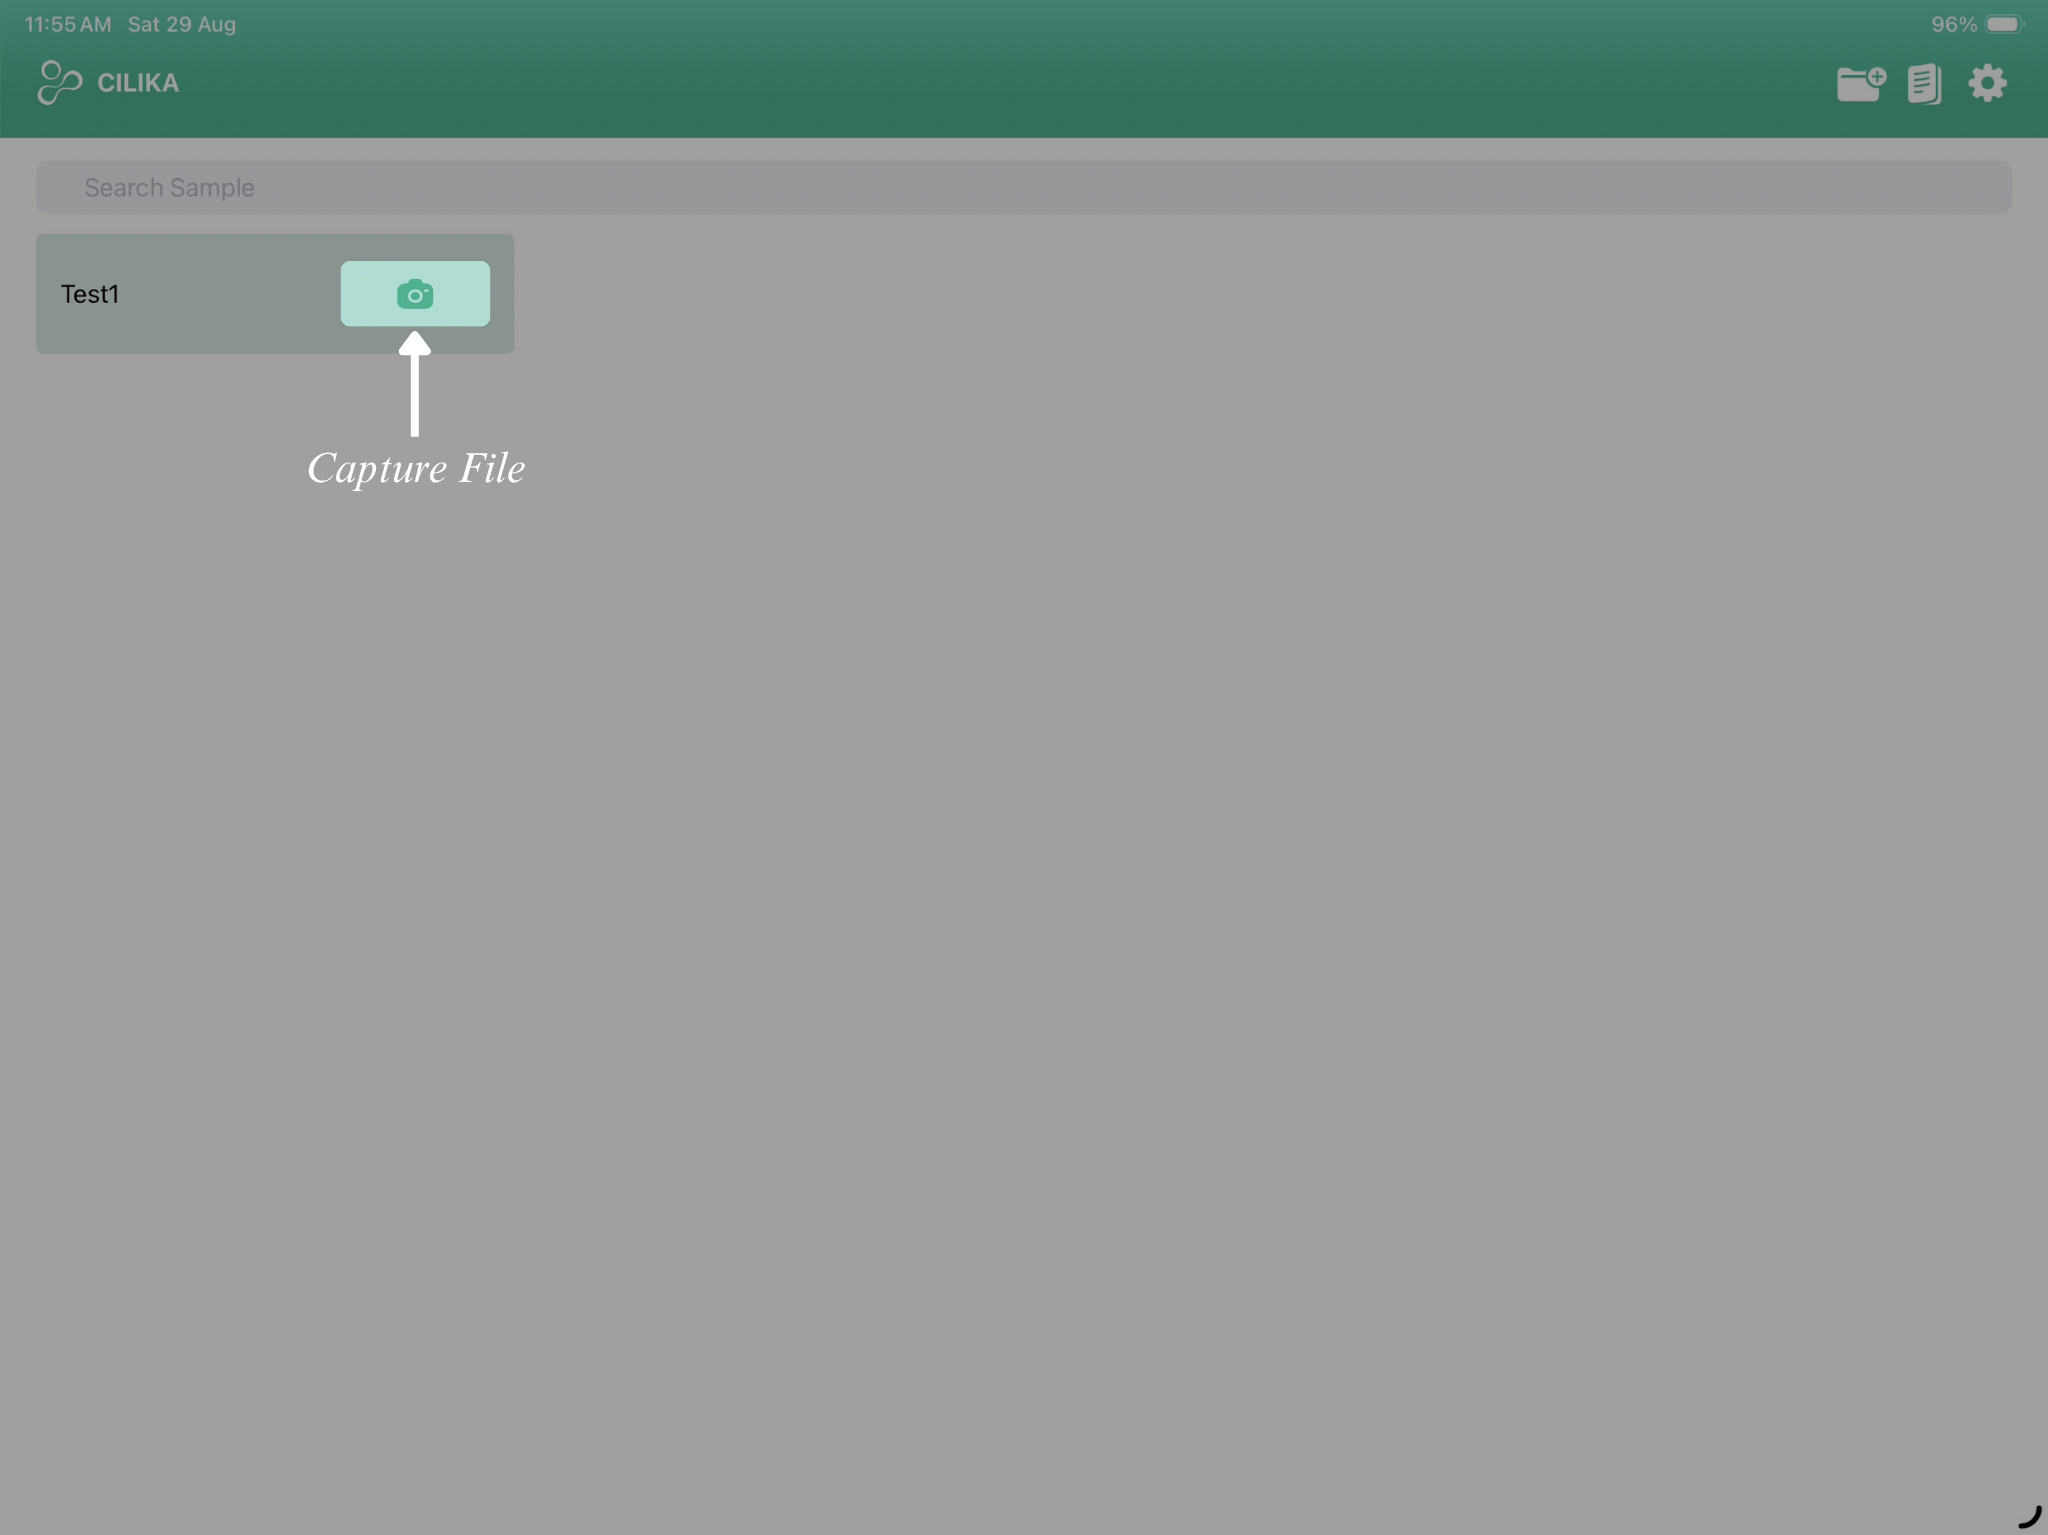


 ) located at the bottom center of the screen.
 ) to the left.
 ) to the screen if it has already been configured in the Main Settings.
 ) to enable or disable the background sound.