App Settings
1.5 App Settings
Go to the back to the home page, and tap on the settings icon. A pop up window appears on the screen with various settings option.
| Image Compression | Indicates the quality of the image. The User has three options from which they can choose their preferred image quality | |
| Video Compression | Indicates the quality of the image. The User has three options from which they can choose their preferred image quality. | |
| Screen Recording | Allows users to record live view screen, can be used in demonstrations and trainings. | |
| Horizontal Flip | Flips the live view image horizontally. | |
| Vertical Flip | Flips the live view image vertically. | |
| Measurement Unit | The measurement unit can be changes here. You can switch between Micrometer and Millimeter. | |
| Enable Tiff Format | Tiff Format is an uncompressed file format, enabling this format stores the image in the highest quality. | |
| Lens Profile | ||
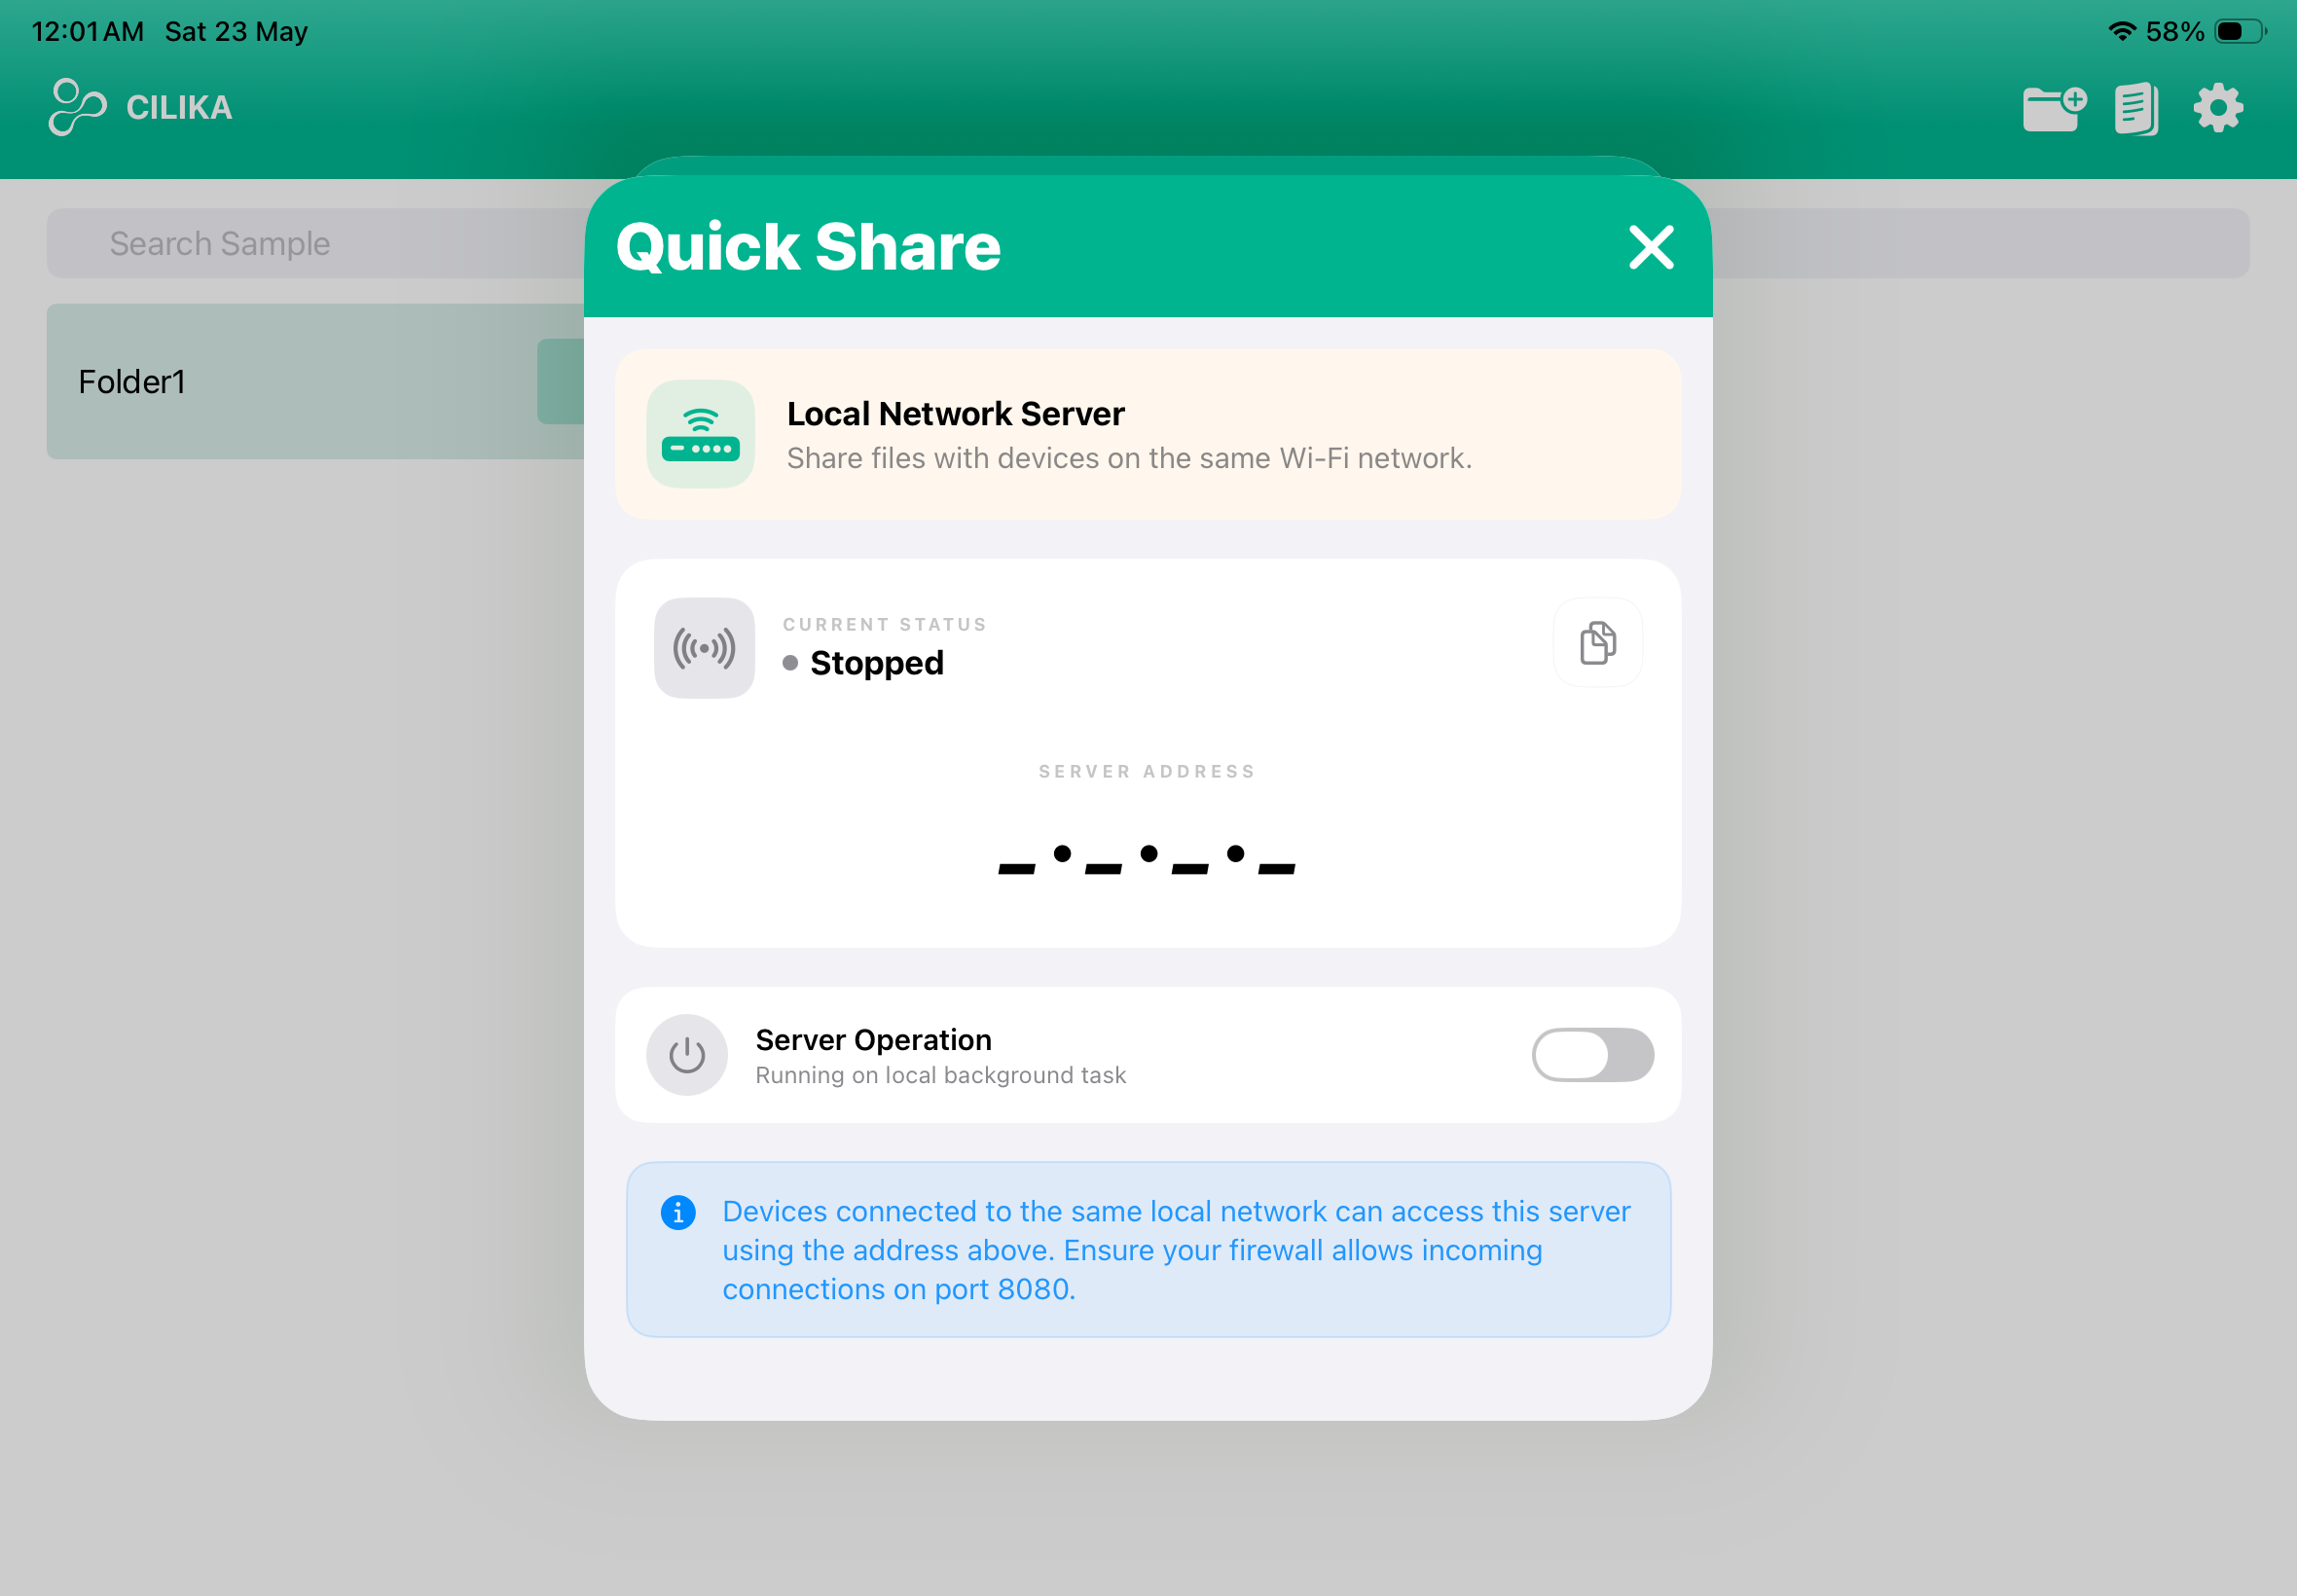
| Object Storage | ||
| Quick Share | ||
| Reference Image | An external reference image can be added on the live view screen and can be positioned according to the users preference. | |
| Watermark General | a faint, semi-transparent text which the user can place over their captured image. Its primary purpose is to identify ownership, protect against unauthorized copying. | |
| Watermark Cilika | It is a faint, semi-transparent image, embedded by default in the captured image. | |
| Zoom | Switching ON this option helps you increase and decrease the magnification on live view. | |
| Scale Setting | Controls the appearance and behavior of the on-screen scale bar. This settings gives the user two scale settings to choose from.
|
|
| Auto Hide | ||
| RBC Template | ||
| hide Calibration | ||
| Enable Grid | ||
| Unit | ||
| Size | ||
| Opacity | ||
| Line Type | ||
| Color | ||
| Show Frame |
Image Compression

- This setting offers the user to select, image quality type.
- Low: Medium: Original:
Video Compression
- This setting offers the user to select, image quality type.
Screen Recording
Allows users to record live view screen, can be used in demonstrations and trainings.
Horizontal Flip
1. Tap on the Horizontal Flip toggle to flip the live view screen image horizontally.
Vertical Flip
1. Tap on the Vertical Flip toggle to flip the live view screen image vertically.
Measurement Unit
1. Tap on the toggle to change the measurement unit to either micrometer (μm) or millimeter
Enable Tiff Format
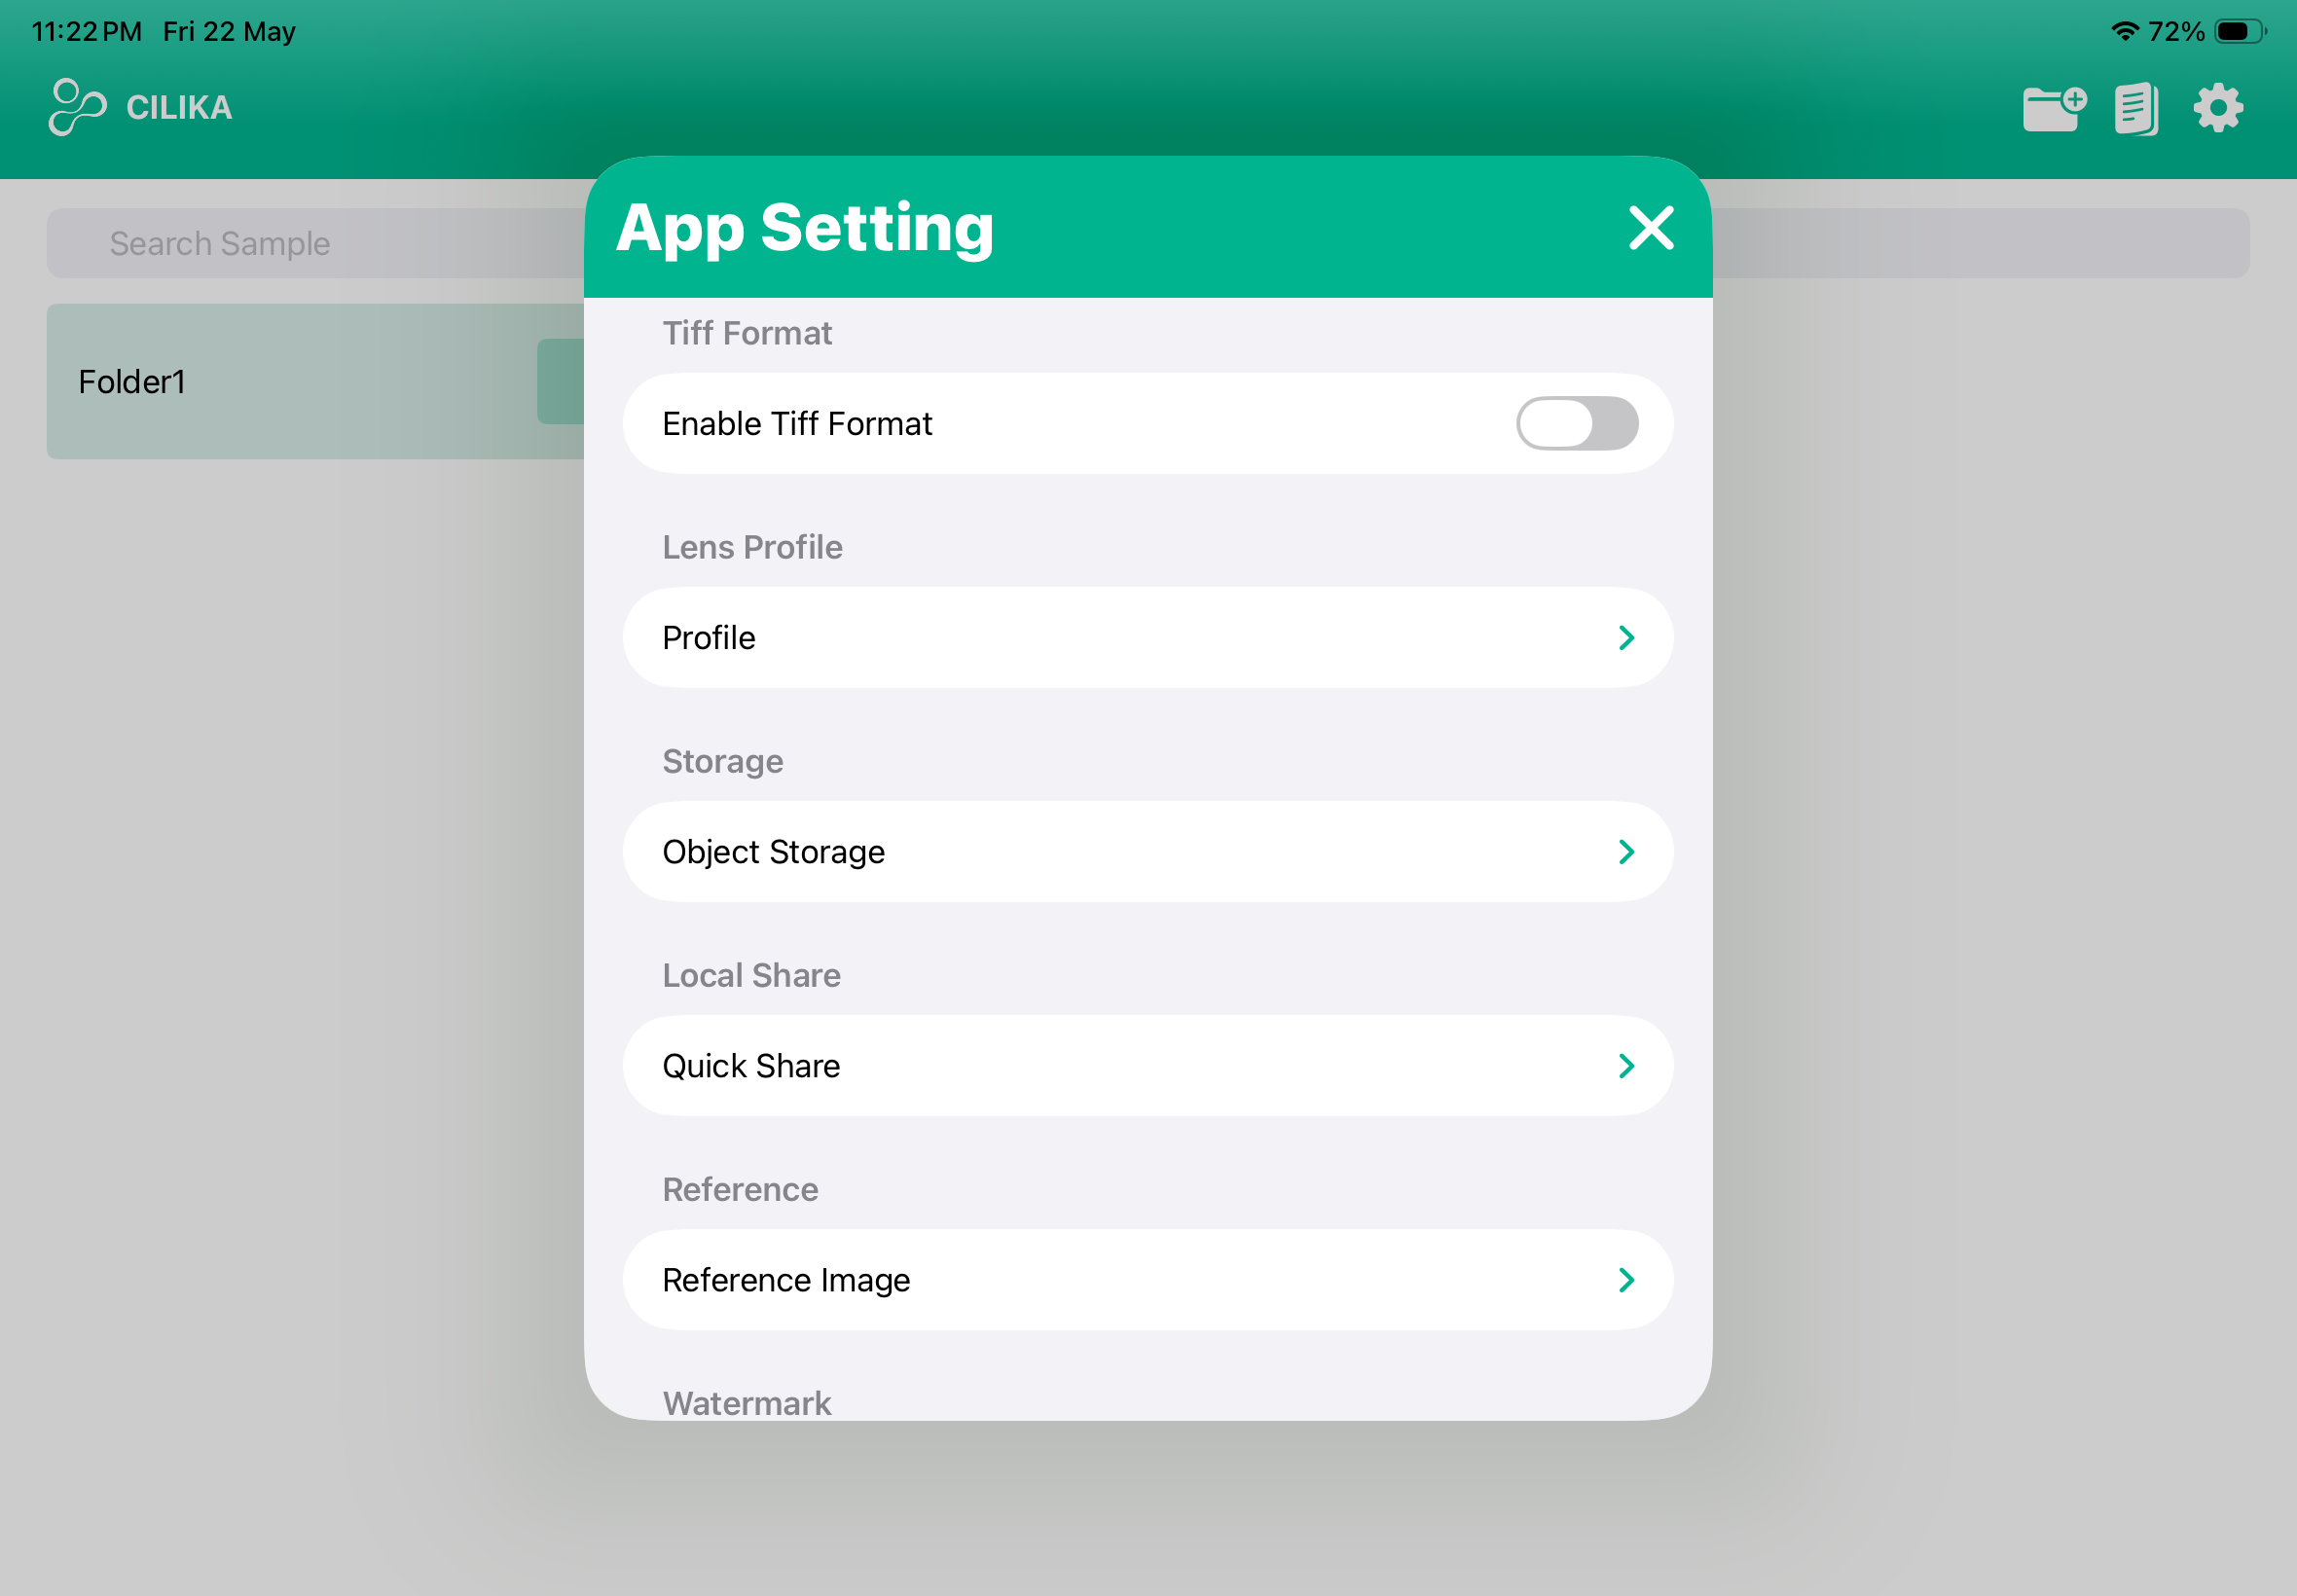
1. Tap on the Enable Tiff to store the image in the highest quality.
Lens Profile
- Go to lens profile by tapping on it
- A default lens profile will already be active.
- Scroll down to set up a new lens profile.
- Add your custom lens and give it a personal color.
- Tap on the plus icon on the right to add a new lens profile.
- Tap on the lens you want to see on the live screen. Selected lenses will turn black. Preview the lens you have selected.
- Add a profile name and tap on add. Lens profile is added.
- Scroll back up and tap on your profile to activate it.
- To delete the lens profile, tap on the edit option above the status.
Object Storage
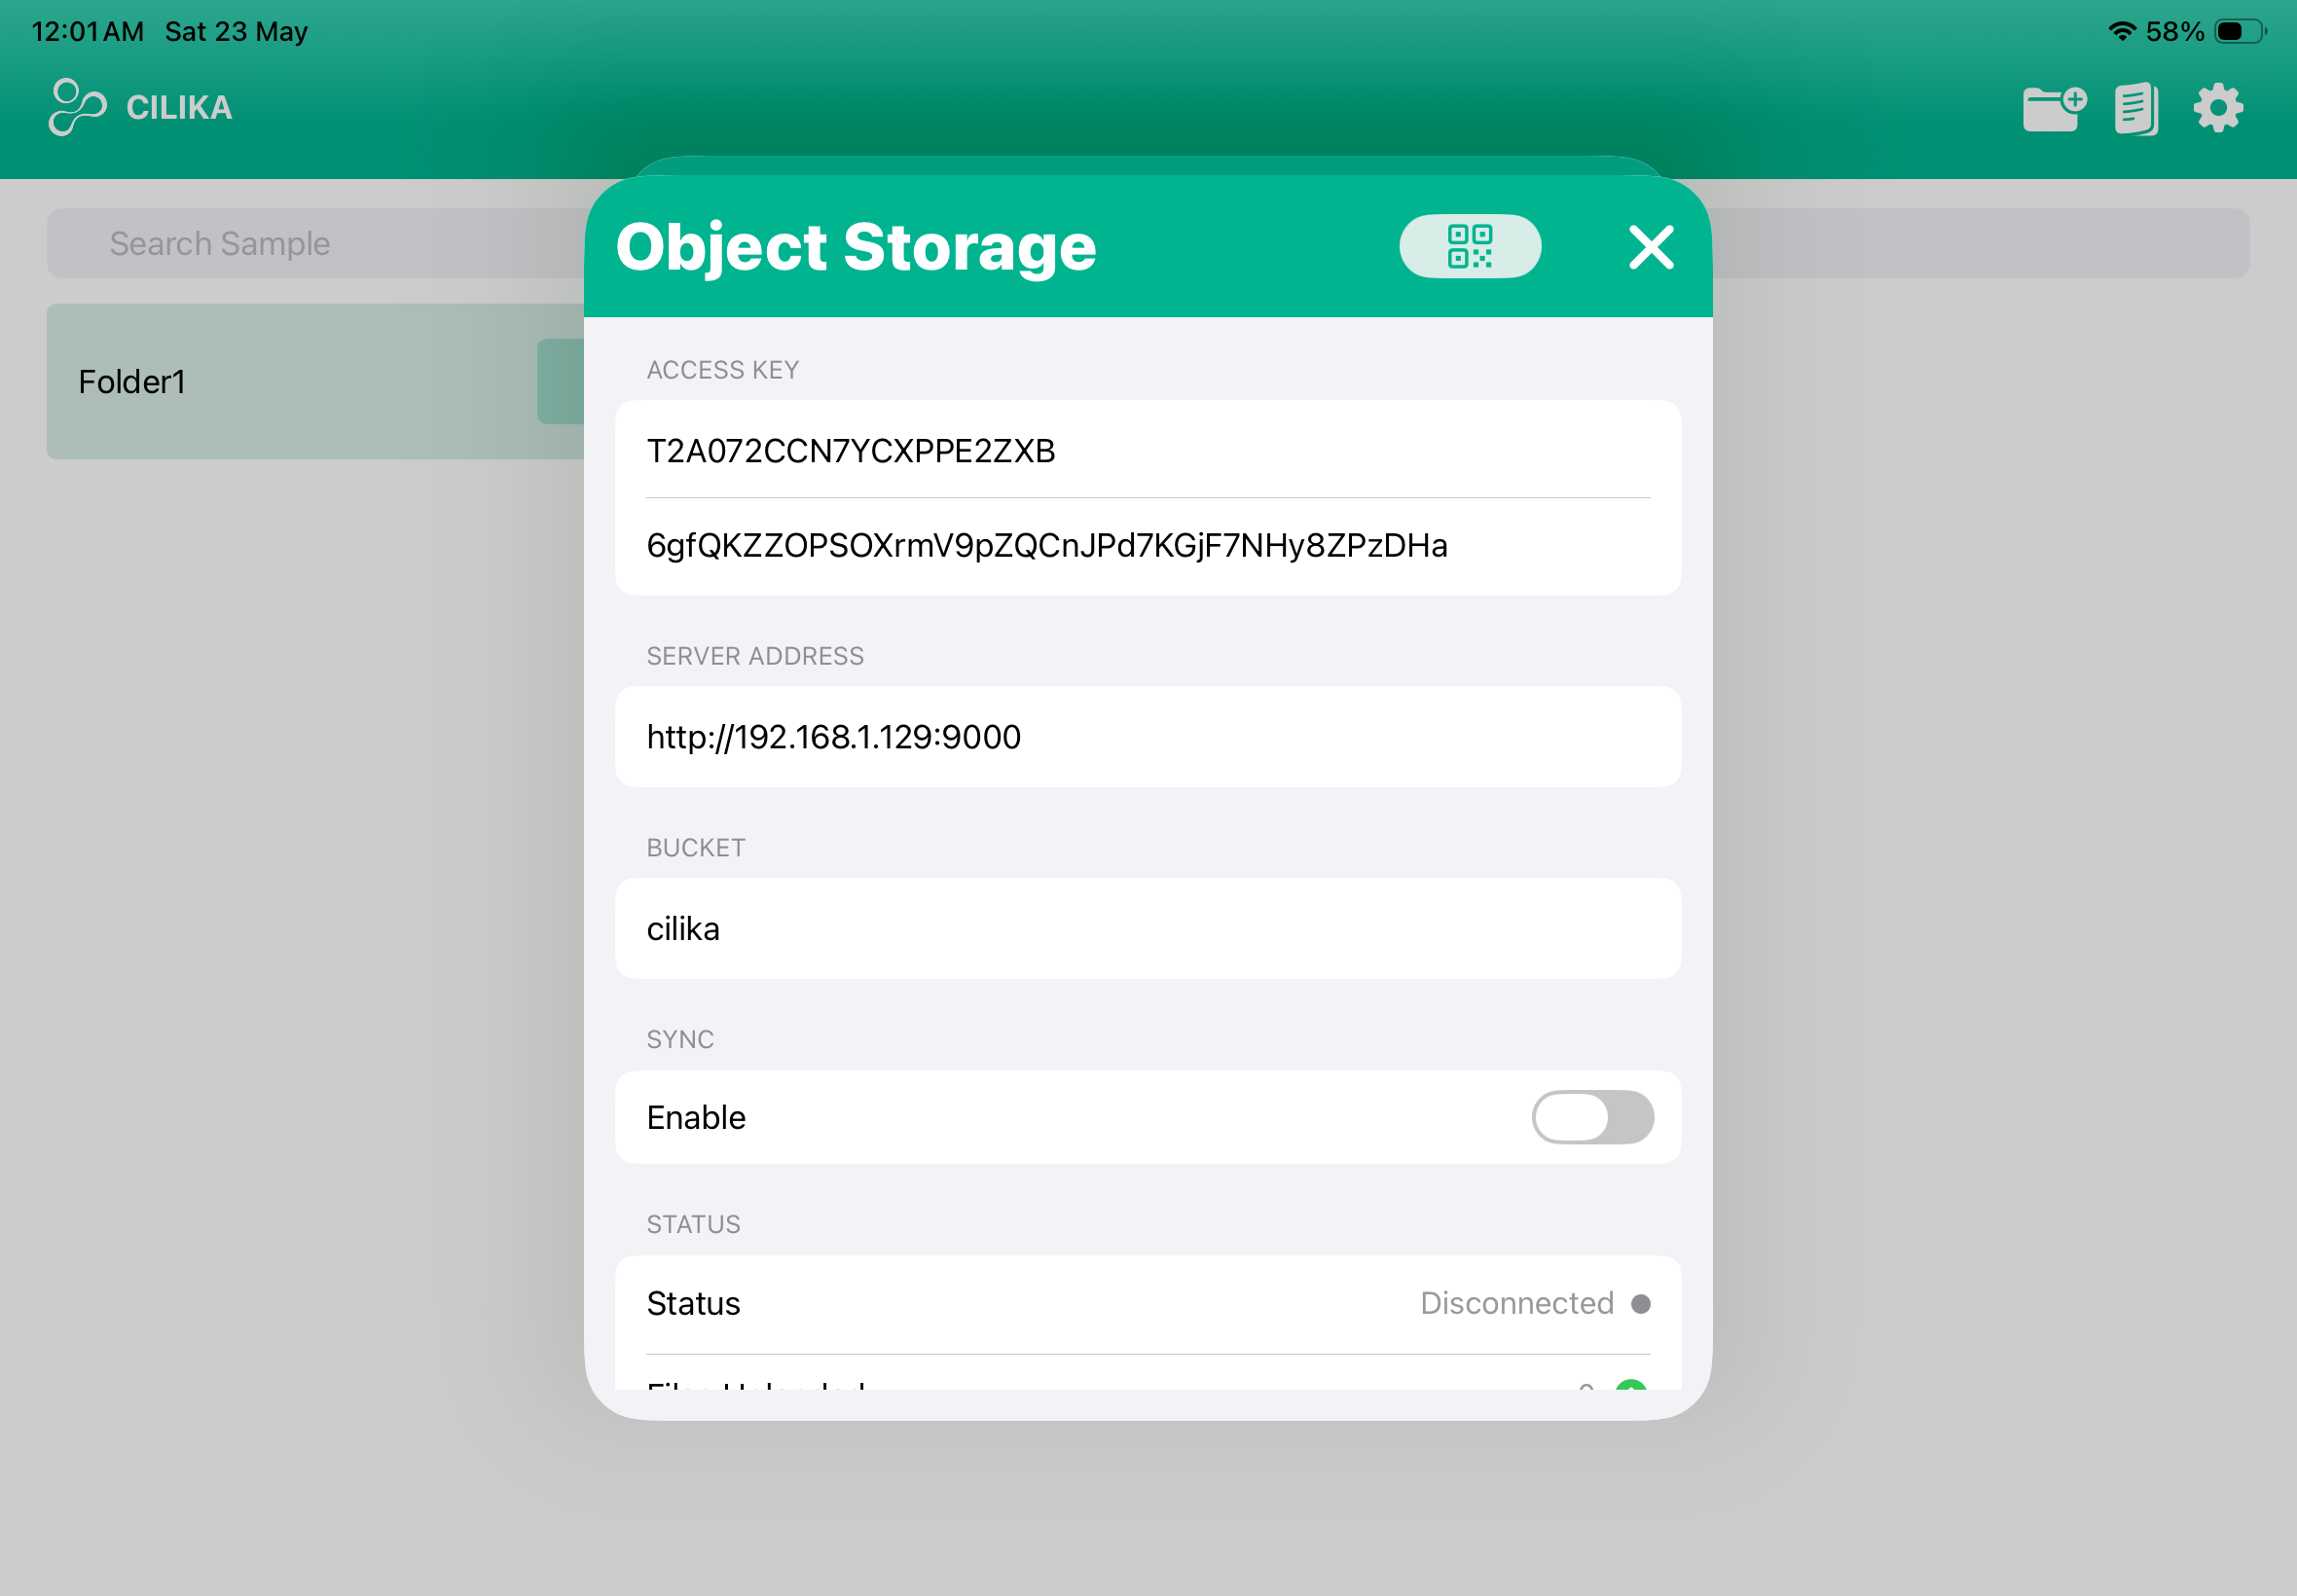
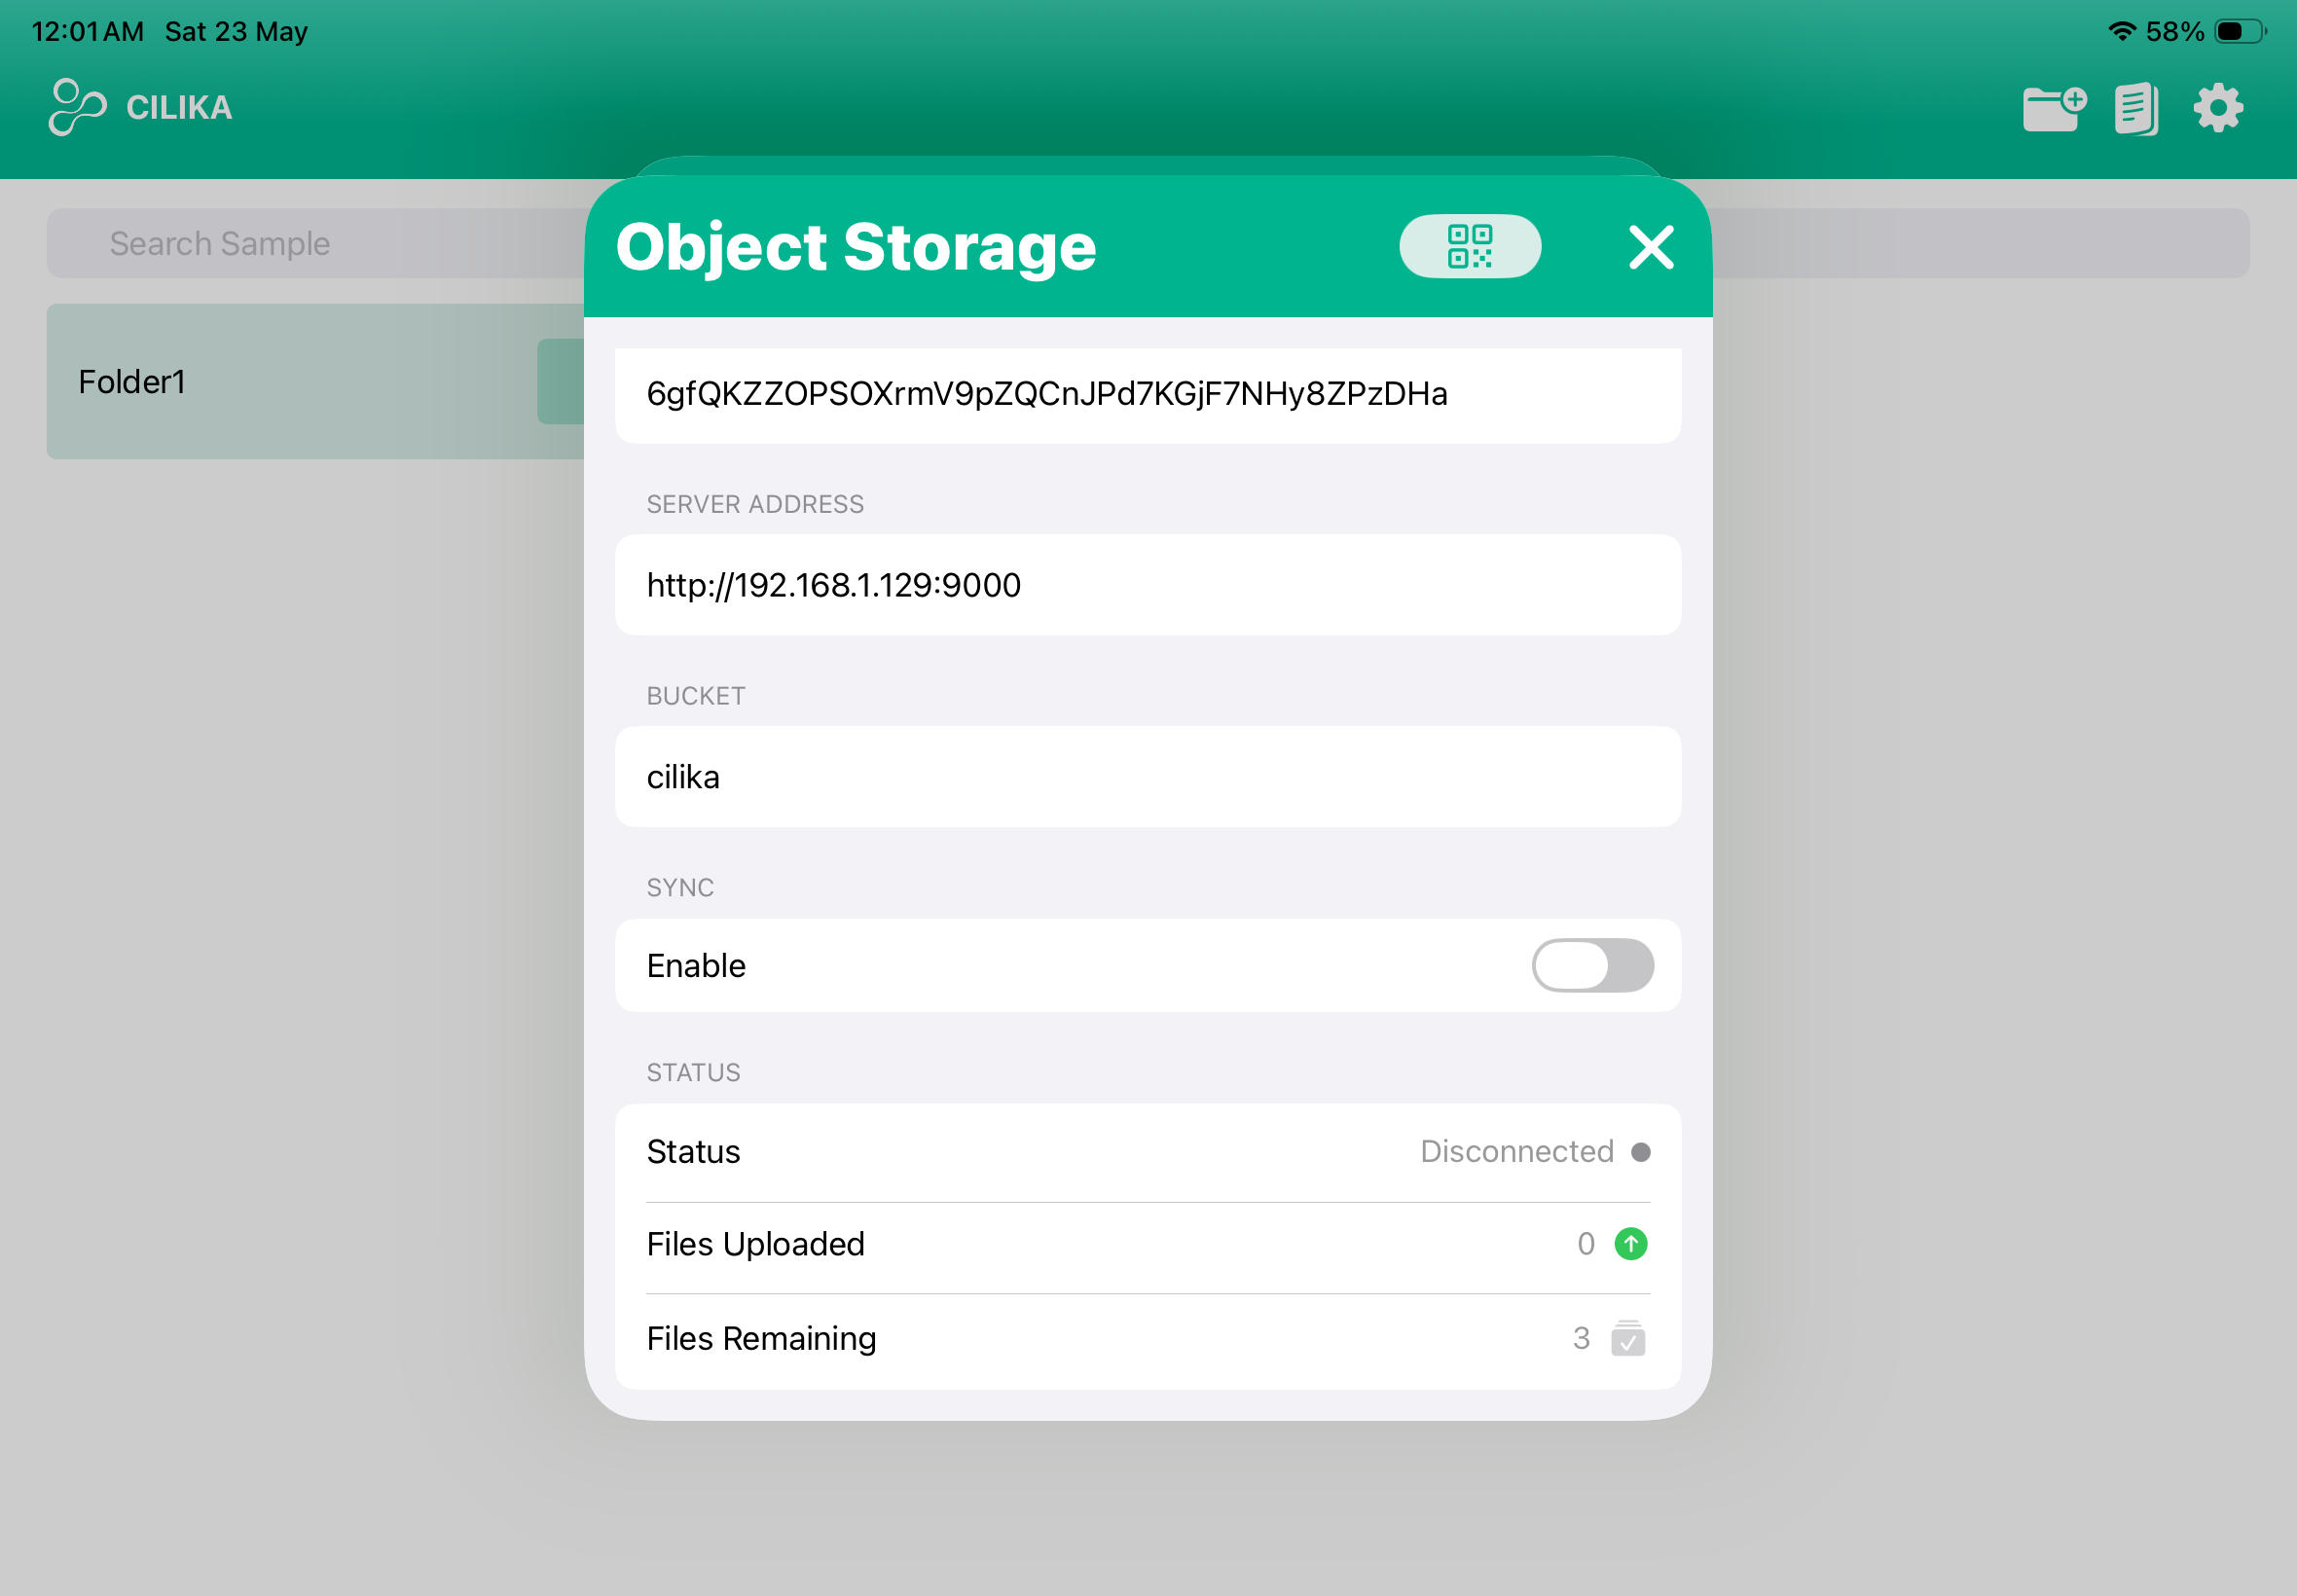
- Helps direct file transfers between your iPad and a desktop computer (Windows or Mac) within the same local network.
Reference Image
1. An external reference image can be added on the live view screen and can be positioned according to the users preference.
Watermark General
- a faint, semi-transparent text which the user can place over their captured image. Its primary purpose is to identify ownership, protect against unauthorized copying.
- Watermark can be used as an identifier.
- The watermark can be customized according to the
Watermark Cilika
It is a faint, semi-transparent image, embedded by default in the captured image.
Zoom
Switching ON this option helps you increase and decrease the magnification on live view.
Scale Setting
Controls the appearance and behavior of the on-screen scale bar. This settings gives the user two scale settings to choose from.
- Bar: A simple horizontal line with end caps and a numeric label (e.g. 600.0 µm). This is the most common style for publication-quality images.
- Ruler: A bar with periodic tick marks resembling a physical ruler.
Auto Hide
This option hides the Annotation drawer.
RBC Template
hide Calibration
Enable Grid
The Enable Grid, overlays a grid on the live view screen.
Unit
This setting helps determine the measurement unit in either micrometers or millimeters.
Size
Opacity
Line Type
Color
Show frame
This option helps capture the microscopic view in a square frame instead of the usual microscopic circle view.
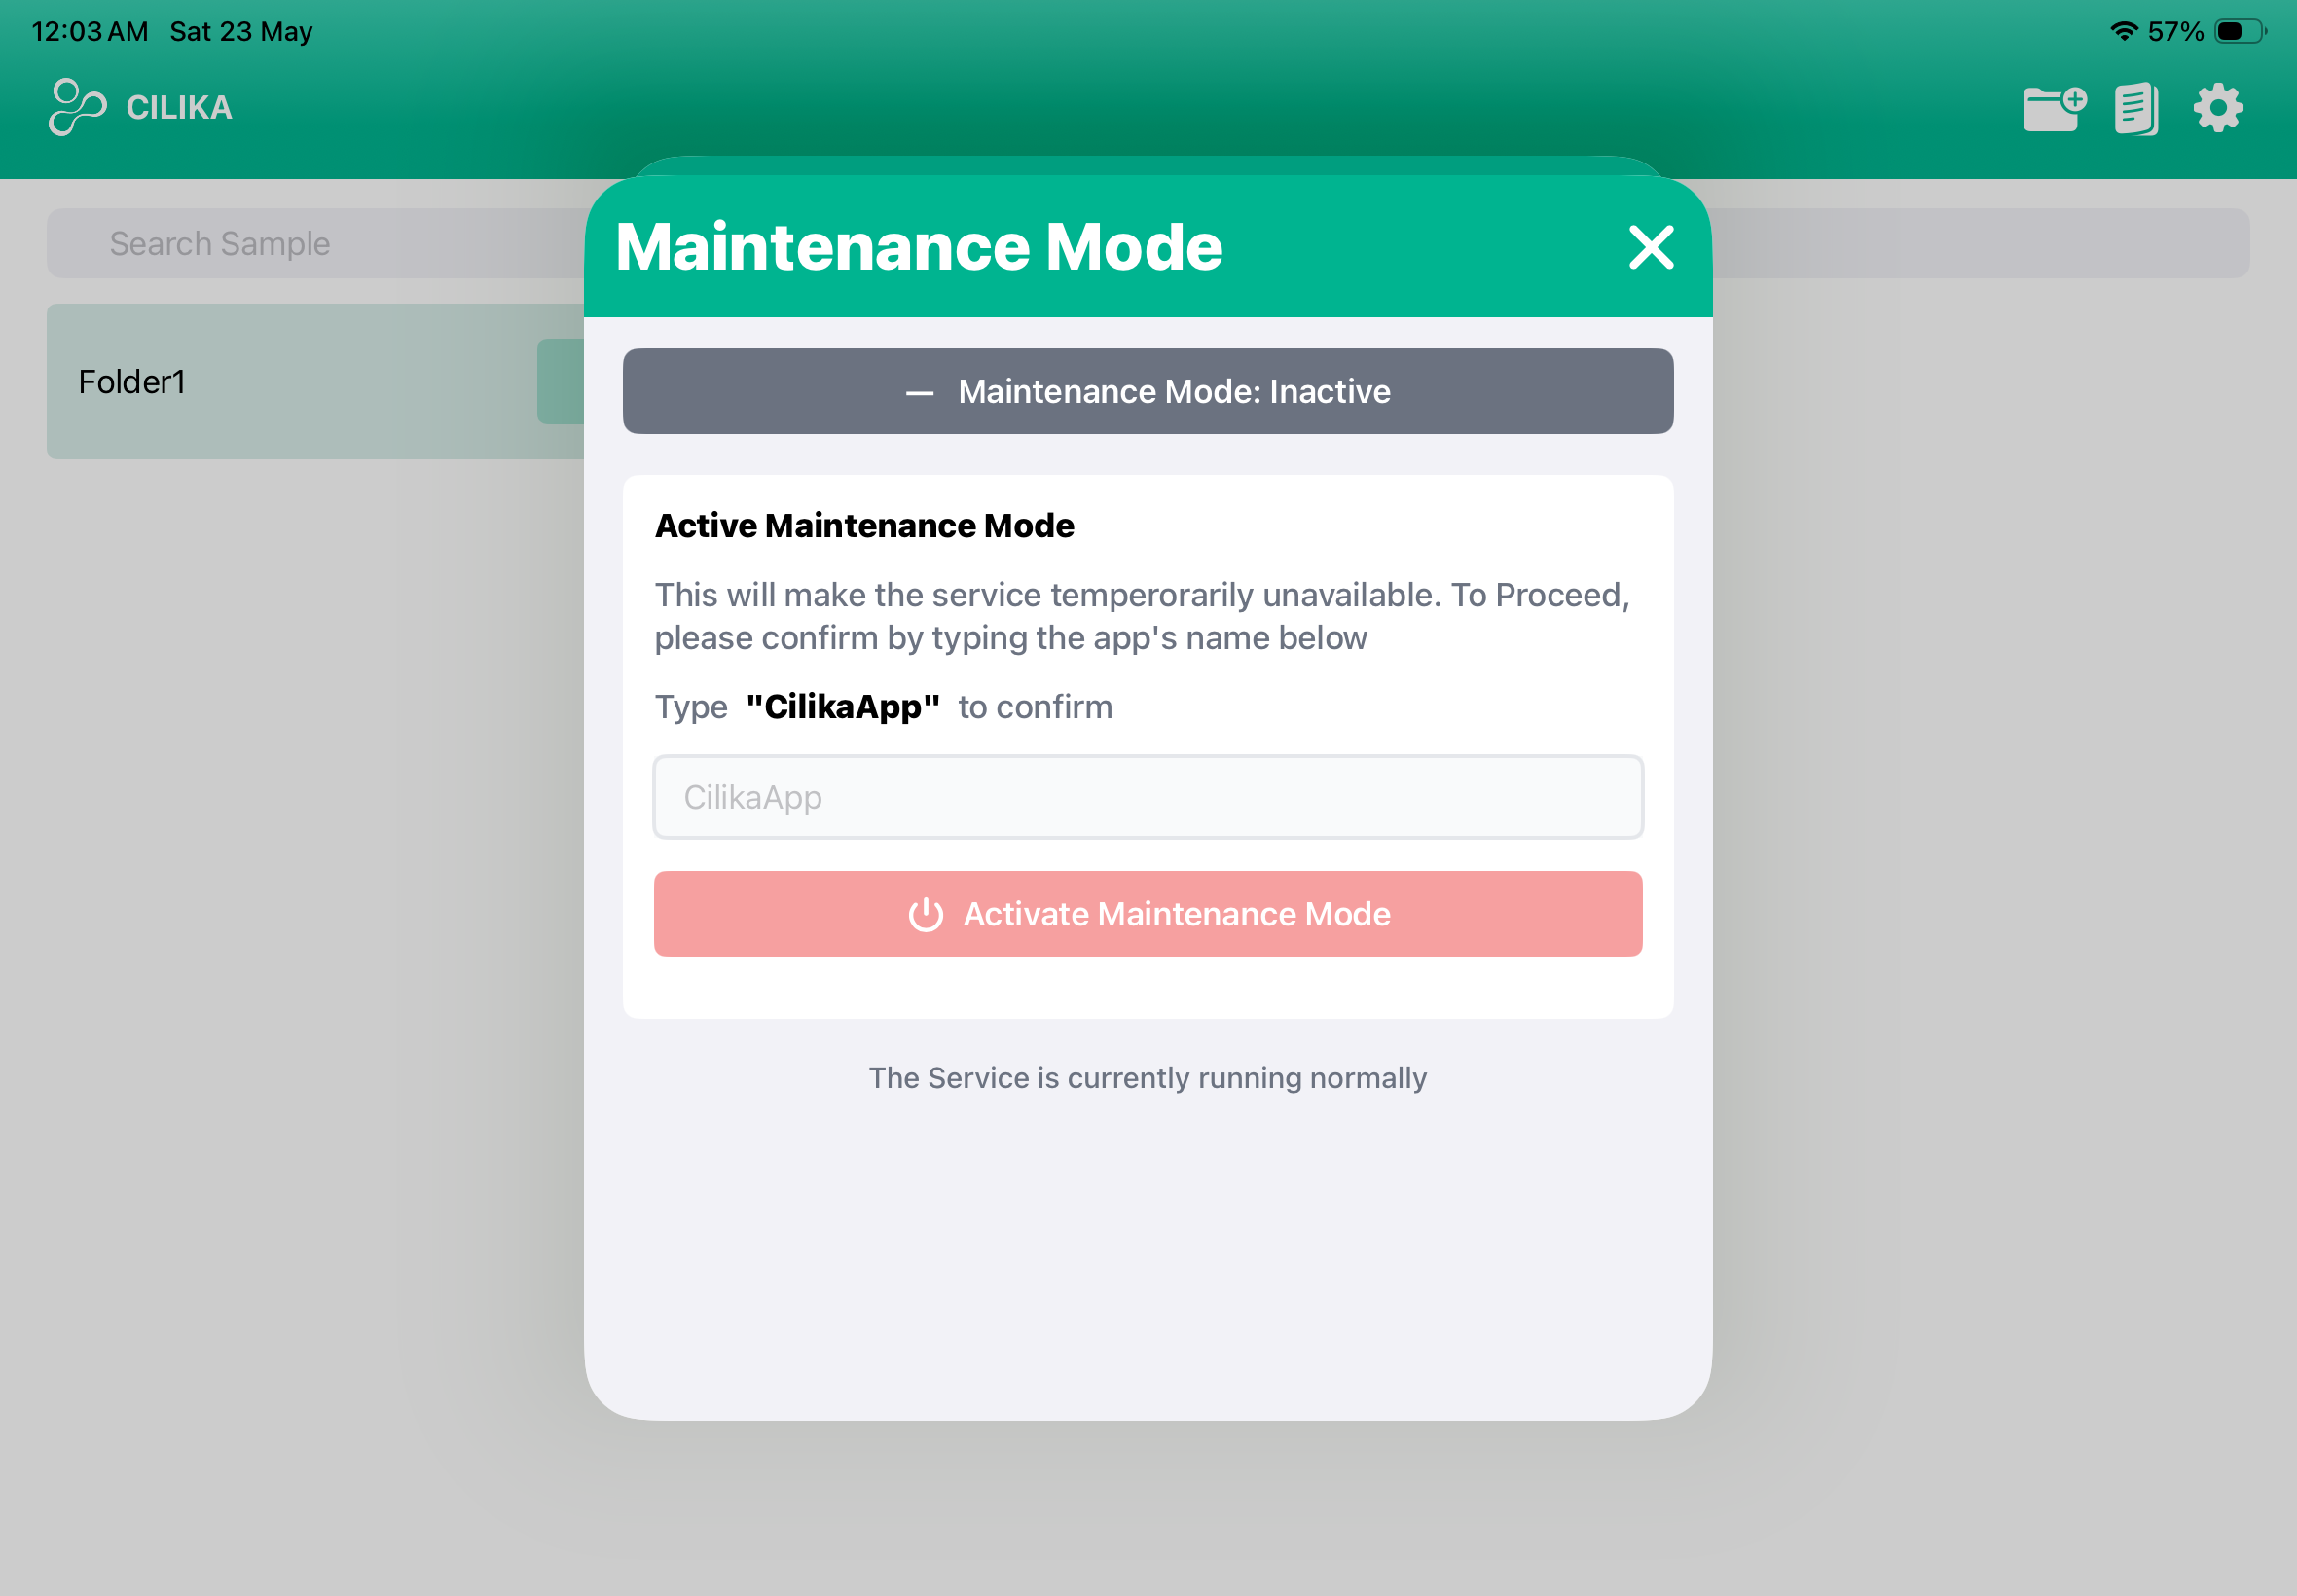
Maintenance Mode