Getting Started
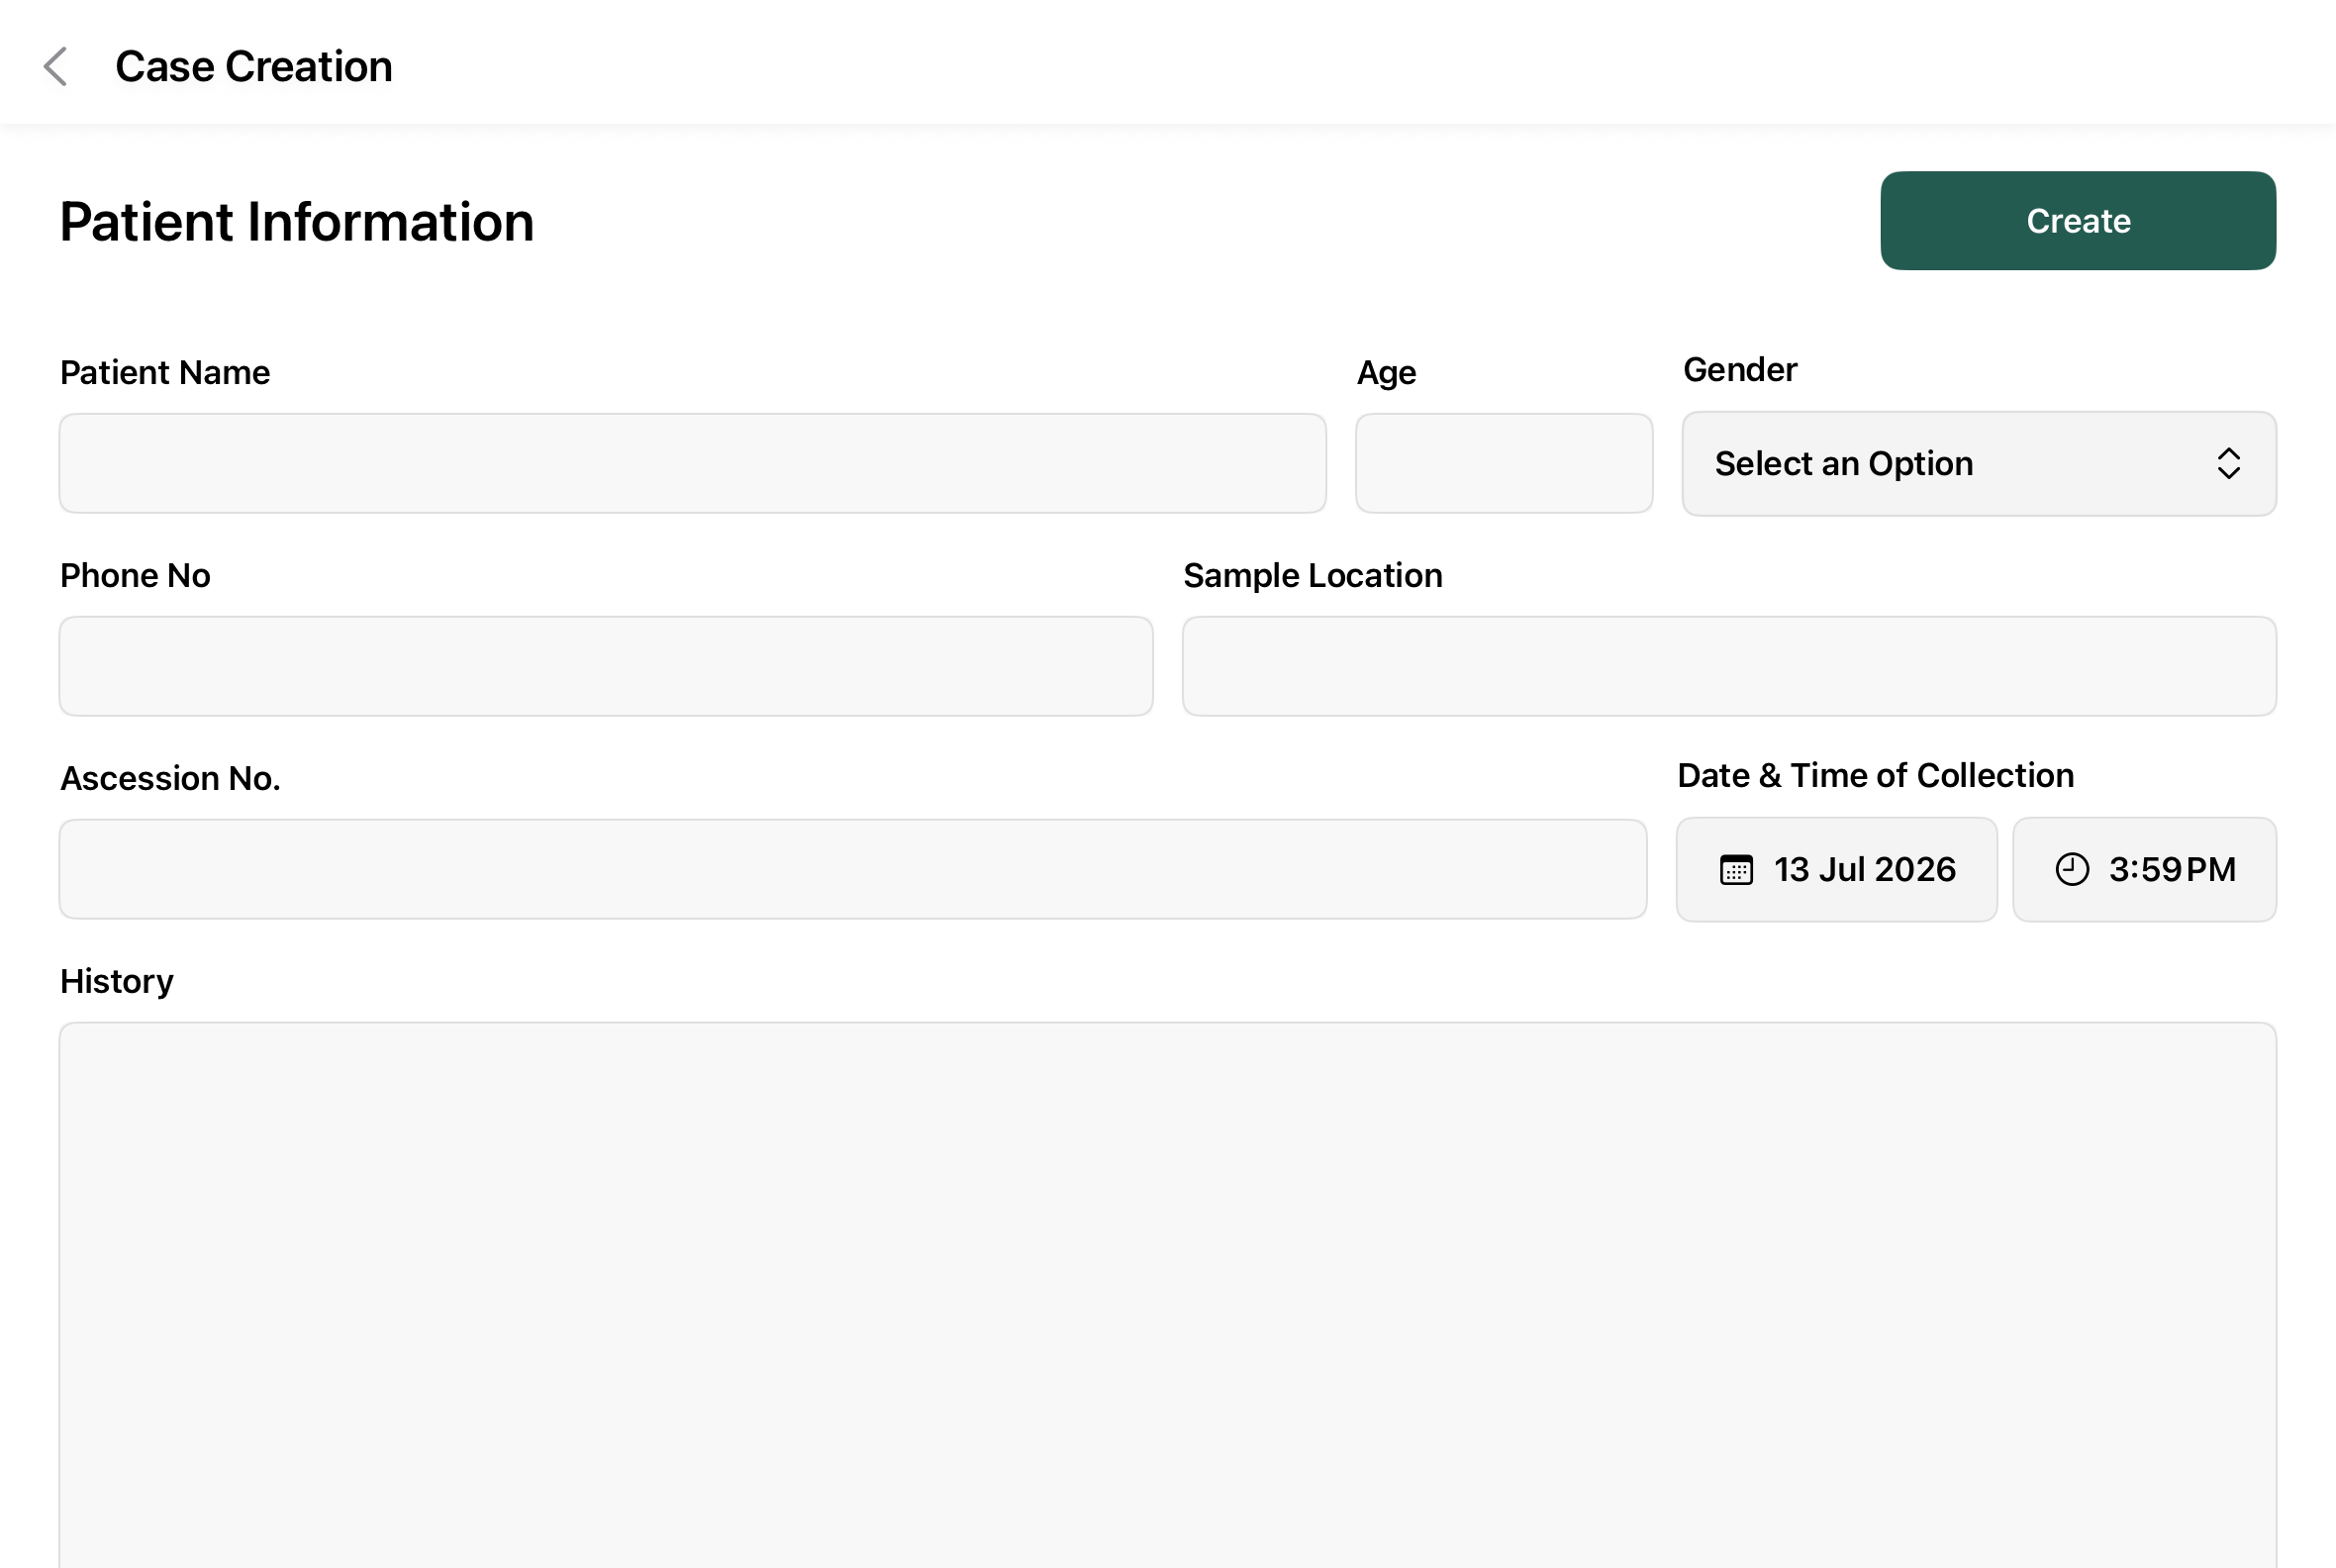
Create a New Case
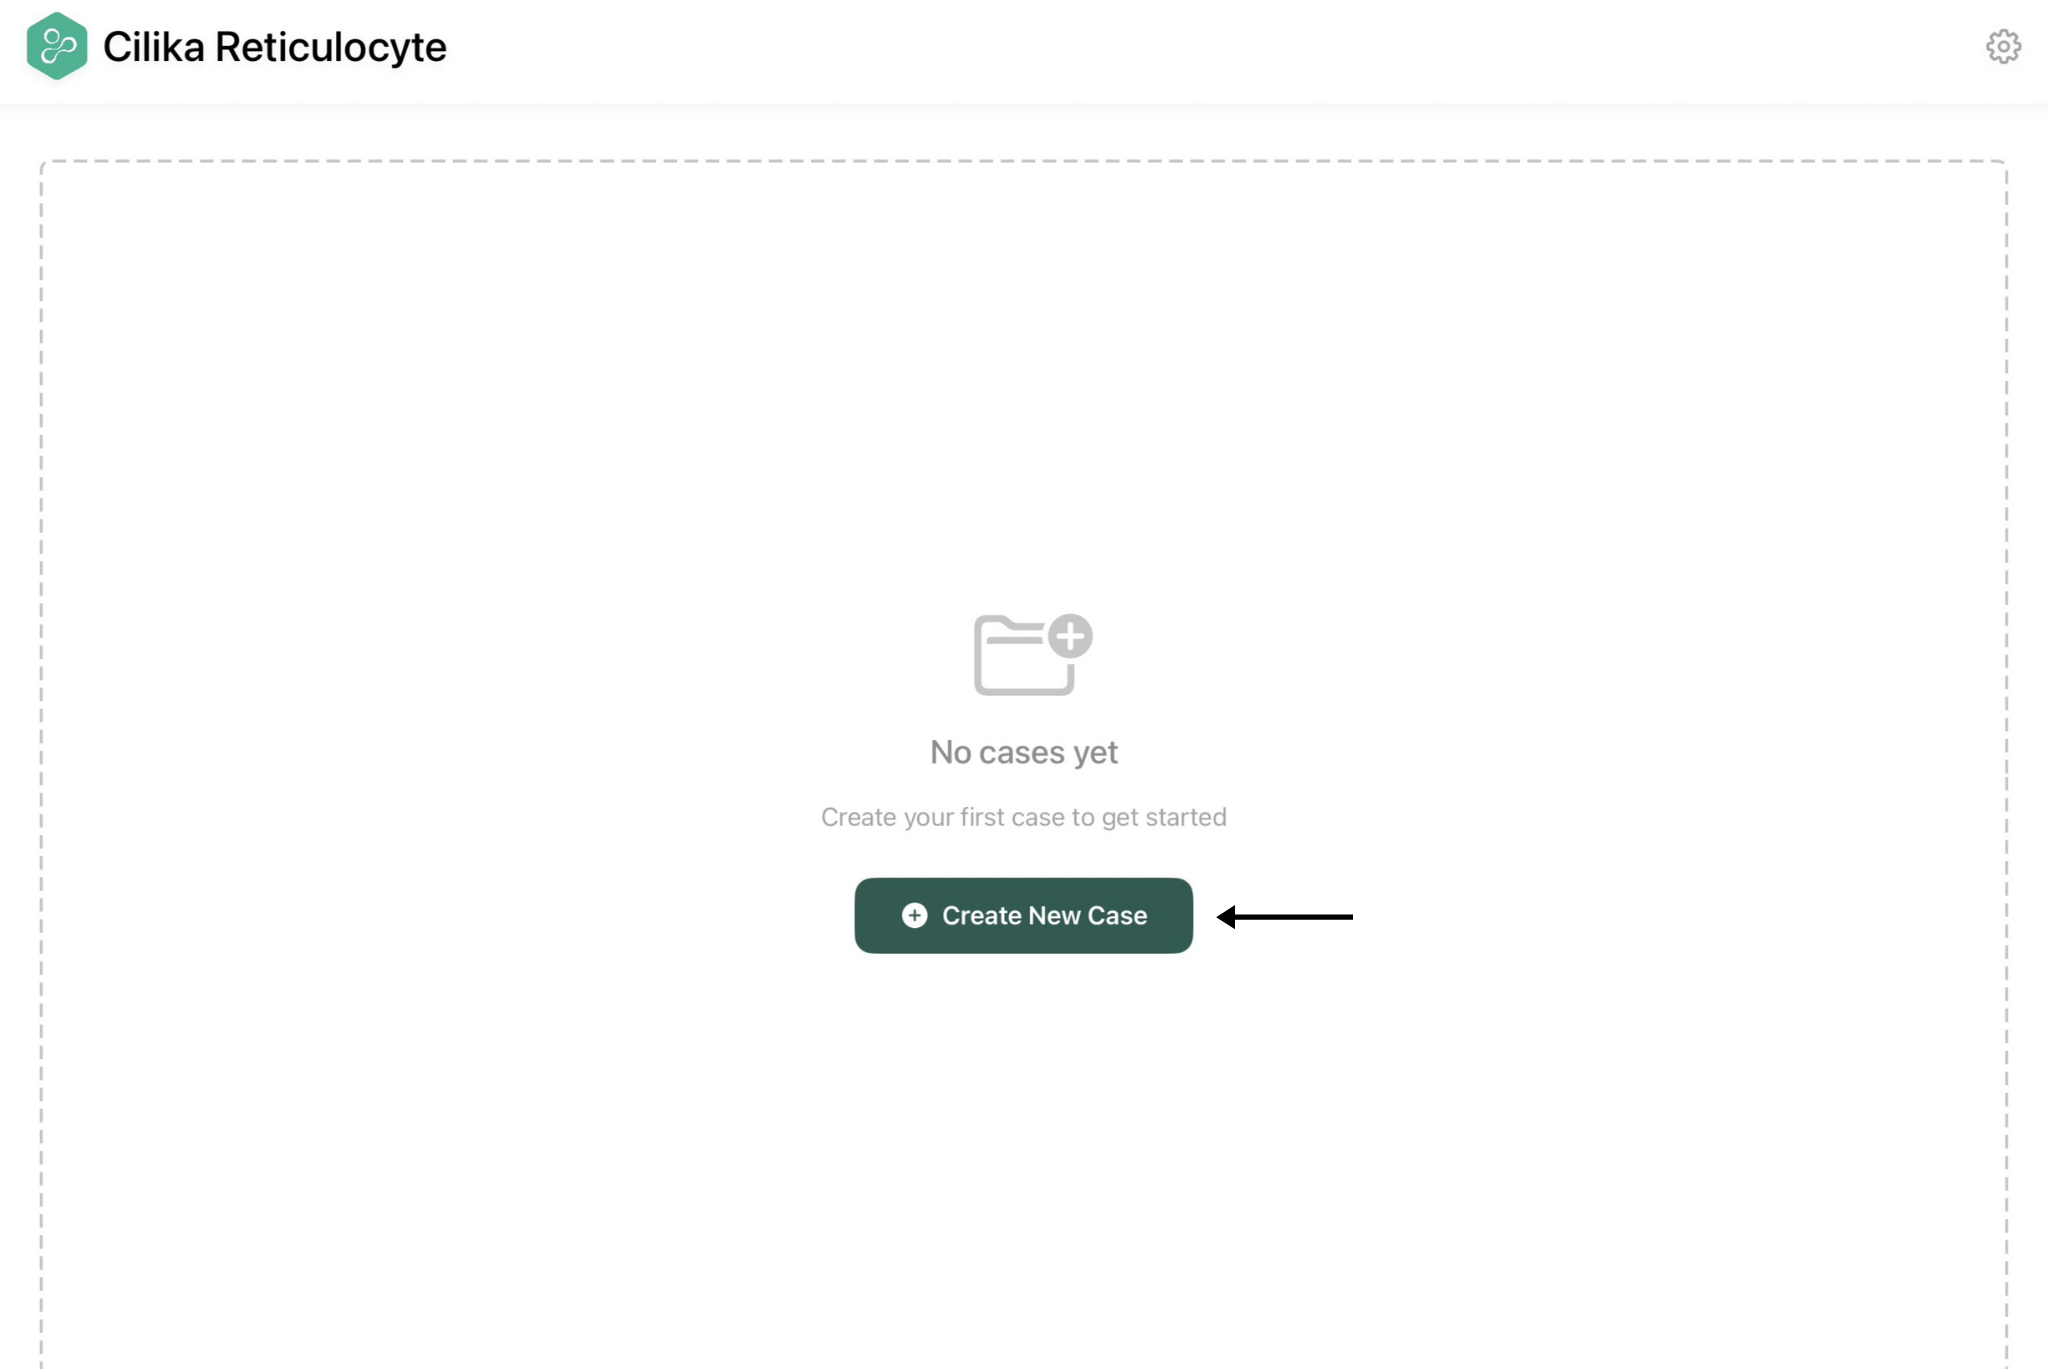
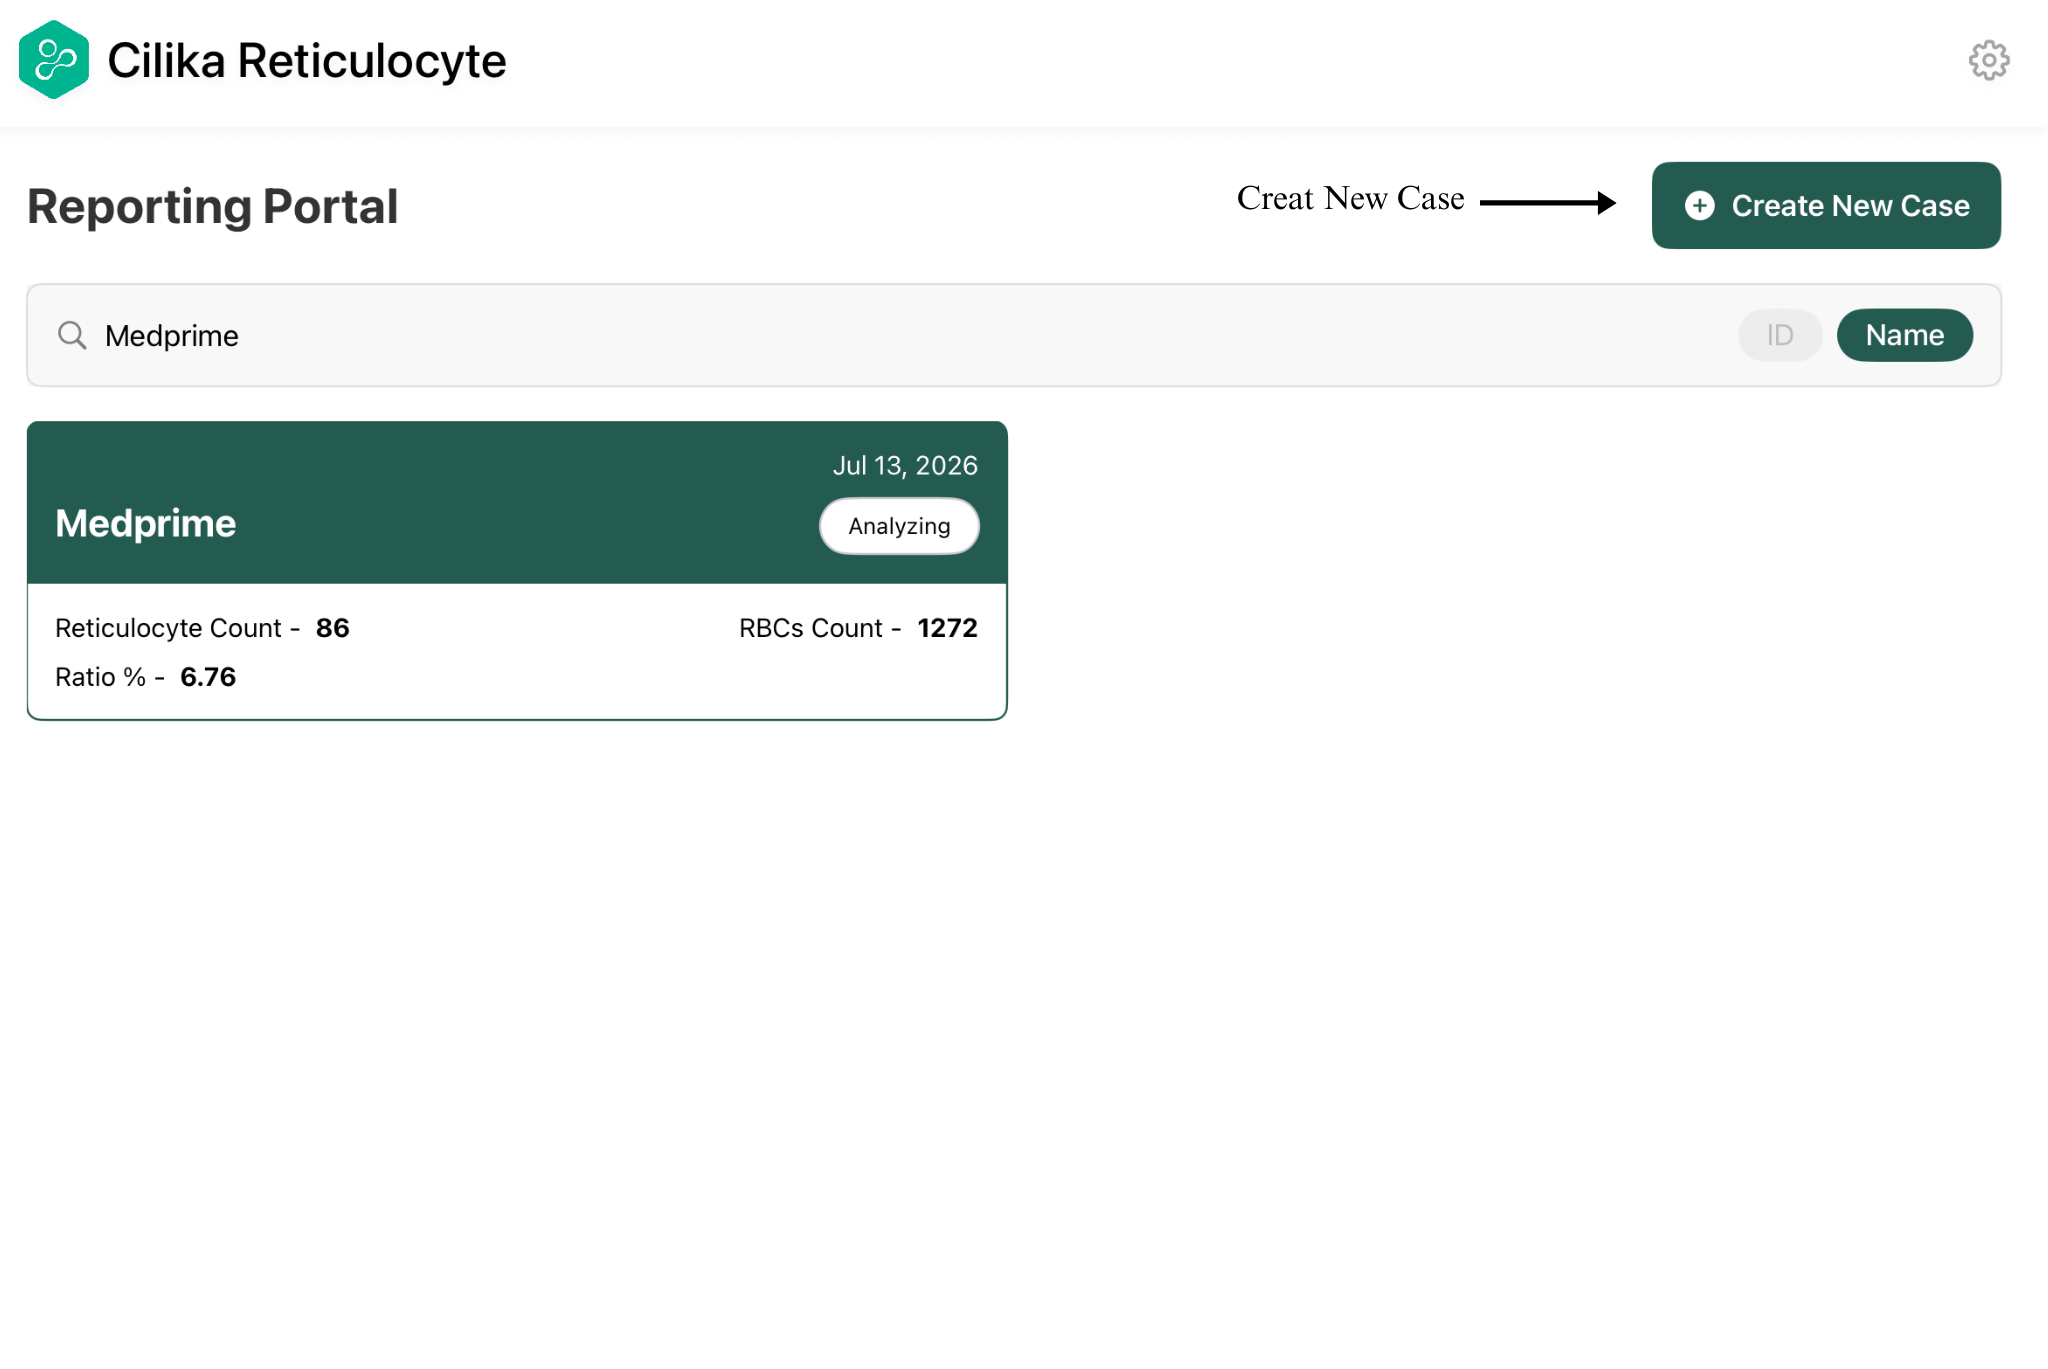
The Dashboard is the landing page where all patient cases are displayed. From here, you can create a new case or access an existing one.
LaunchOpen theCilikaReportingReticulocyteapplication.- If
Onno cases exist, theDashboard,pageclickdisplays a Create Case button.
EnterOnce the required patient details.
Save the information to create the case.
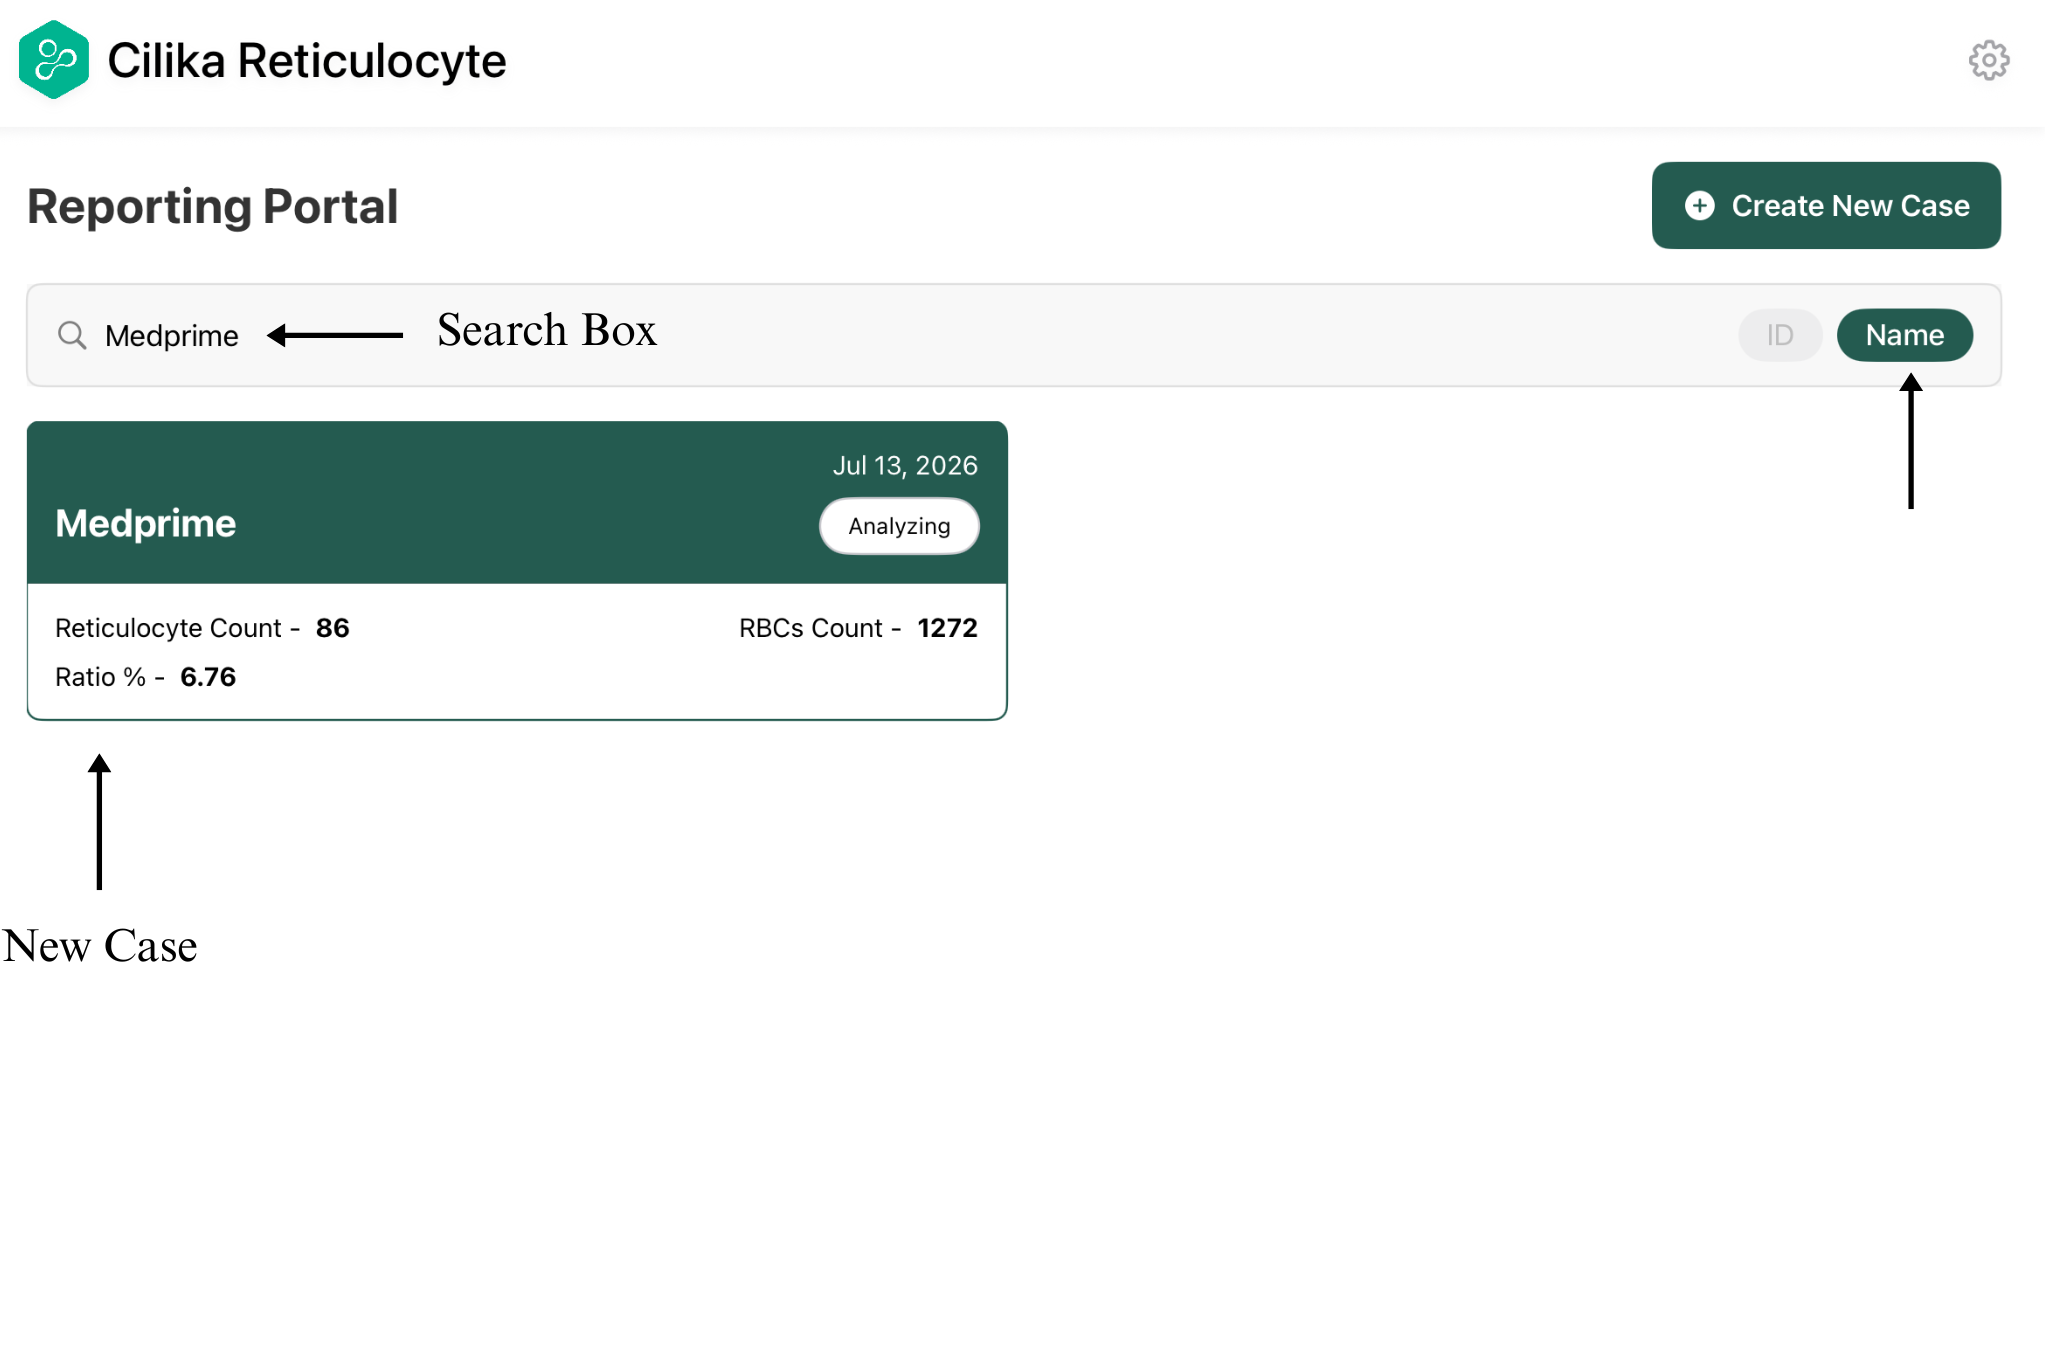
The newly created case appearsis created, it is displayed as card on the dashboard.
|
|
|
|
|
|
Existing Case
After creating a case, you can reopen it anytime from the Dashboard.
-
Open the Dashboard.
-
Locate the required case from the list.
-
Use the Search bar to search by ID or Name, if required.
-
Select the desired case to open it. The selected case opens, allowing you to continue image acquisition or review.
- You can also create a new case.
|
|
|
Capture Images
The Image Capture screen is used to acquire microscope images for analysis.
-
Open the required patient case.
-
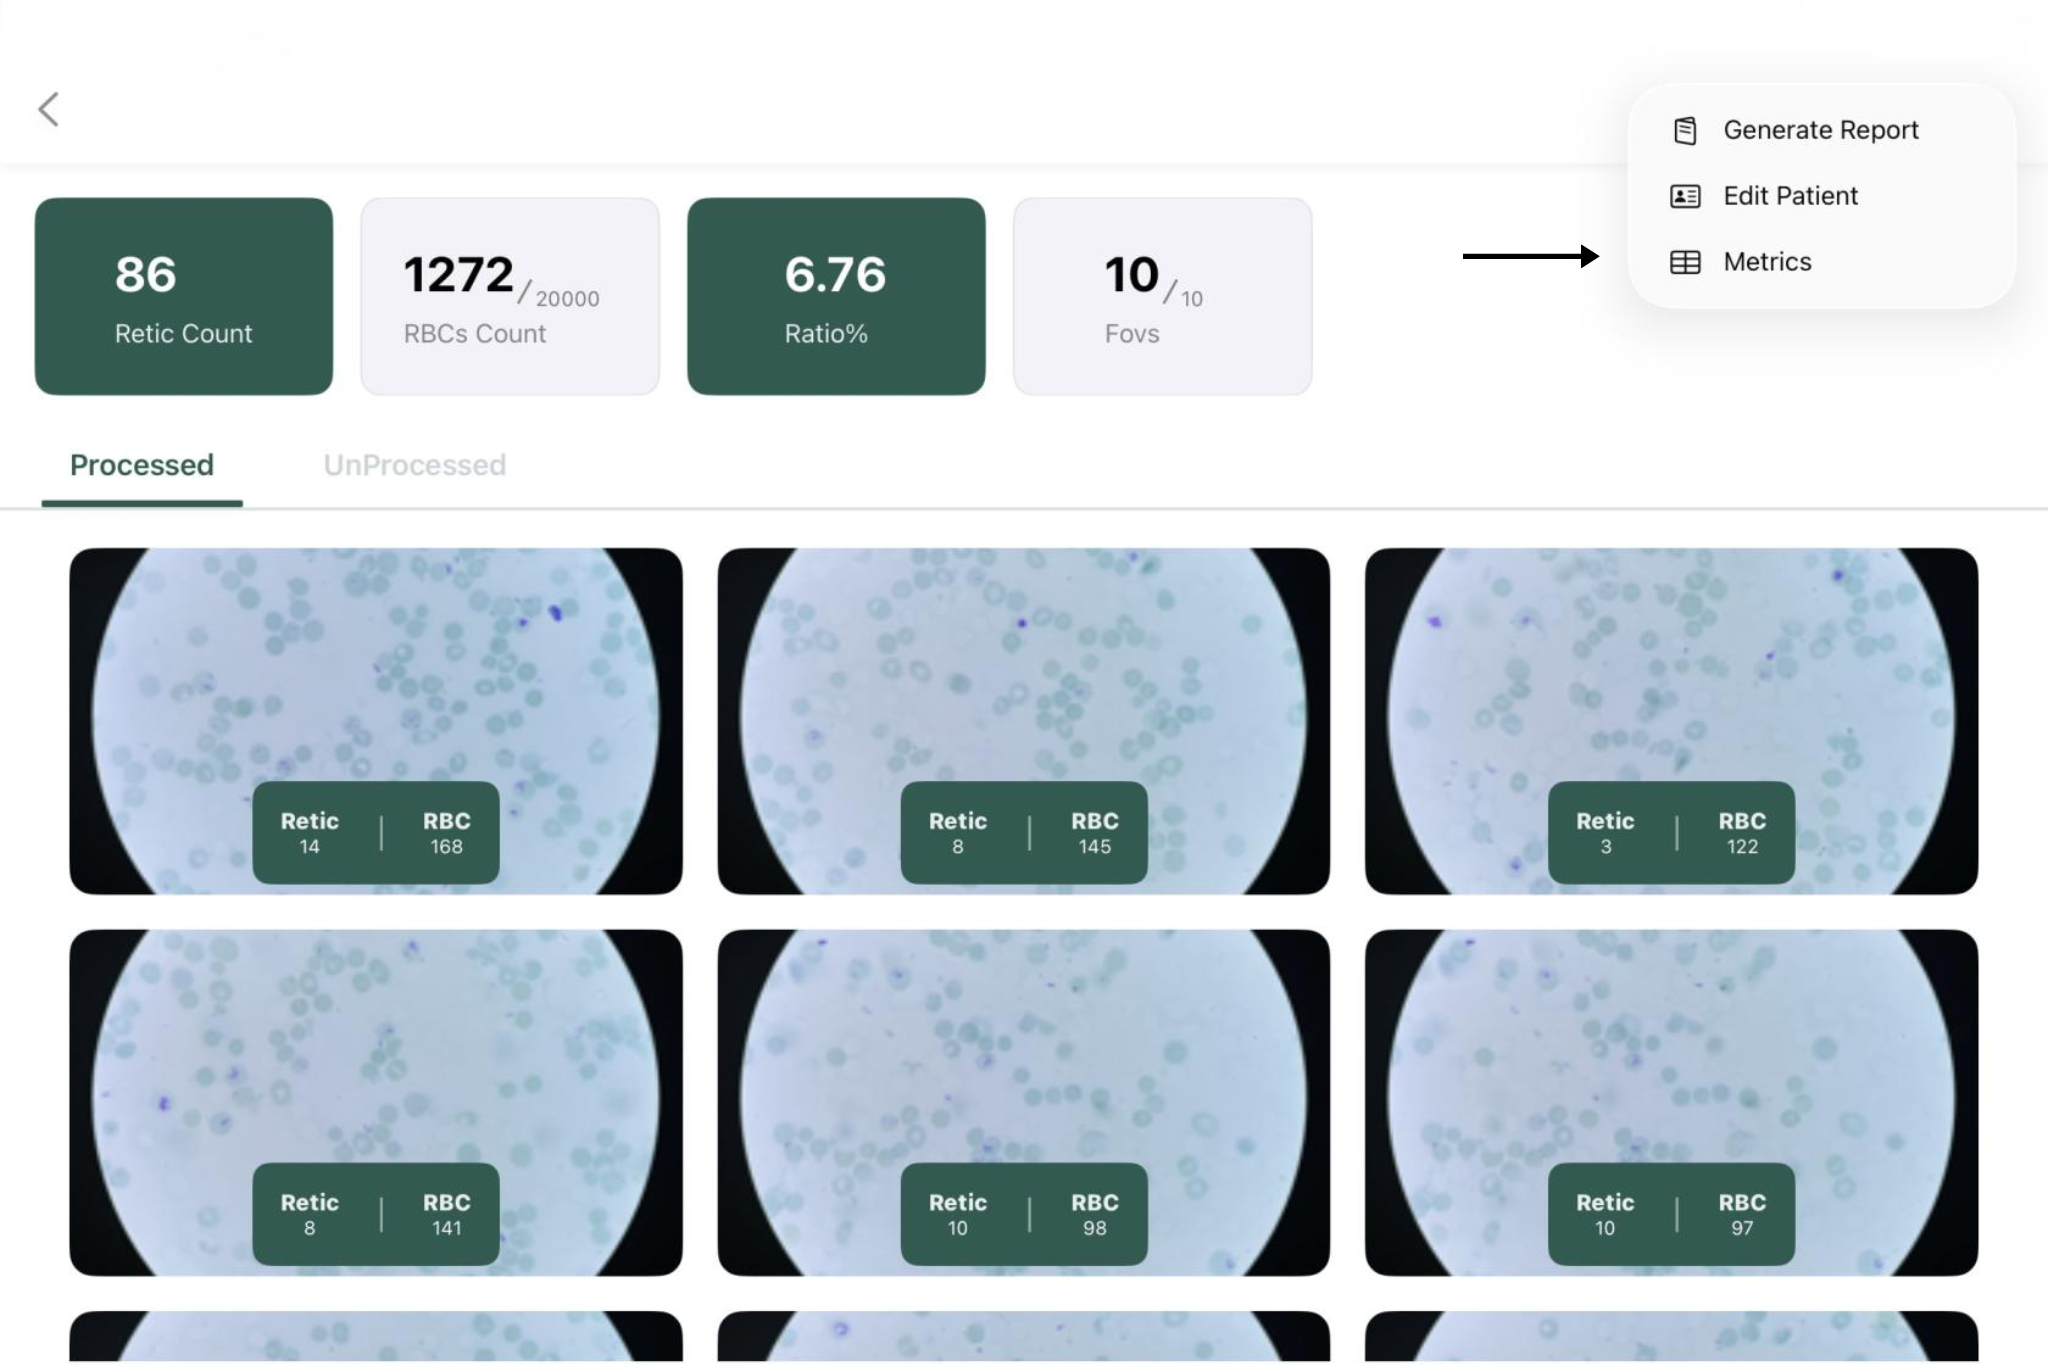
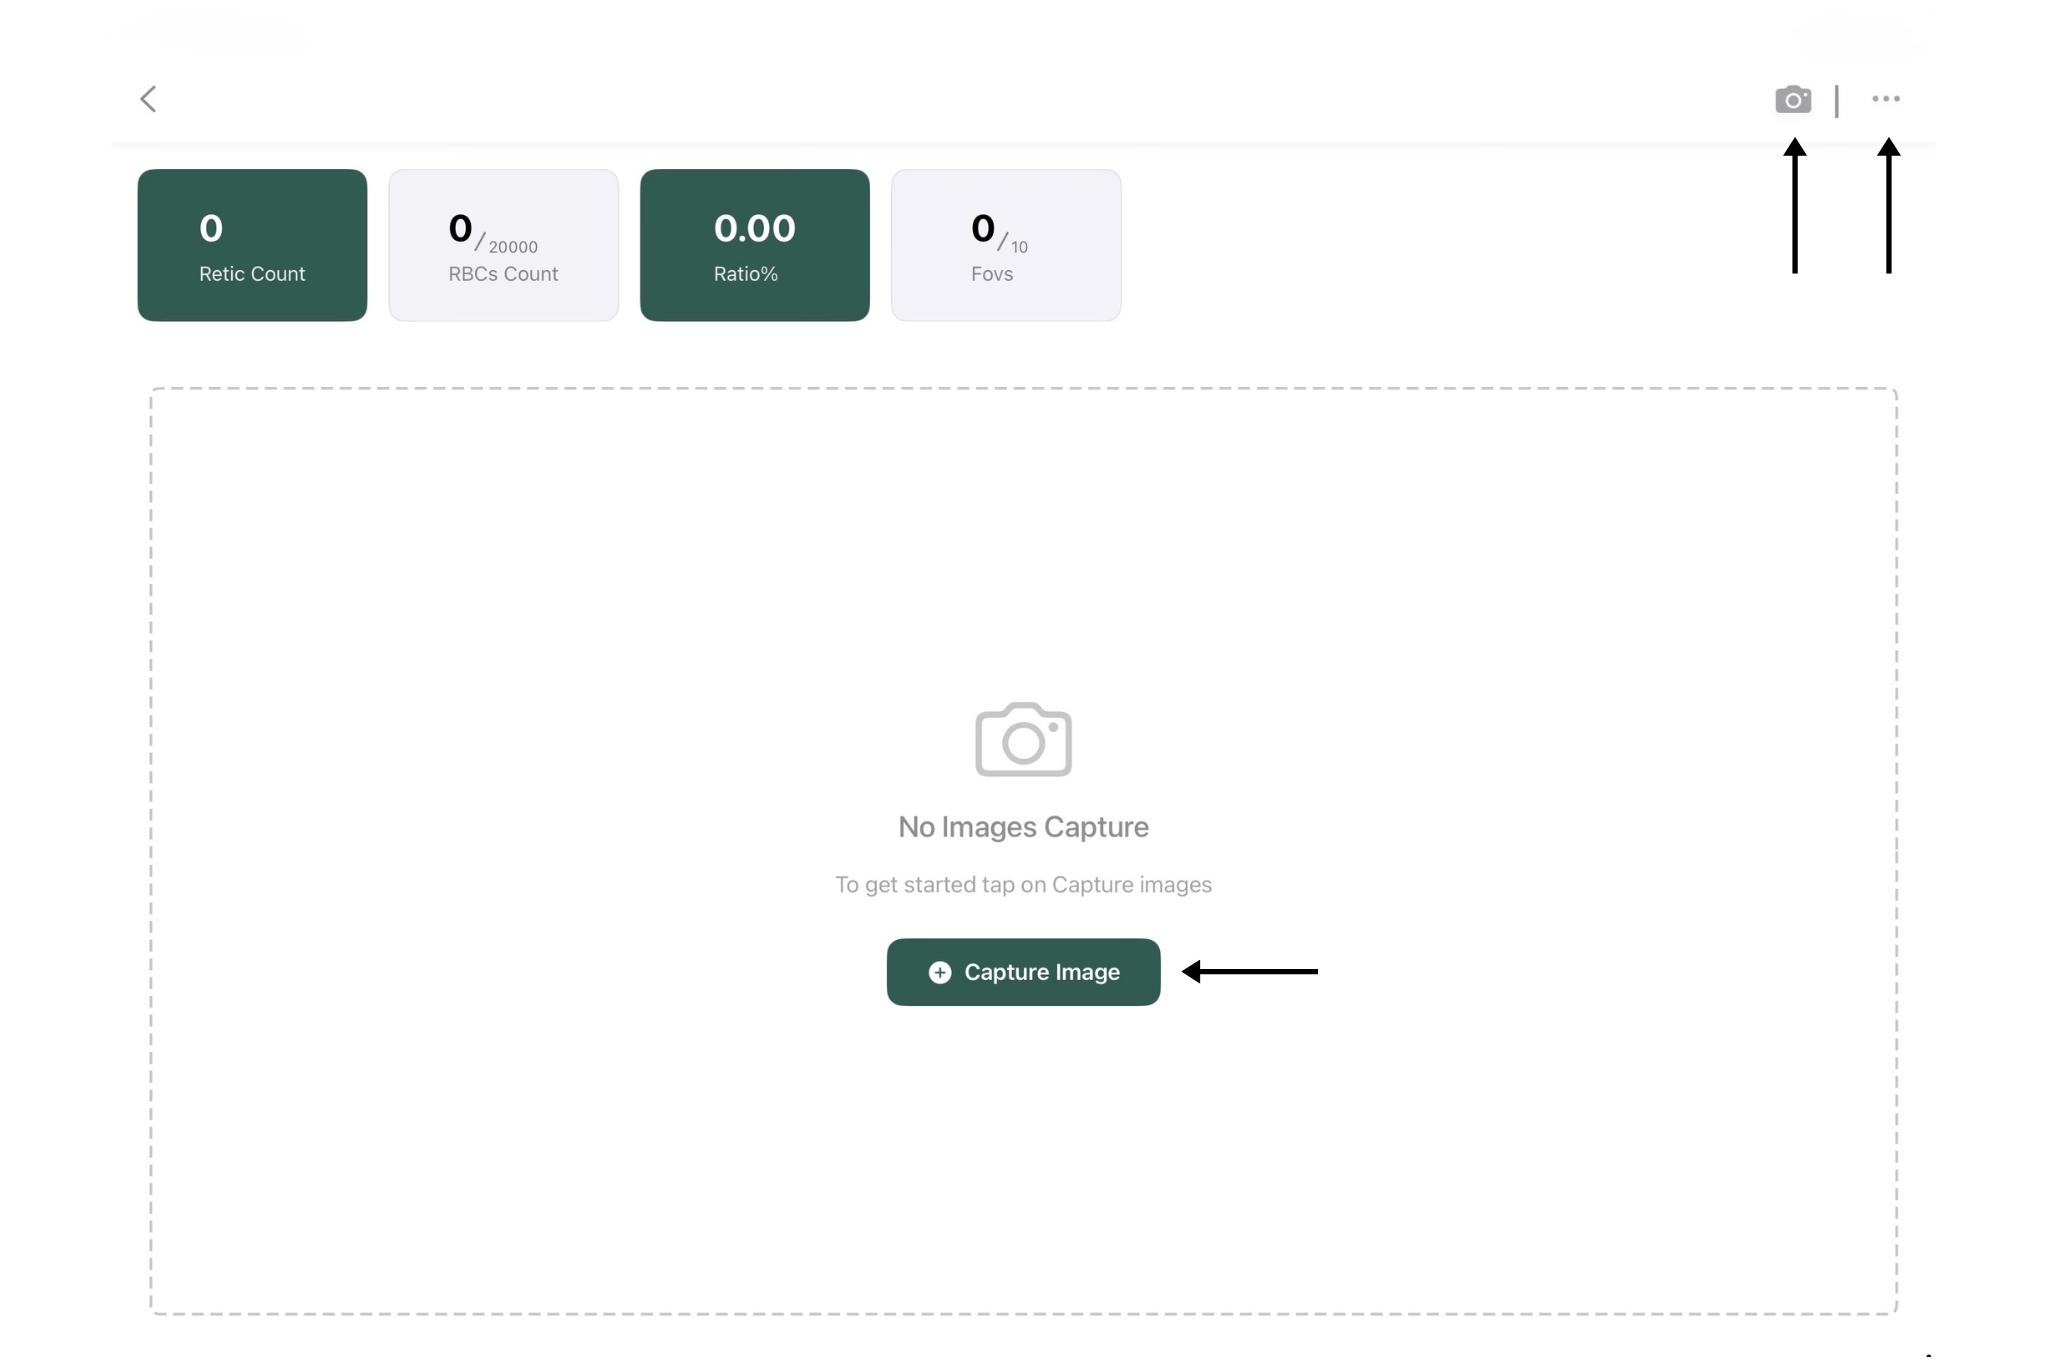
Review the summary counters displayed at the top of the screen:
-
Retic Count
-
RBC Count
-
Ratio (%)
-
FOVs
-
-
If no images have been captured, you will find Capture Image option once you open a case.
-
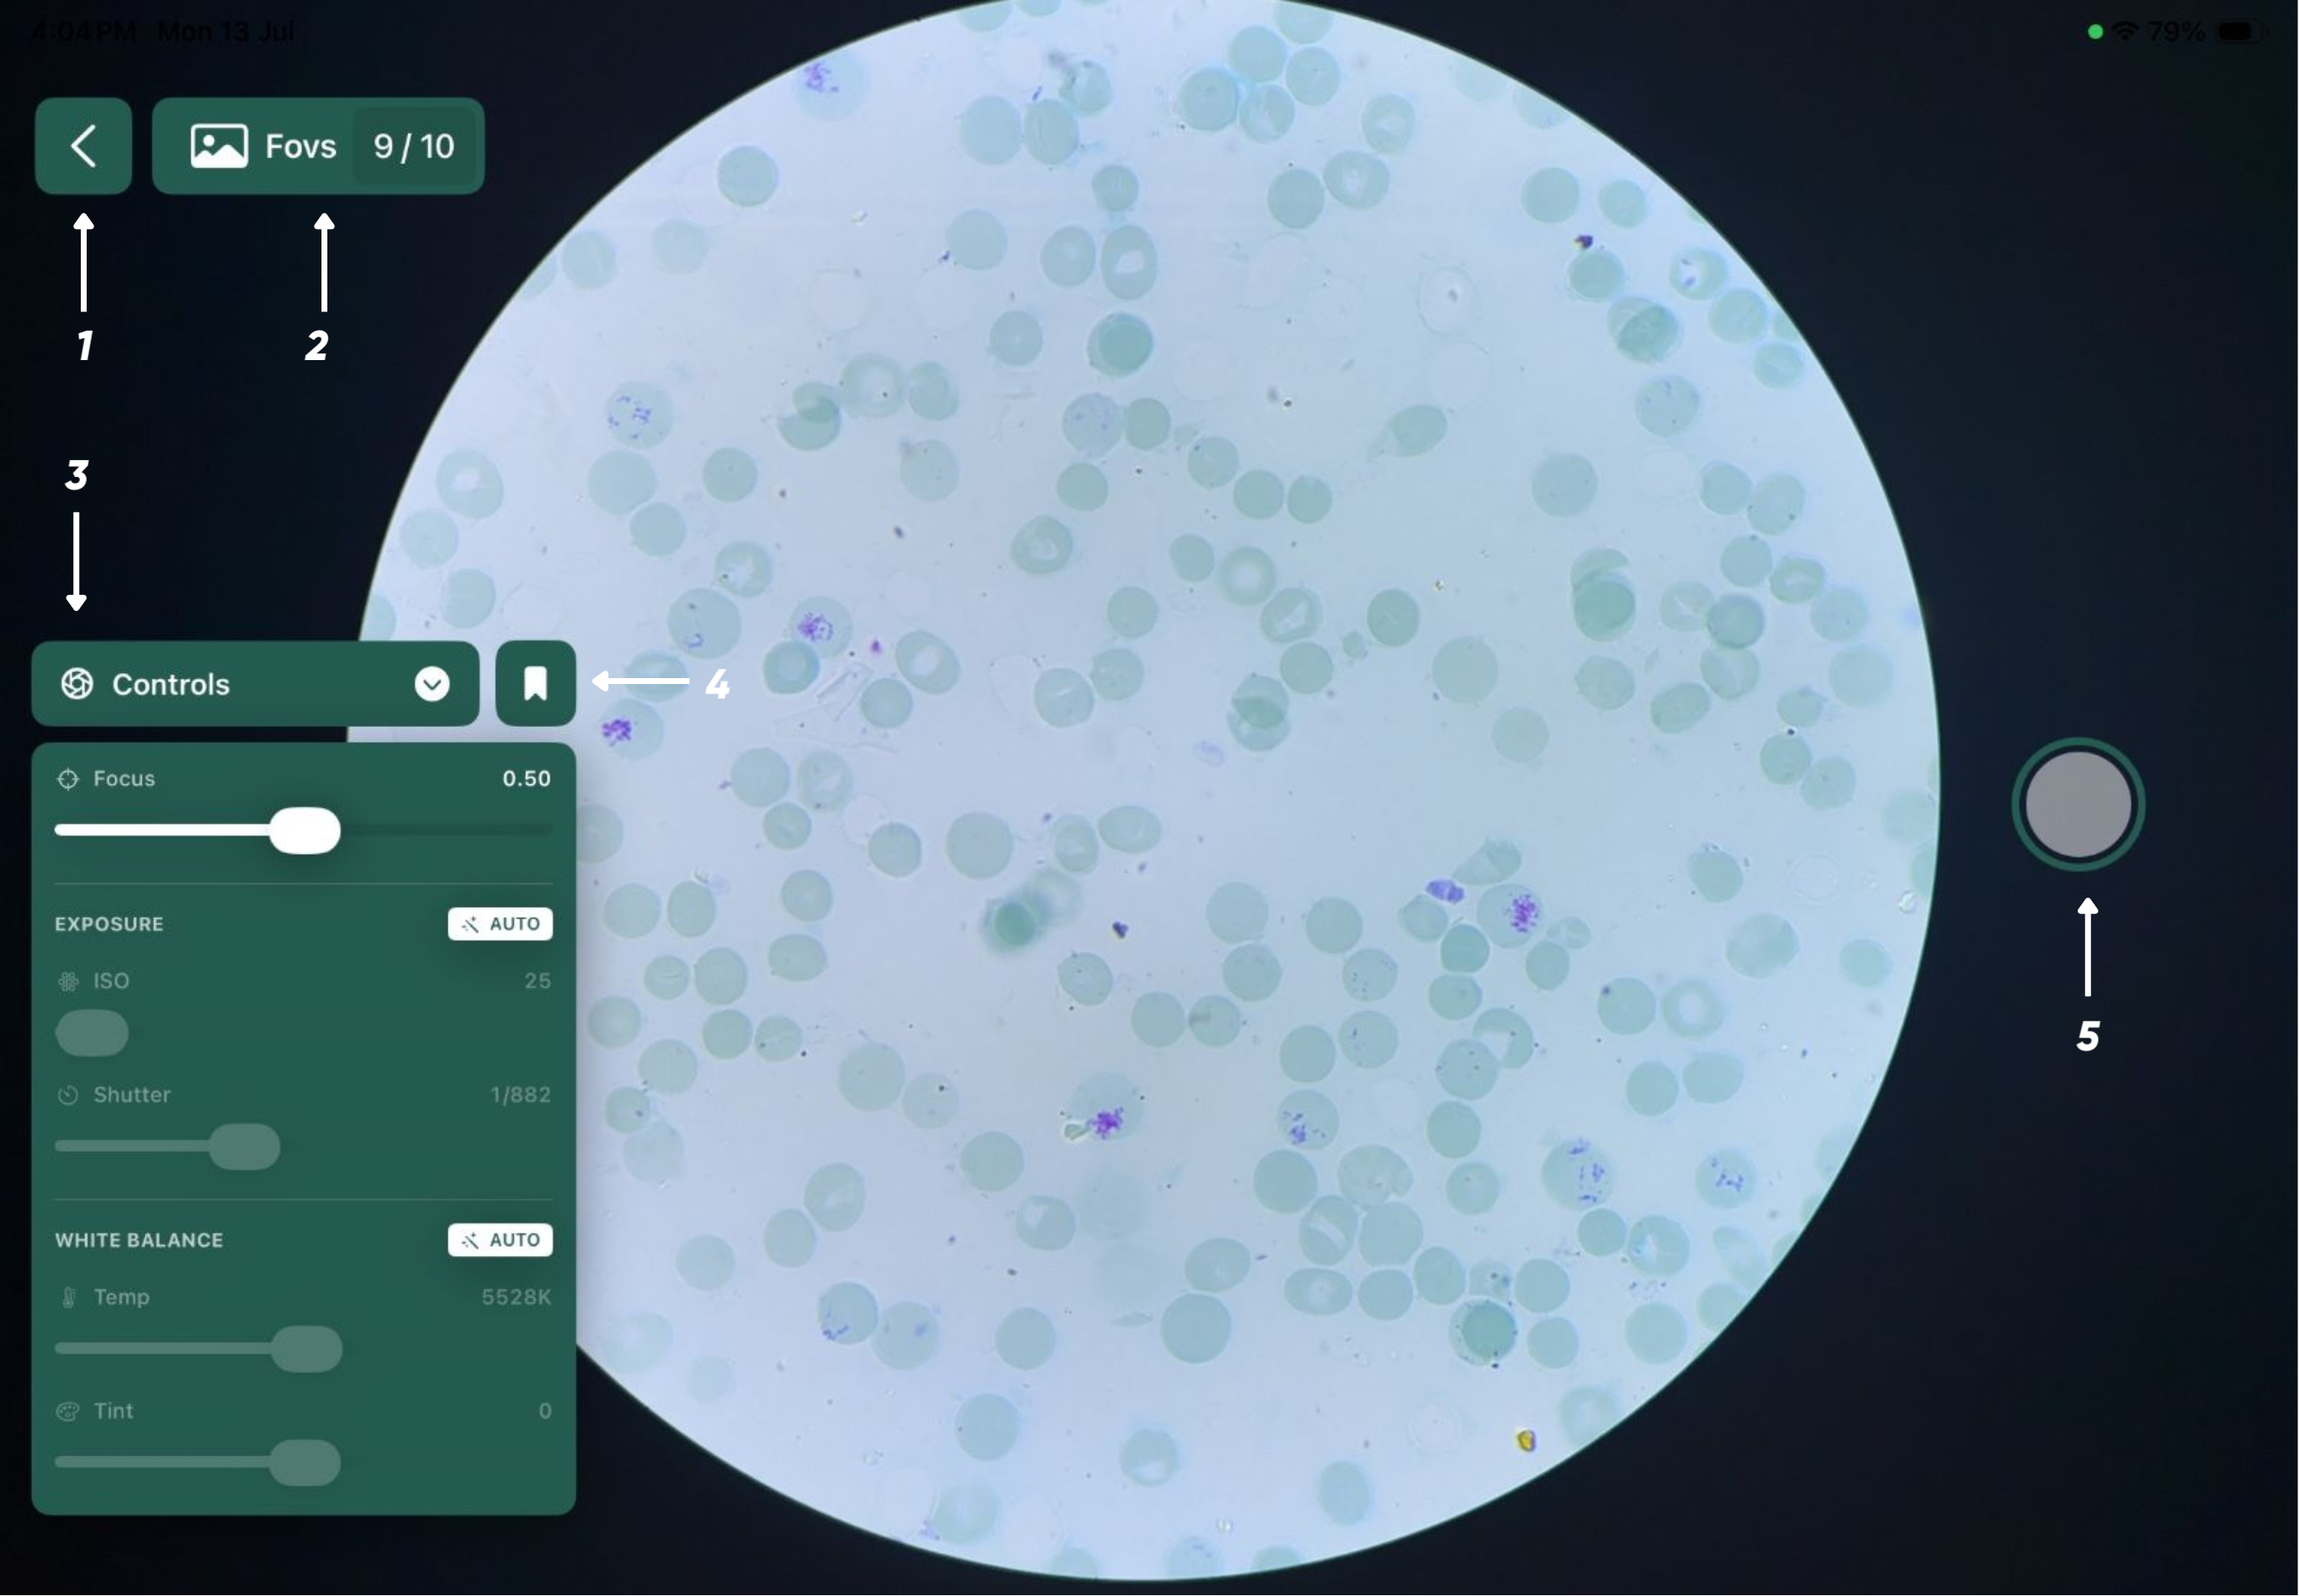
Position the microscope field clearly within the camera view.
-
The capture view has camera settings labeled as tools on the left.
-
The tools are set to auto manually but can be adjusted by tapping on the auto button.
-
Tools include:
-
Focus
-
Exposure
-
White Balance
-
-
Once the camera settings have been adjusted, tap the Capture button to capture an image.
-
Continue capturing images until the required number of Fields of View (FOVs) is reached.
- The Fields of View (FOVs) can be set by the user. The minimum FOVs are 10.
|
|
|
|
|
|
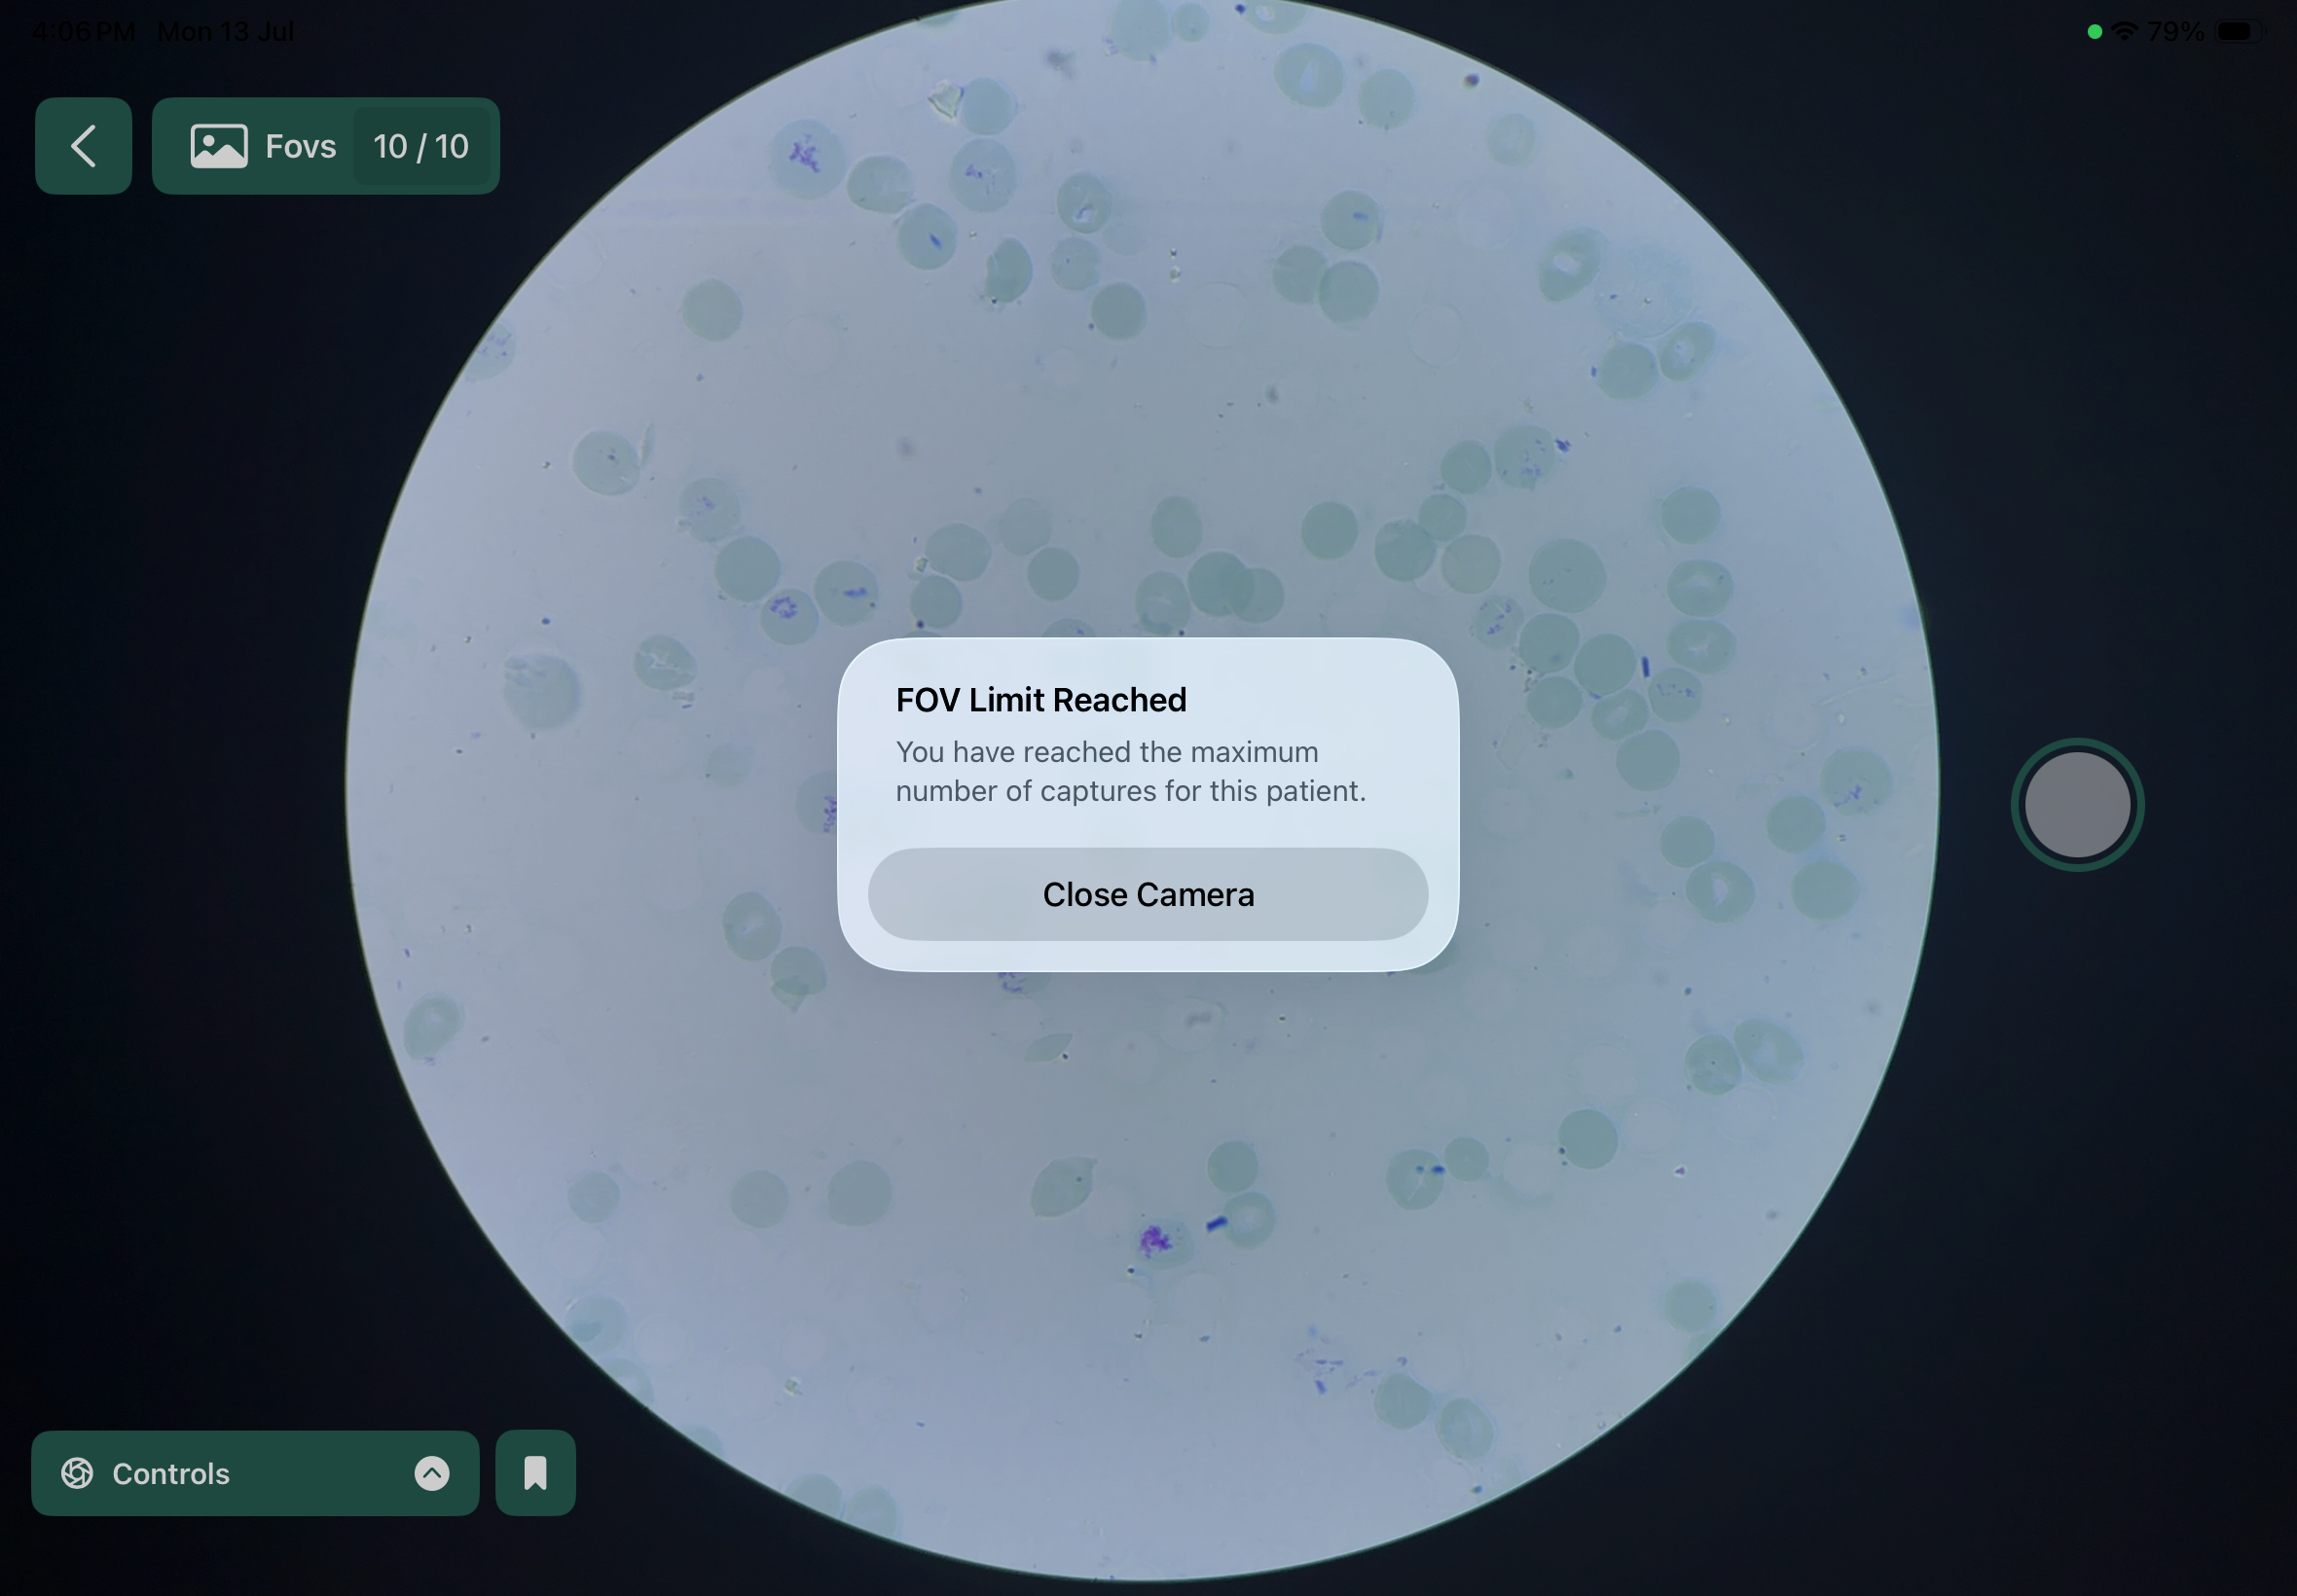
Incomplete POV
- If the FOV limit is not full filled, the user can find the the capture image button at the top right corner of the previous page.
- Once the FOV limit is reached, the button disappears.
Review Captured Images
Once image capture is complete, the application processes the images and displays the analysis results.
Review AI Detection Results
Each processed image can be reviewed to verify the AI-generated detections before generating the final report.
-
Select a processed image from the image list.
-
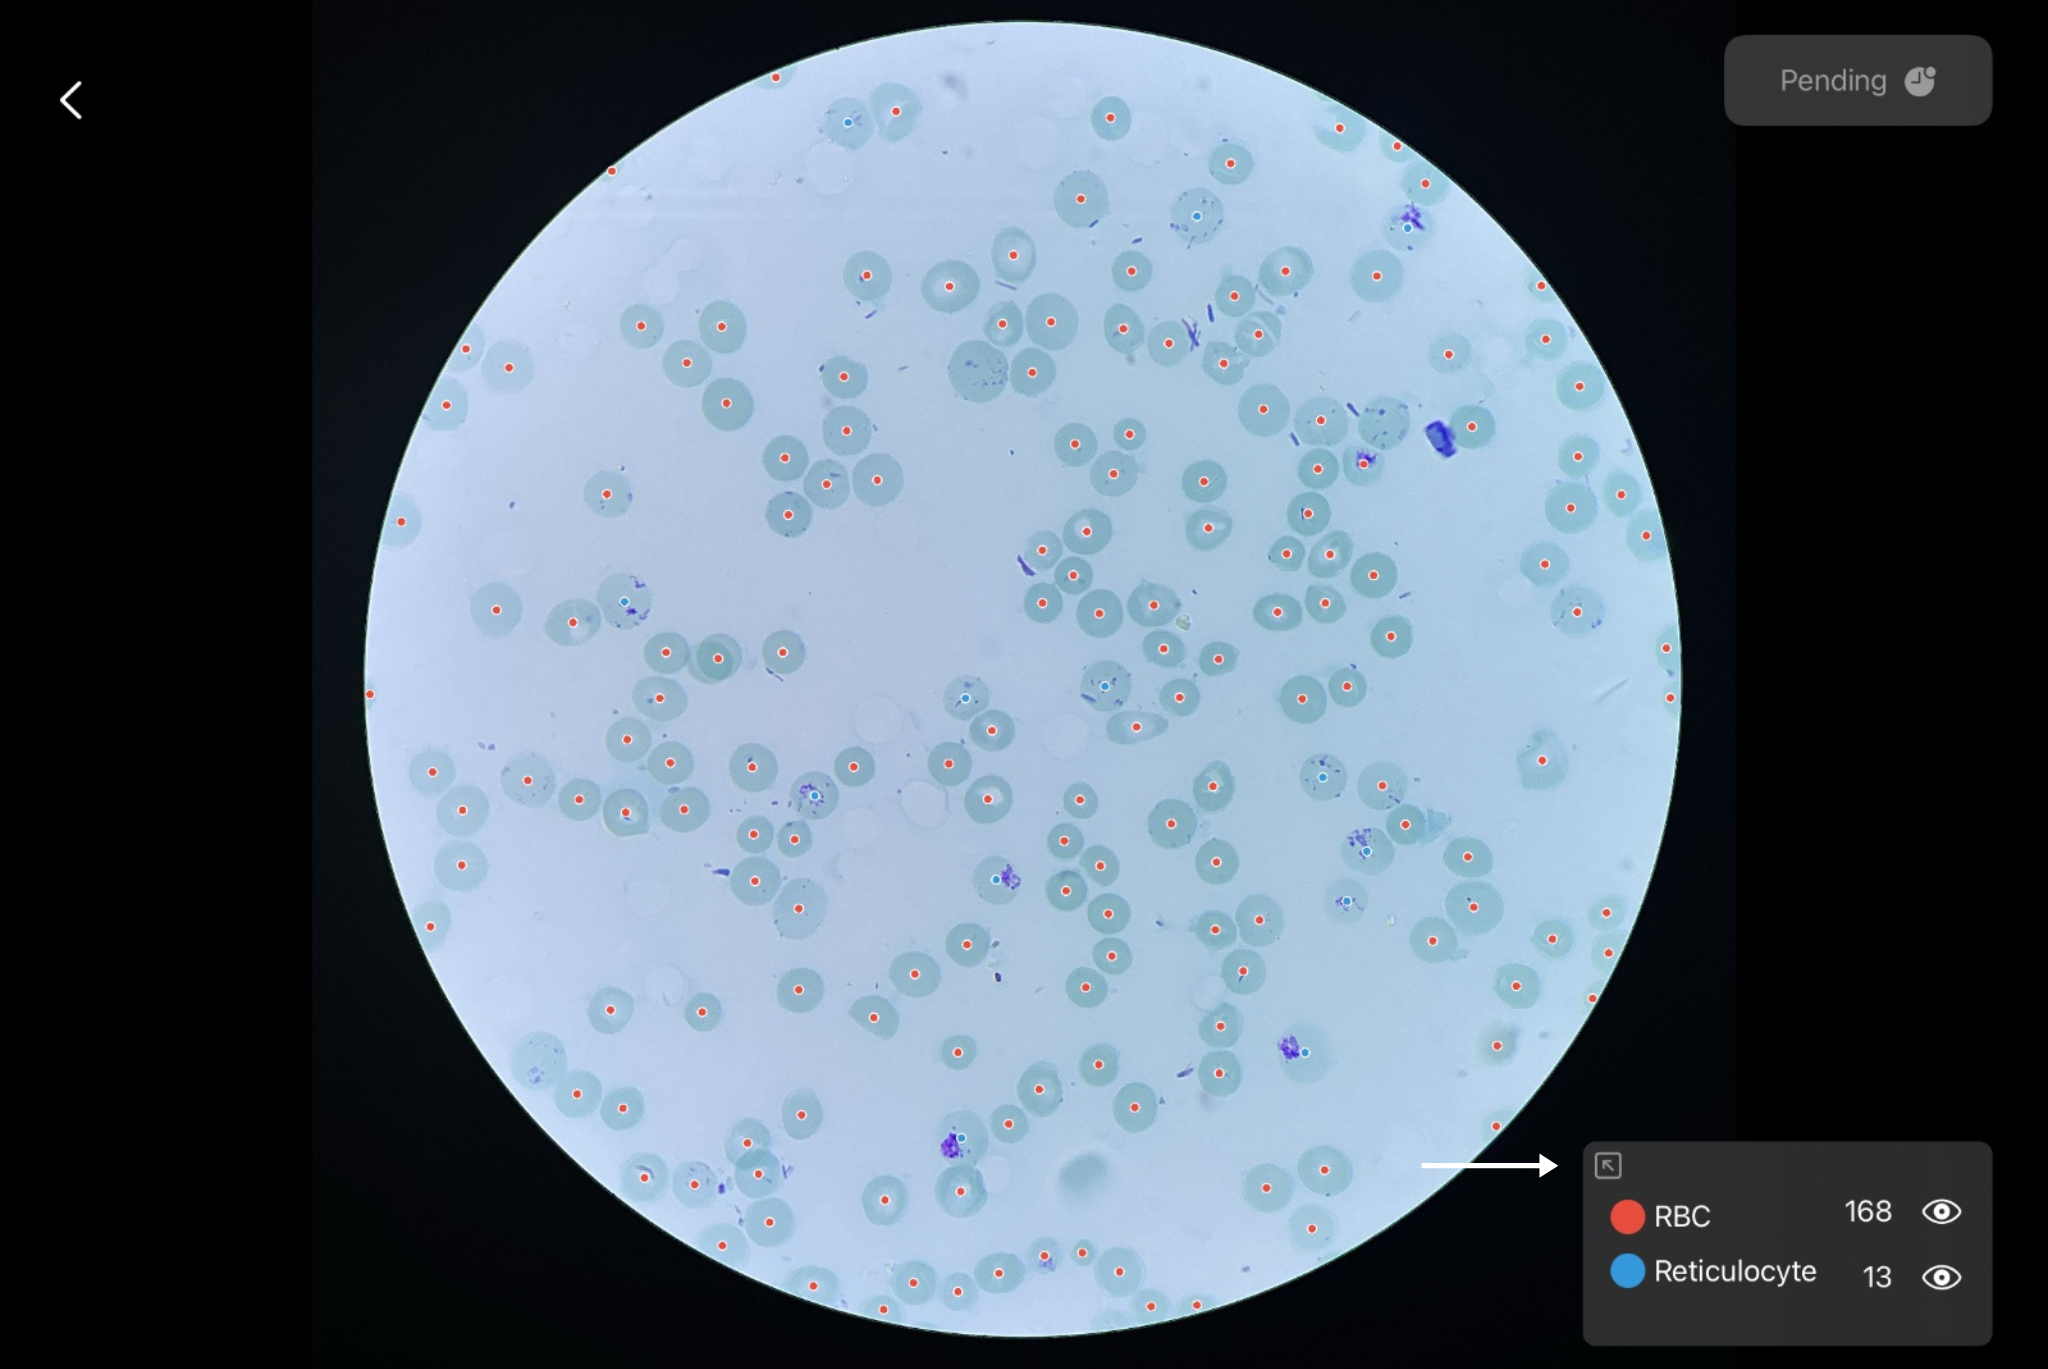
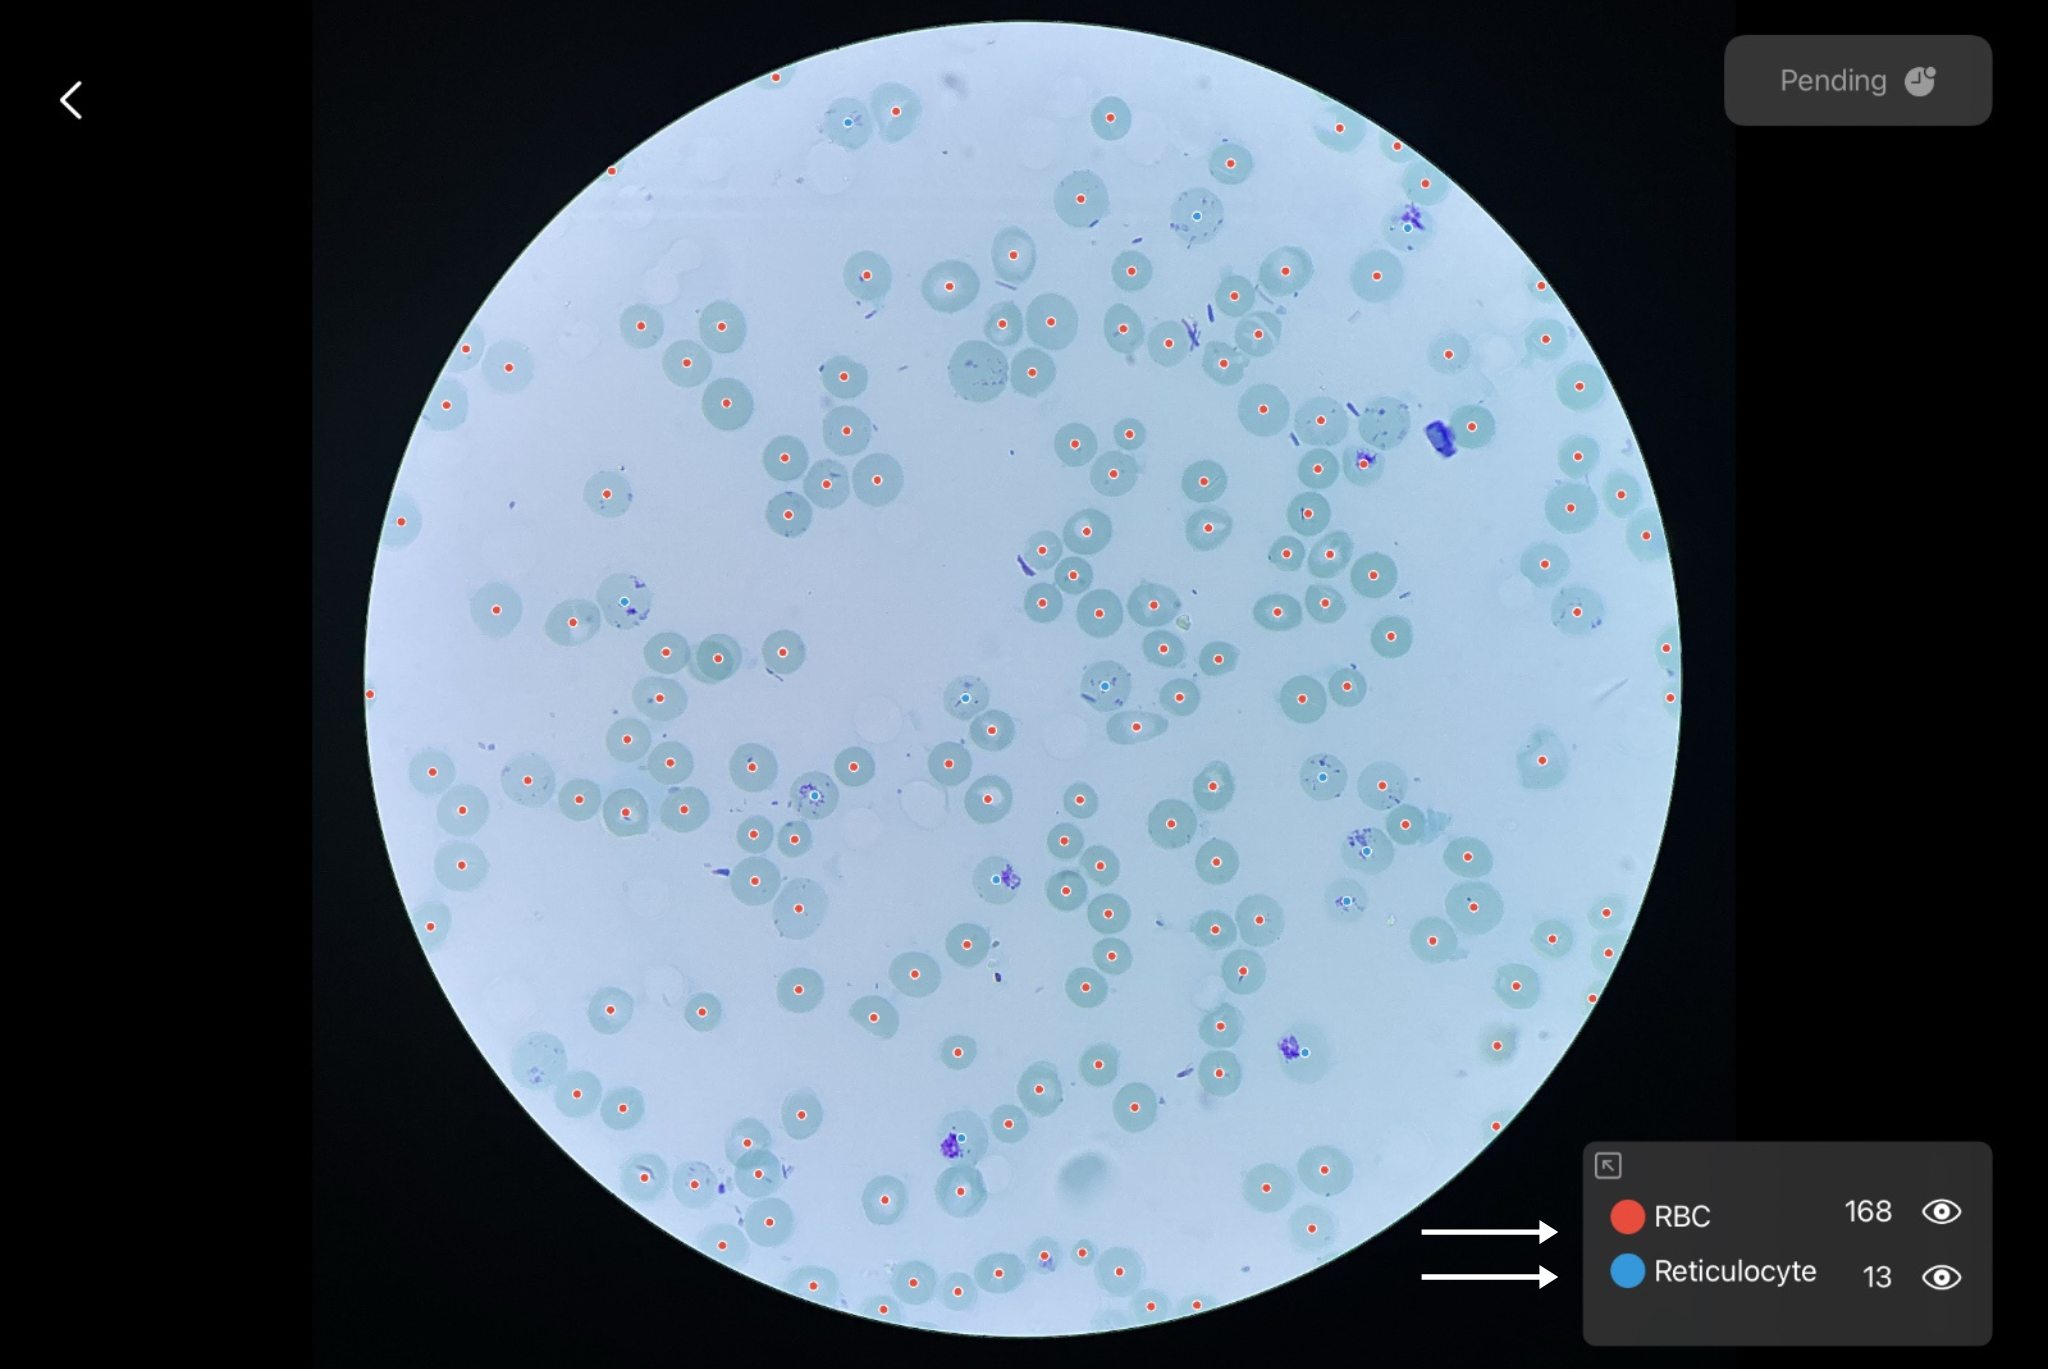
Review the highlighted AI detections displayed on the microscope image.
-
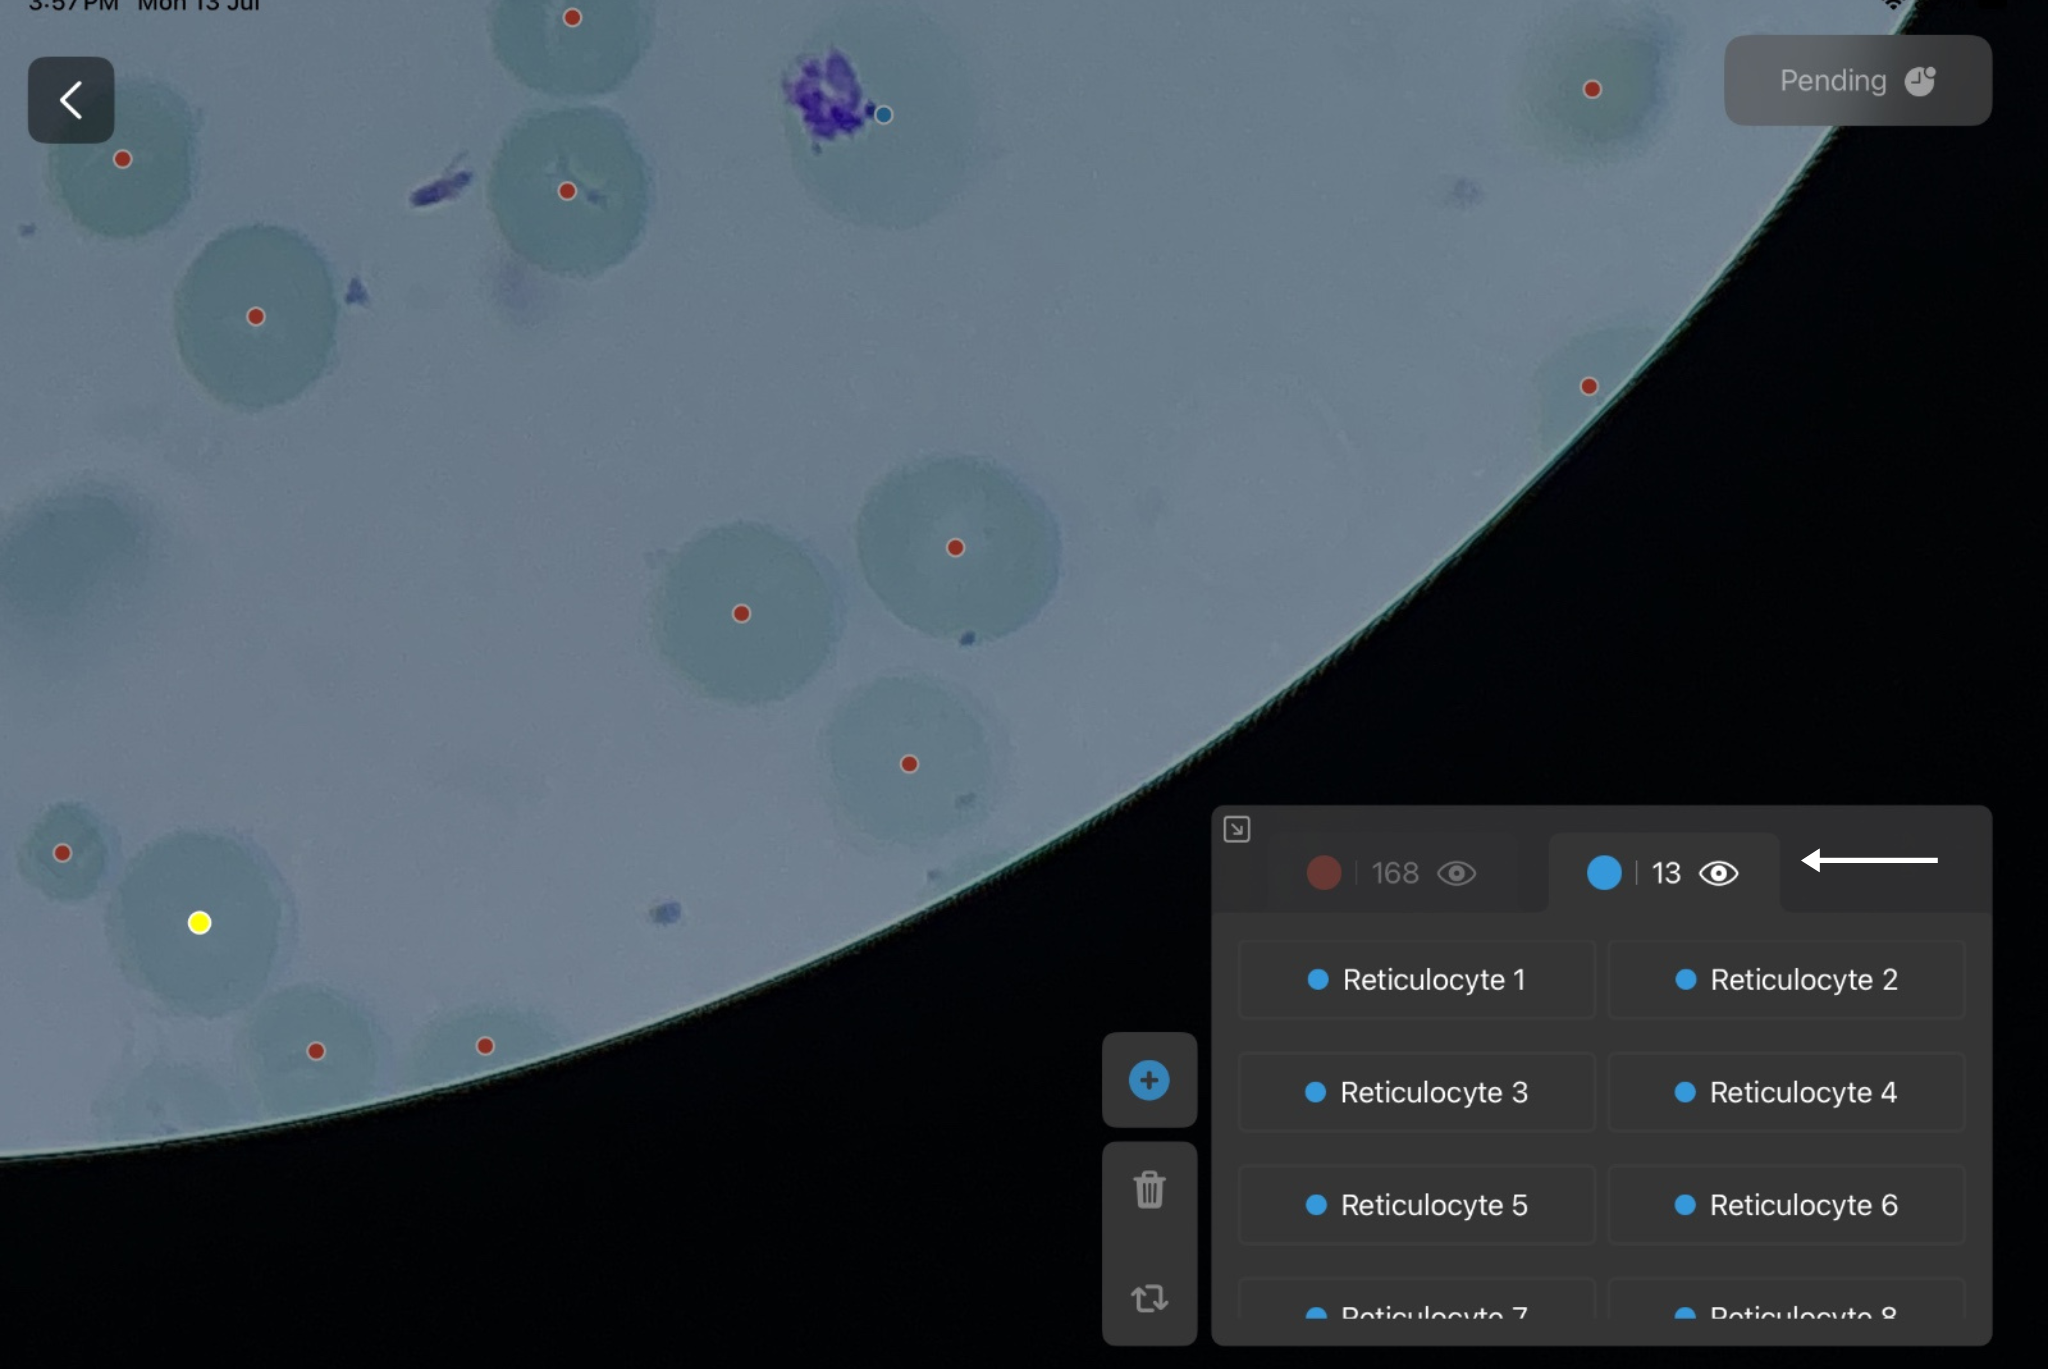
View the list of detected reticulocytes.
-
Select any detected reticulocyte to view its position within the image.
-
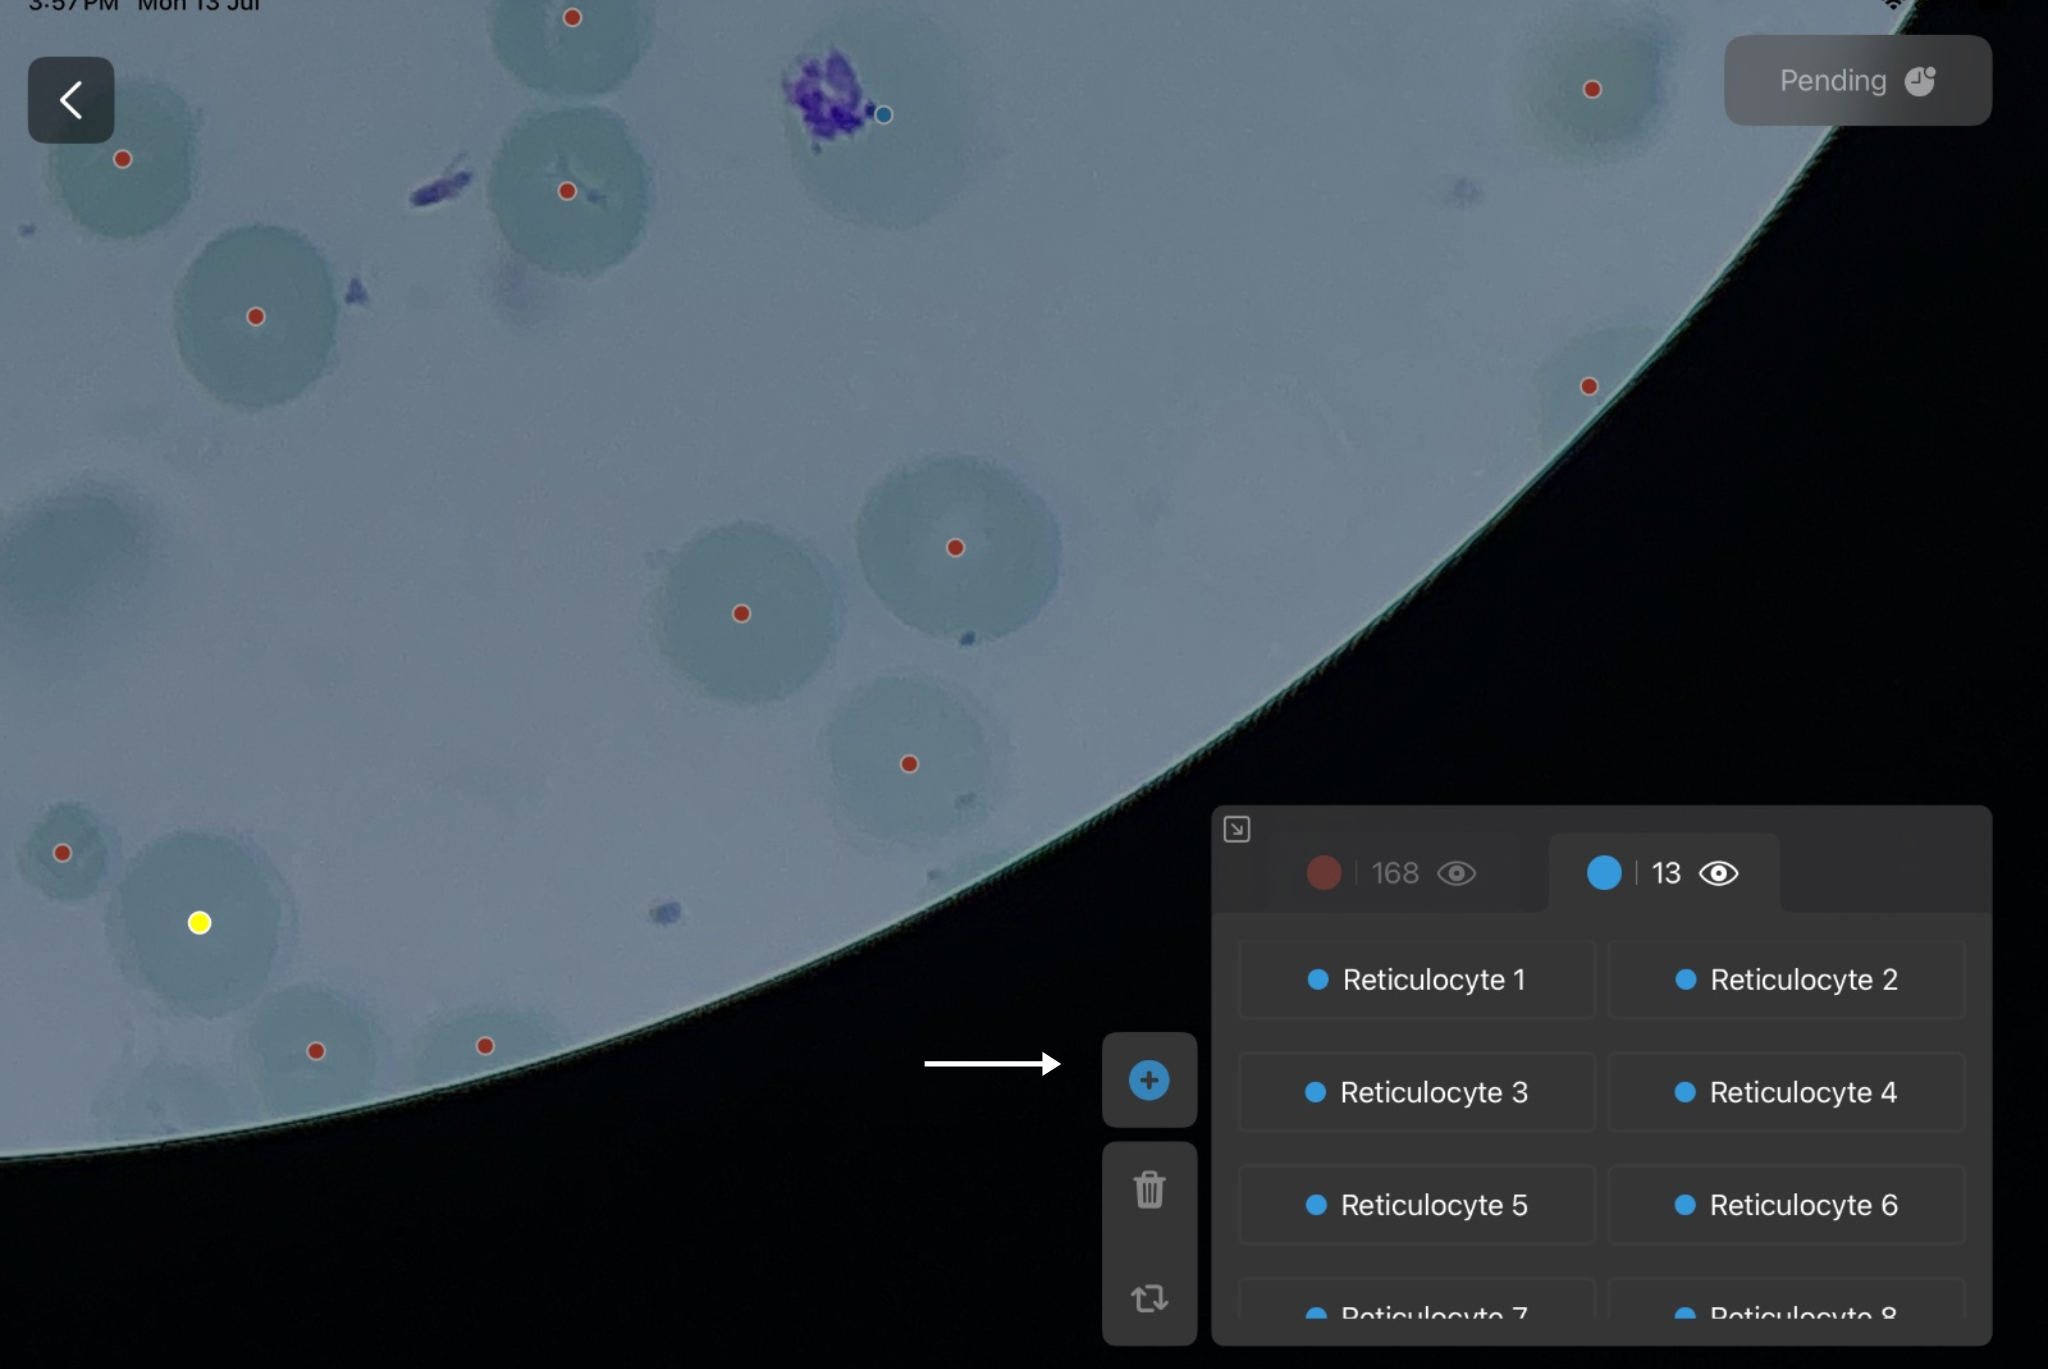
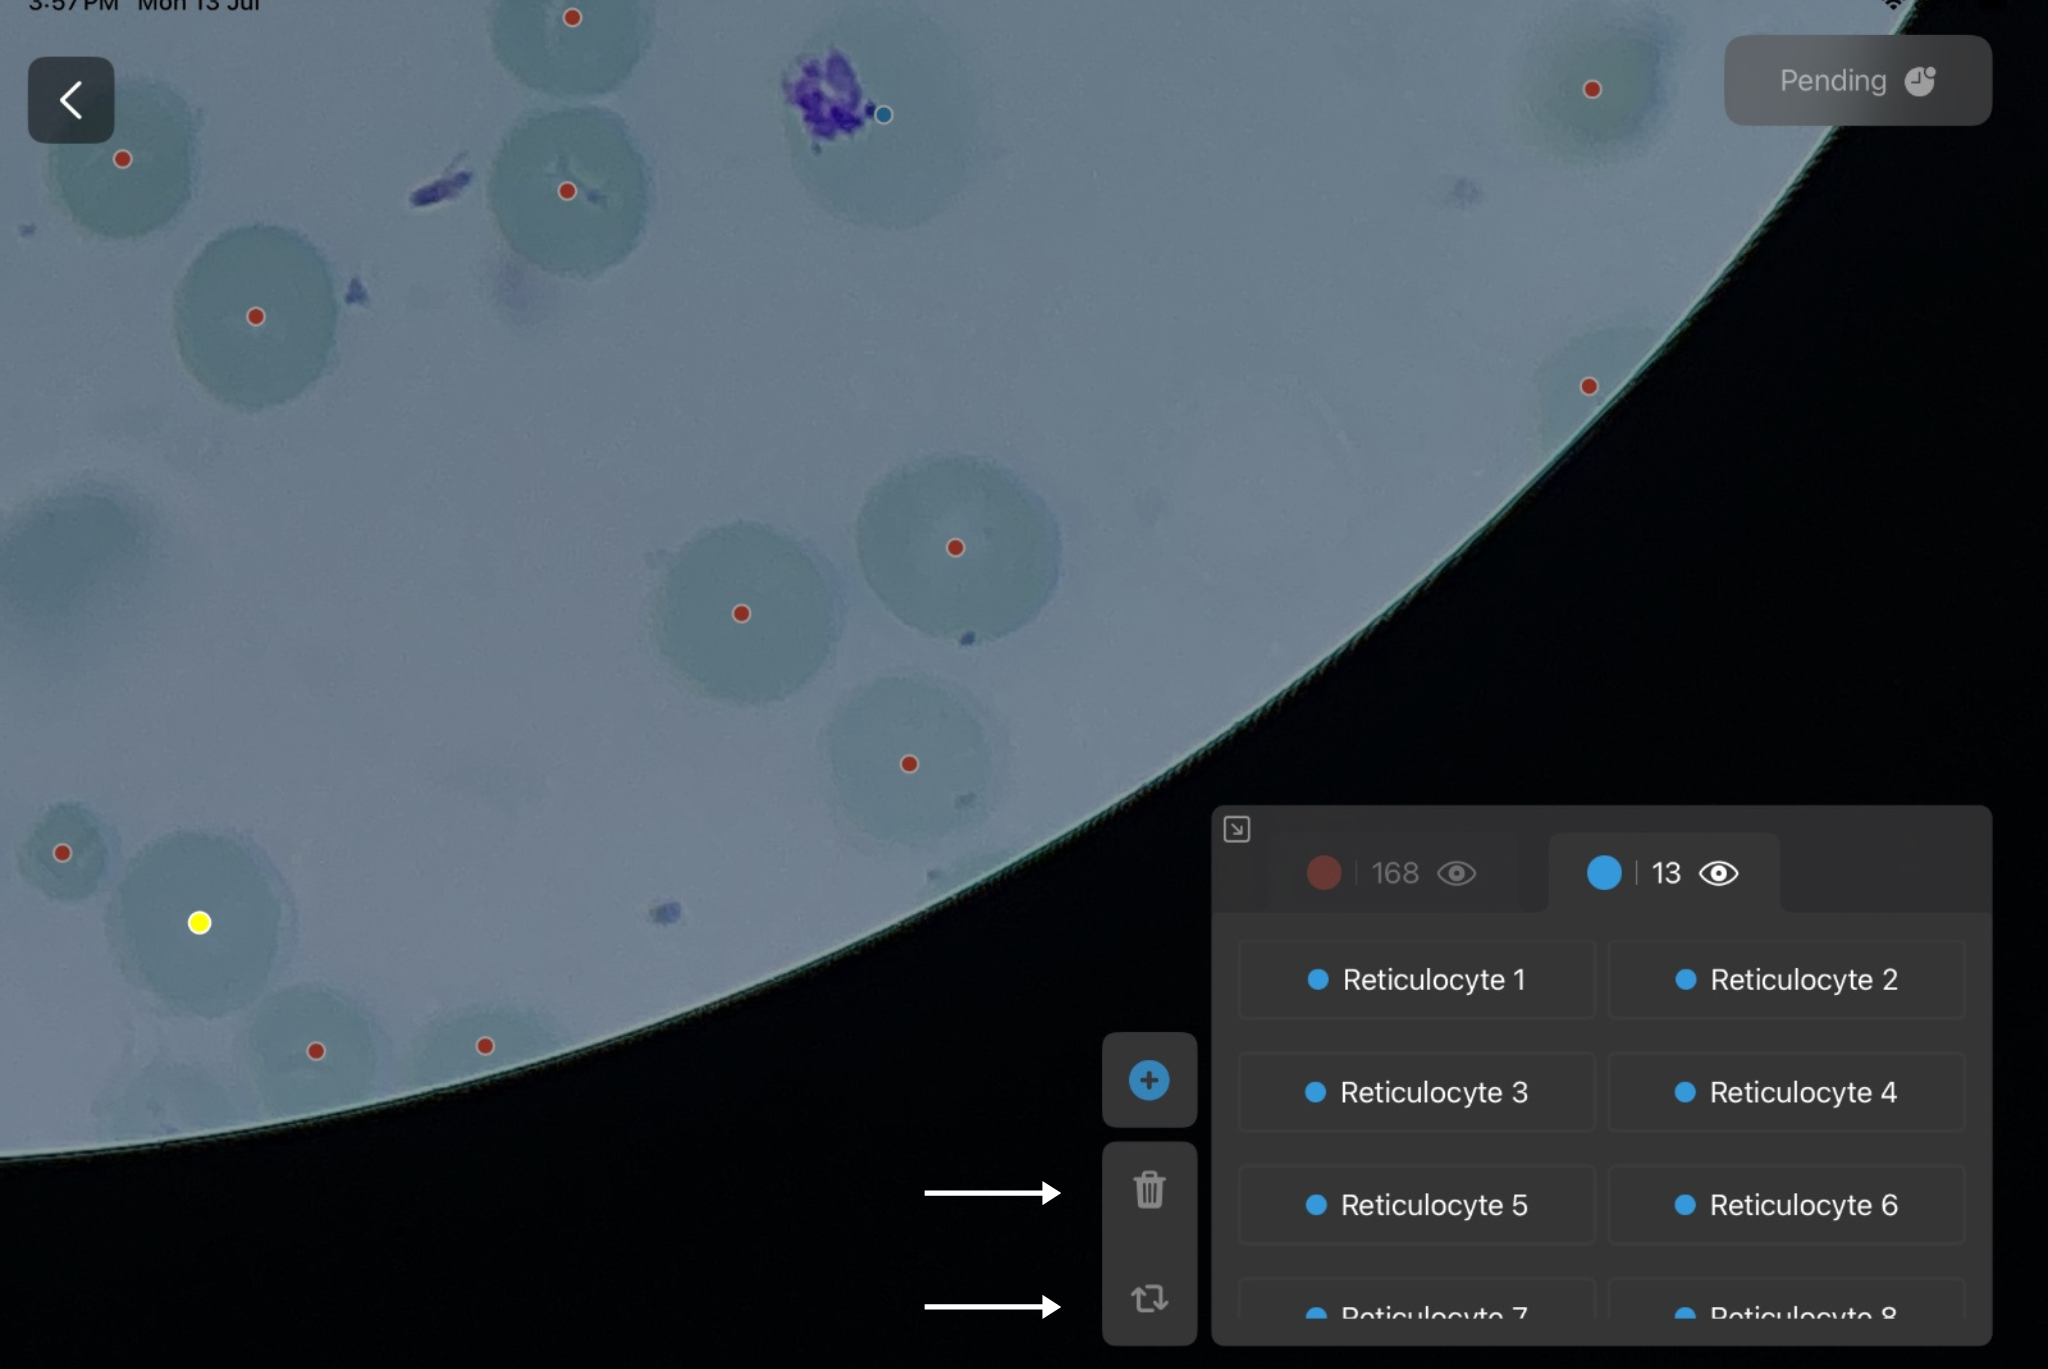
If required, manually:
-
Delete a detection.
-
Modify an existing detection.
-
-
Save the changes and return to the processed image list.
|
|
|
|
|
|
|
|
|
Reviewed Images
Images that have been reviewed can be marked to help you identify completed reviews.
-
Complete the review of a processed image by tapping on the Pending button.
- The Pending button is located a the top right.
-
Return to the Processed tab.
-
Locate the reviewed image.
-
Verify that the image displays the Reviewed badge.
|
|
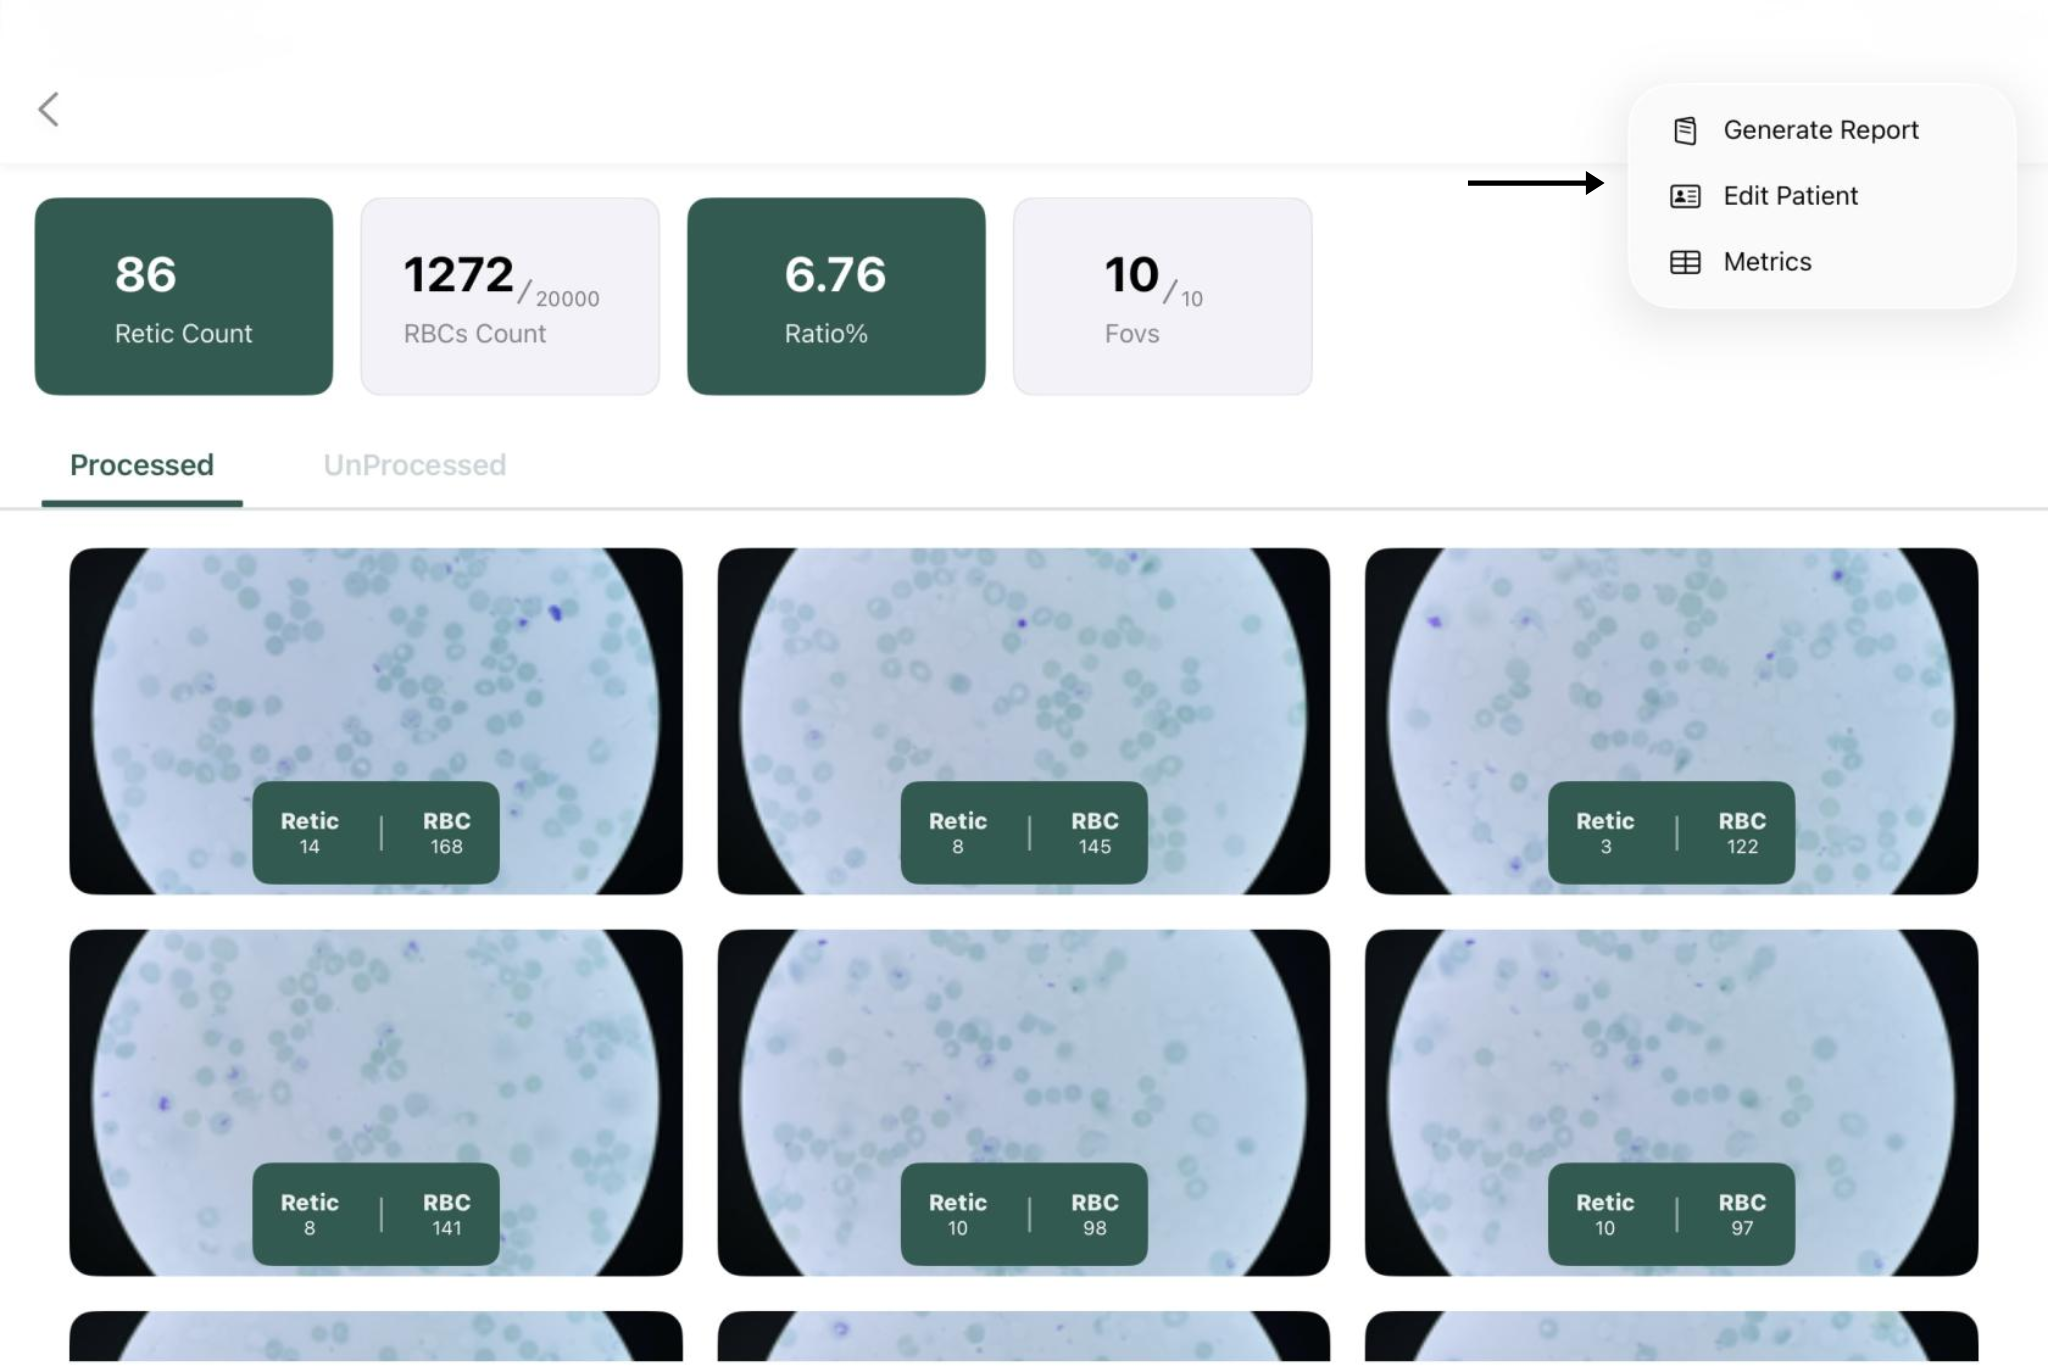
Generate a Report
After reviewing all processed images, you can generate a patient report.
-
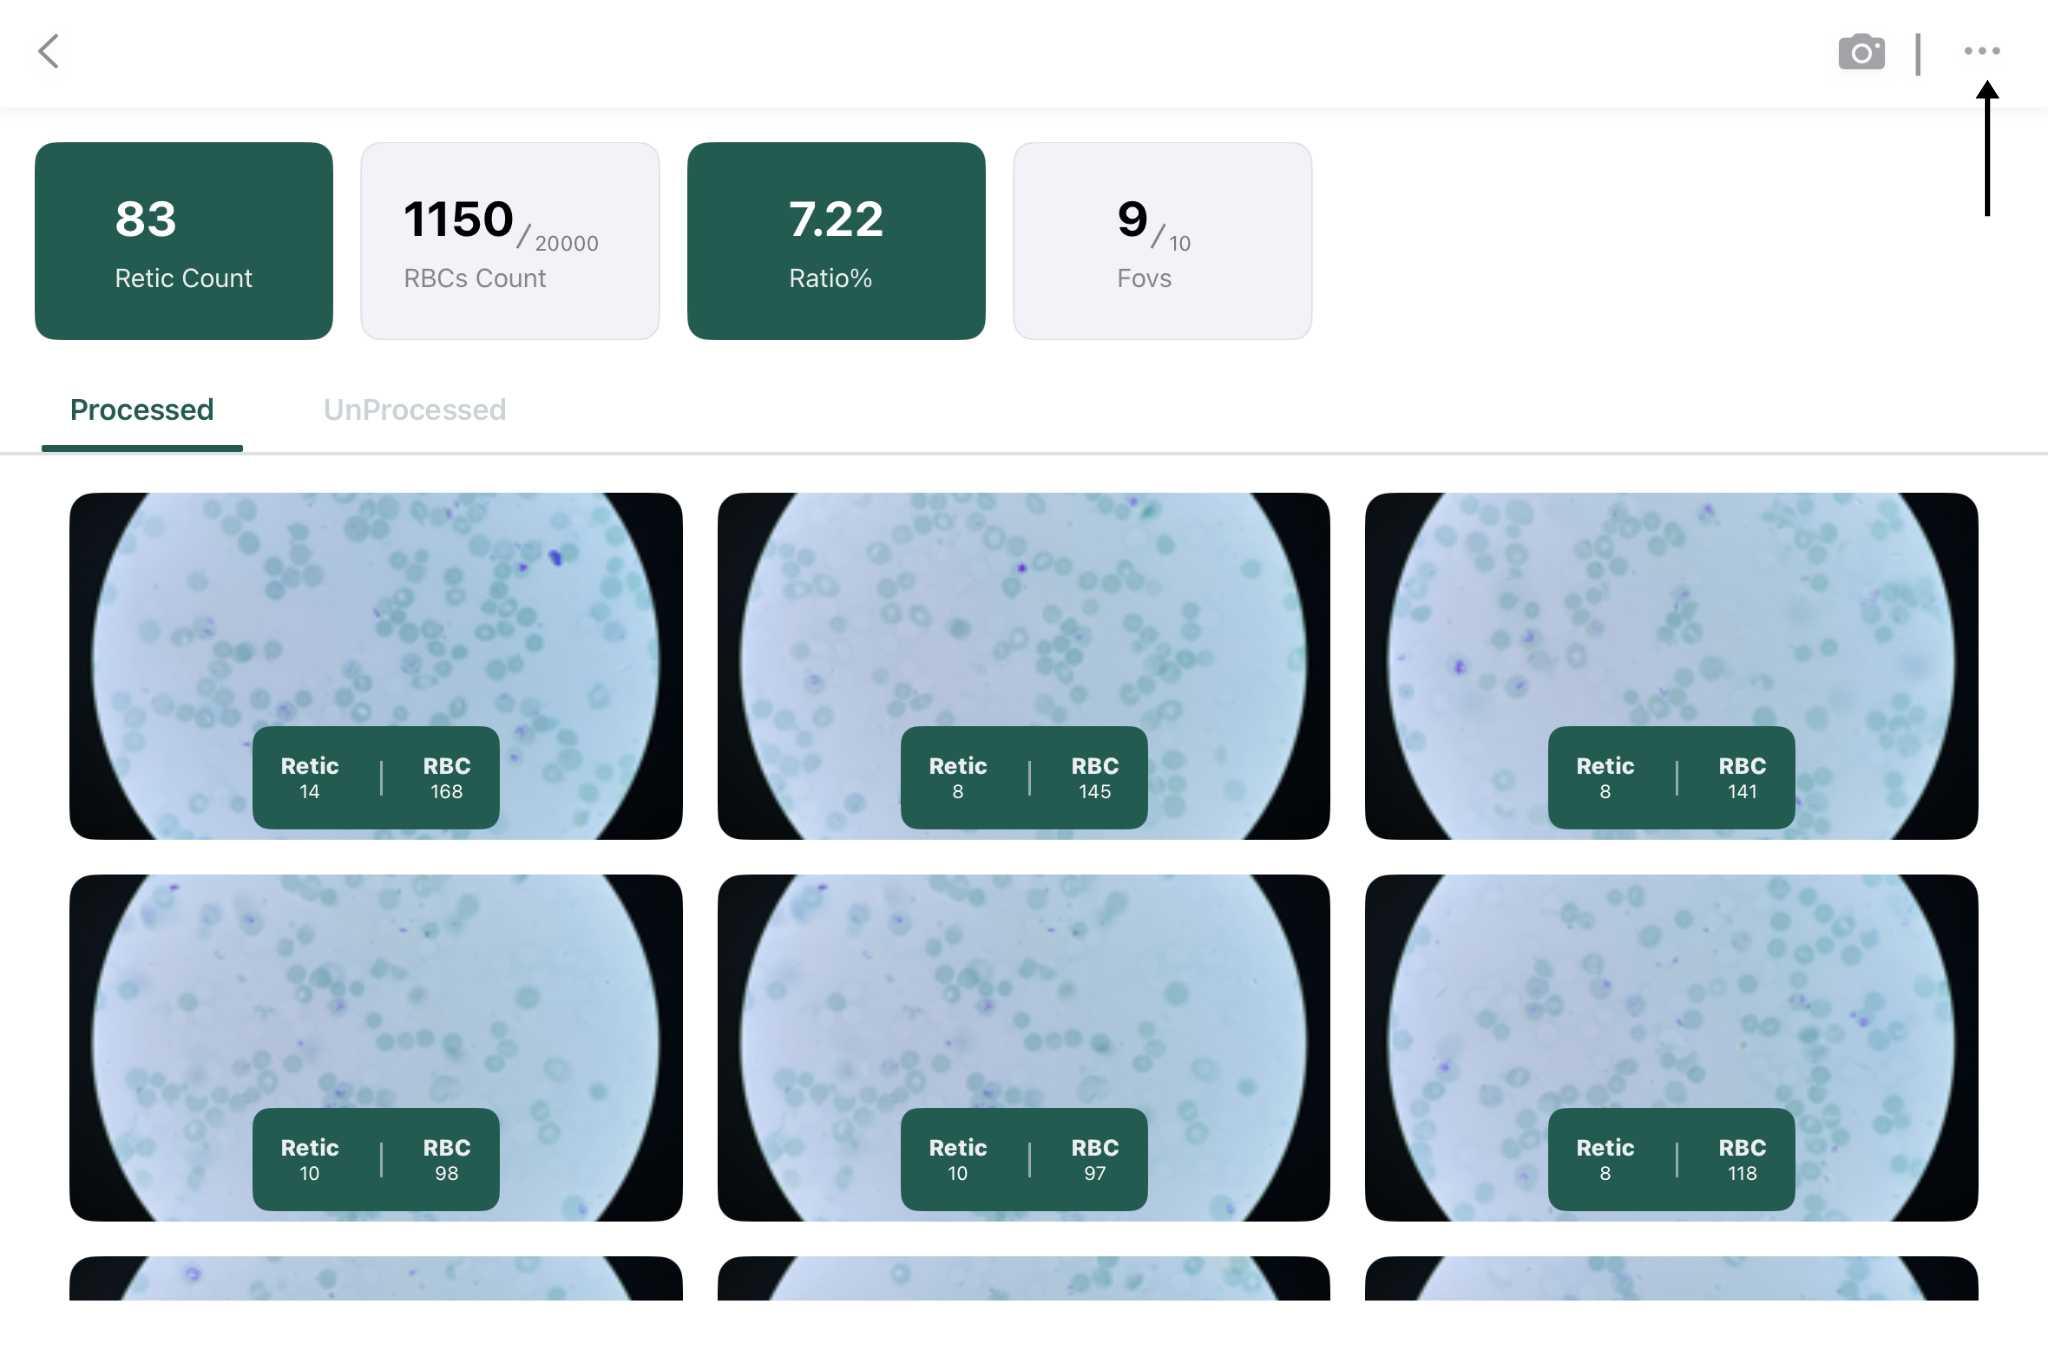
Open the completed case.
-
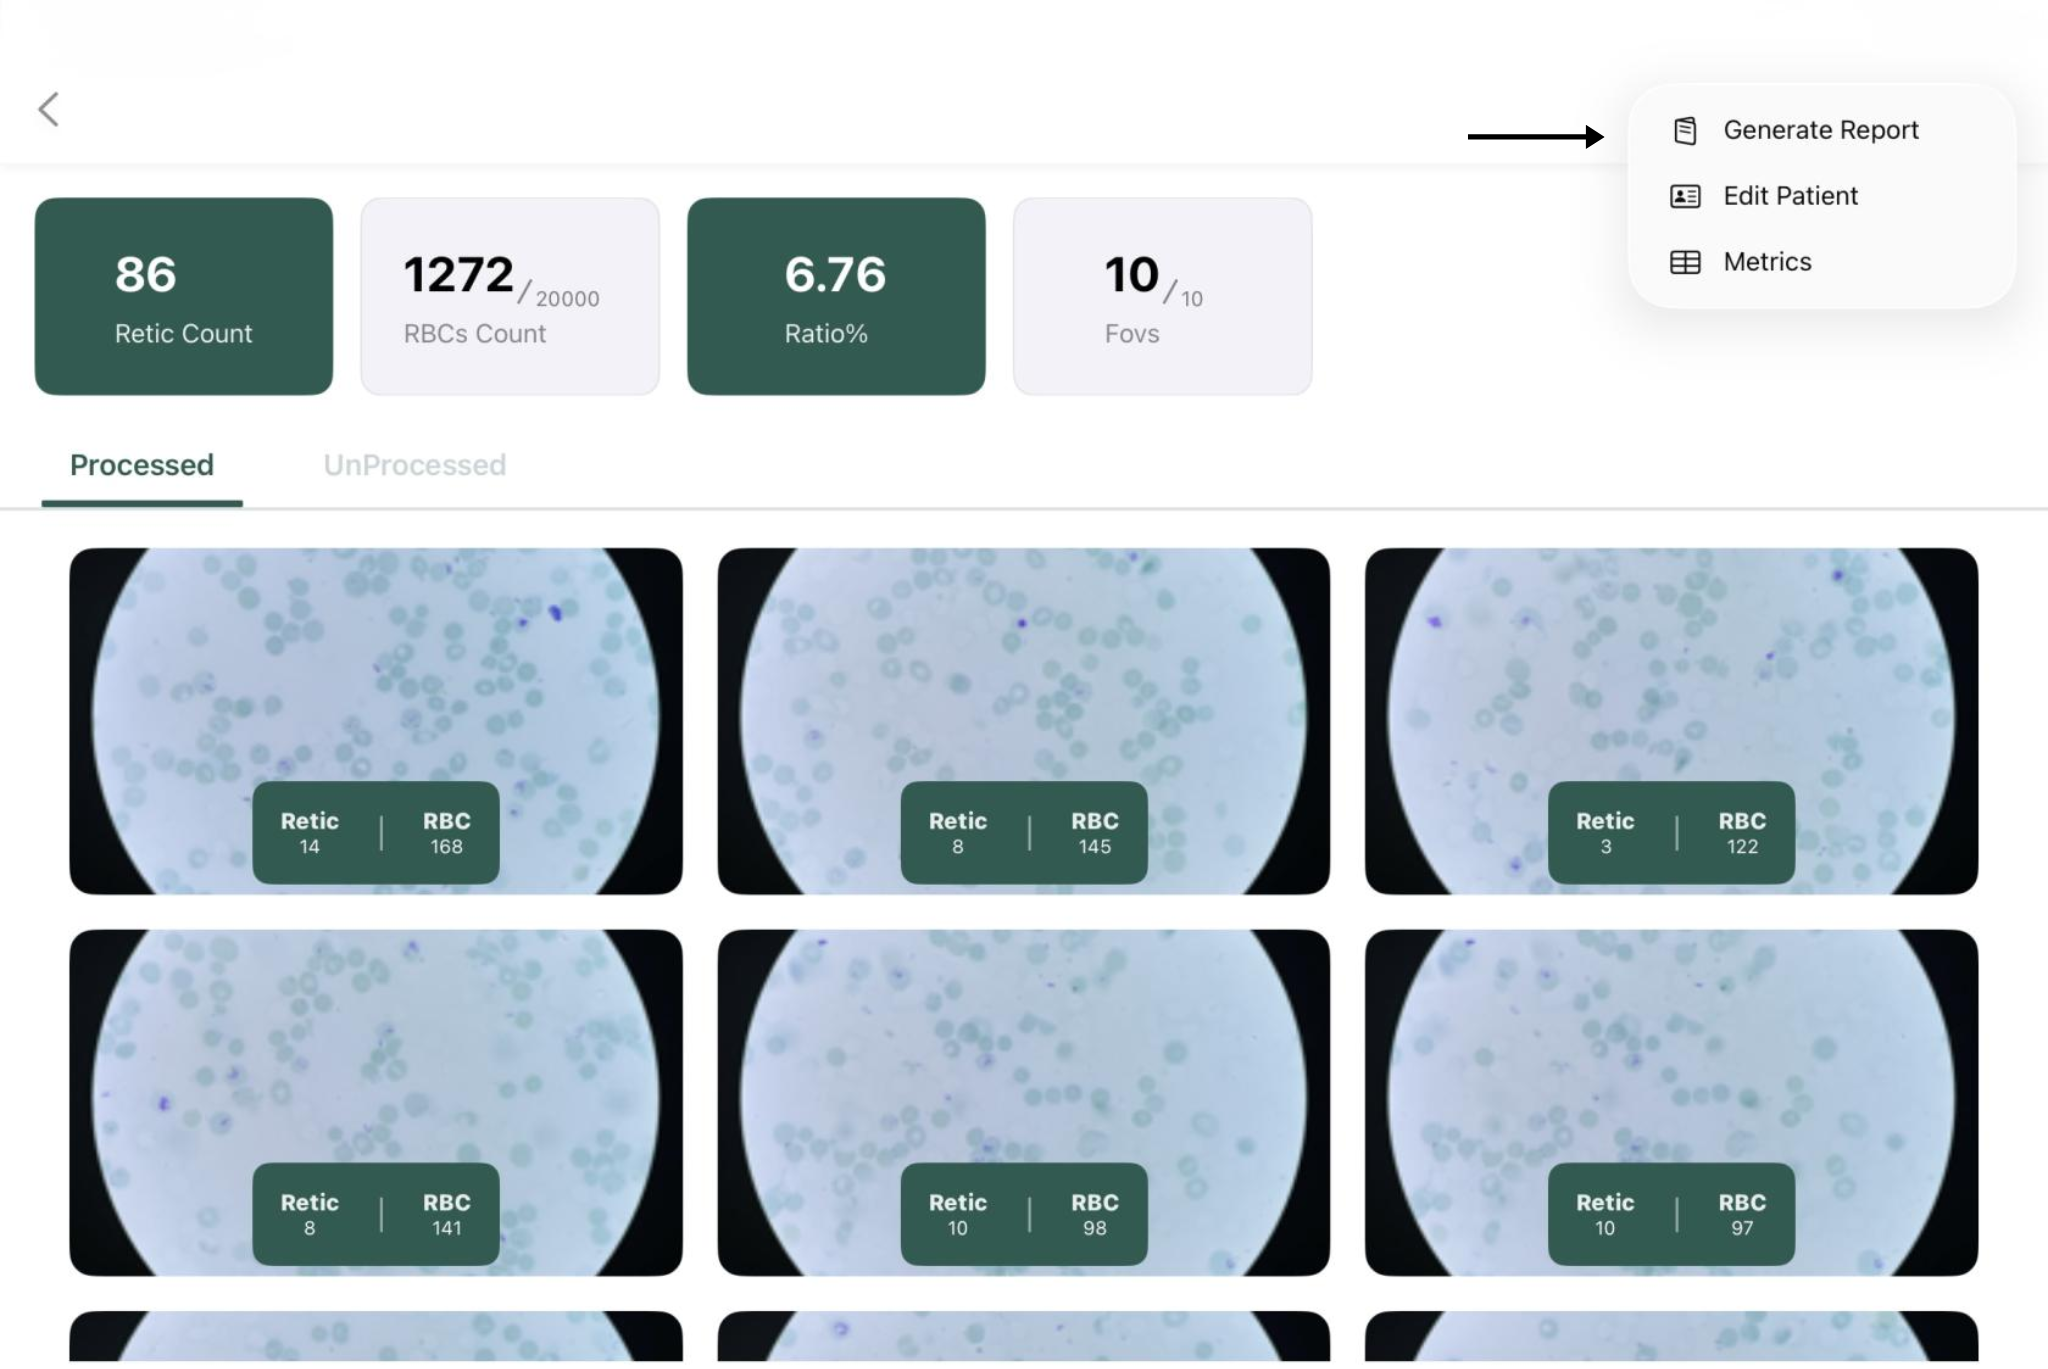
Click the More Options (⋮) menu.
-
Select Generate Report.
-
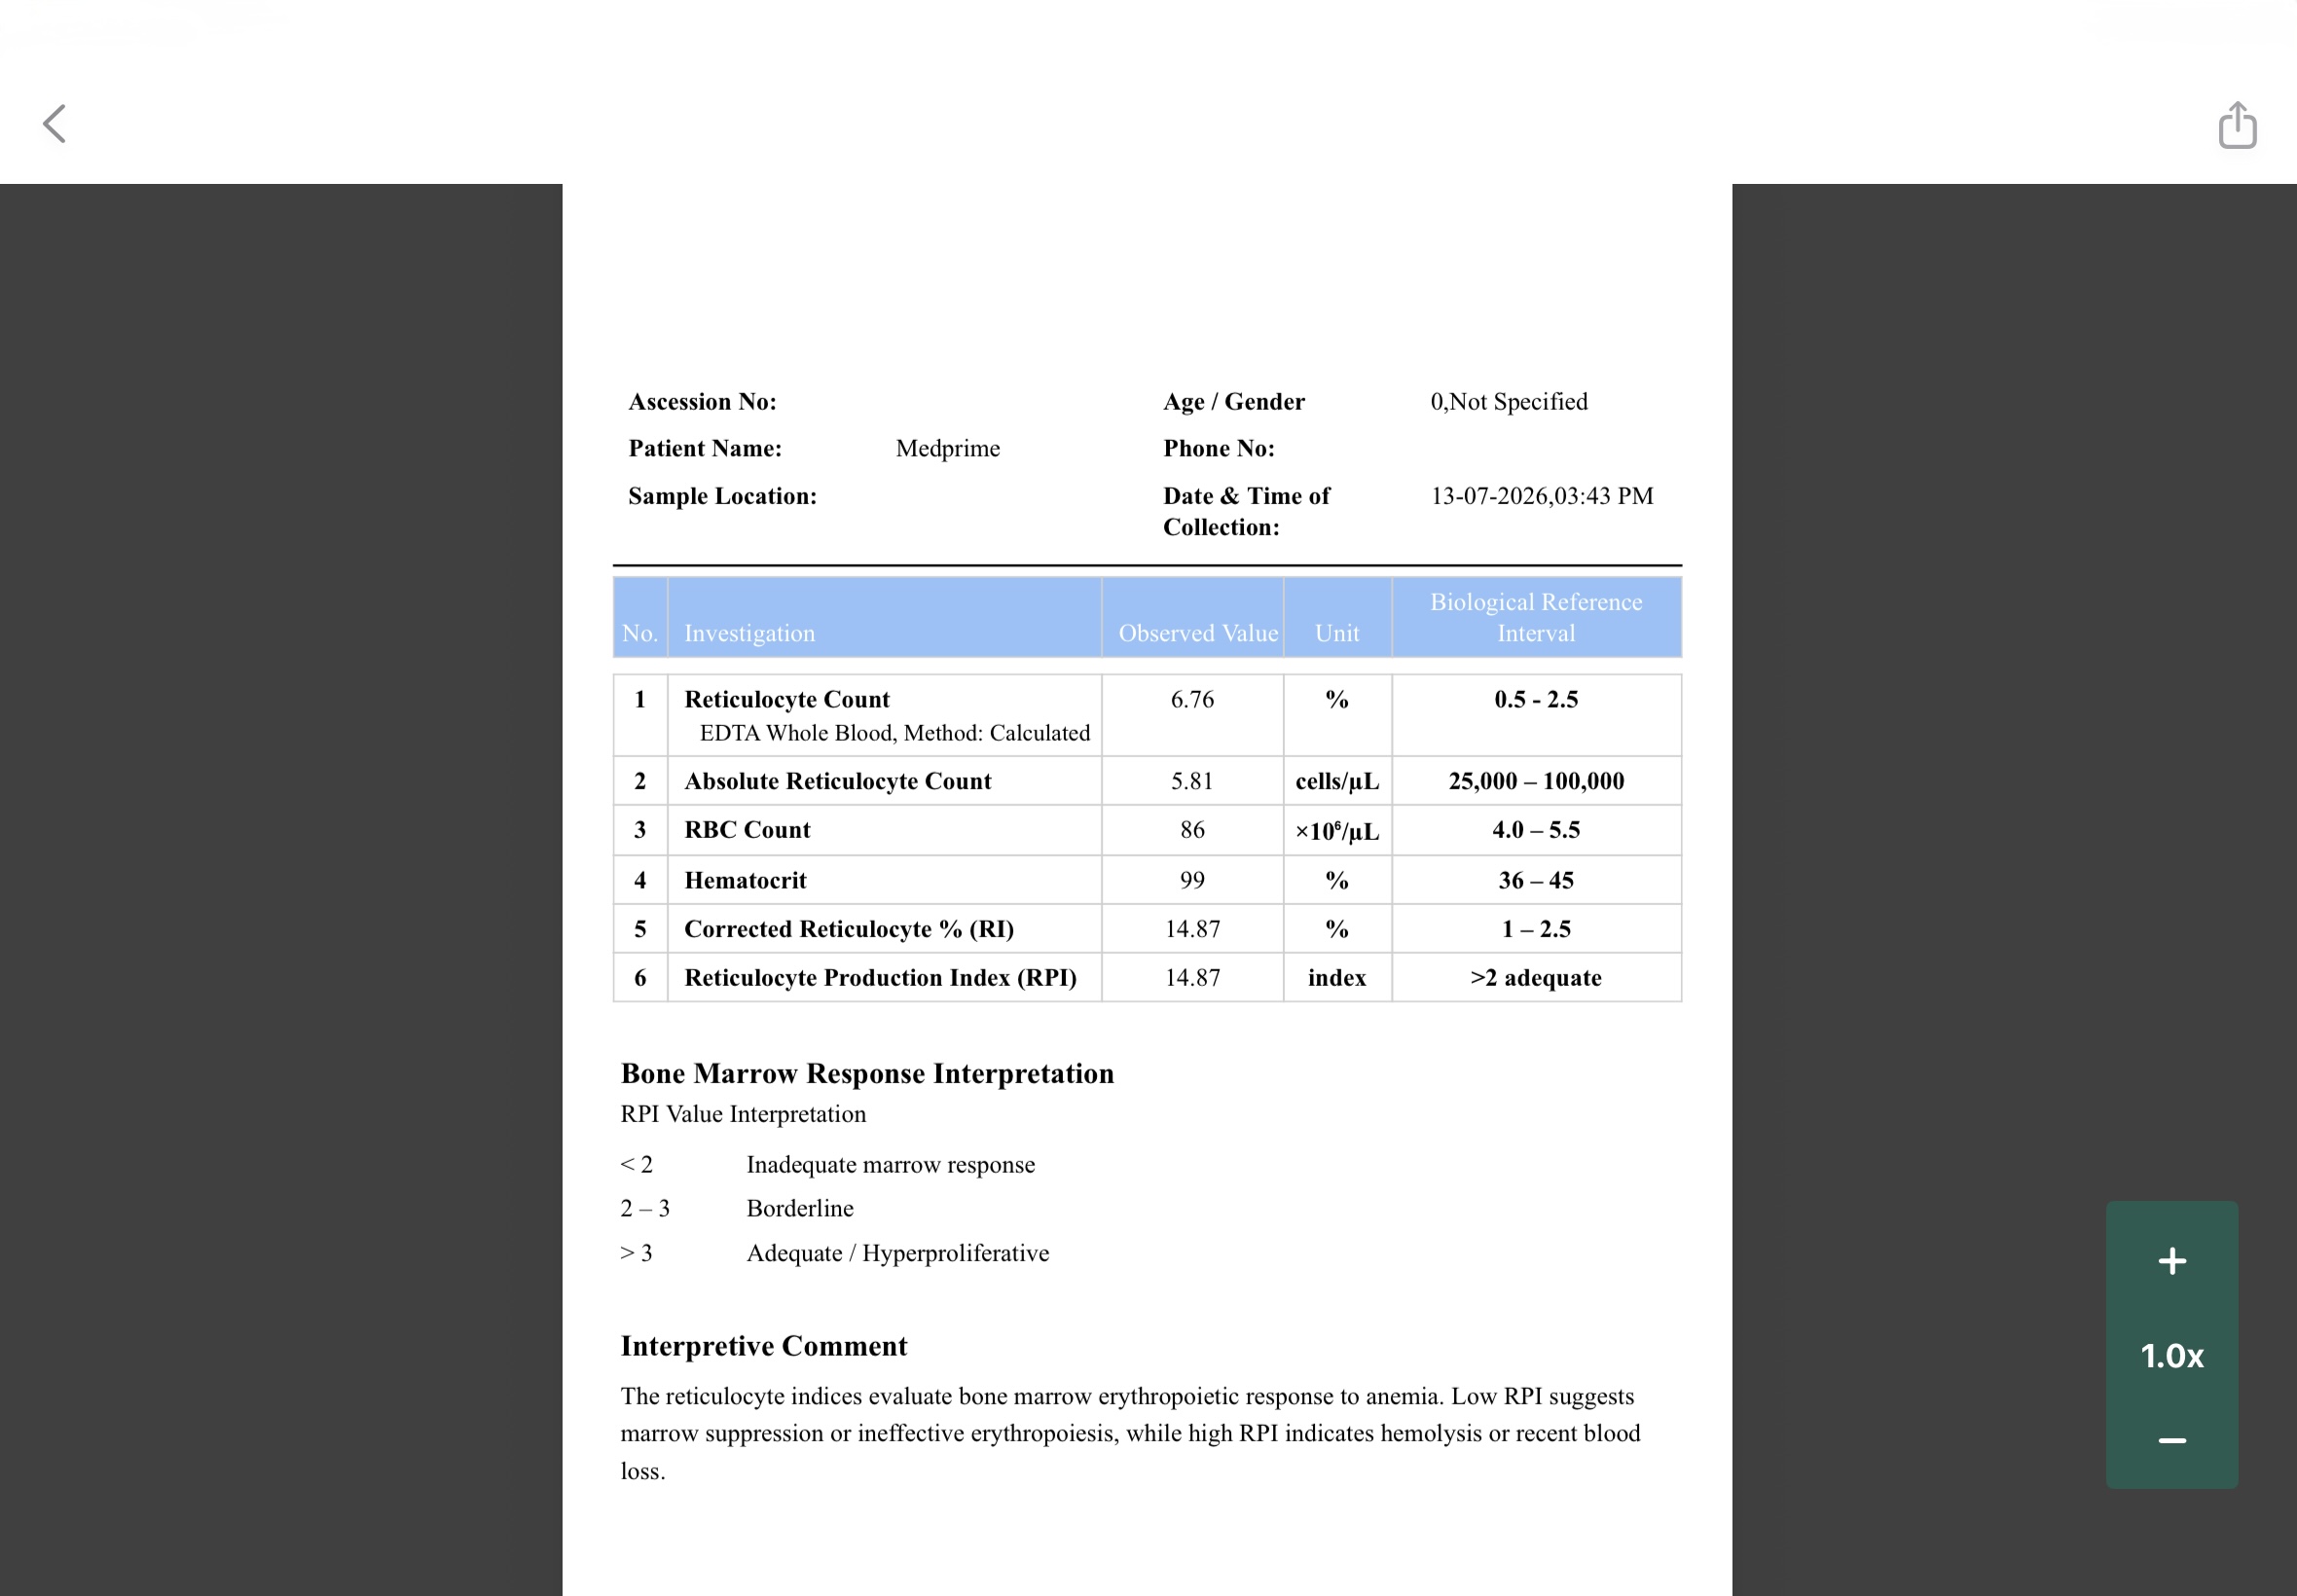
Review the generated report.
-
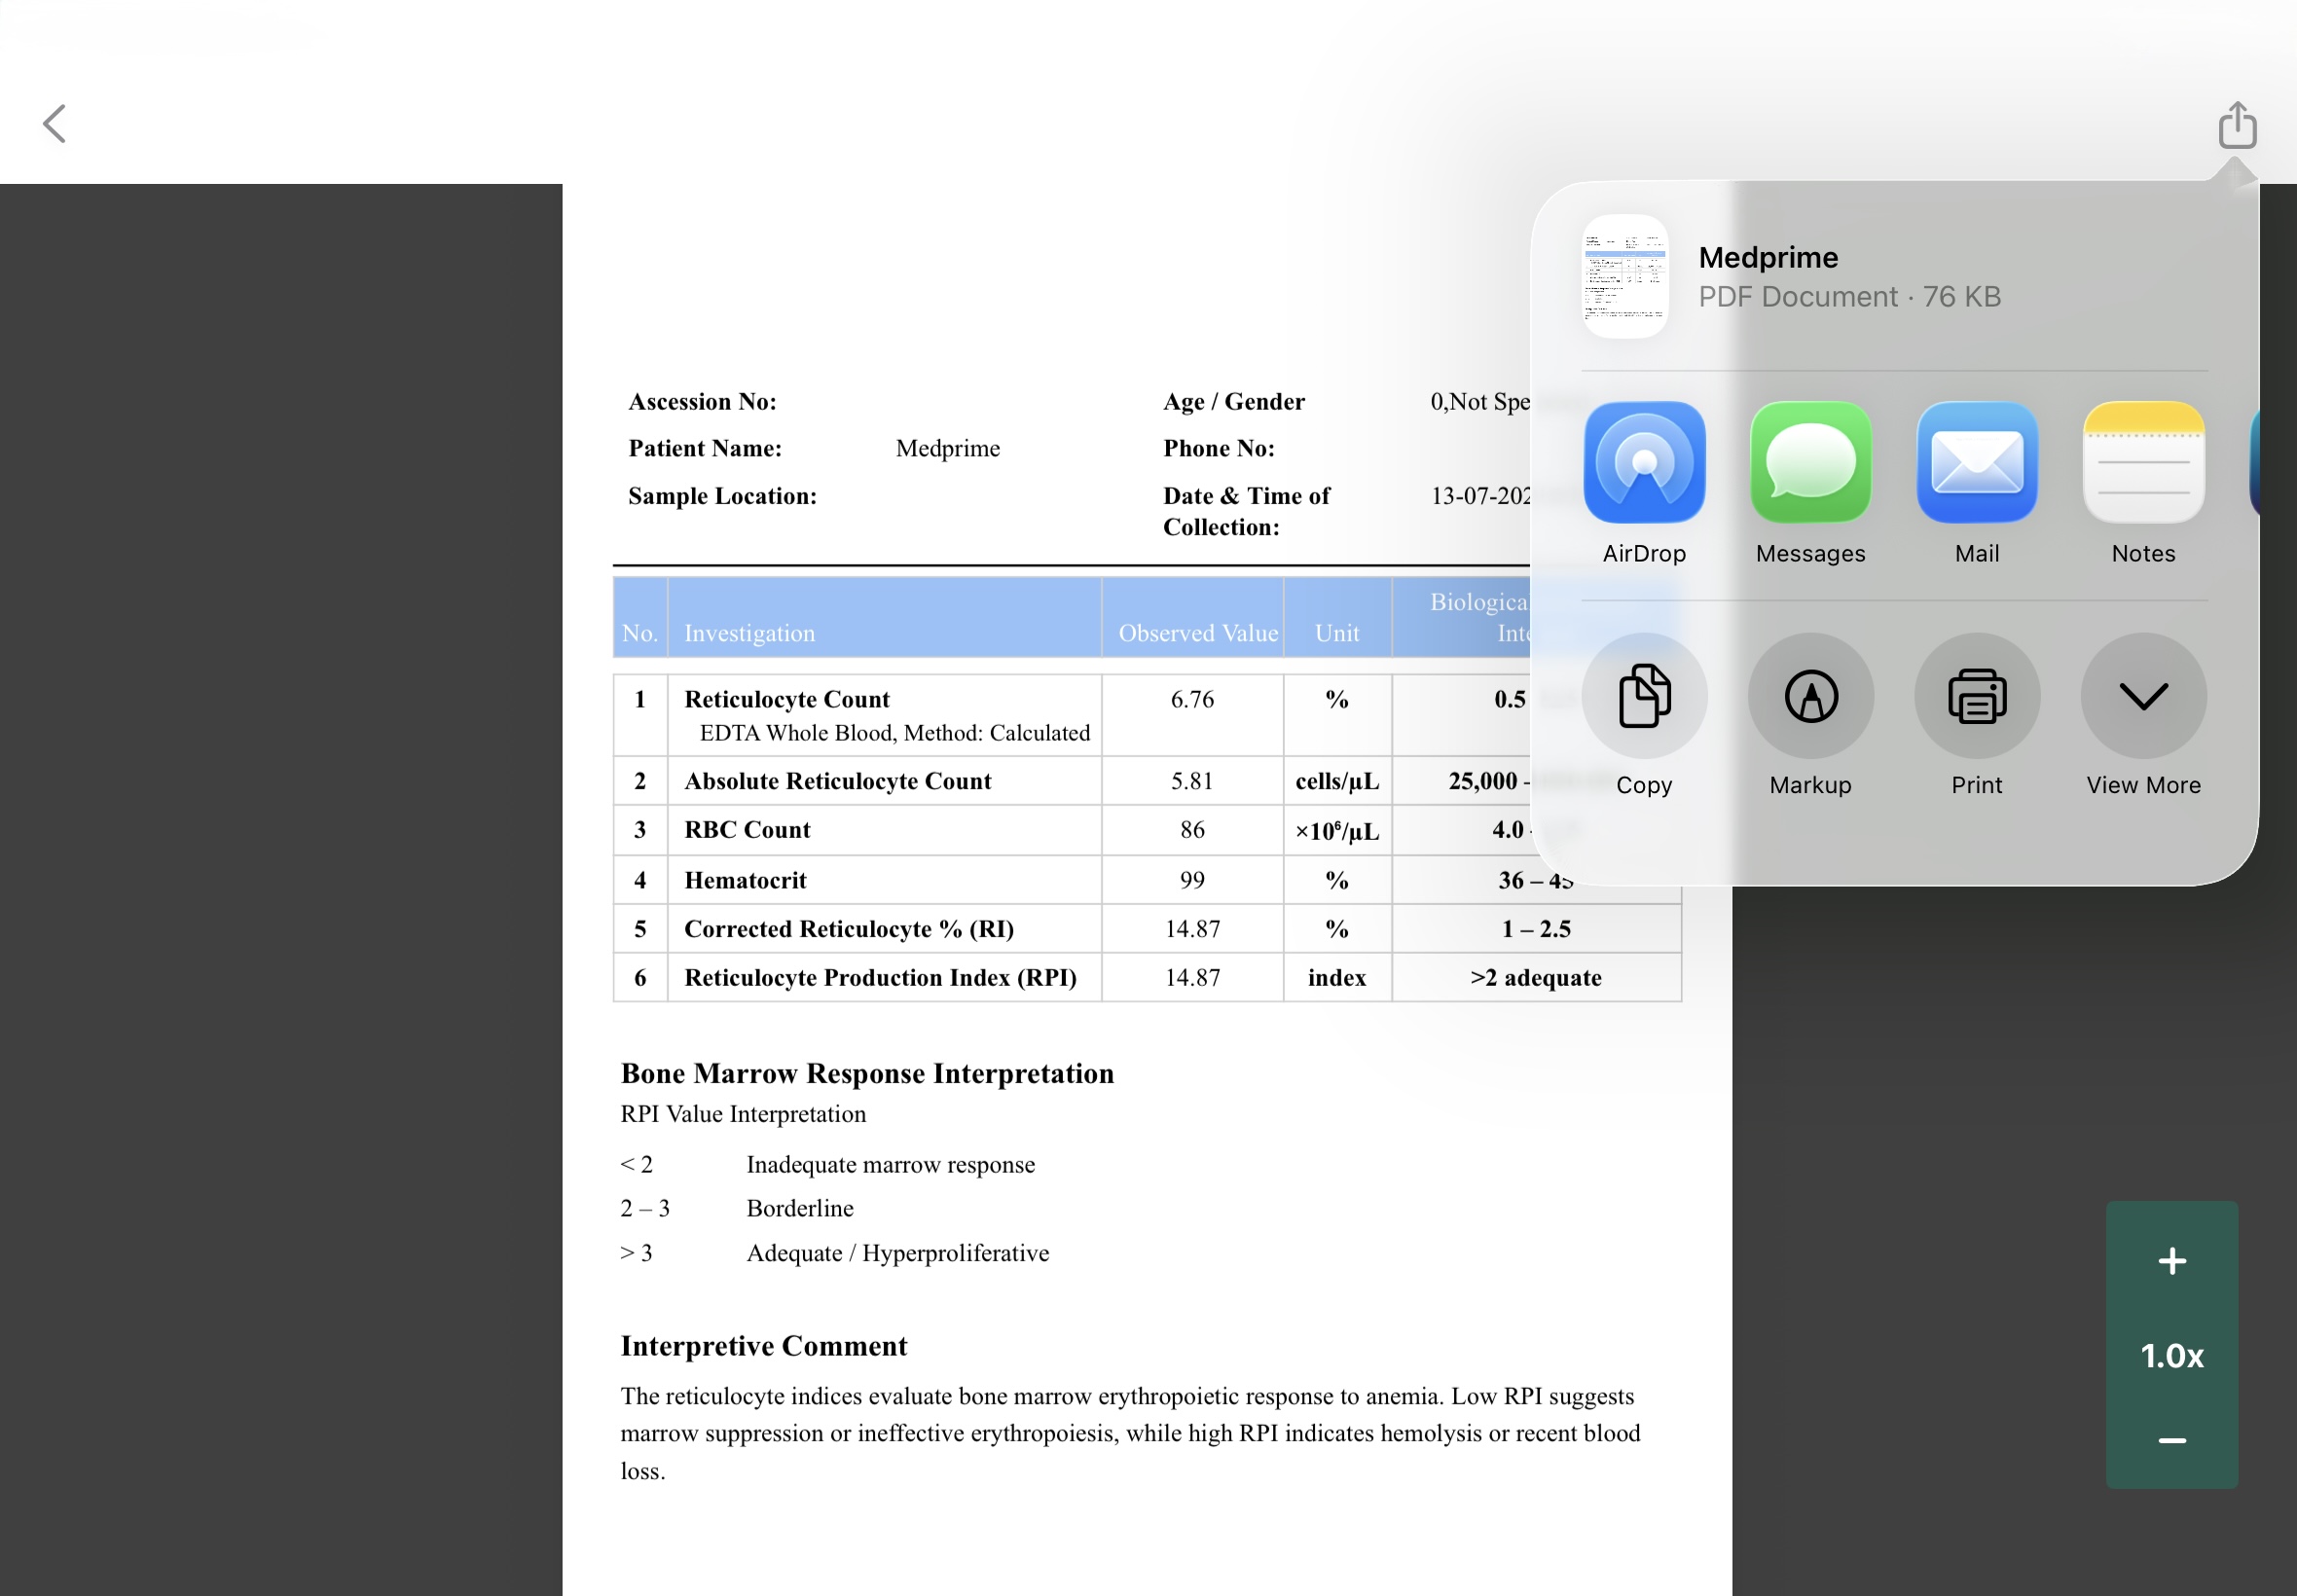
Save or share the report as required.
|
|
 |
 |
|
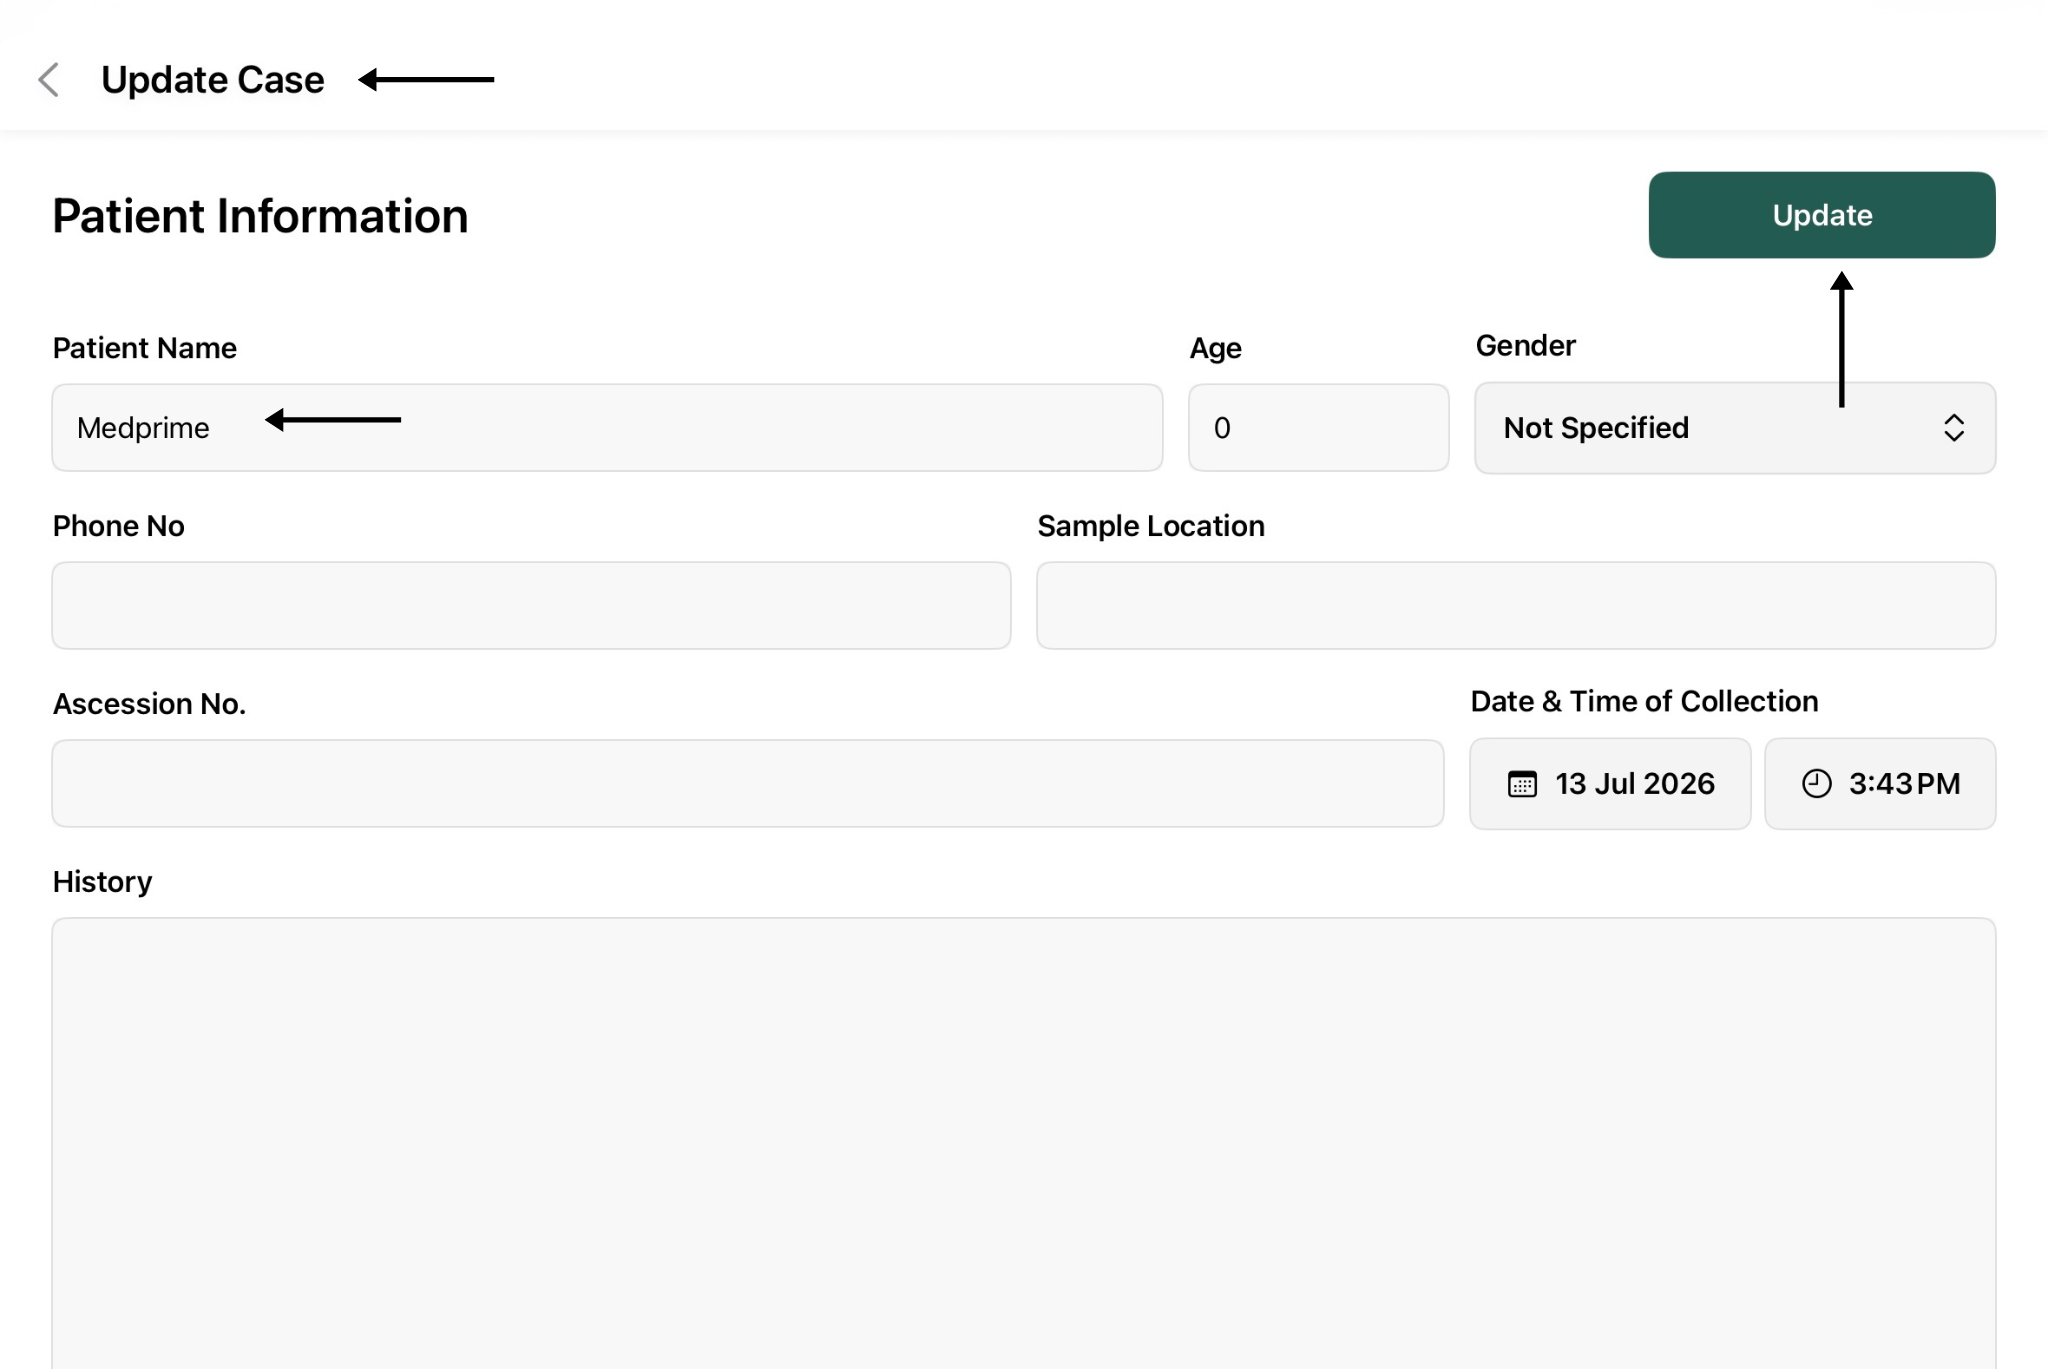
Edit Patient Information
Patient details can be updated at any time before generating the final report.
-
Open the required patient case.
-
Click the More Options (⋮) menu.
-
Select Edit Patient.
-
Update the required patient information.
-
Save the changes by tapping on Update
|
|
|
View Case Metrics
The application provides a summary of the analysis performed for the selected case.
-
Open the required case.
-
Click the More Options (⋮) menu.
-
Select Metrics.
-
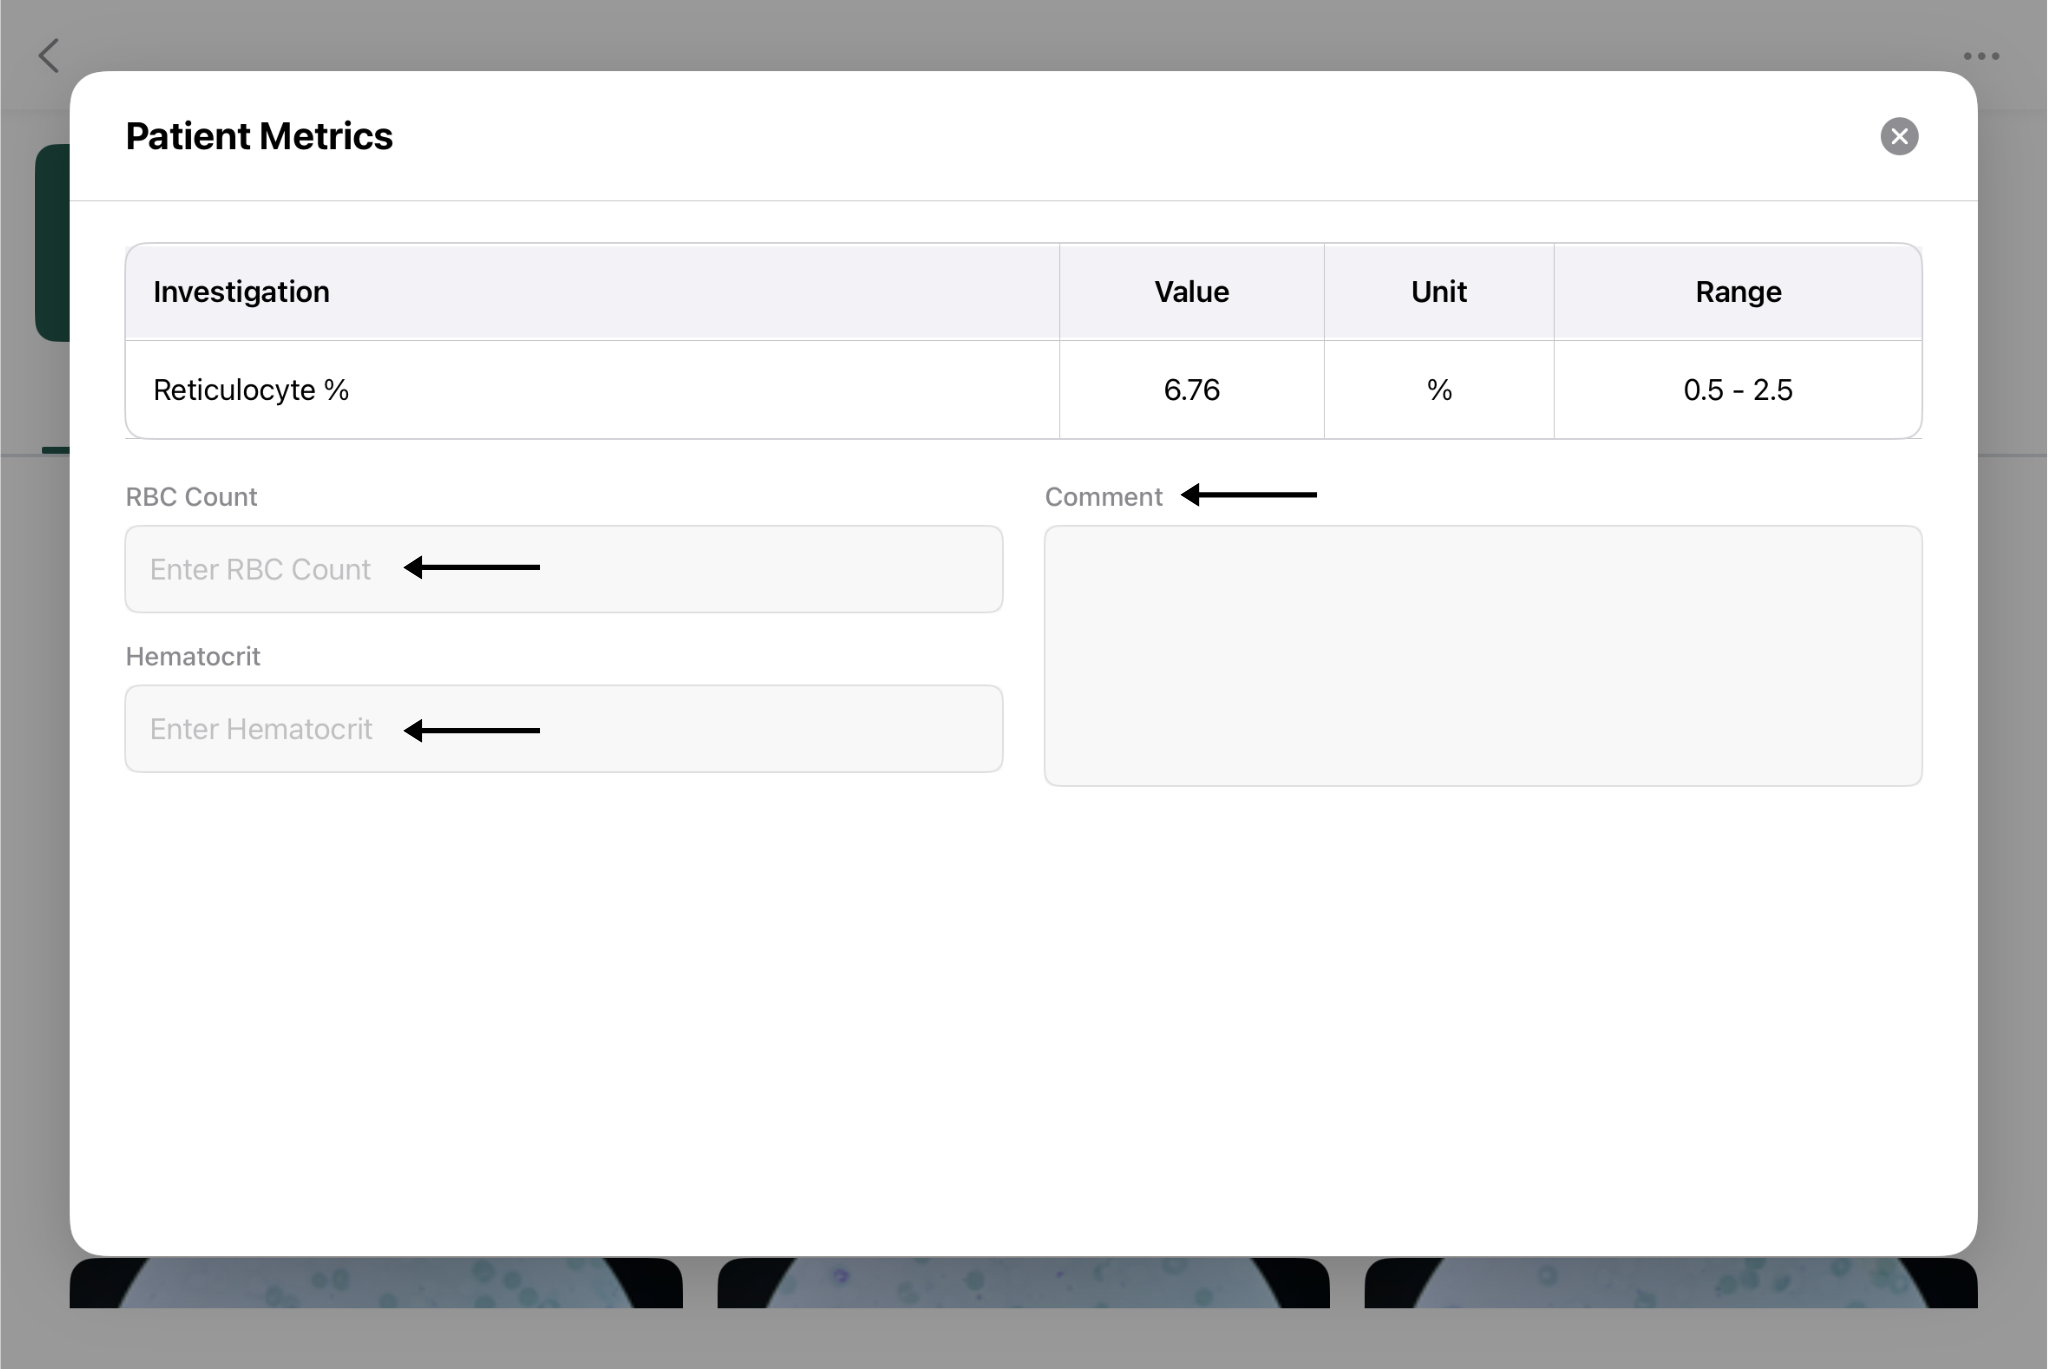
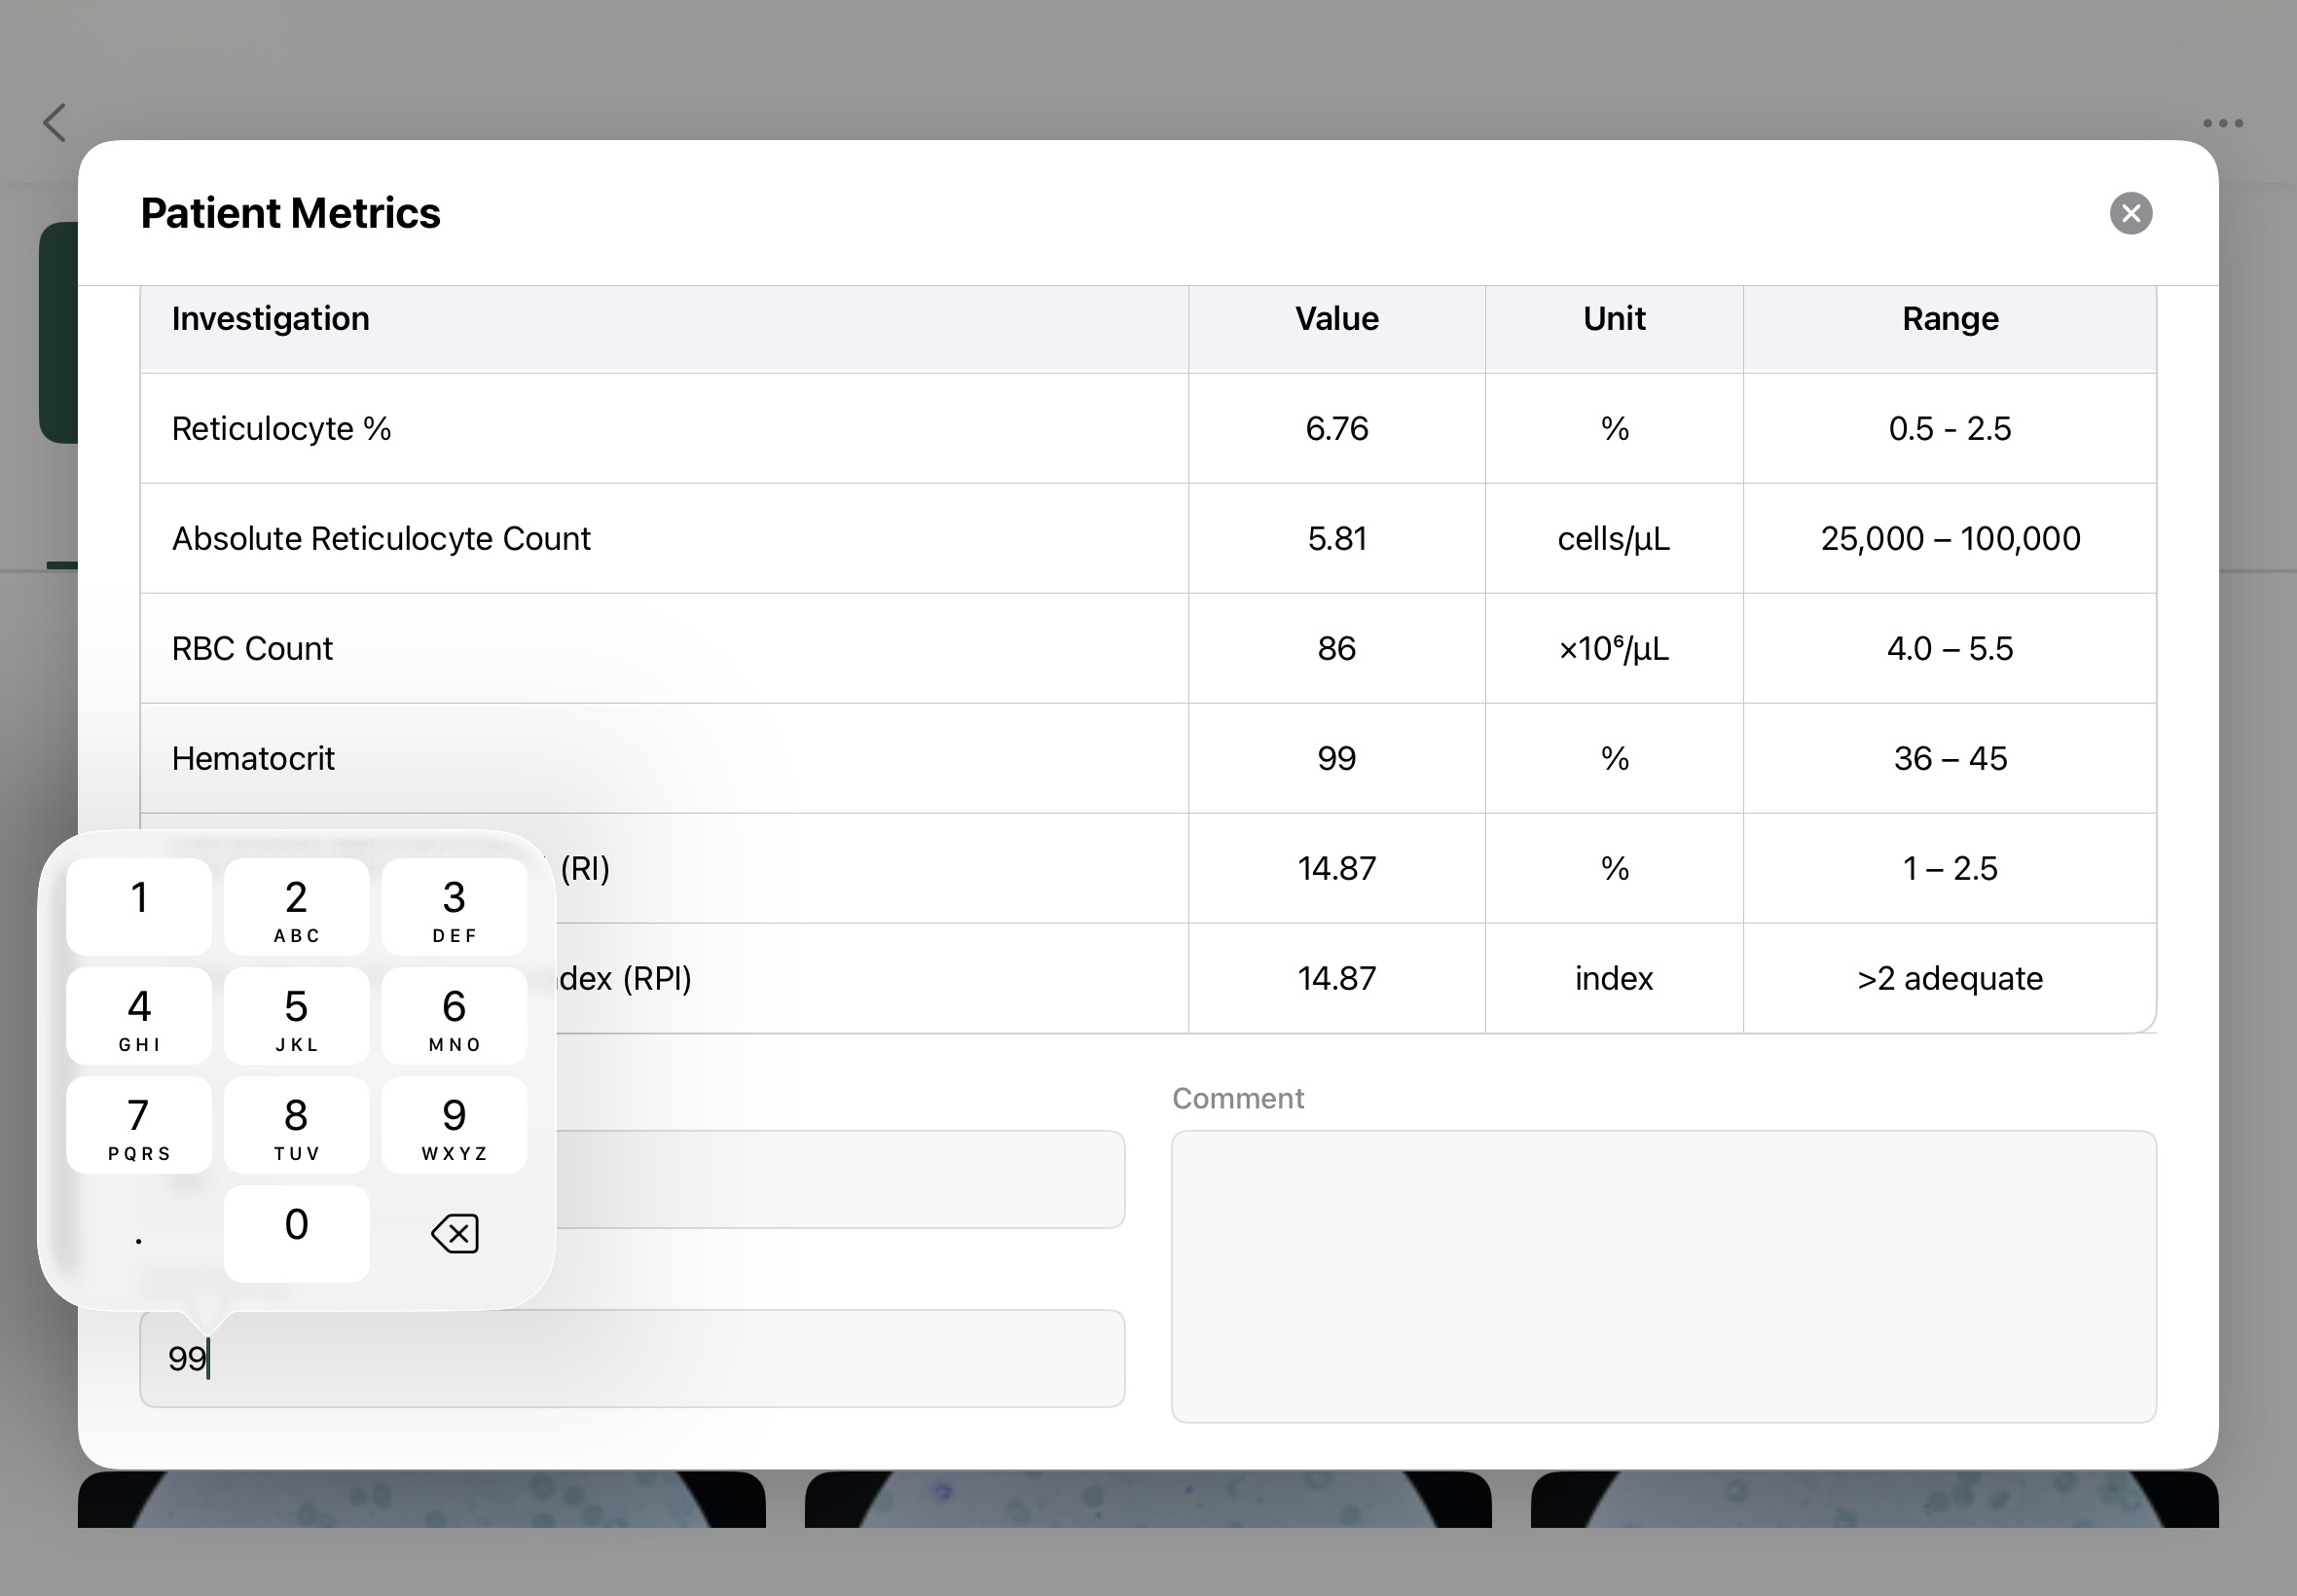
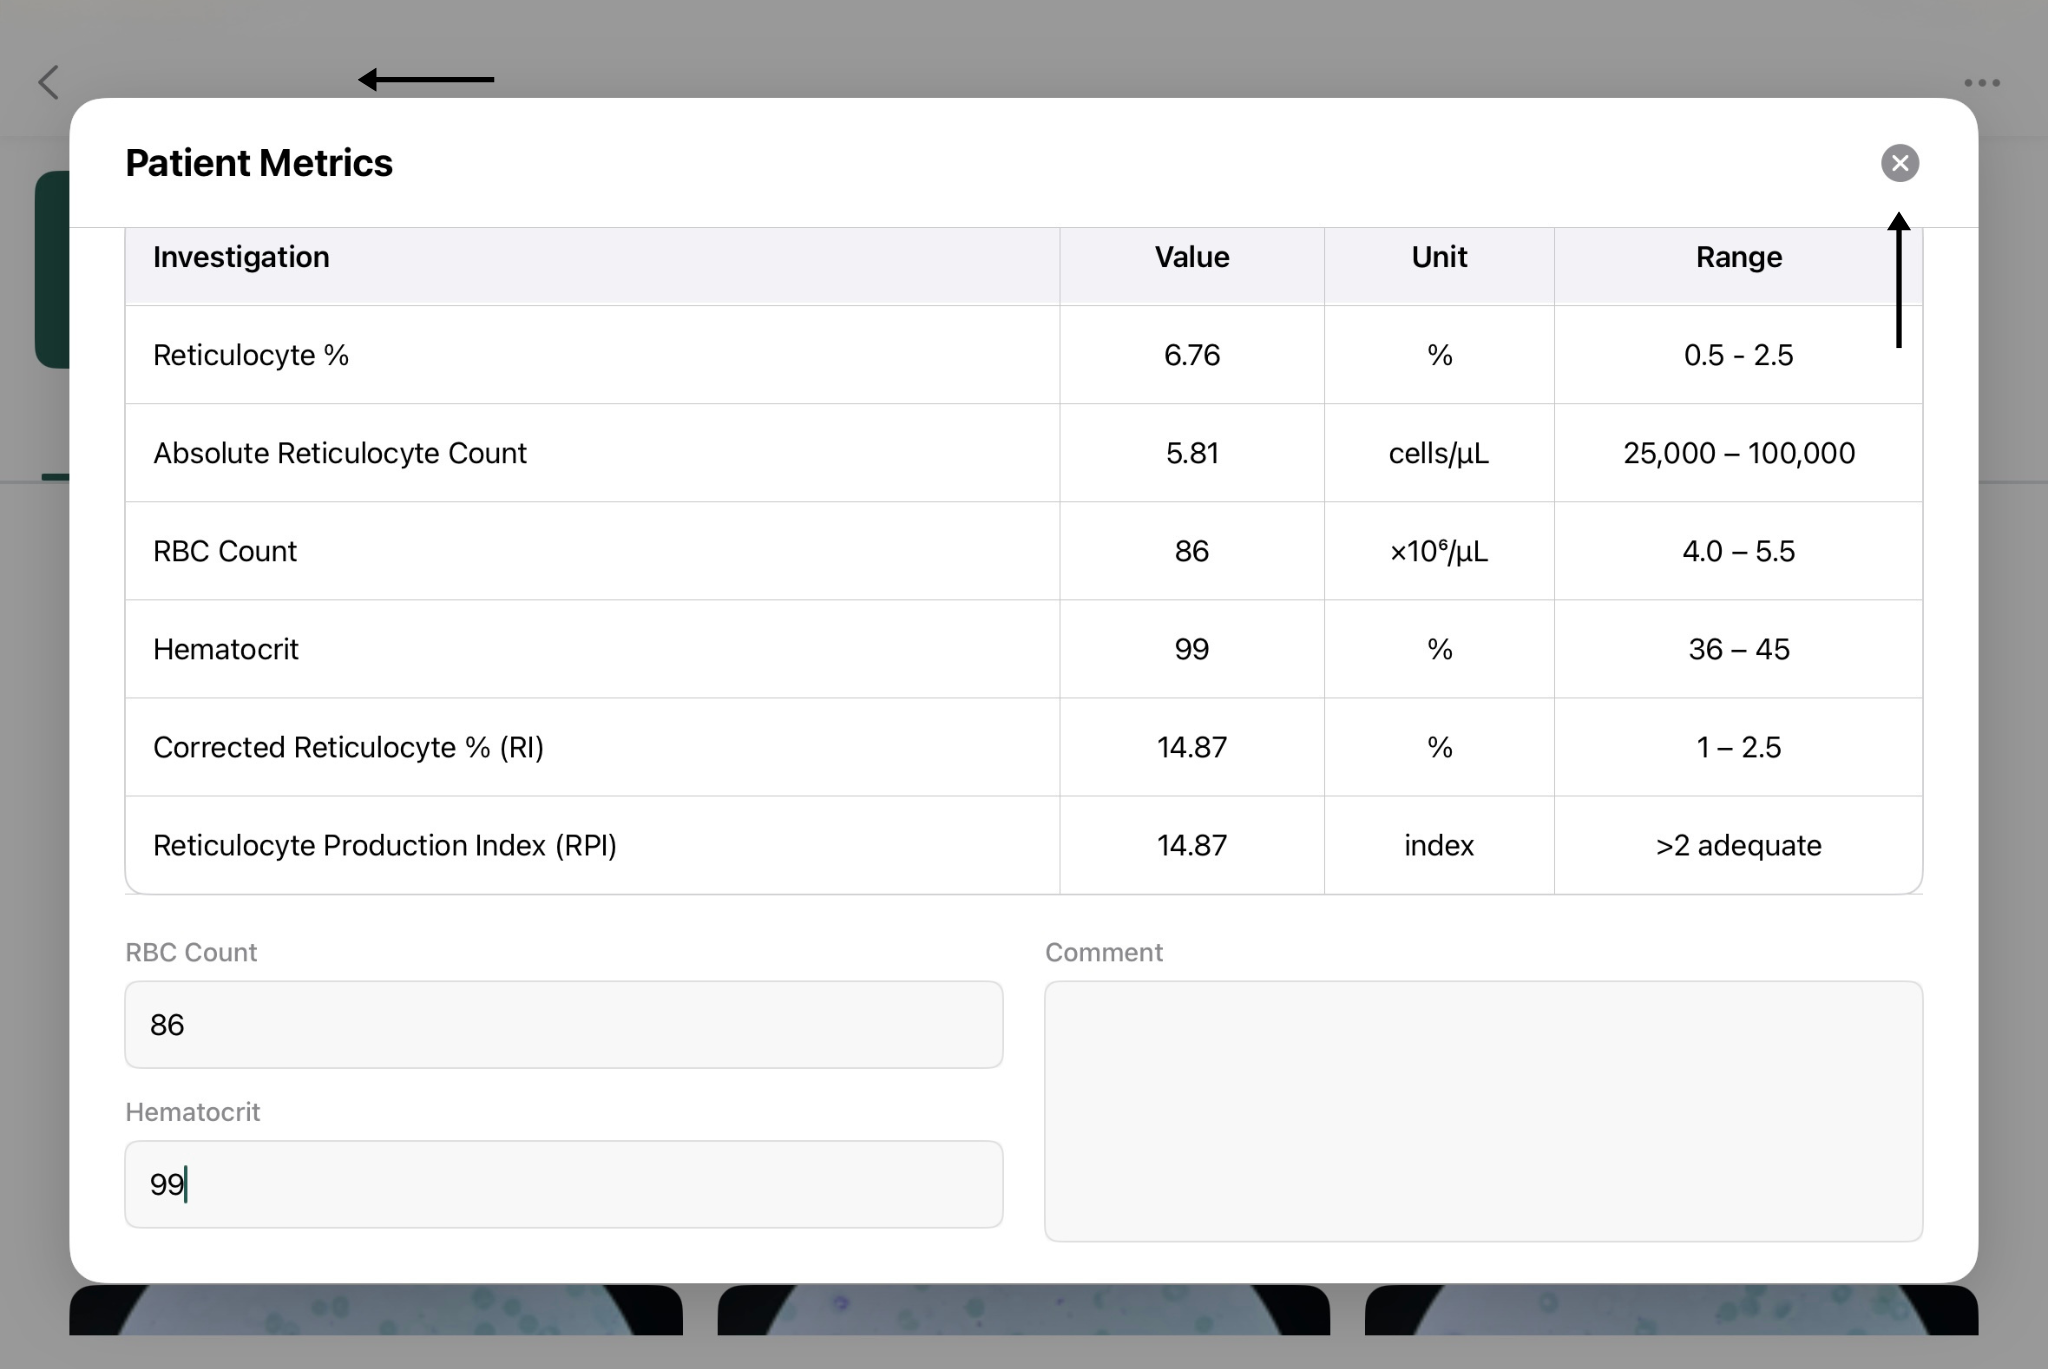
Review the displayed case metrics.
- User can add in RBC Count and Hematocrit to get a more in-depth report.
- Reopen the Patient Matrix to update changes.
|
|
|
|
|
|