
Getting Started
The Cilika application is located on the home screen of your IOS. Locate the Cilika iOS application icon ( ) in the dock at the bottom of the screen and tap on it to launch the Cilika application.

The dashboard has three icons at the top right corner:
-
Add Folder
-
Generate Report
-
Settings
Add Folder
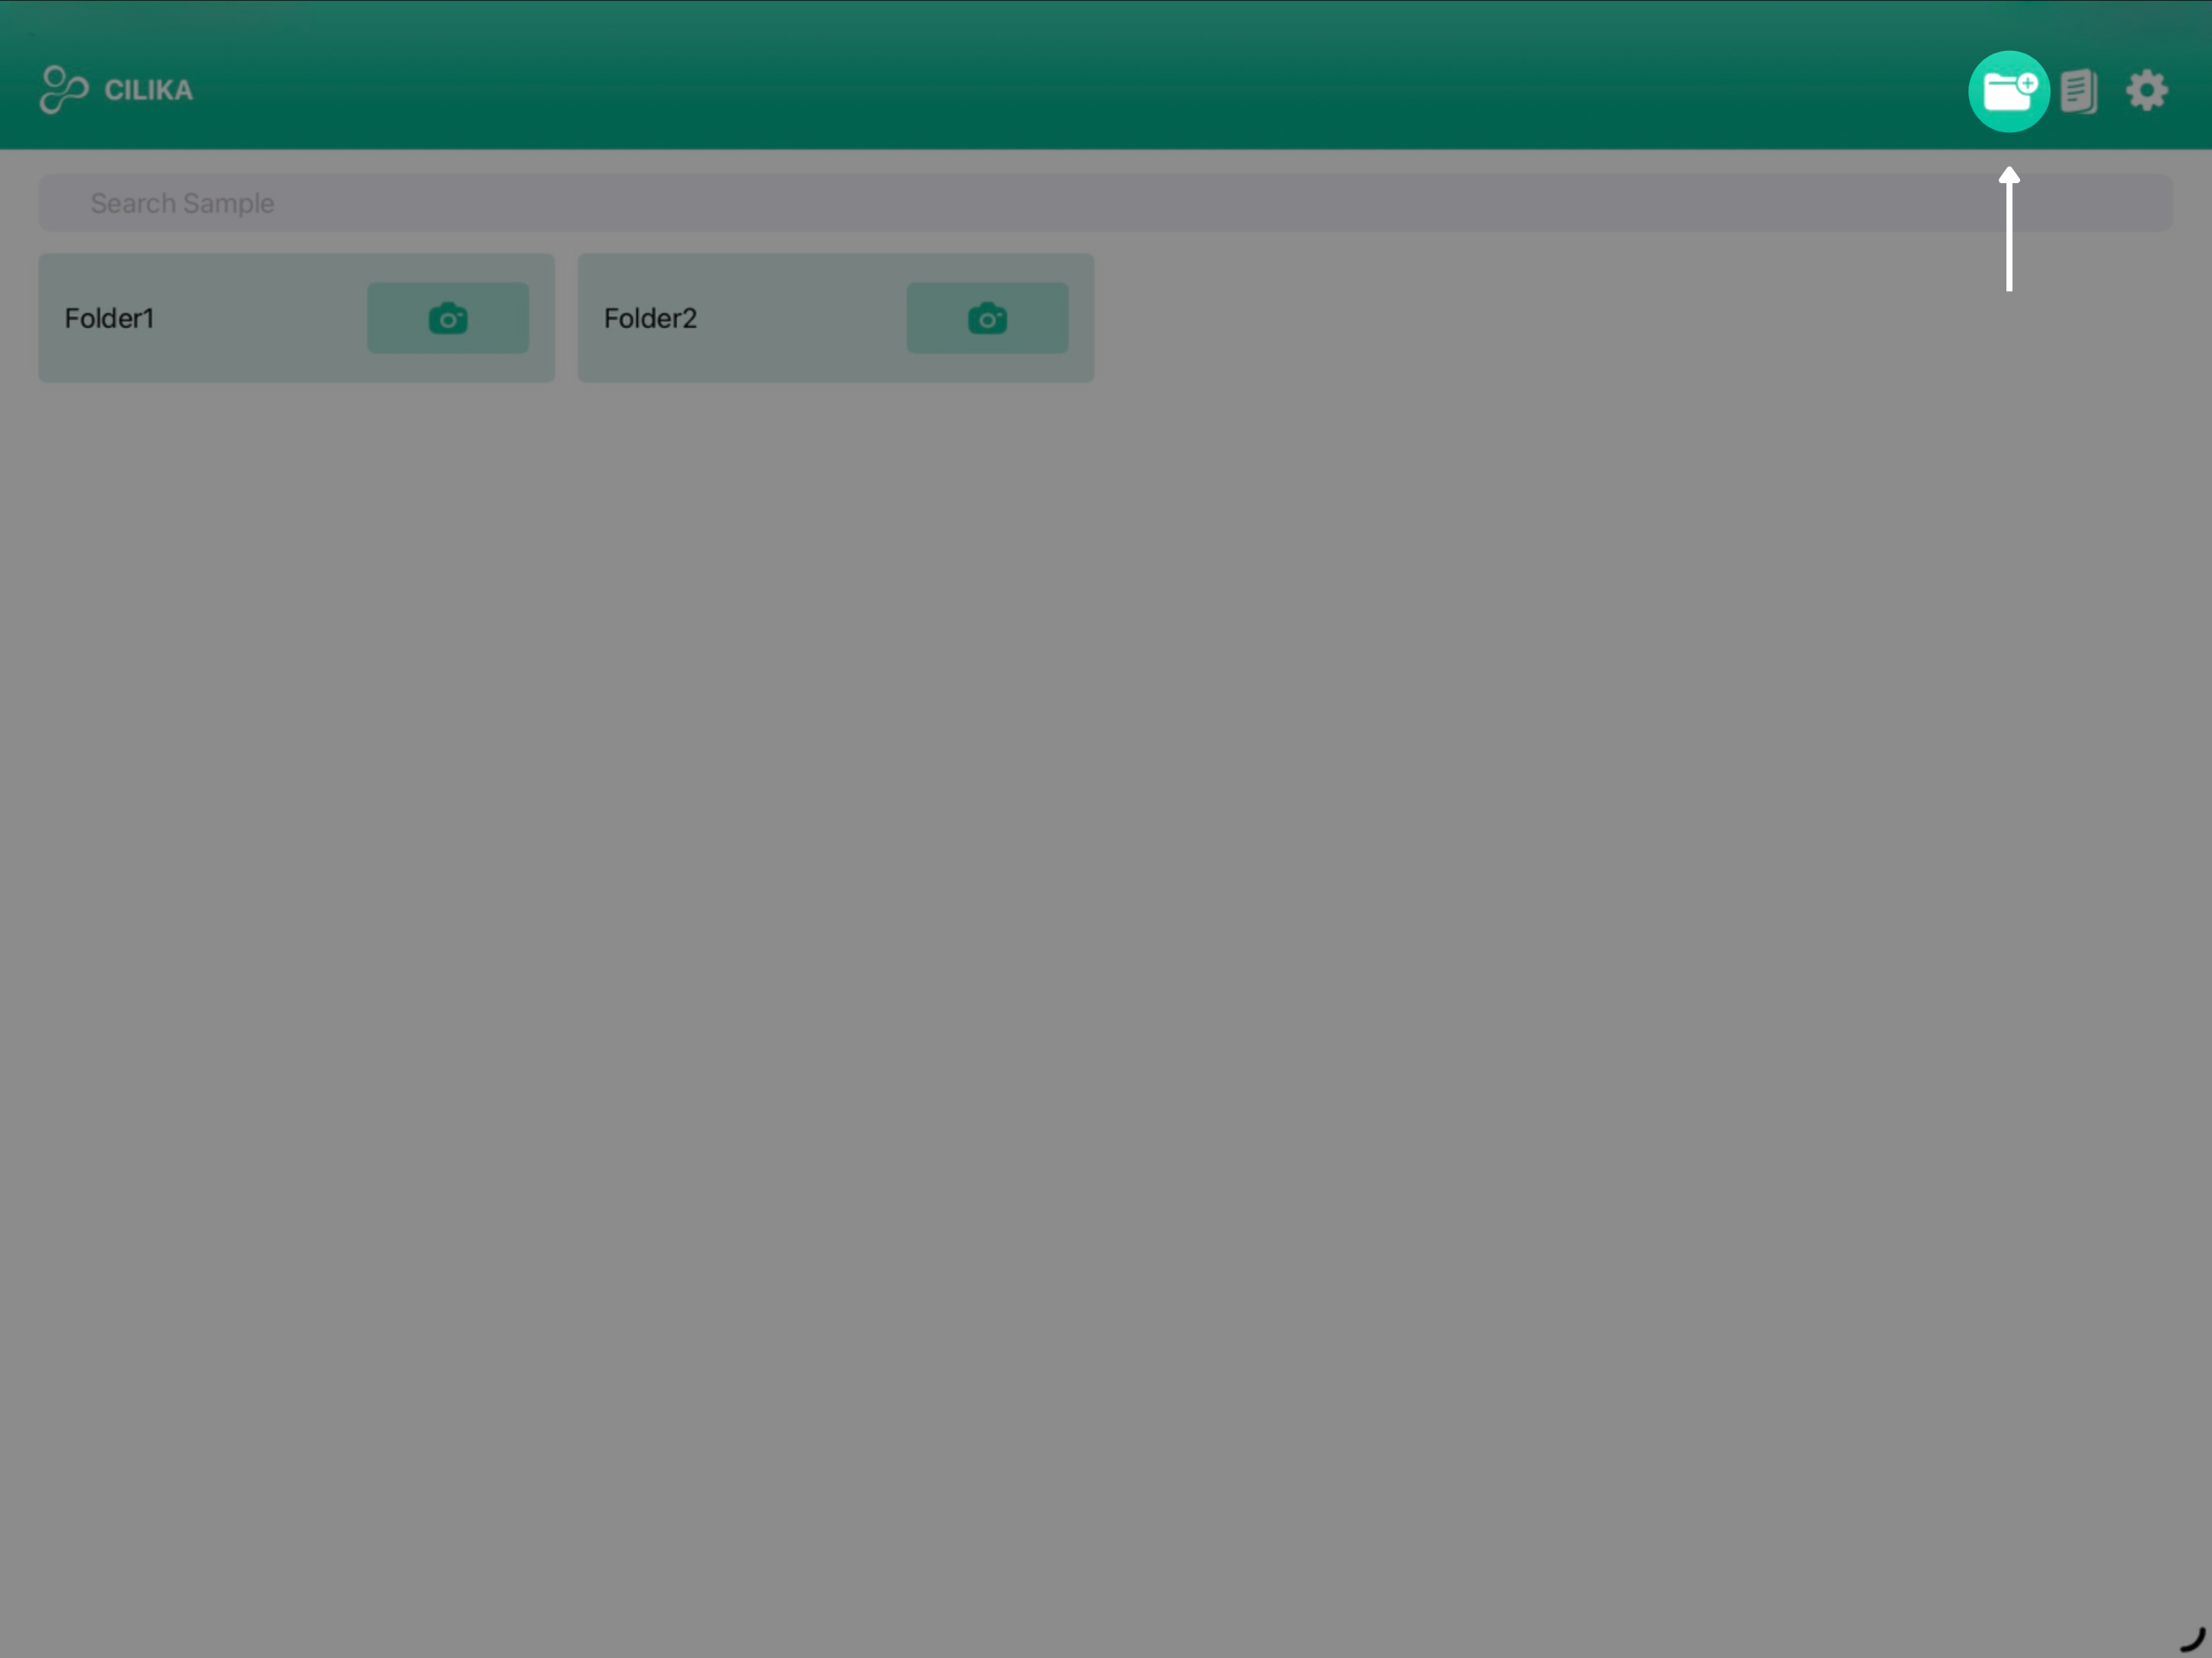
1. Tap on the Add folder icon in the top-right ( )
)

2. An Add Folder dialog appears.
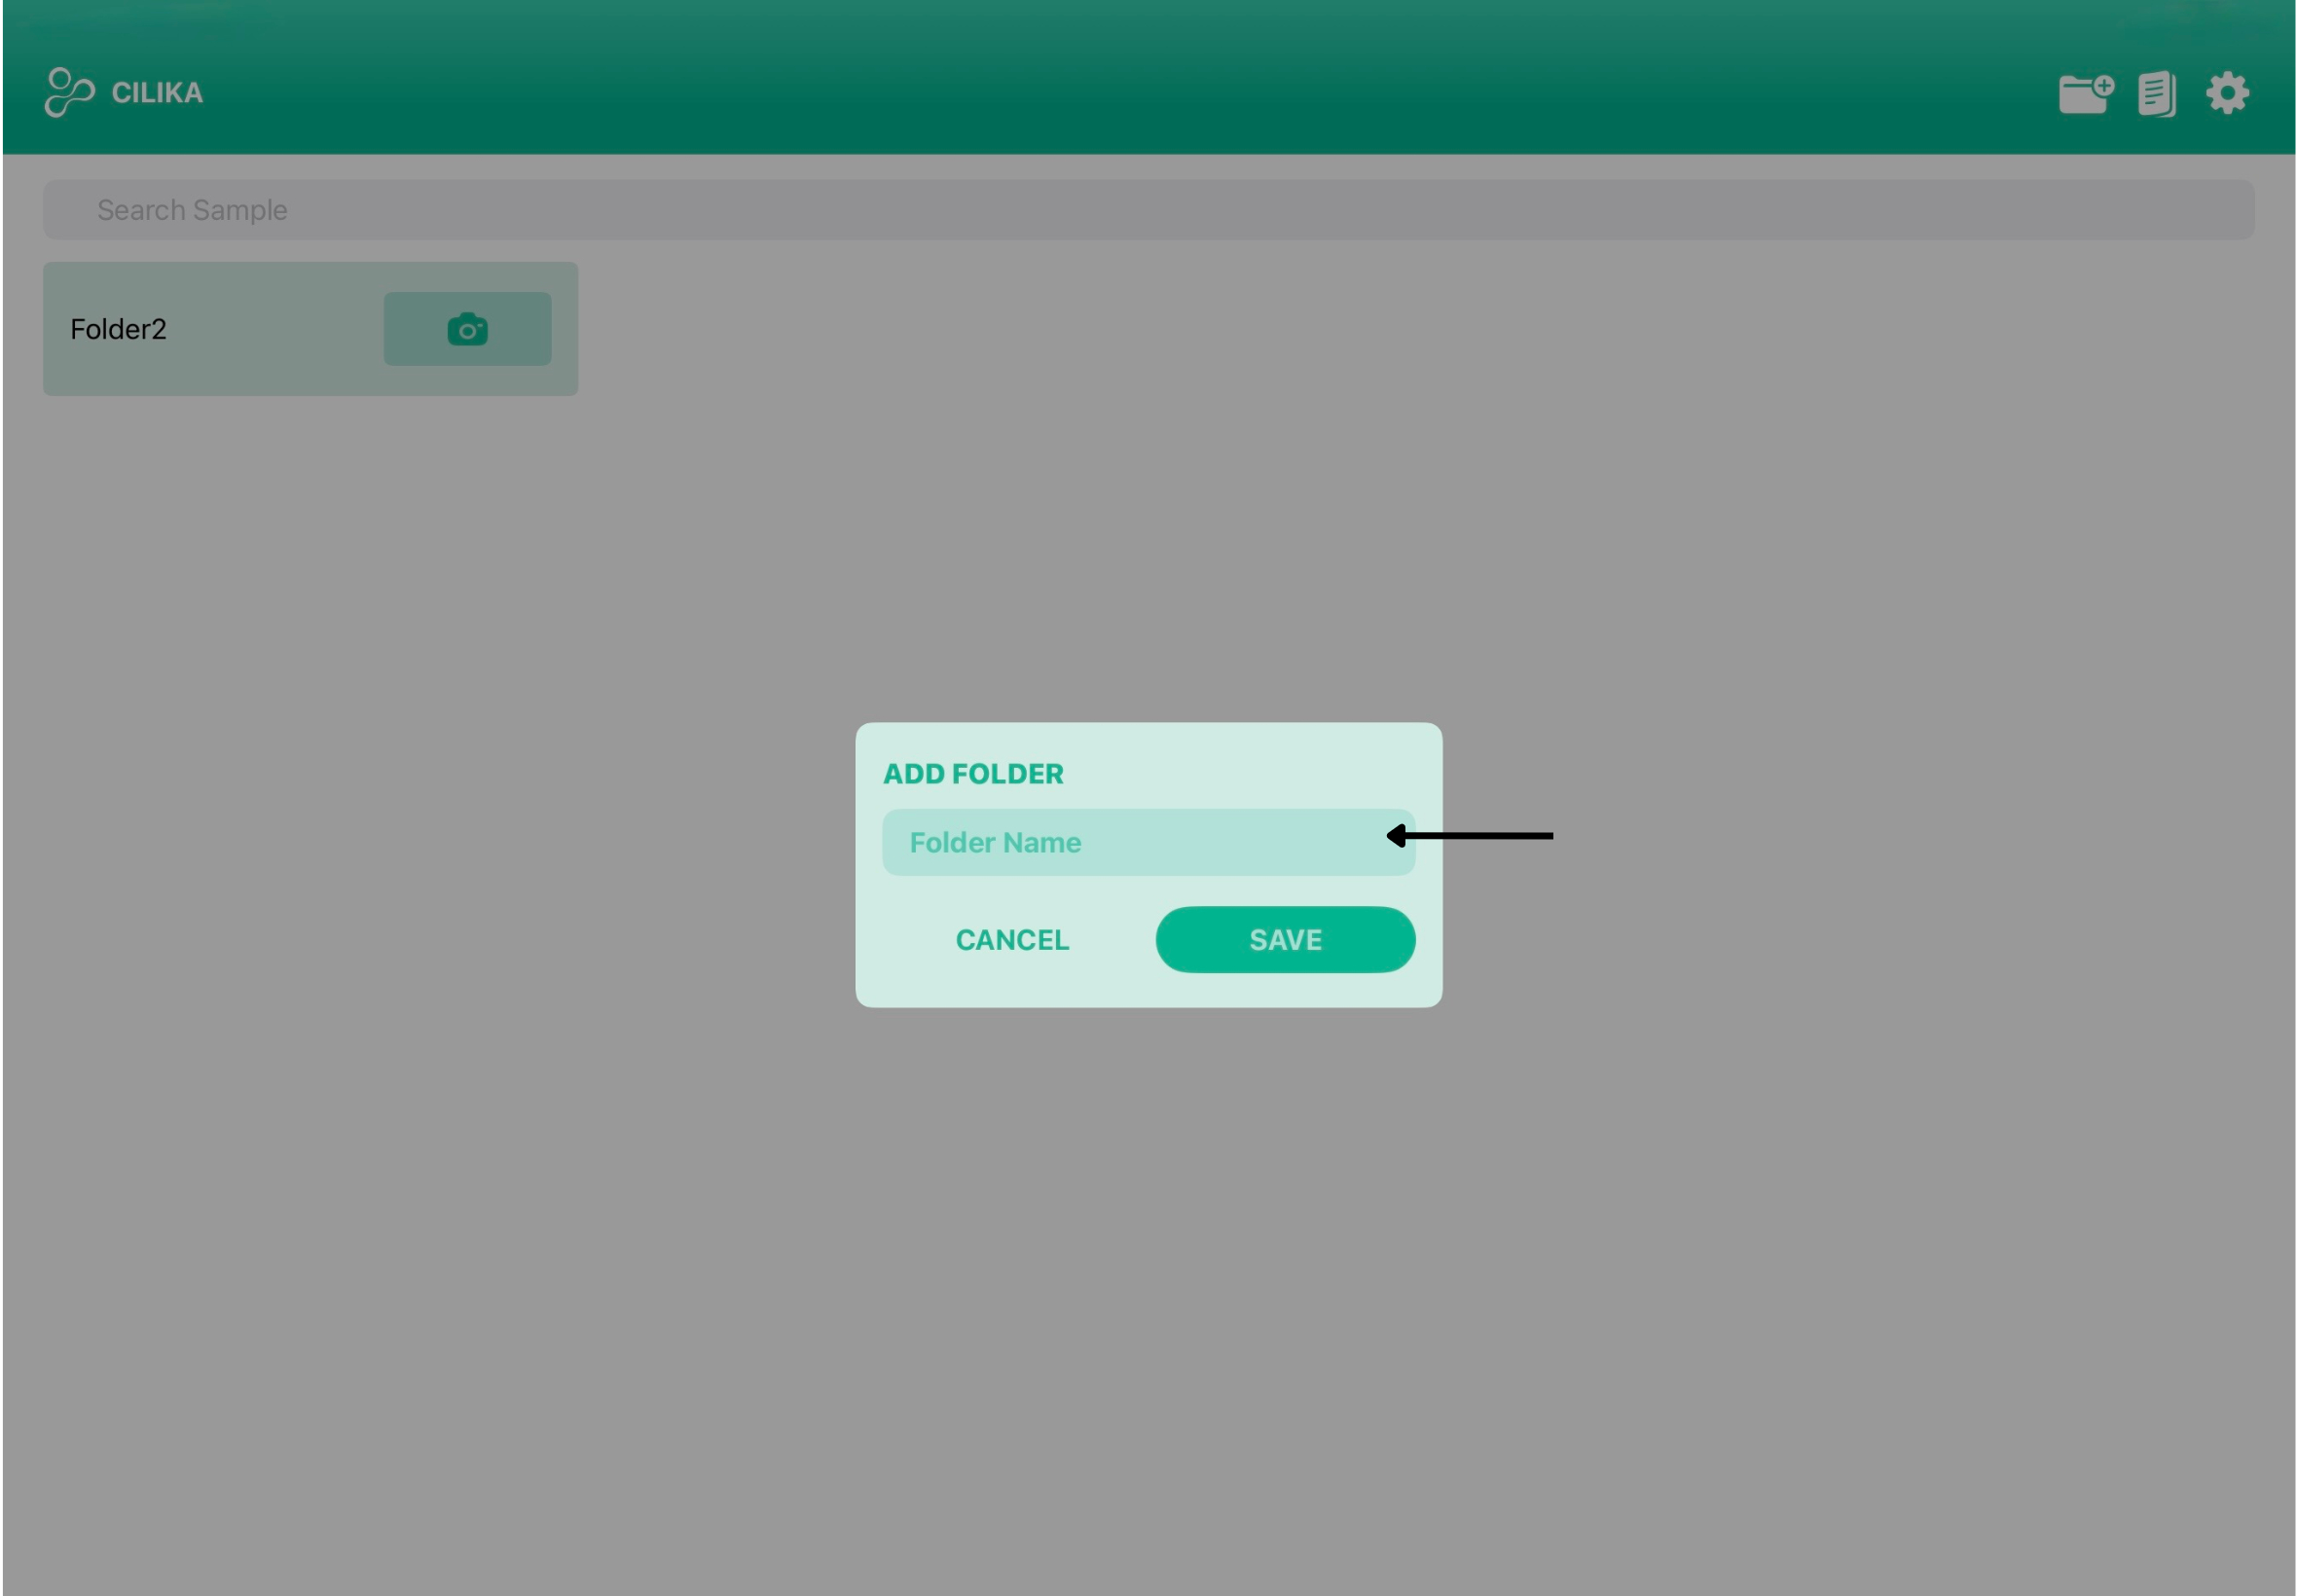
3. Type in a clear, unique name (for example the case number or patient identifier) is to be added in the text box.
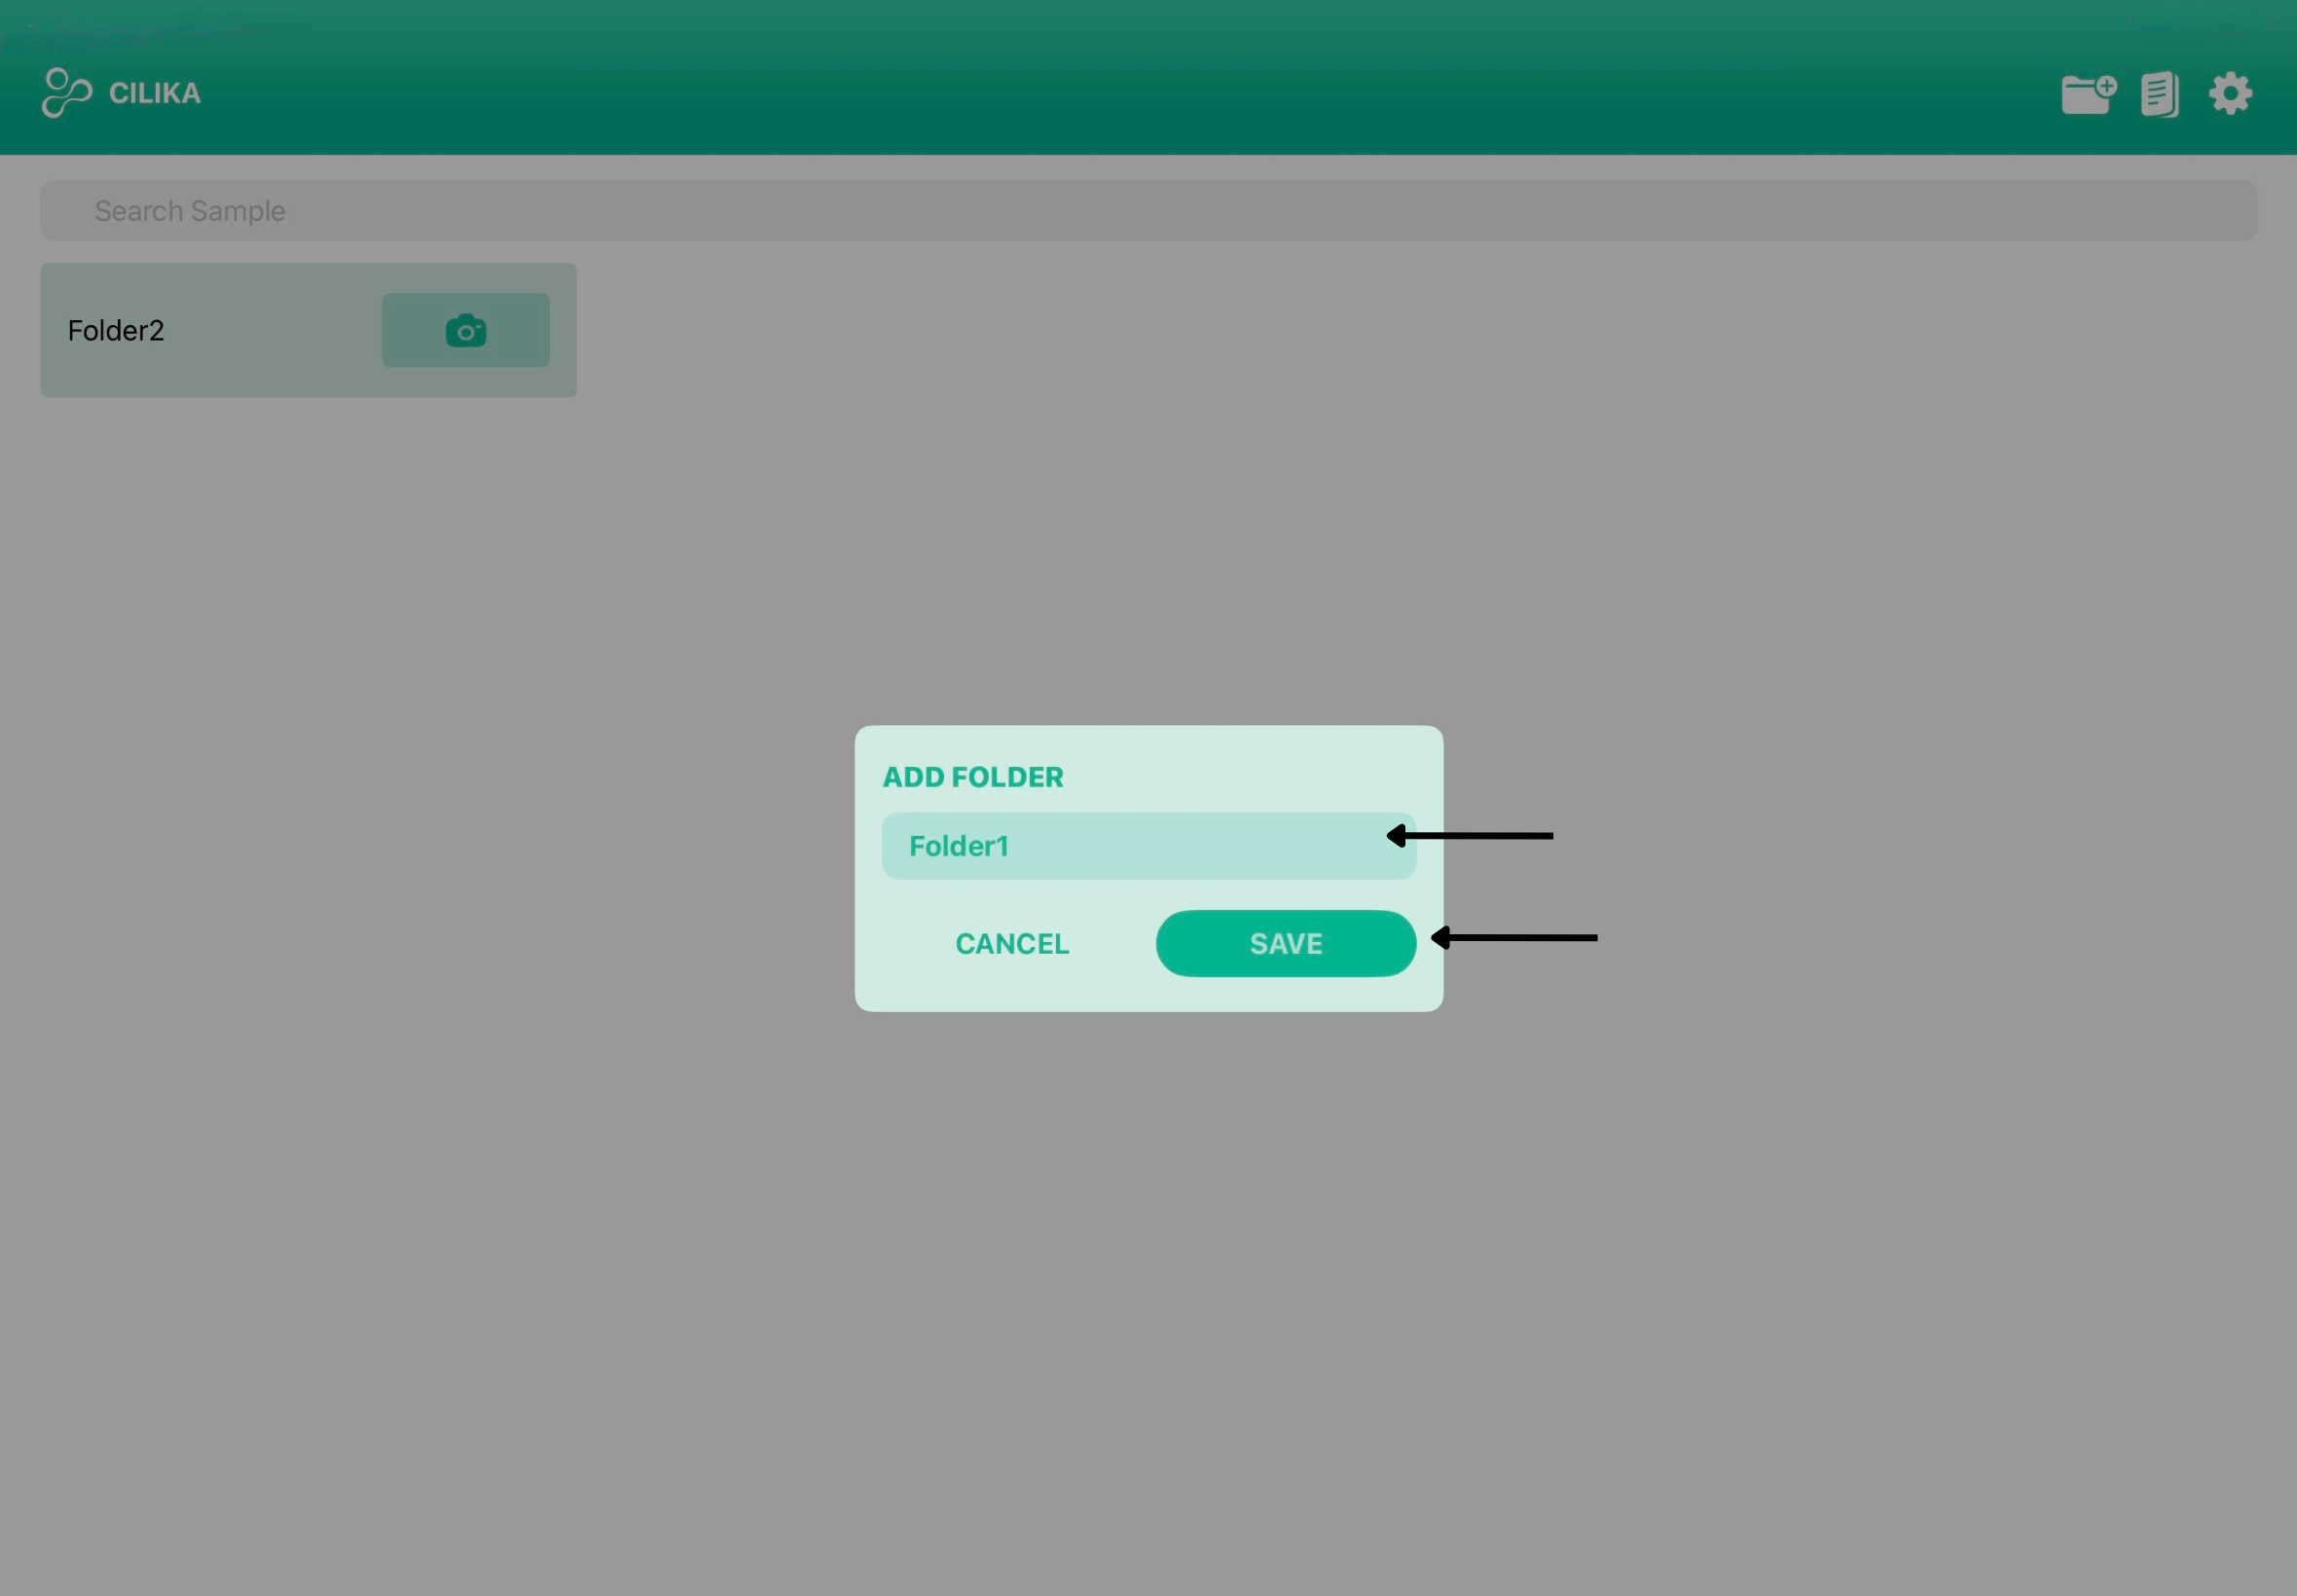
4. Tap Save, for the new folder to appear on the Dashboard.
|
Figure 1.2 (A) Add Folder |
Figure 1.2 (B) Name Folder |
Figure 1.2 (C) Save |
Rename and Delete Folder
1. Long press the folder to get the following two options:
-
Delete (
 )
) -
Rename (
 )
)


2. Once you tap on the Rename () option, Rename Folder popup appears on the screen.
3. Enter a valid folder name with no space in between.
4. Tap on Save to save the new name or Cancel to get the previously saved name.
5. Tapping on the Delete () option it deletes the whole folder, which includes all the files inside the folder.
Add File
1. Tap the Camera ( ) located on the folder beside the folder name.

2. A camera opens up, this is the Live Microscopic View.
3. Make sure the iPad is horizontally positioned for it to work.
4. If the microscopic image is not visible on screen, restart the application.
Navigating Live Microscopic View
Understanding the Camera |
|
Figure 1.4 Screen Layout |
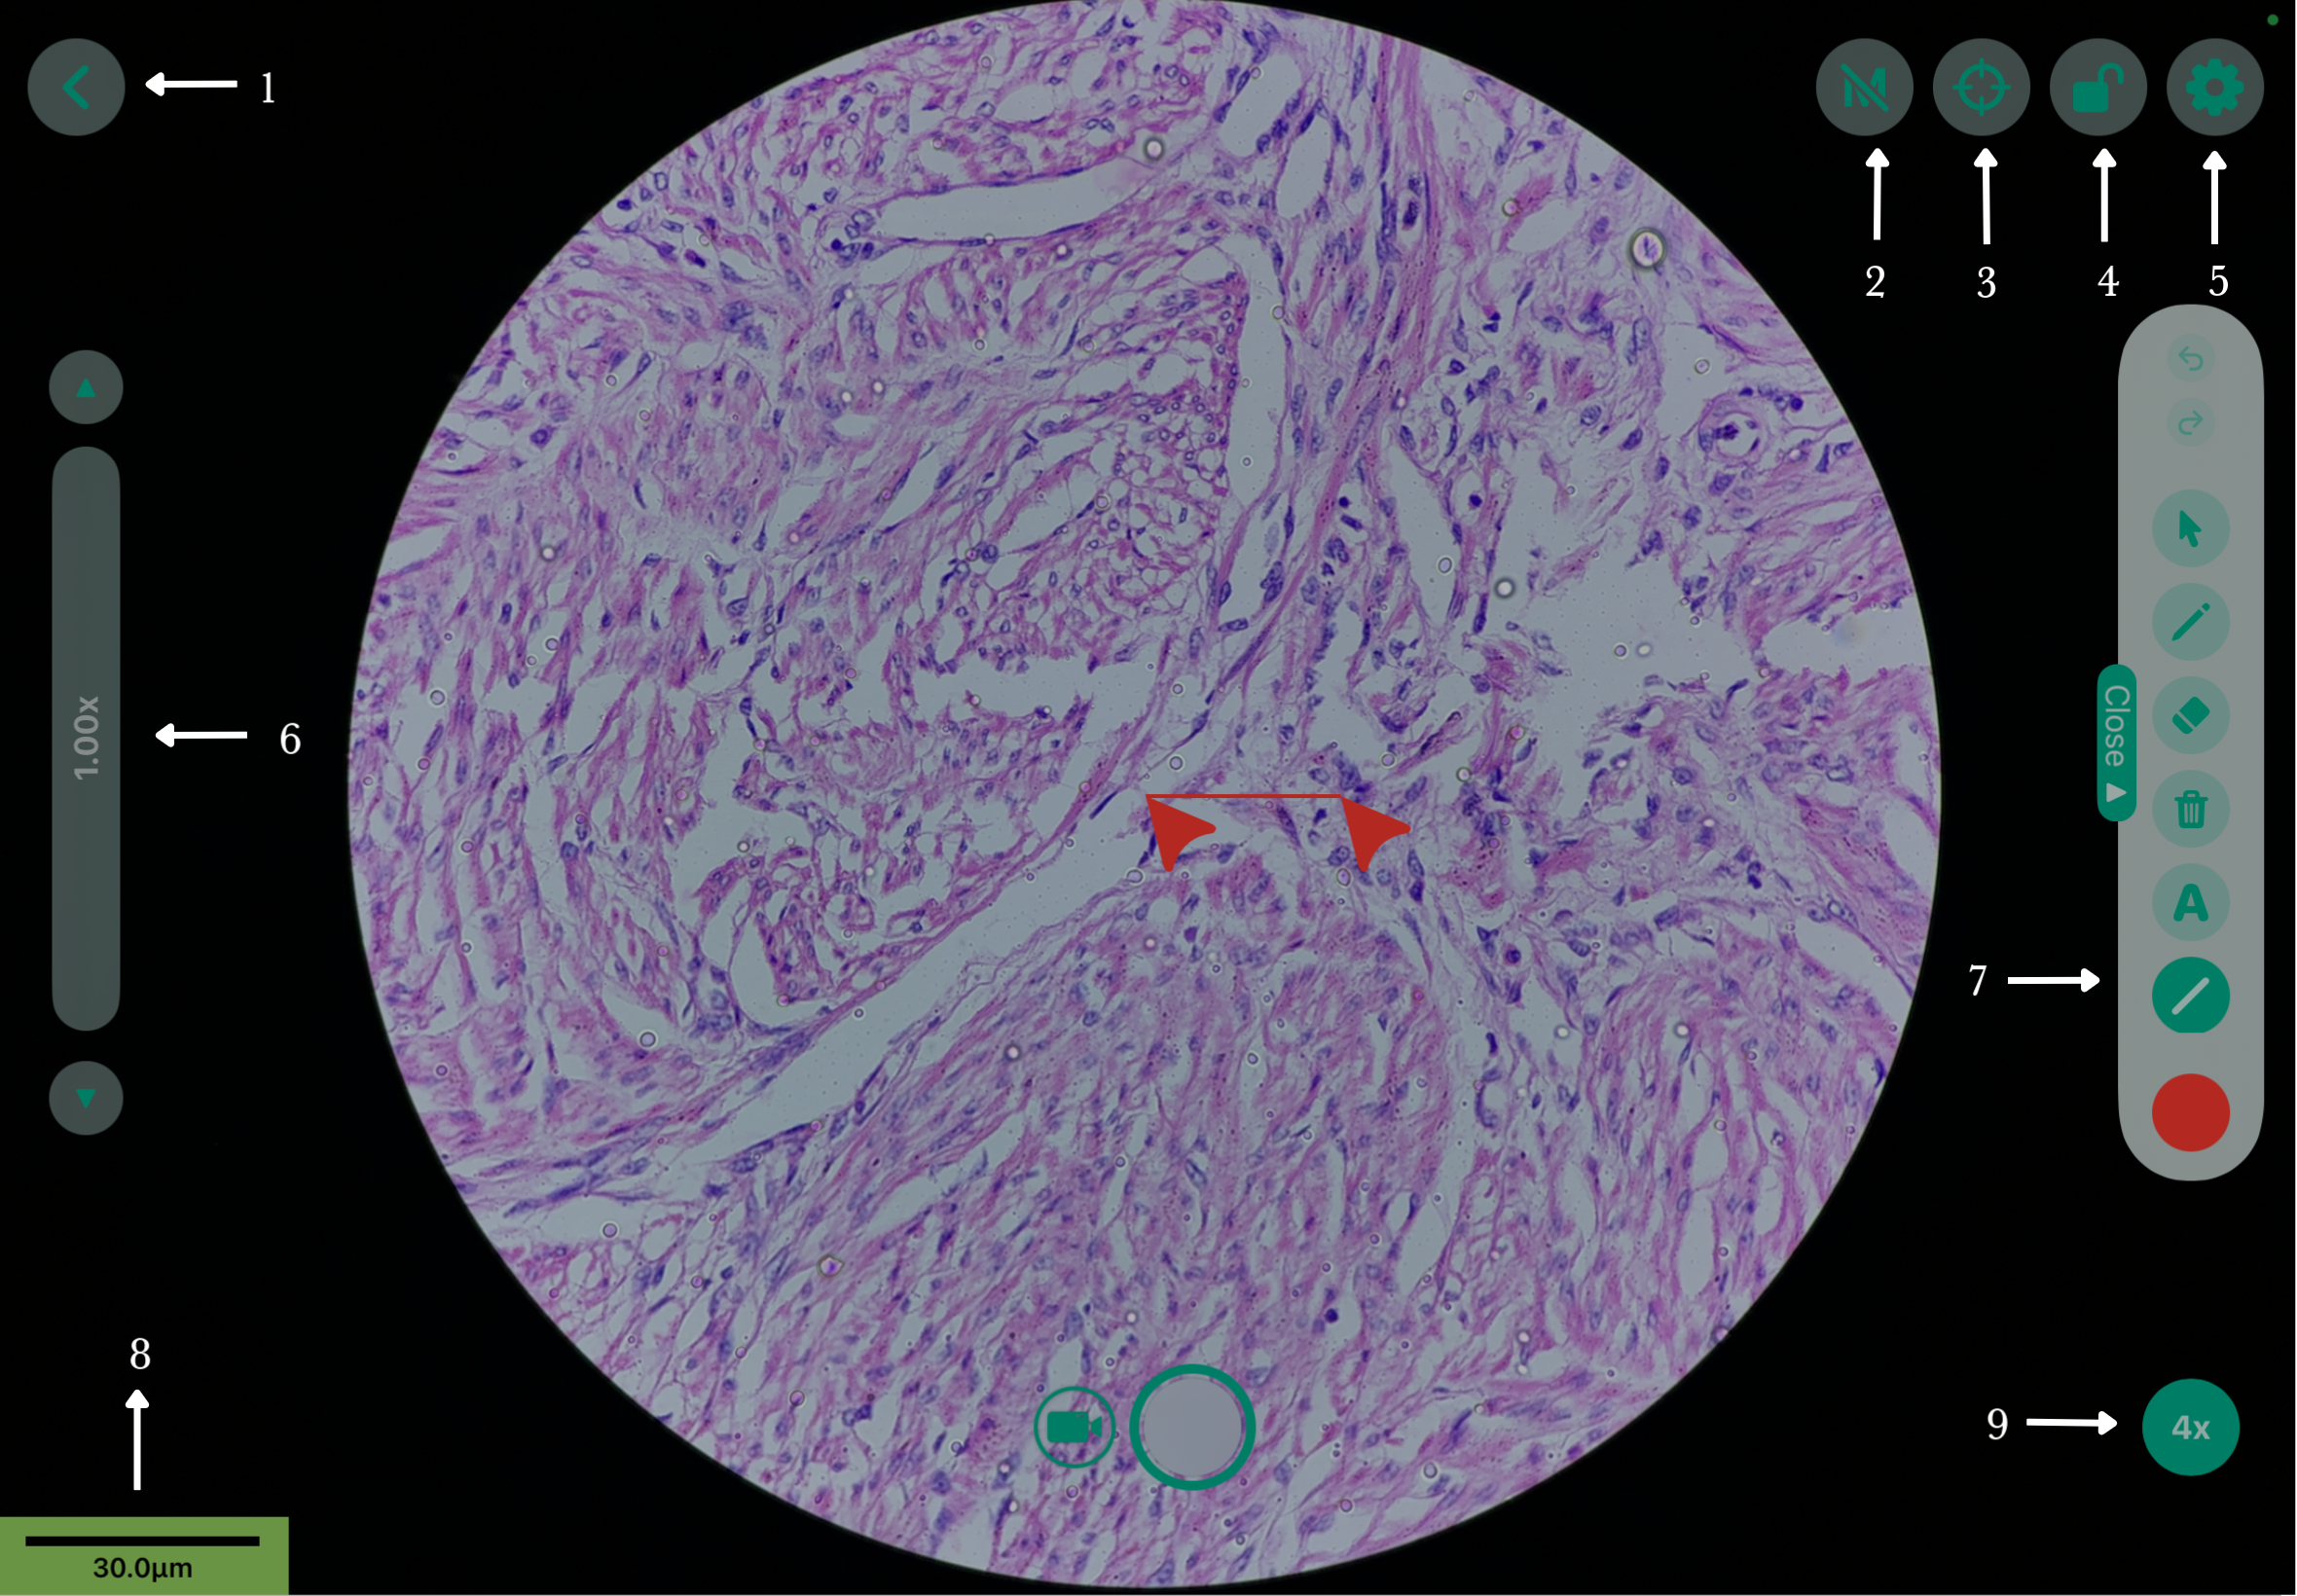
Live View — Screen Layout: |
||
|
|
Tools |
Description |
1 |
Back (‹) |
Select the Back (‹) arrow to return to the folder. |
2 |
Measurement (M) |
Show or hide the exact measurements of selected areas and annotations on the slide. |
3 |
Crosshair / Reticle (
|
Shows or hides the center target in the live microscopic view. |
4 |
Lock (
|
Locks the screen to prevent accidental touches during viewing or capture. |
5 |
Settings (
|
Opens Camera Settings. |
6 |
Zoom Slider |
Use the ▲ / ▼ arrows to zoom in or out and make fine adjustments to the live microscopic view |
7 |
Open Drawer |
Opens the annotation tools available for marking the live microscopic view. |
8 |
Scale Bar |
Displays the scale of the image to help estimate the size of the viewed specimen or region. |
9 |
Objective Lens |
Displays the currently selected objective lens or magnification level. |


Zoom Slider
1. The Zoom Slider is located on the left side of the screen.
2. Drag the slider up to zoom in on the live microscopic image or down to zoom out.
3. Use the ▲ / ▼ arrows to make fine zoom adjustments.
4. The available zoom range is 1.00x to 5.00x.
Scale Bar
1. The Scale Bar displays the measurement scale of the microscopic image, for example, 30.0 µm.
2. Check the Objective Lens displayed in the bottom-right corner, such as 4x, 10x, 40x, or 100x.
3. Ensure that the selected Objective Lens matches the magnification of the microscope to maintain accurate image scaling and measurements.
Recording
1. Find a Capture and Recording button.
2. Tap on the Circle Button ( ) located at the bottom center of the screen.

3. To switch to video, you can tap on the Video Button ( ) to the left.

4. Tap on the Mic button ( ) to enable or disable the background sound.

5. After capturing the live view, enter a valid File Name in the Details dialog box, then select Save to save the captured image.
3. Annotation and Measurement
|
|
|
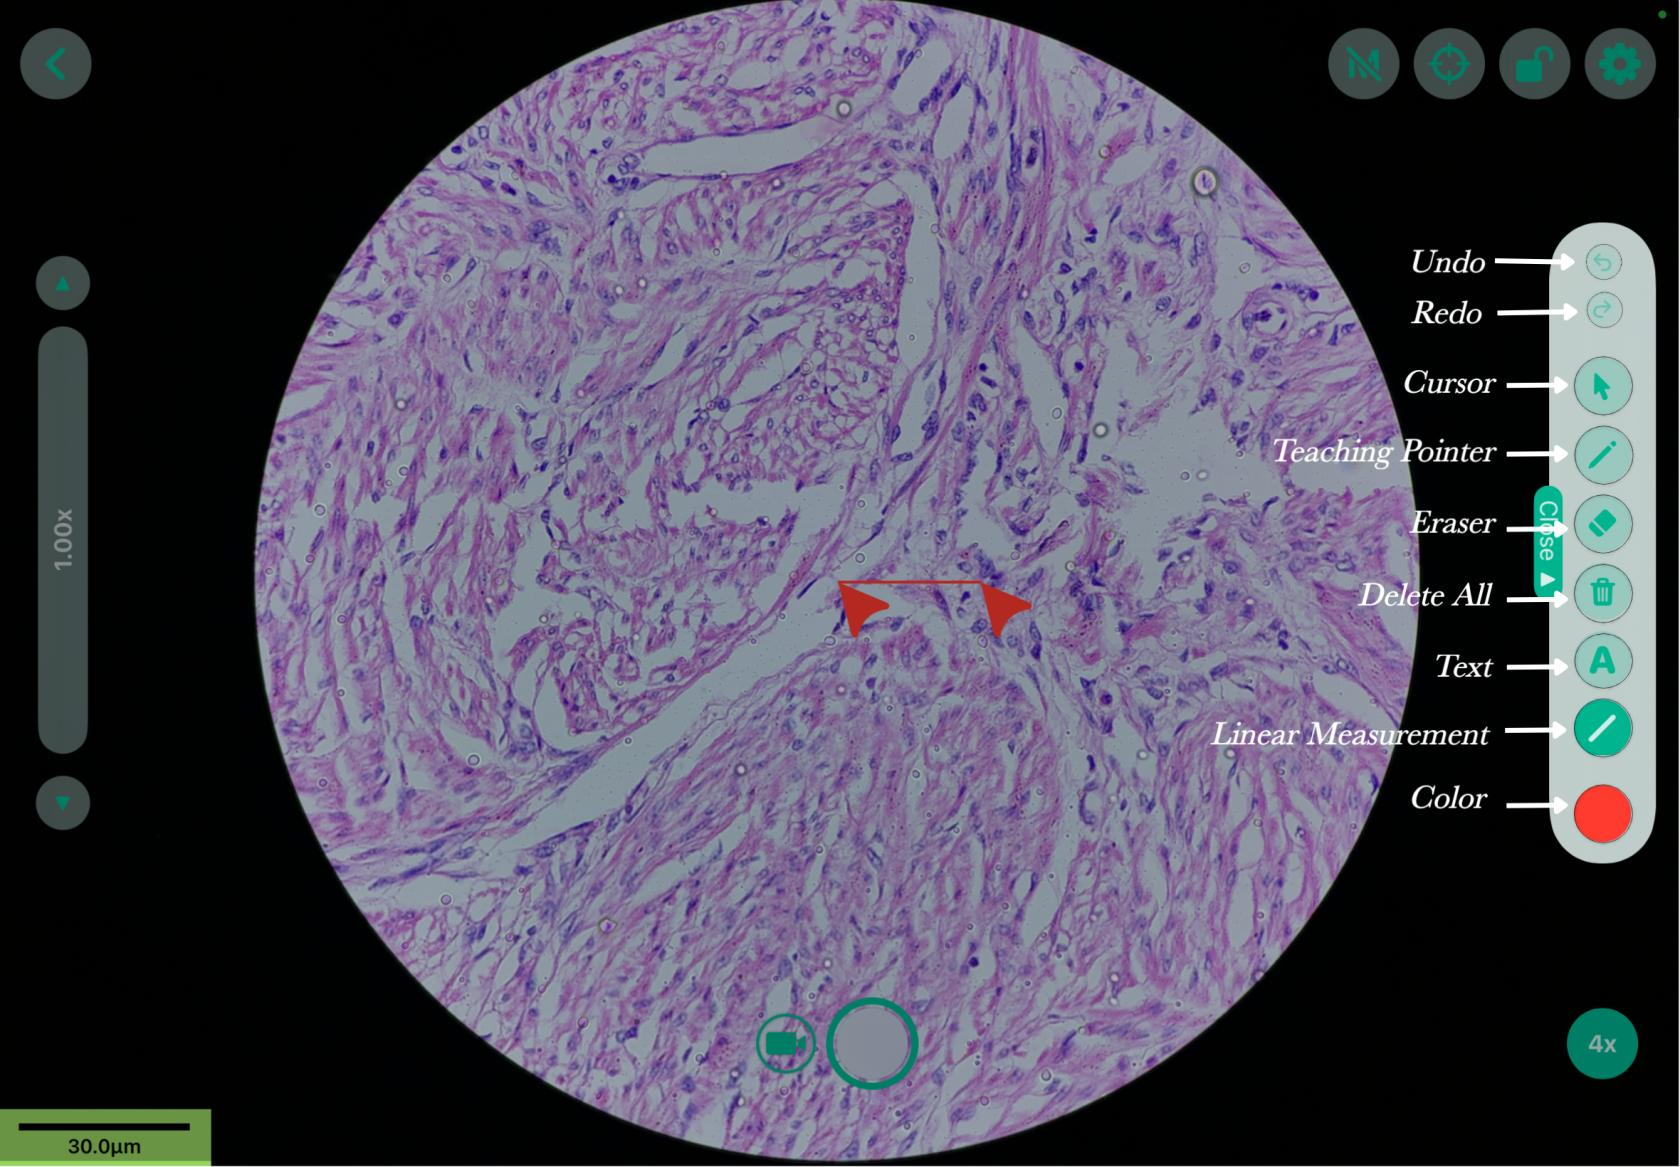
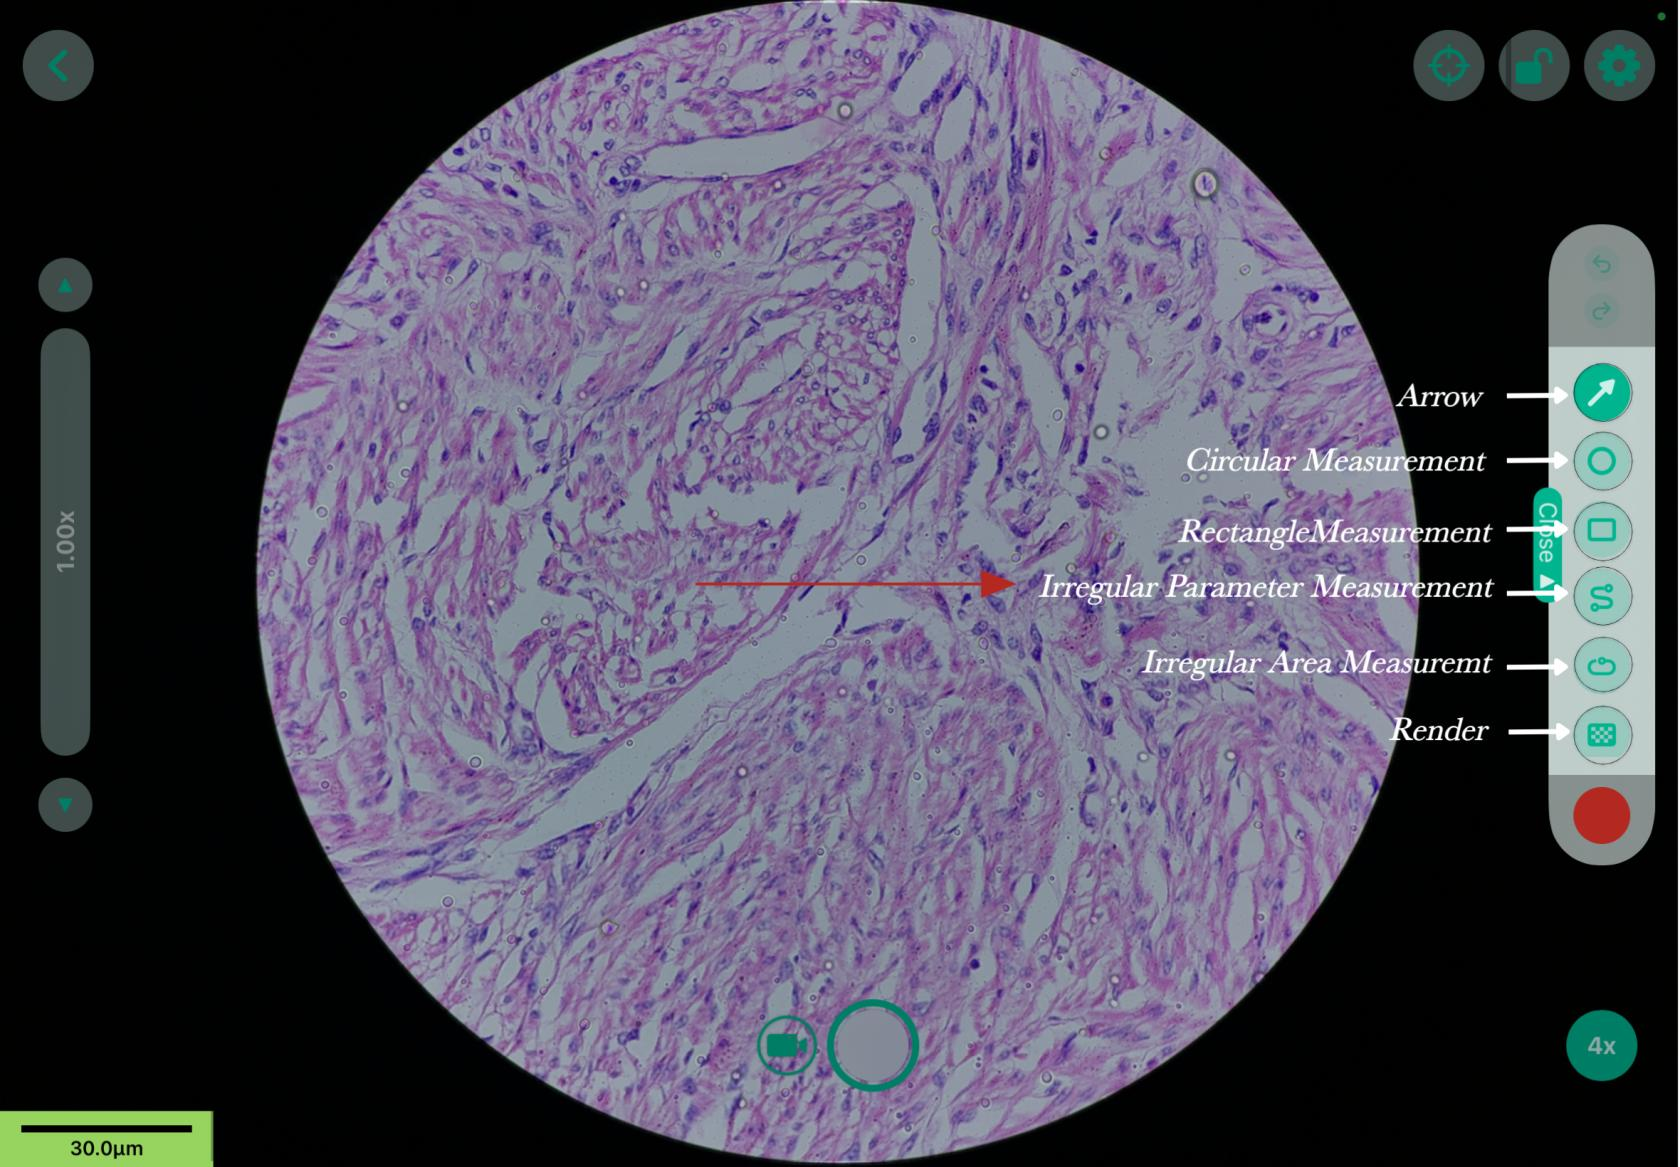
Open Drawer :
1. Locate the Open Drawer on the right side of the screen.
2. Select the Open Drawer to display the drop-down menu.
Activation Cursor
1. The Activation cursor ( ) is the first icon in the drawer.

2. This tool activates and deactivates the the annotation tools on the live view screen.
Teaching Pointer
1. A Teaching Pointer ( ) is a digital cursor on the screen.

2. Can be used to highlight specific cells or areas during live demonstrations or training.
3. By default, only 1 Teaching Pointer appears on the screen.
4. Up to 4 Teaching Pointers can be used together at any given point.
5. To configure the number of available Teaching Pointers, refer to the General Settings ( )
)
Freehand
1. Select the Pencil icon ( ) from the annotation tools in the Open Drawer.

2. Use your finger or stylus to draw the required annotation directly on the image.
3. Long-press or double-tap the Freehand tool to open the Line Width settings and adjust the thickness of the annotation.
4. To change the annotation color, select the red dot ( ) in the drawer and choose the required color.

Line/Arrow
1. Select the Line/Arrow icon ( ) to place a line on the microscopic image.

2. Select the tool again to adjust the line width.
3. Drag the handles at either end of the line to adjust its length and position.
4. The measurement displayed near the line indicates the distance represented by the line. Drag the line to reposition it as required.
5. To hide the measurement, select the M icon to turn the measurement display off.
Text
1. Select the Text (A) icon to open the Custom Text dialog box.
2. Enter the required label or note in the text field.
3. Select Set to place the text annotation on the viewing area.
4. Position the text at the required location on the image.
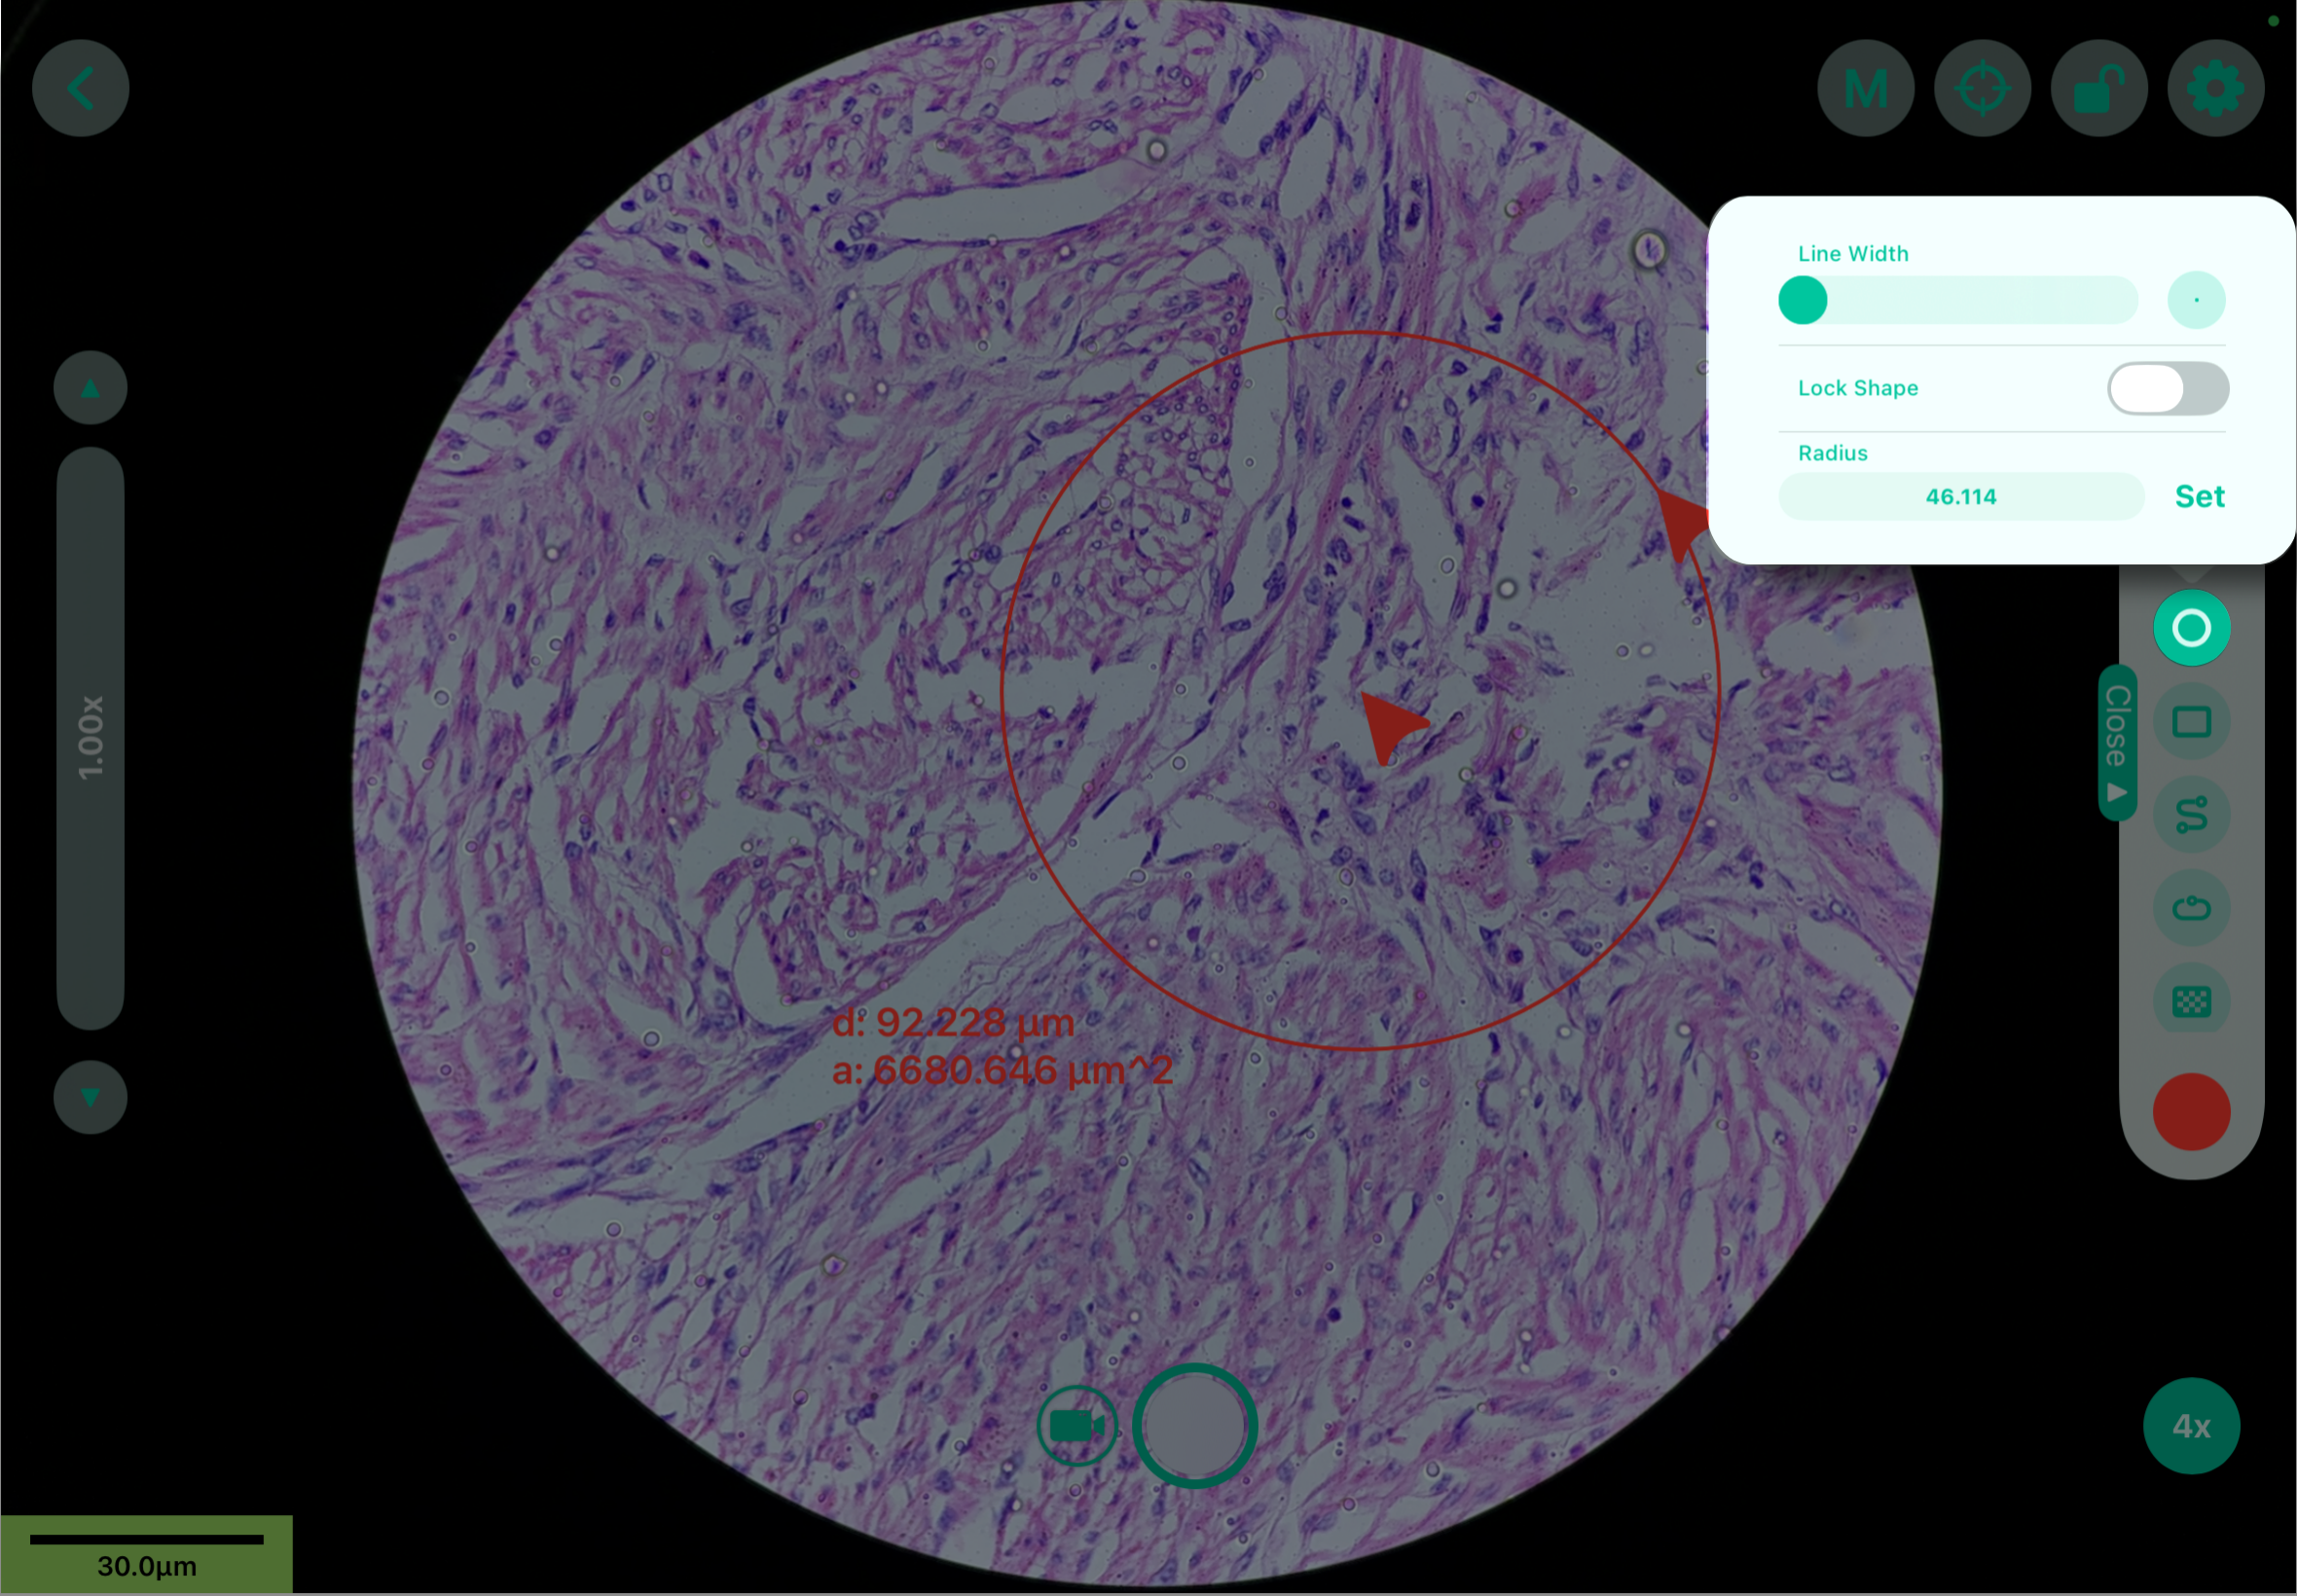
Circle
1. Select the Circle icon (O) to create a circle on the image.
2. Drag the available handles to adjust the size of the circle.
3. Select the Circle tool again to access additional options, such as Line Width, Lock, and Radius.
4. Enter the required radius, if applicable, and select Set to apply the value.
5. Once the circle is locked, adjust the pointer size as required.
Box
1. Select the Box icon ( ) to create a rectangular annotation.

2. Drag the available handles to adjust the height and width of the box.
3. Select the Box tool again to enter specific Height and Width values.
4. Enter the required measurements and select Set to apply them.
5. Use the available options to adjust the Line Width or lock the shape in place.
Dotted Marker
1. Select the S icon ( ) to activate the Dotted Marker tool, this tool helps draw a dotted annotation/space.

2. Tapping on it again lets you adjust the line width.
Enclosed Shape
1. Select the Enclosed Shape ( ) in the Open Drawer.

2. Draw the required shape around the region of interest.
3. When you finish drawing, the tool automatically connects the endpoint to the starting point with a straight line, creating a closed shape.
Rendering
1. Scroll through the tools in the Open Drawer and locate the Rendering icon ( ).
).

2. Select the Rendering icon to apply and save the current annotations and markings to the image.
3. After rendering, the annotations and markings appear as part of the saved or exported image.
Error Recovery Tools |
||
Tools |
Symbols |
Features |
Undo |
|
This reverses your last performed action or a series of action and is located at the very top of the open drawer. |
Redo |
|
It reverses the Undo command, reapplying the changes you just removed. |
Erase |
|
|
Delete All |
|
Instantly clears all current annotations, markings, and measurements from the live view or image. |


