
Getting Started
The Cilika application is located on the home screen of your IOS. Locate the Cilika iOS application icon (green icon) in the dock at the bottom of the screen and tap on it to launch the Cilika application.
The dashboard has three icons at the top right corner:
1. Add Folder
2. Generate Report
3. Settings
|
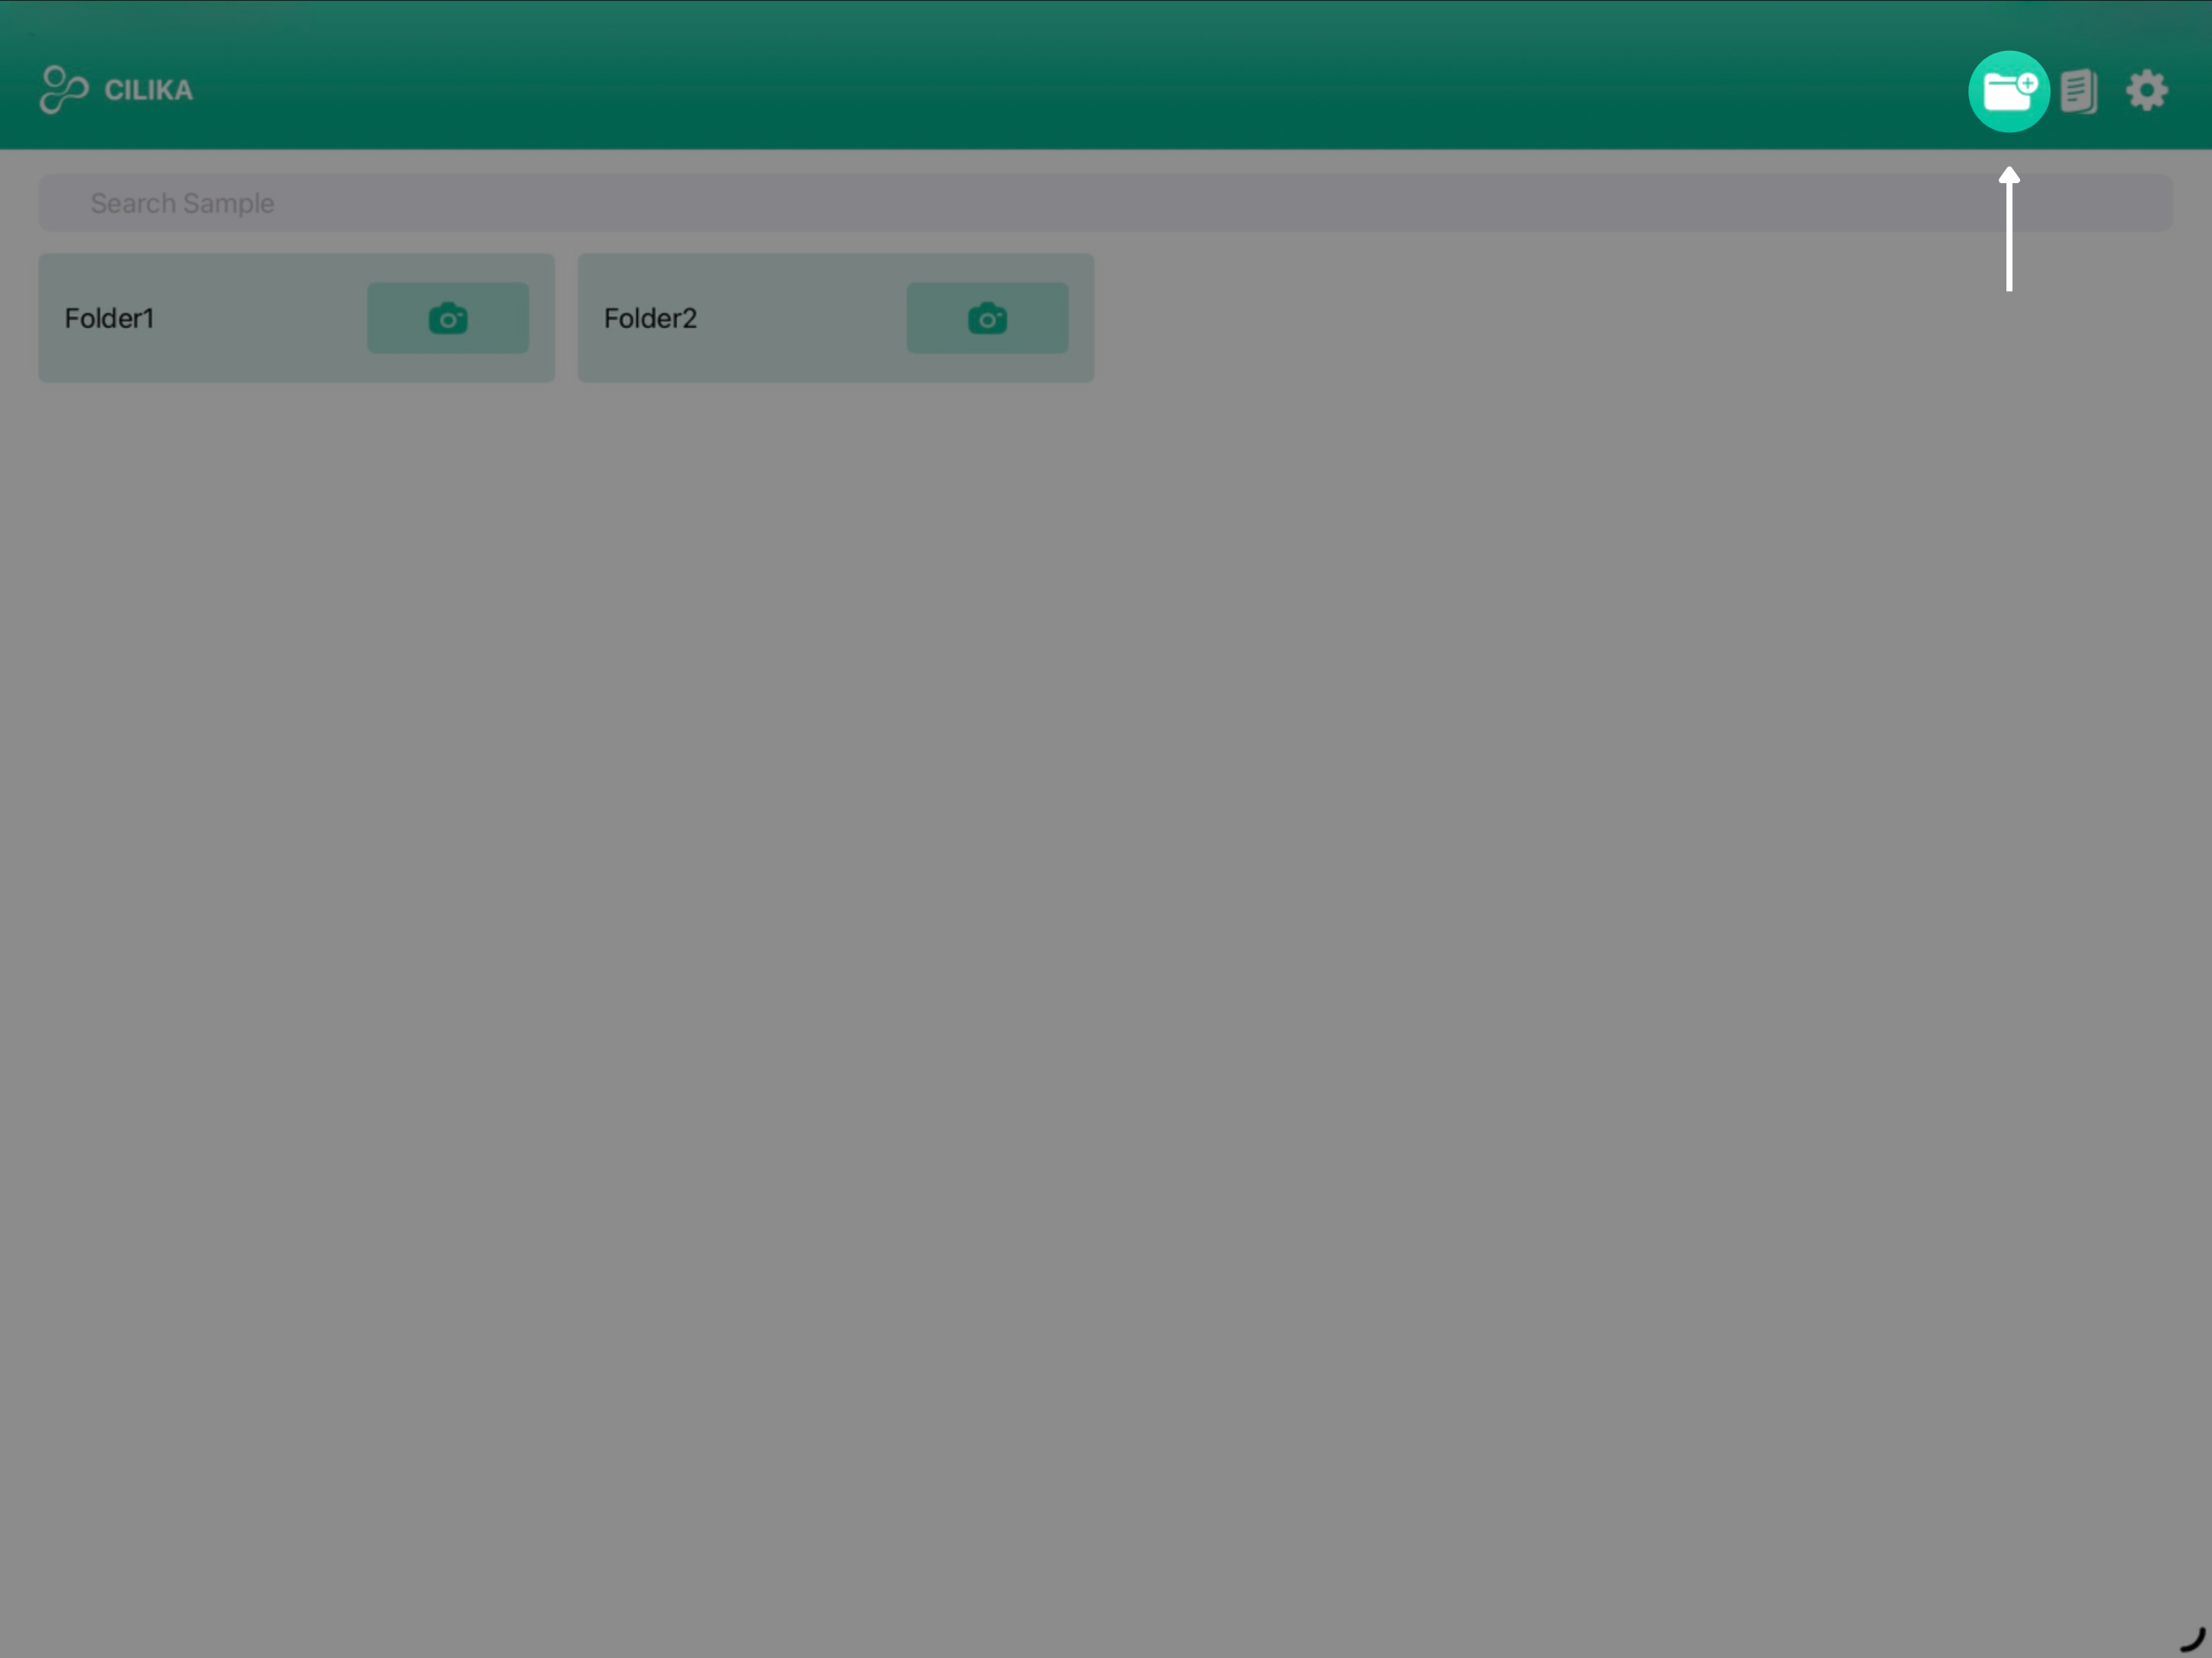
Figure 1.2 (A) Add Folder |
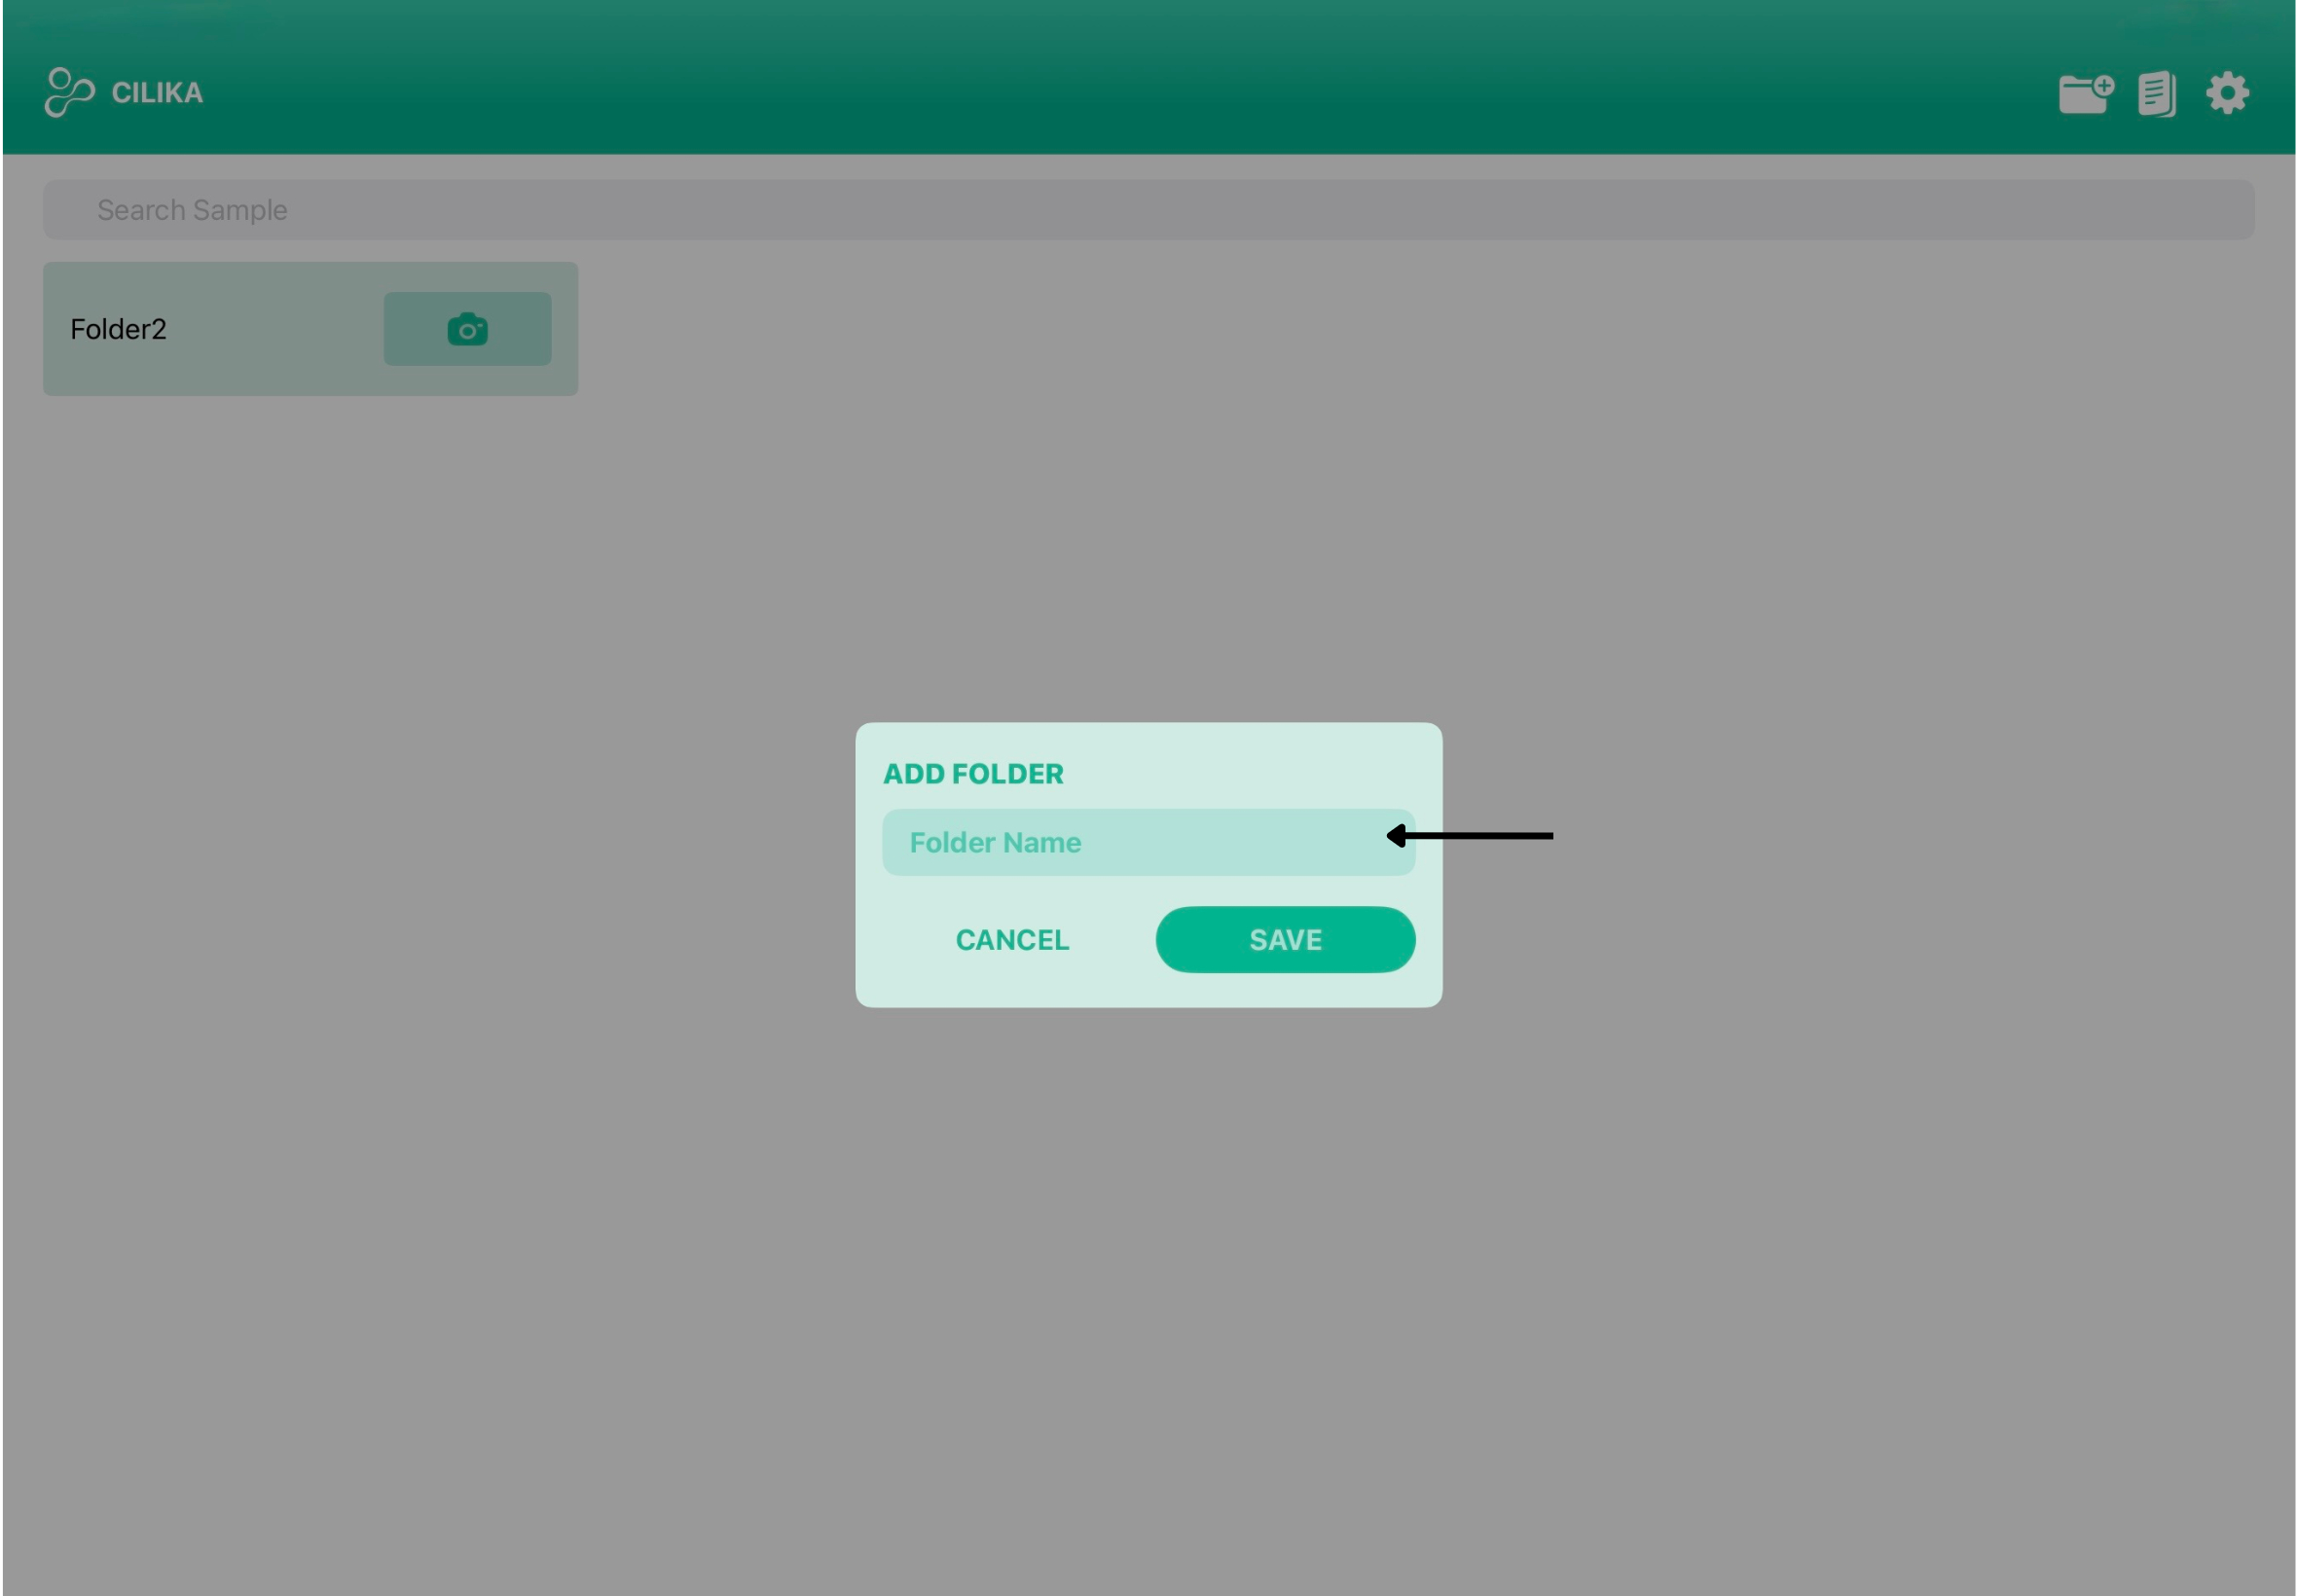
Figure 1.2 (B) Name Folder |
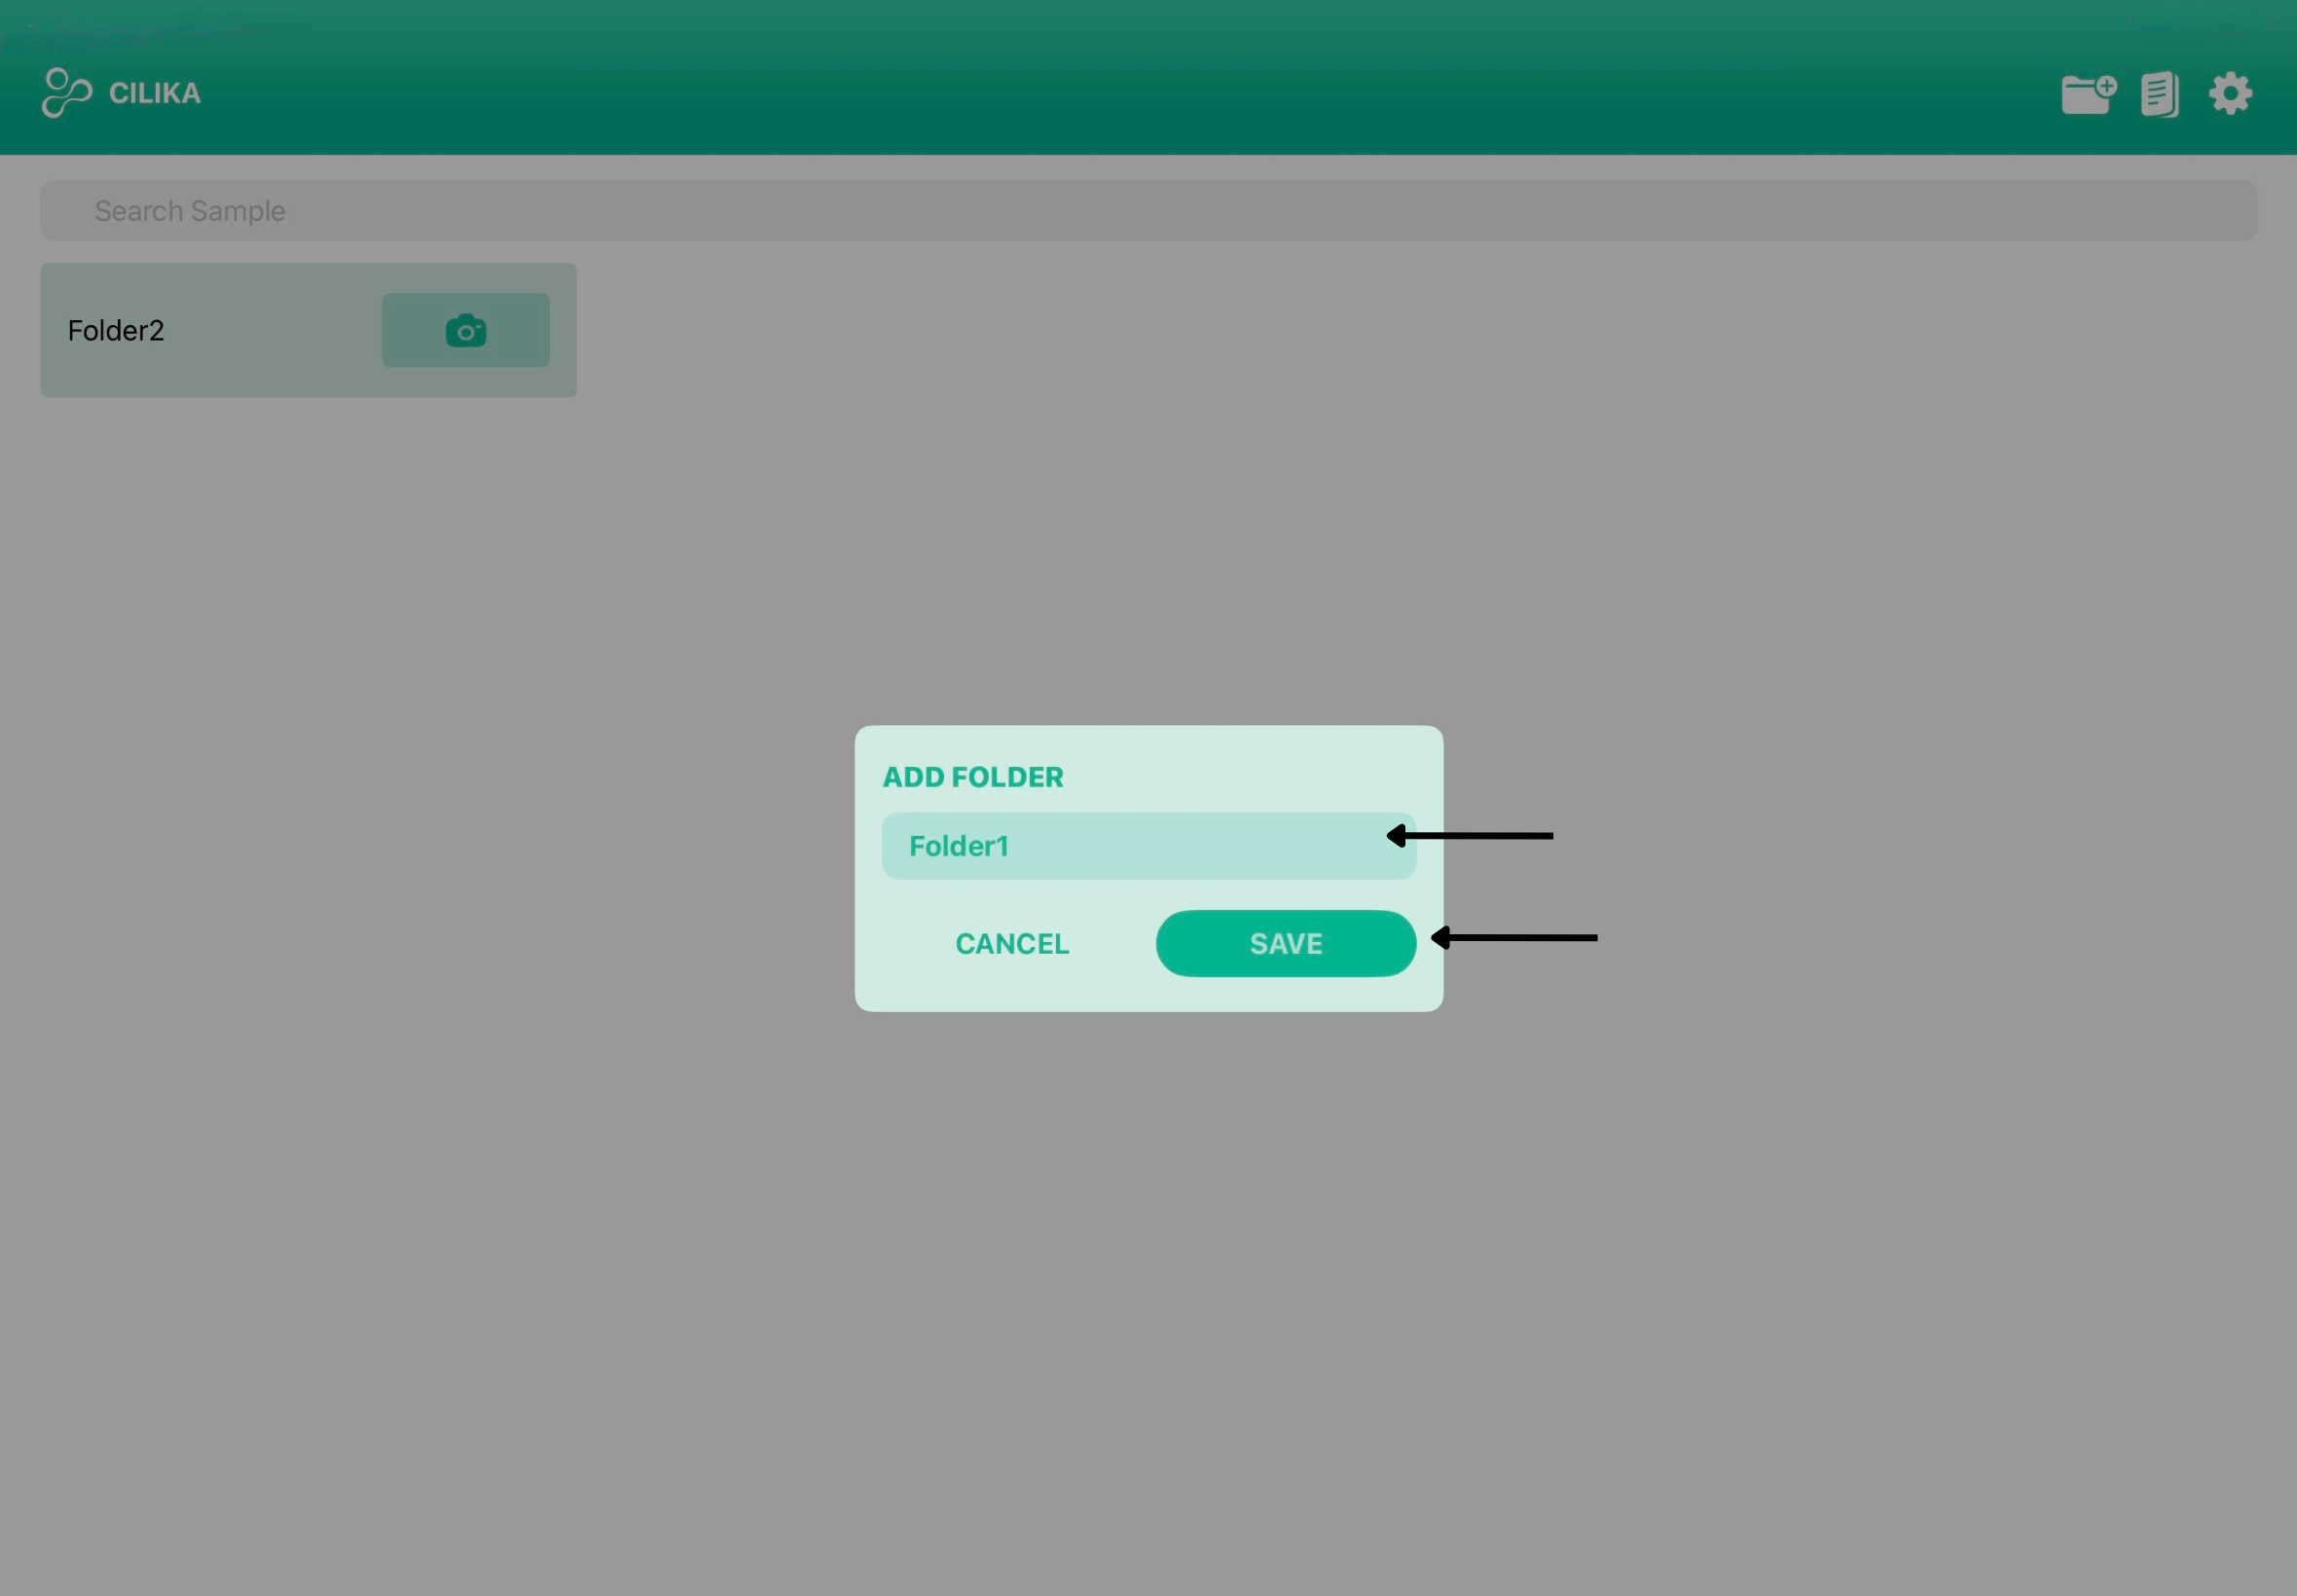
Figure 1.2 (C) Save |
1. Add Folder
On the dashboard, tap on the Add folder icon in the top-right (folder with a + sign) to Create a New Folder. An Add Folder dialog appears. Type in a clear, unique name (for example the case number or patient identifier) is to be added in the text box. Tap Save, for the new folder to appear on the Dashboard.
Rename and Delete Folder
When you hold down the folder, two options pop up, Delete and Rename.
Once you tap on the Rename option, Rename Folder popup appears on the screen. Enter a valid folder name with no space in between. Tap on Save to save the new name or Cancel to get the previously saved name. Tapping on the delete option deletes the whole folder, which includes any or all the files inside the folder.
Add File
Once you have added the folder and named it properly, tap the Camera icon located on the folder beside the folder name. A camera opens up, this is the Live Microscopic View. Make sure you iPad is horizontally positioned for it to work. If you are unable to see the microscopic image on screen, restart the application. If you are facing any more issues go through the troubleshooting guide.
2. Navigating Live Microscopic View
1.4 Understanding the Camera |
|
Figure 1.4 Screen Layout |
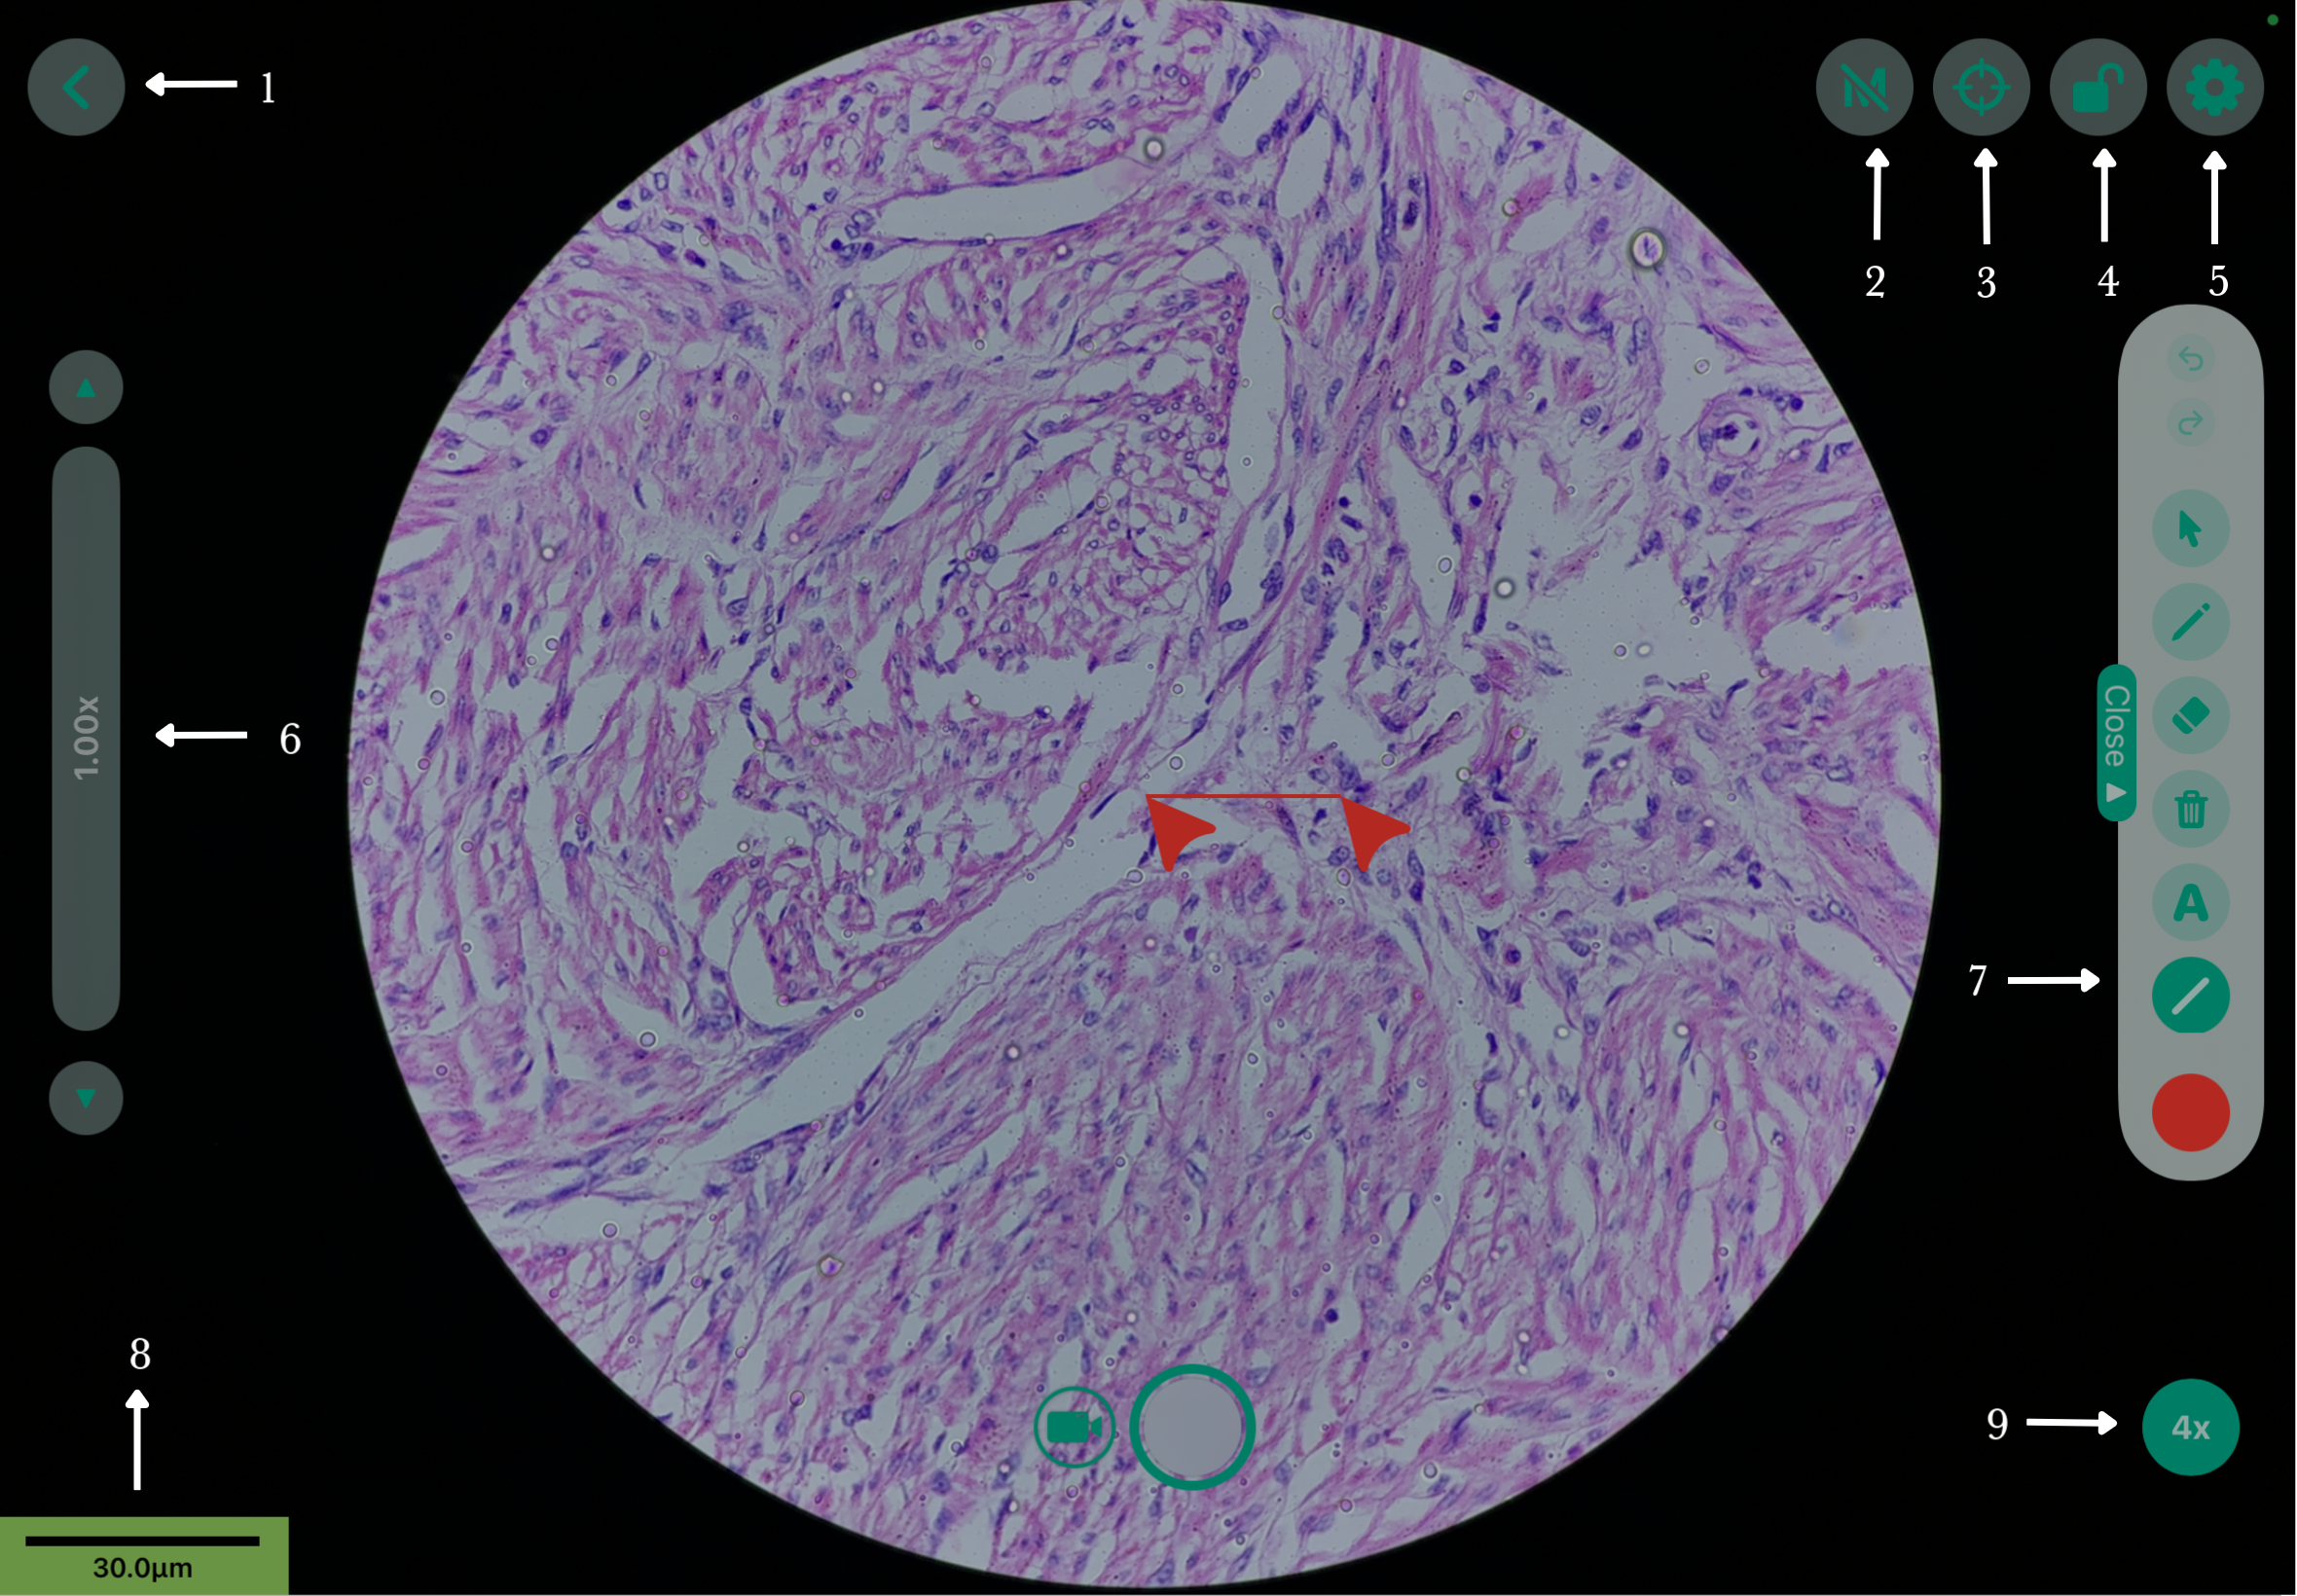
Live View — Screen Layout: |
||
| Tools | ||
| 1 | Back (‹) | Tapping on the Back (‹) Chevron brings you back to the dashboard. |
| 2 | ||
| 3 | Crosshair / Reticle | This tool shows/hides the center target on your live view screen |
| 4 | Lock | locks the screen against accidental touches. |
| 5 | Settings (gear) | Opens Camera Settings. |
| 6 | Zoom Slider | Use ▲ / ▼ arrows to zoom in and out of the live Microscopic View fine adjustment. |
| 7 | Open Drawer | Opens a drop-down of annotation tools. |
| 8 | Scale Bar | |
| 9 | Objective Lens | Helps |
Zoom Slider
Location : Left Side
You can locate the Zoom slider on the left side of the screen. This tool has two arrows on either sides of the zoom bar. Use the ▲ / ▼ arrows to zoom in or out of the microscopic image. You can also drag up on the zoom slider to zoom in on the microscopic image and drag down to zoom out. The range of the zoom is between 1.00x to 5.00x.
Scale bar
Location : Bottom Left
how an why
Recording
Location : Bottom Center
Located at the bottom Center, There is a Capture and Recording button. You can record either capture an image or record a video with and without the sound. Tap on the Circle Button located at the bottom center of the screen. To switch to video, you can tap on the Video Button to the left.
To the right of the capture icon, is another tool. Here you have two tools, Reference Image and
3. Annotation and Measurement
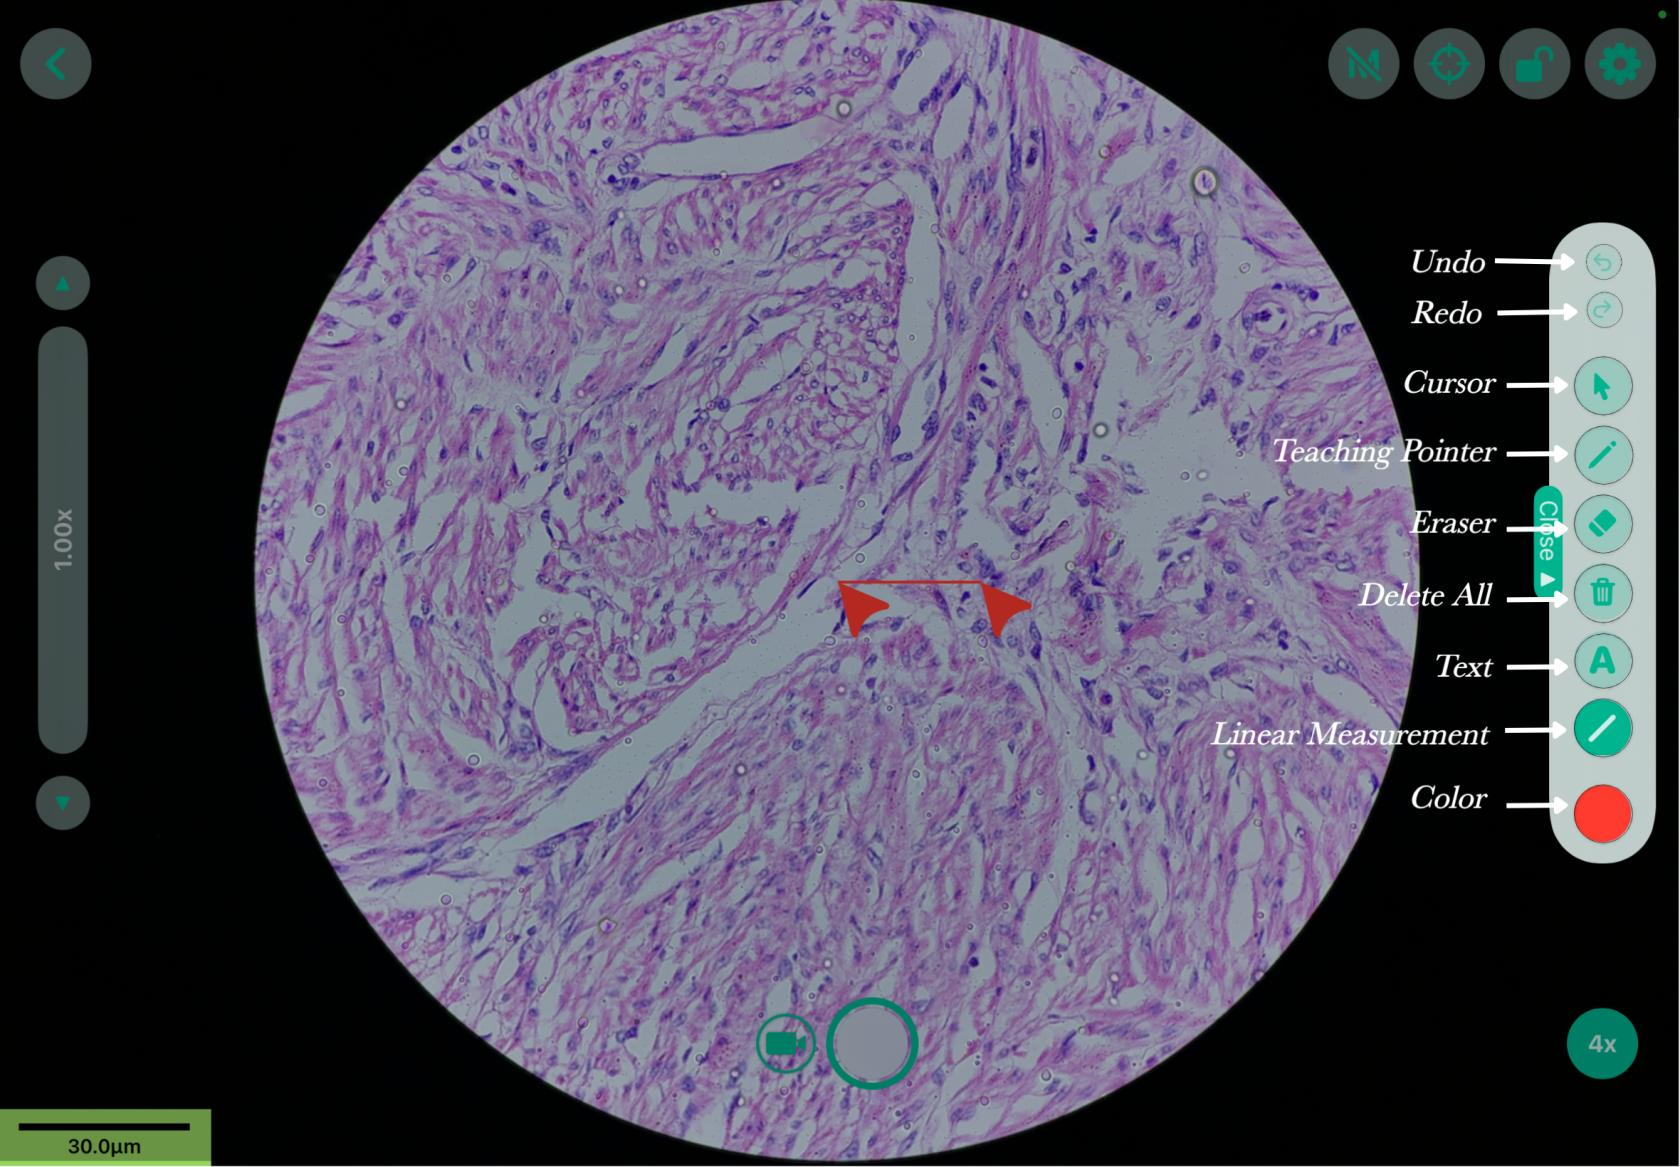
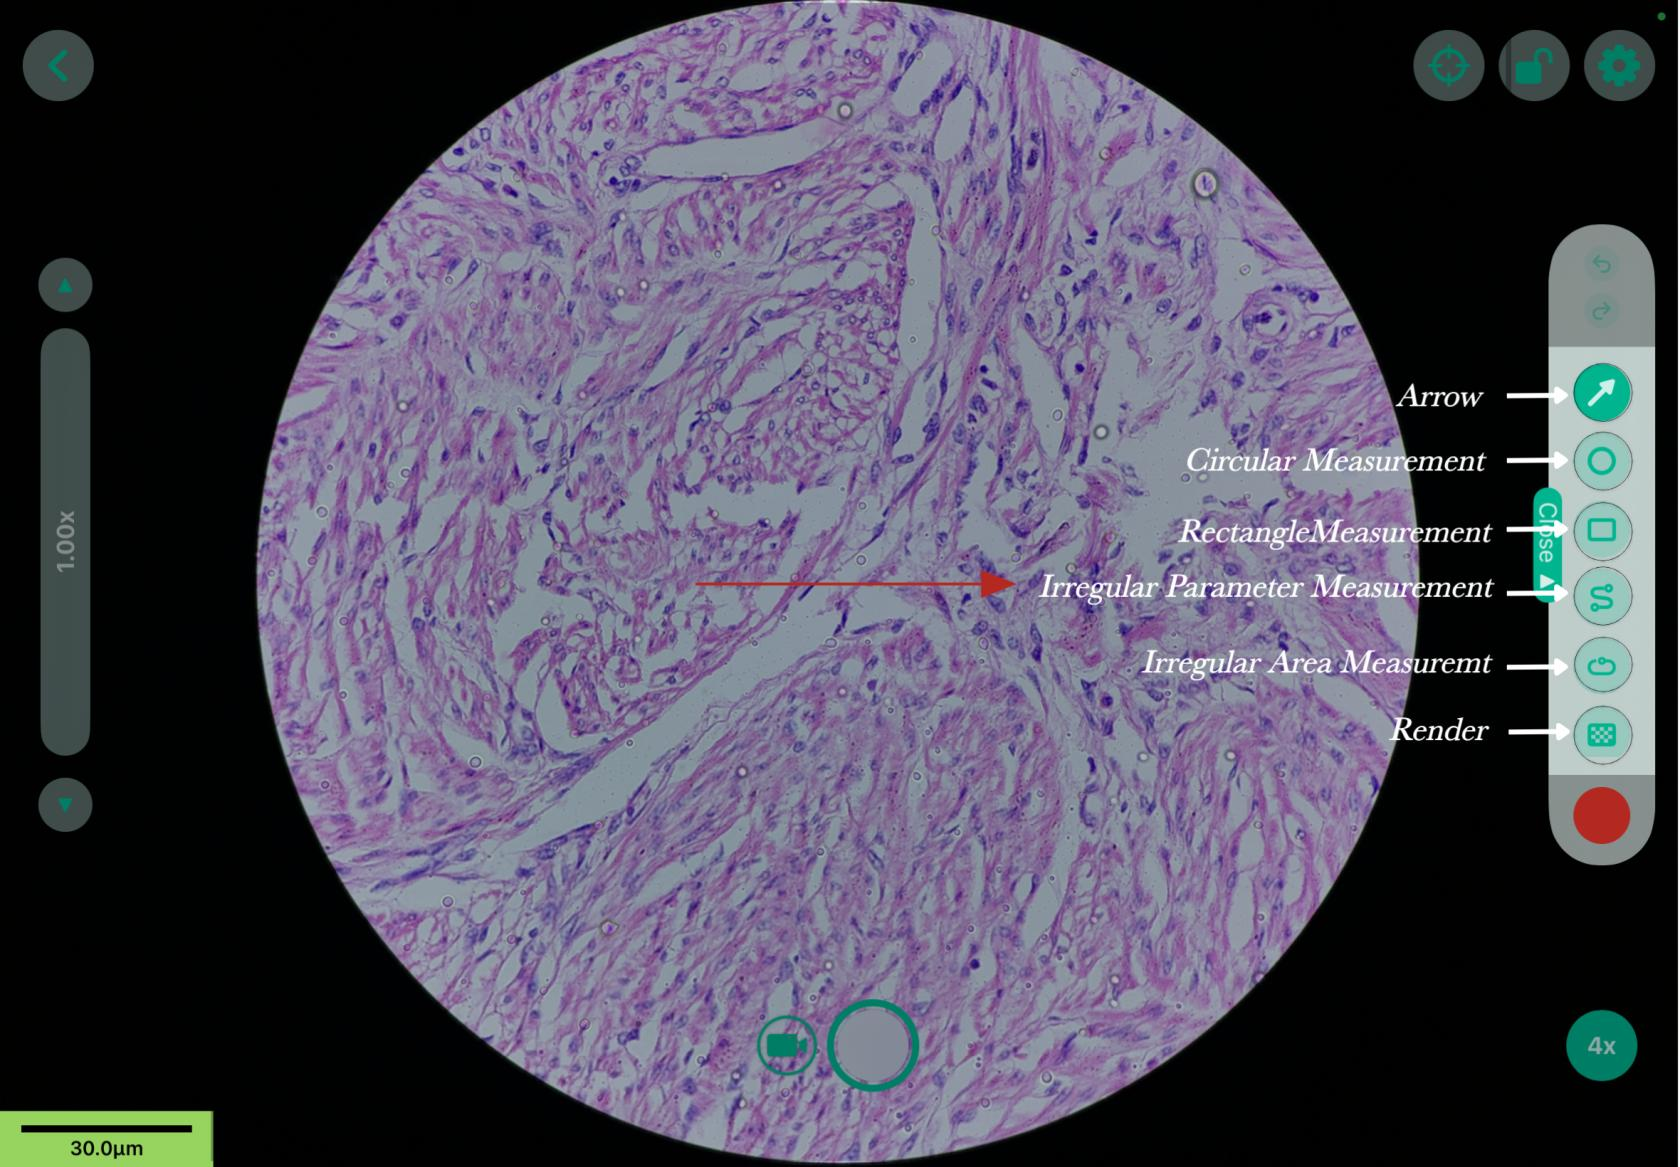
Open Tab - Undo/Redo
Location : Center Right
You will find an element labeled Open on your right. By tapping on the Open drawer, a drop-down appears. The drawer contains all the tools for markings, annotations and shapes. Any annotations or measurements drawn can be undone, redone and deleted here as well.
Activation Cursor 

The activation cursor is the first icon in the drawer. This tool activates and deactivates the the annotation tools on the live view screen.
Teaching Pointer
A Teaching Pointer is a digital cursor on the screen. It can be used to highlight specific cells or areas during live demonstrations or training. By default, only 1 Teaching Pointer appears on the screen. However, up to 4 Teaching Pointers can be used together at any given point (go to app settings).
Freehand
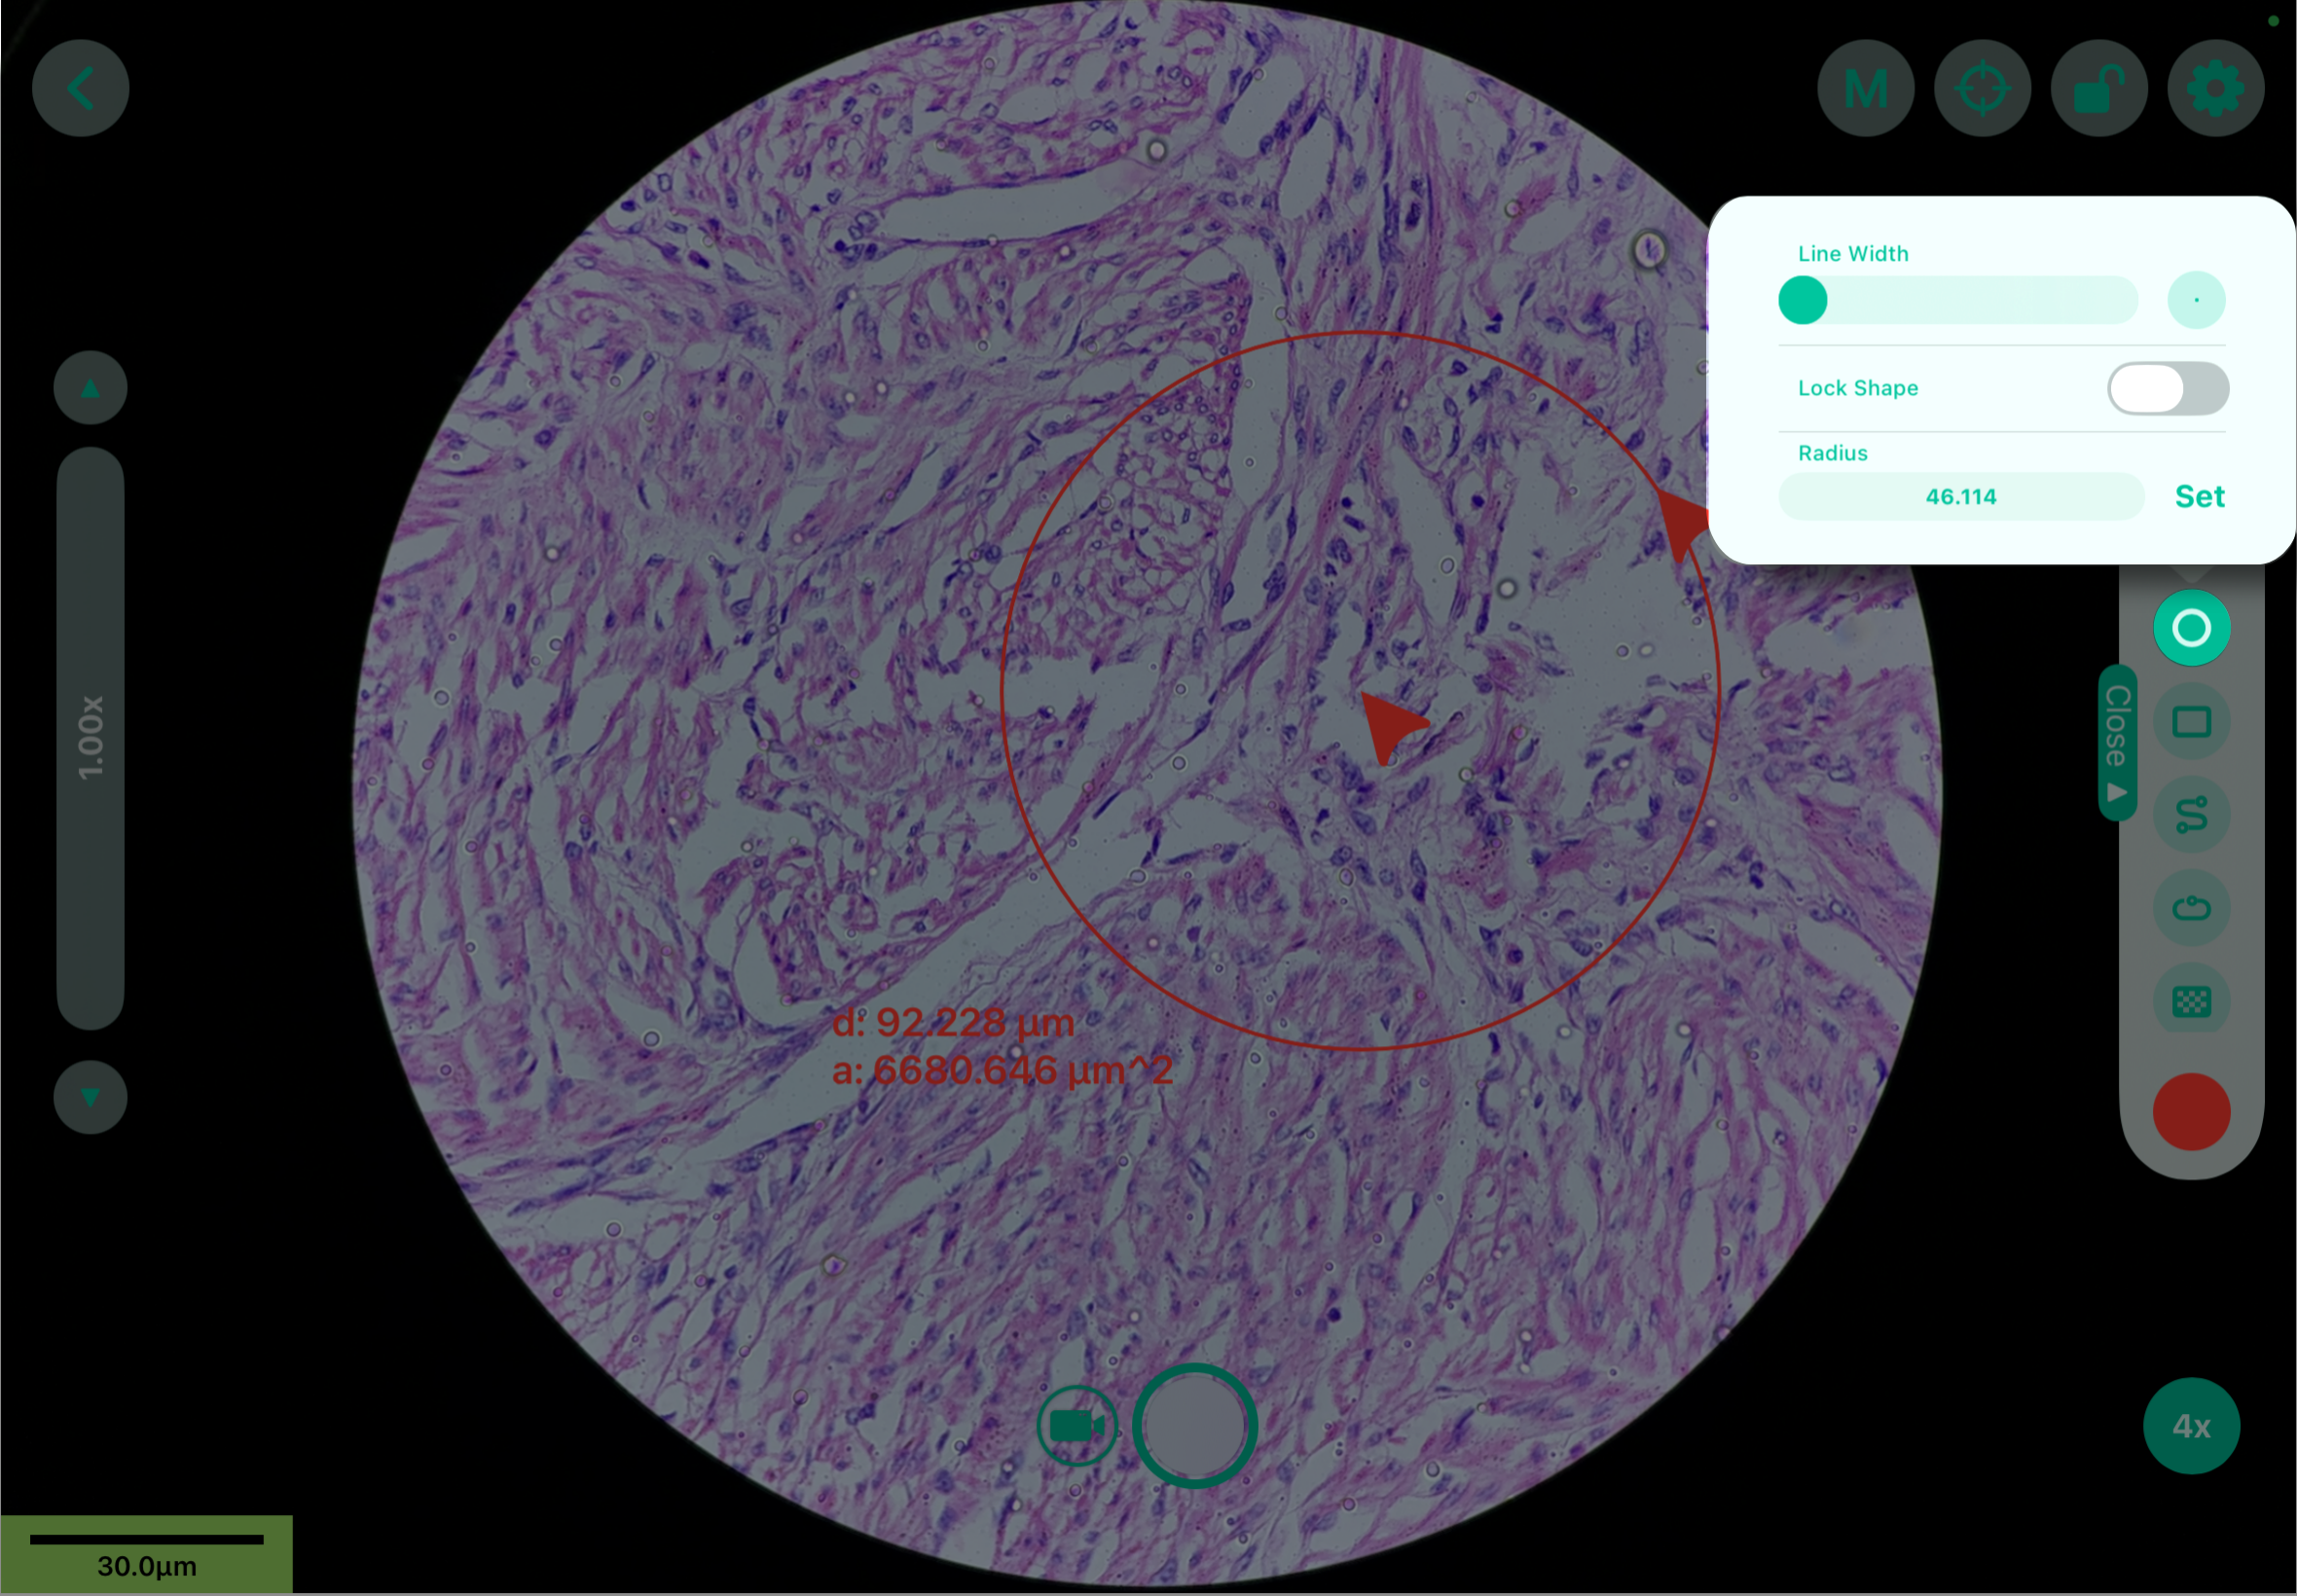
This tool helps create a freehand annotation like drawings or text. Long-press or double tap the tool to open the Line Width, adjust line width. If you wish to change the color of the annotation, tap on the red dot (●) in the drop down and change it to your desired color.
Line/Arrow
Text Circle
Box
Dotted Marker
Enclosed Shape
3.
Error Recovery Tools
Tools Symbols Features Undo↶
This reverses your last performed action or a series of action and is located at the very top of the open drawer. Redo↷
Locate below the Undo option, it reverses the Undo command, reapplying the changes you just removed.
Erase
Scroll down and locate the erase Icon in the tools drawer. This tool Erases only unwanted annotations.
Tapping on it again, lets you adjust the wide of the eraser. Adjust it depending on how much area you want to erase.
Delete All
