
Report
10. Report
Following are the steps to "Create a Report" -
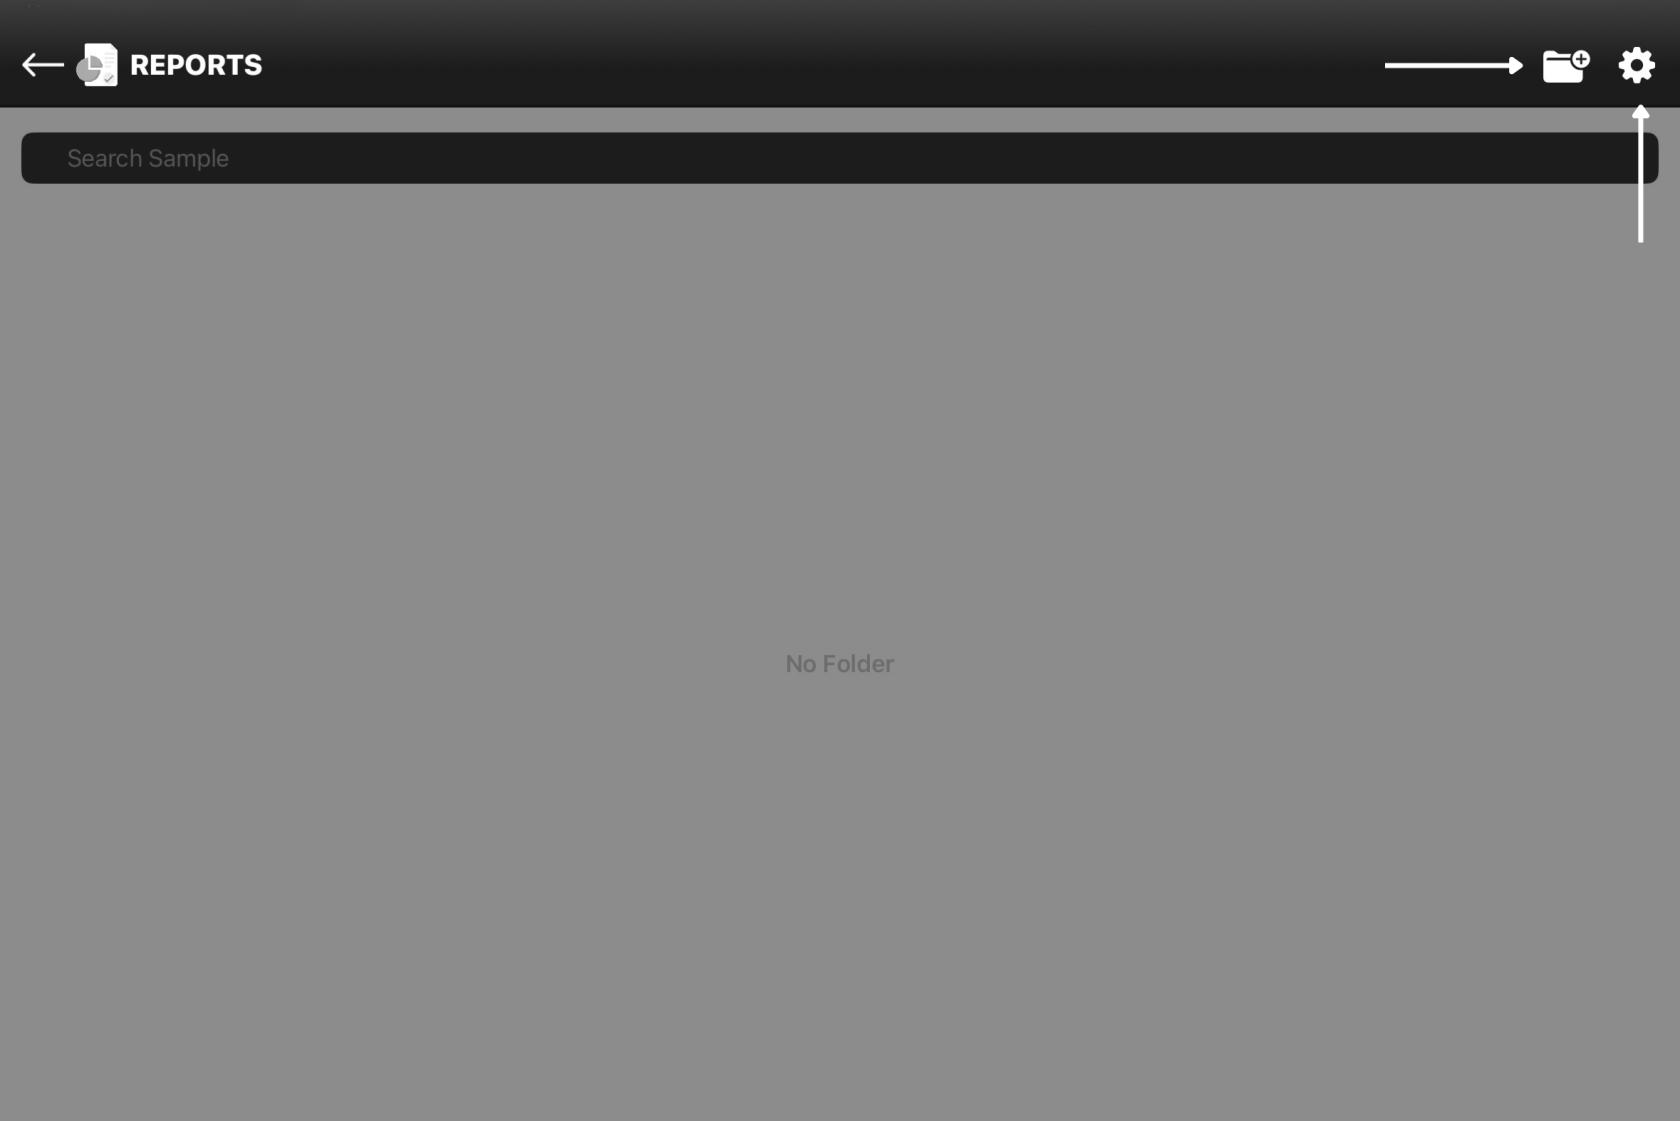
Once you tap on the the report icon at the top right corner,

Figure 10
- Tap the Create Folder icon in the top-right (folder with a + sign).
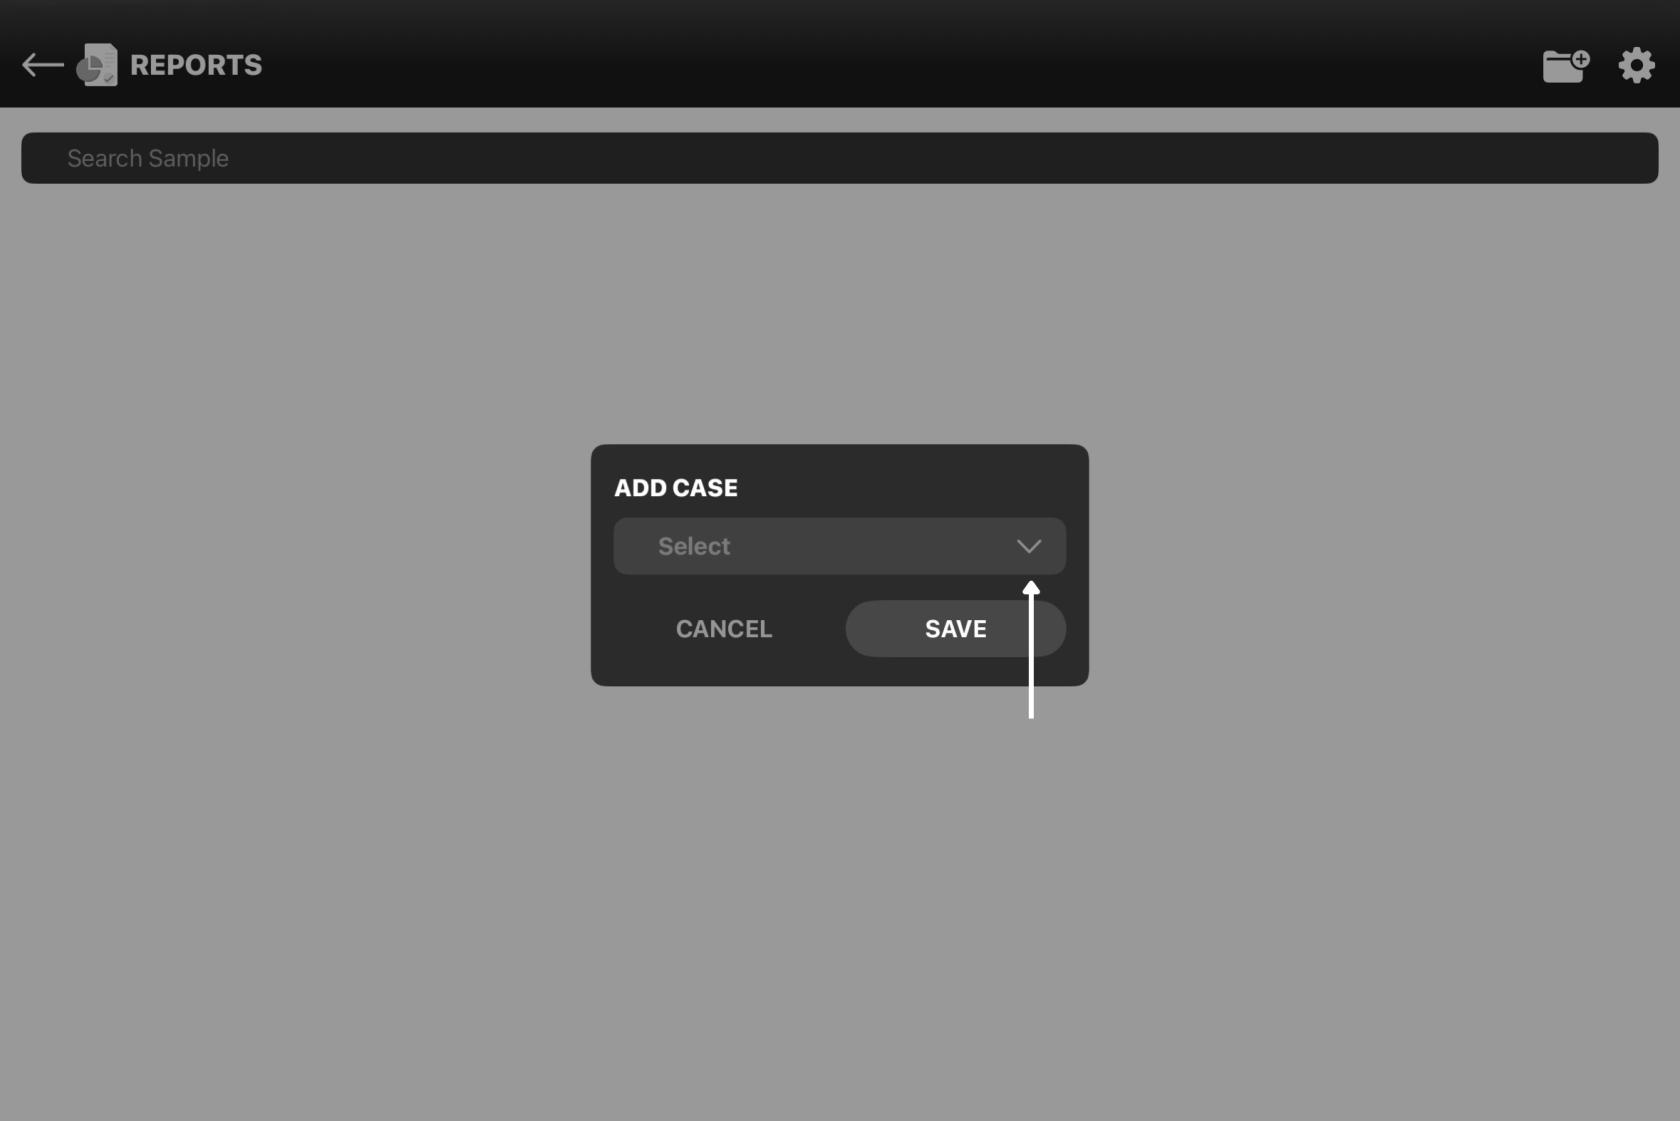
- An Add Case dialog appears. Tap on the the dropdown button.
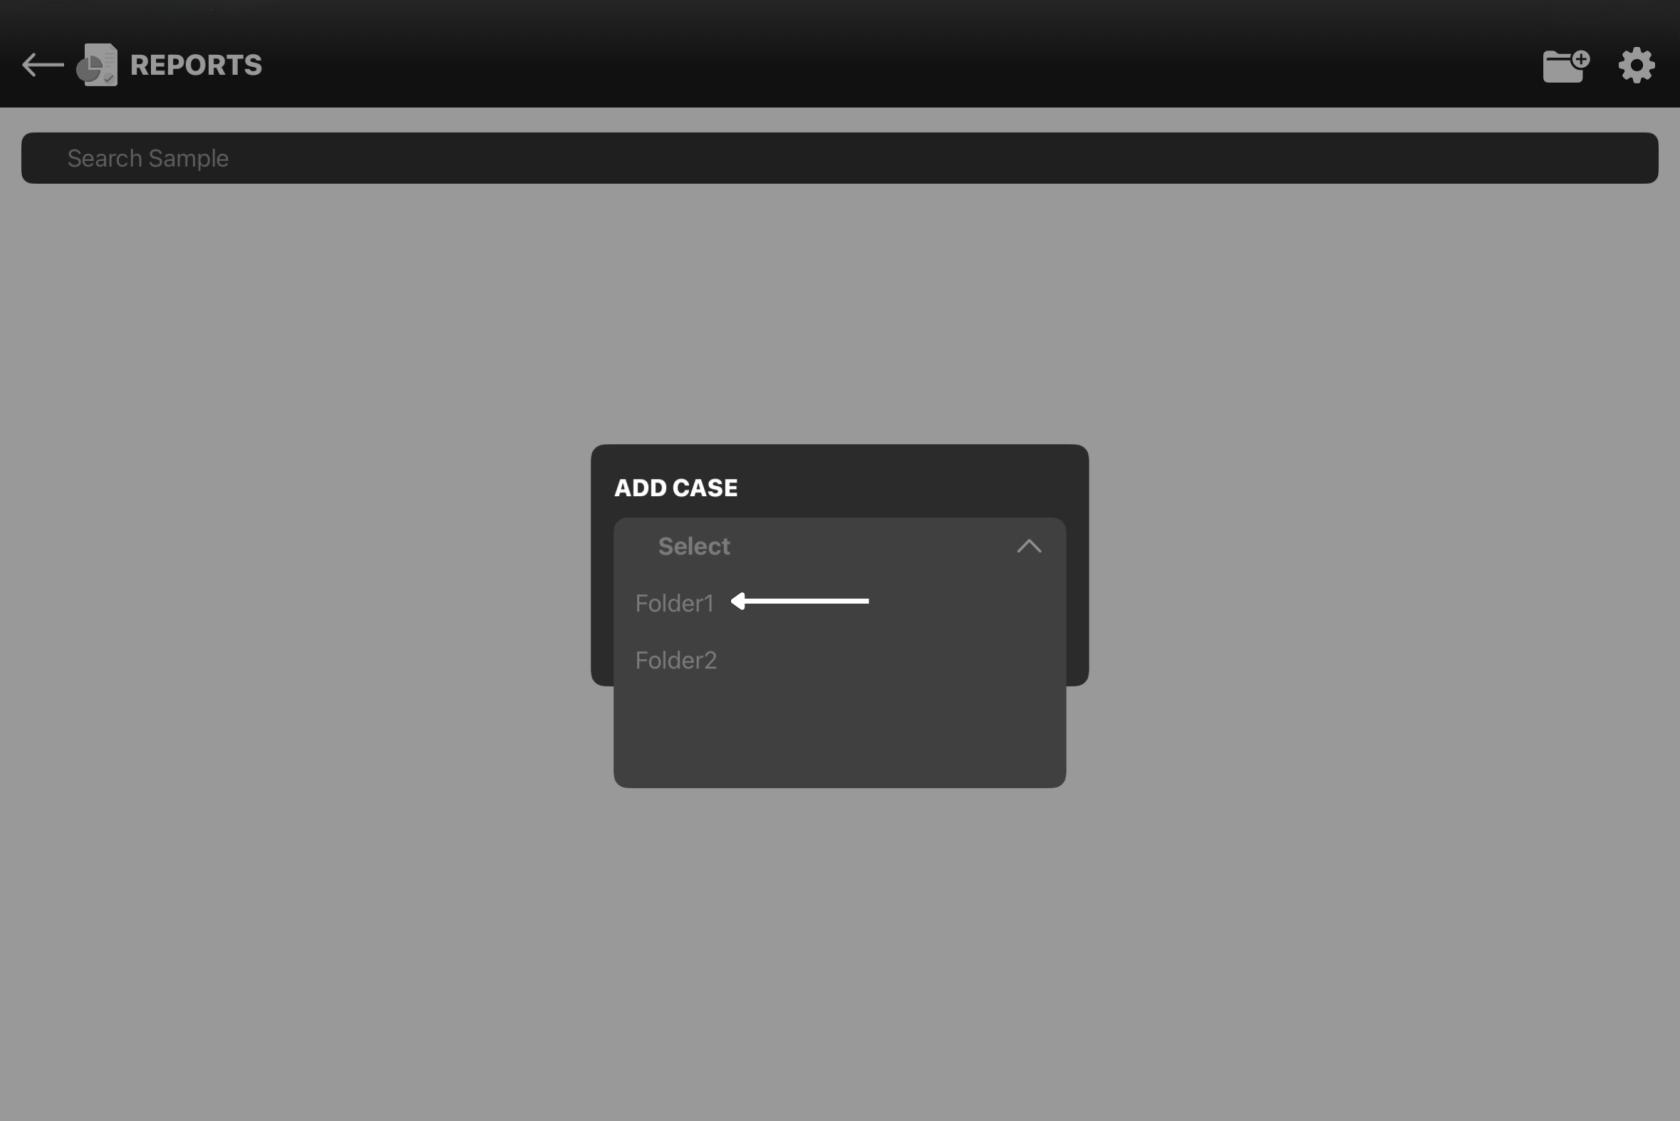
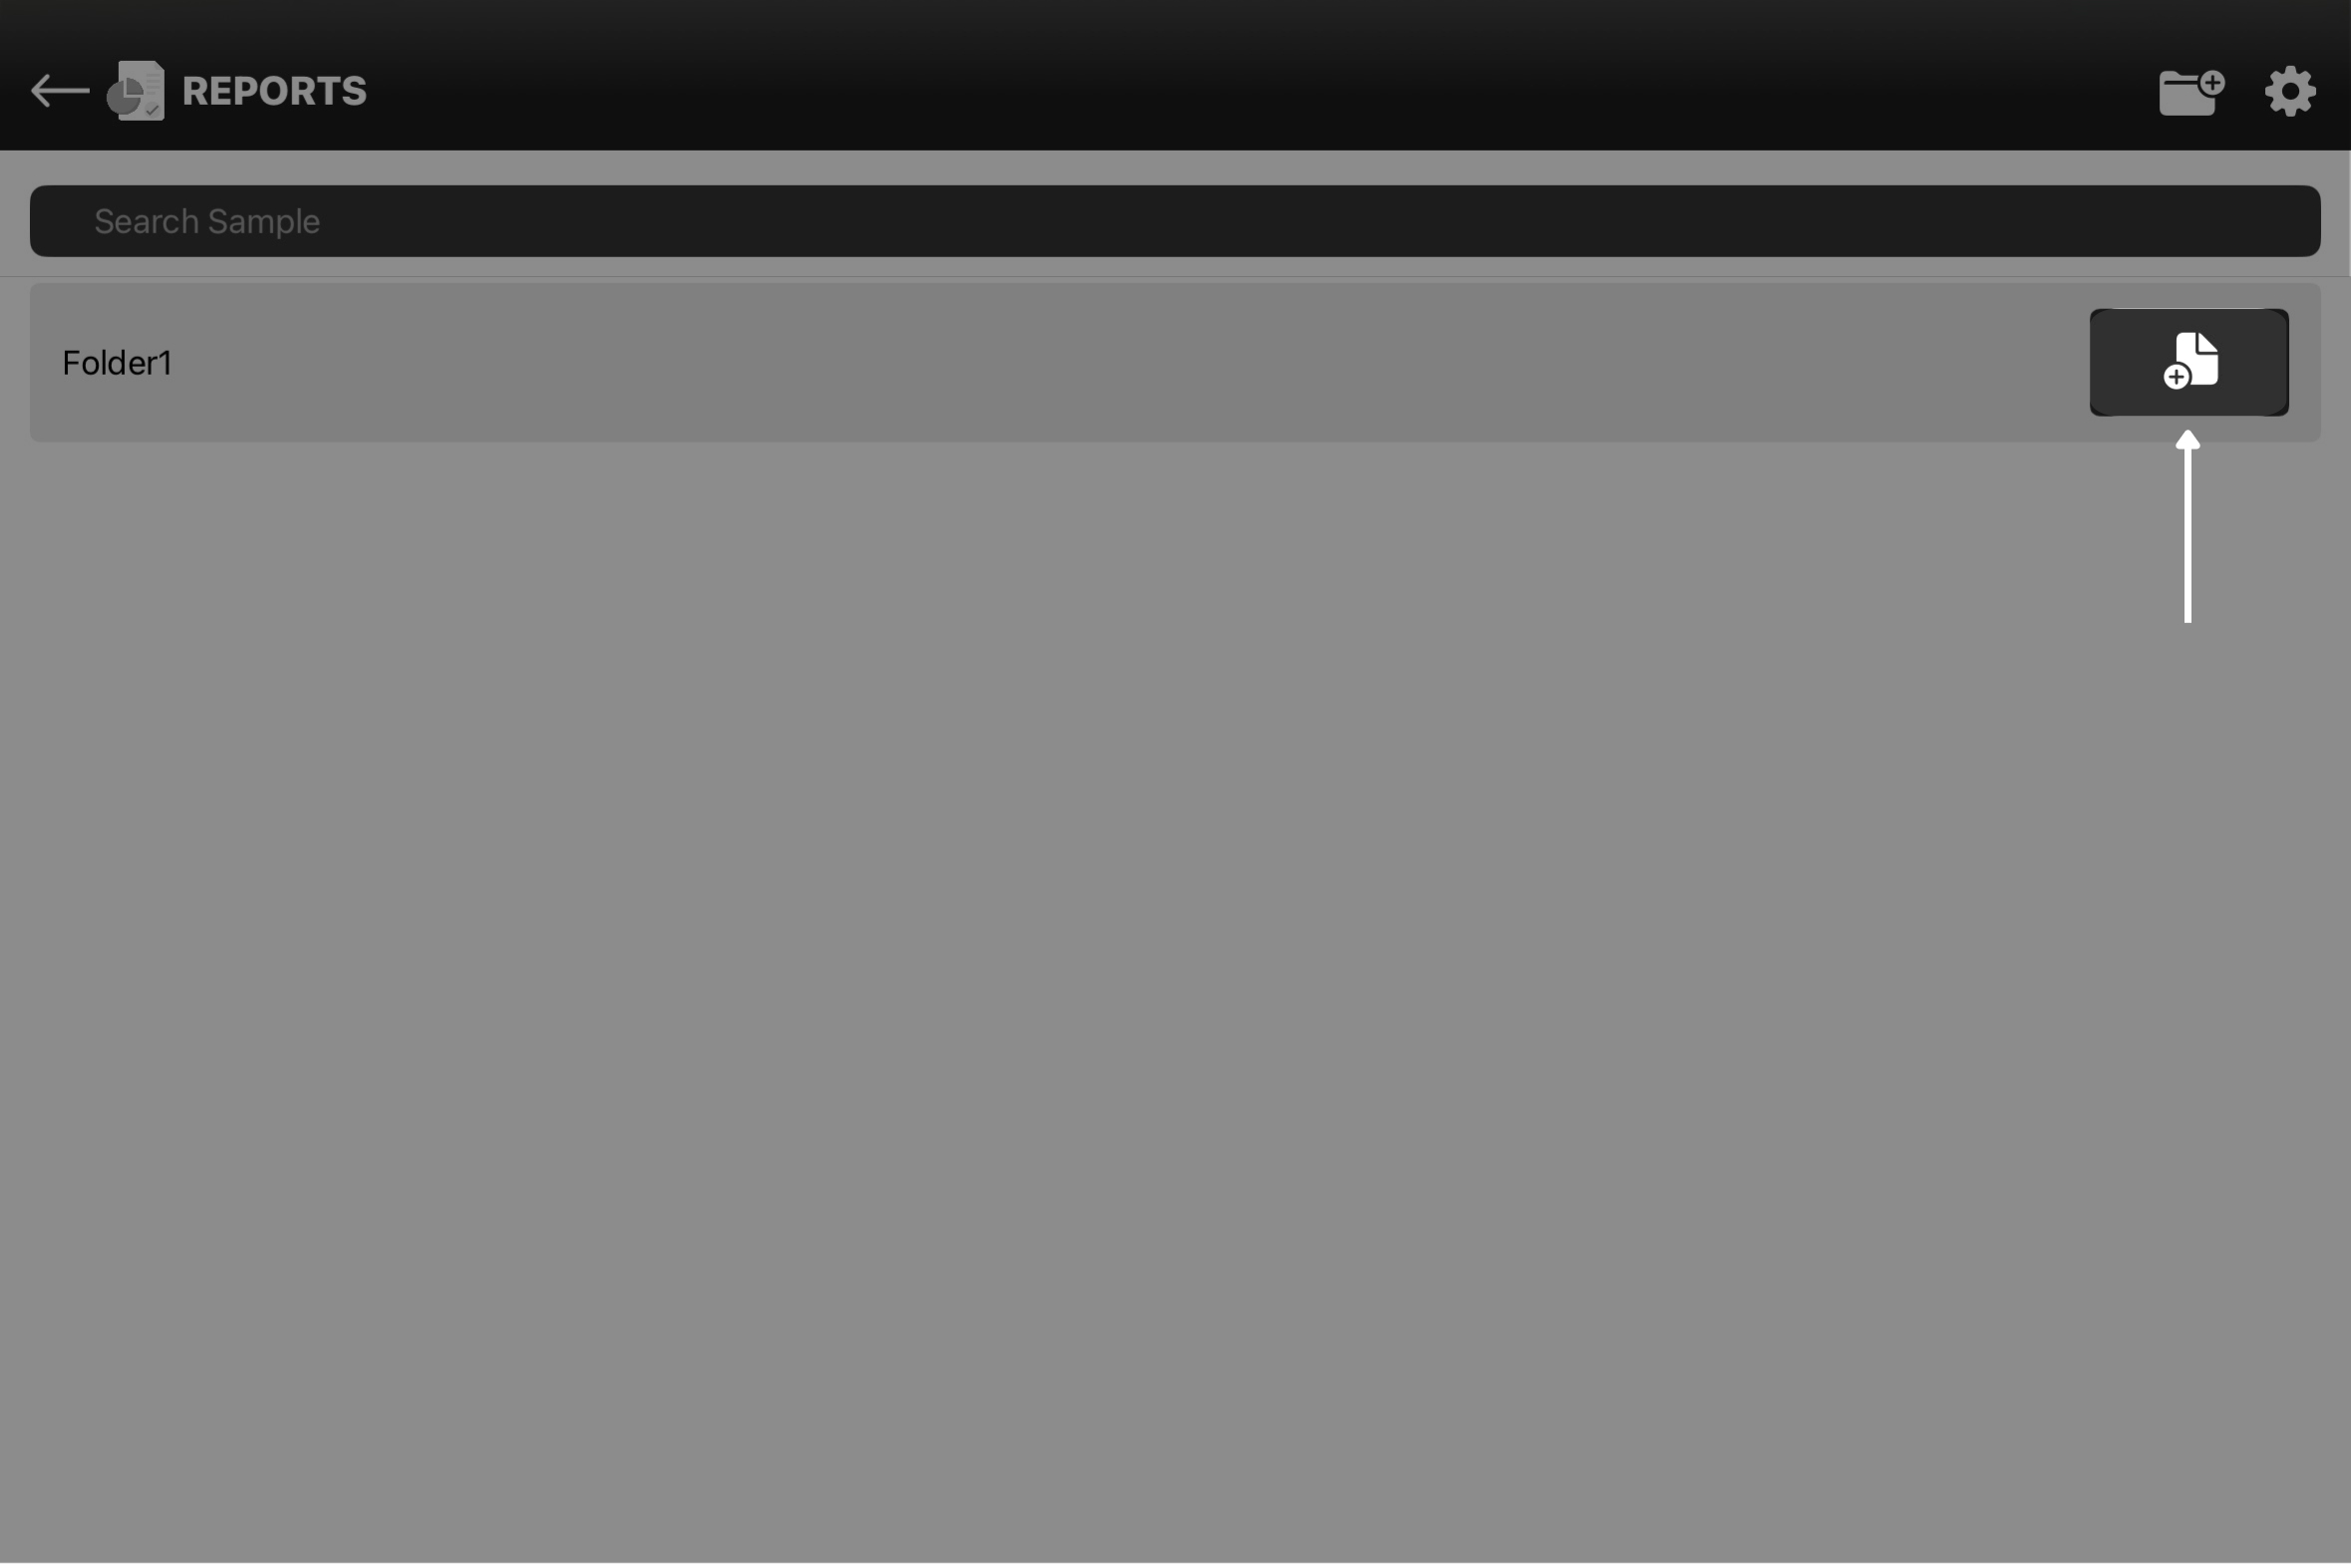
- The dropdown gives a list of all the folders saved or created on the dashboard. Select the folder you wanna add and tap Save (Figure 2.4). The selected folder appears on the screen.
- If the folder does not appear, swipe down on the grid to refresh.
|
Figure 10.1 |
Figure 10.2 |
|
Figure 10.3 |
Figure 10.4 |
Generate Report
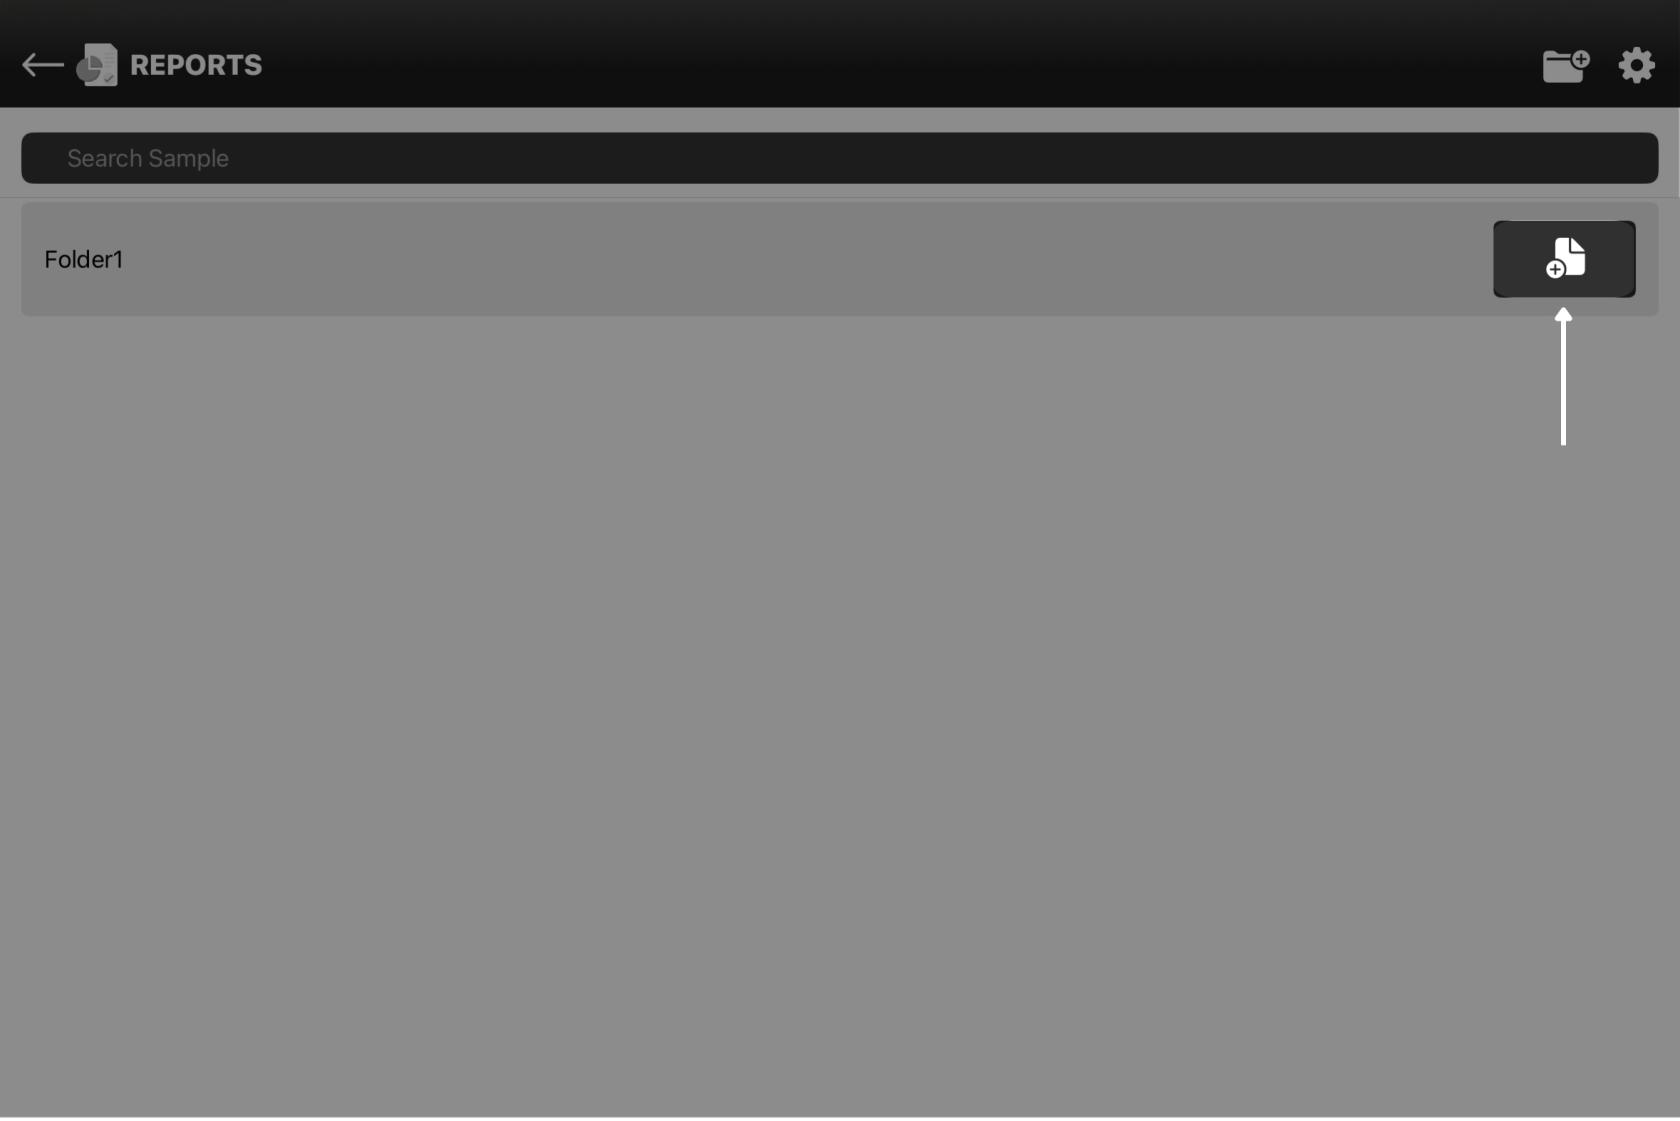
- The new folder appears on the Report Page. Tap on the icon located at the extreme right
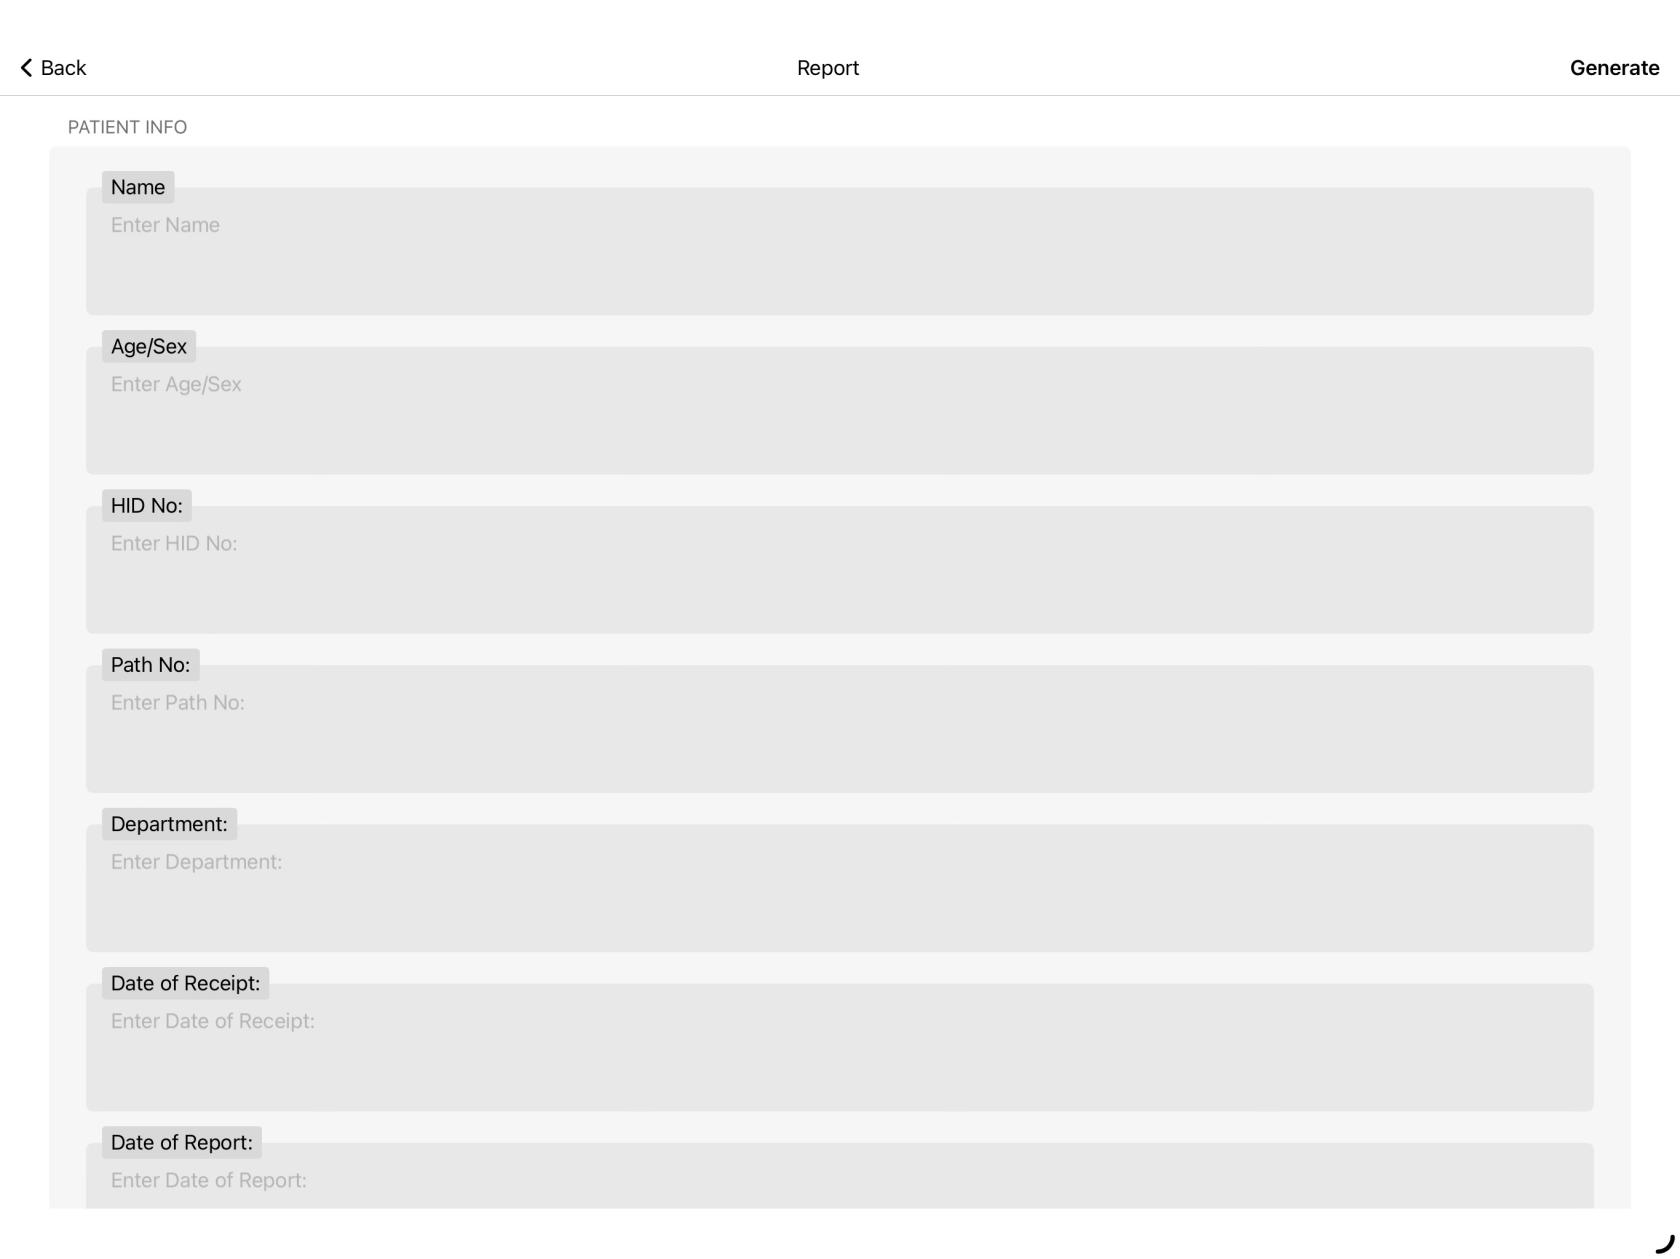
- (folder with a + sign) to add in details to generate your report (Figure 1.5).
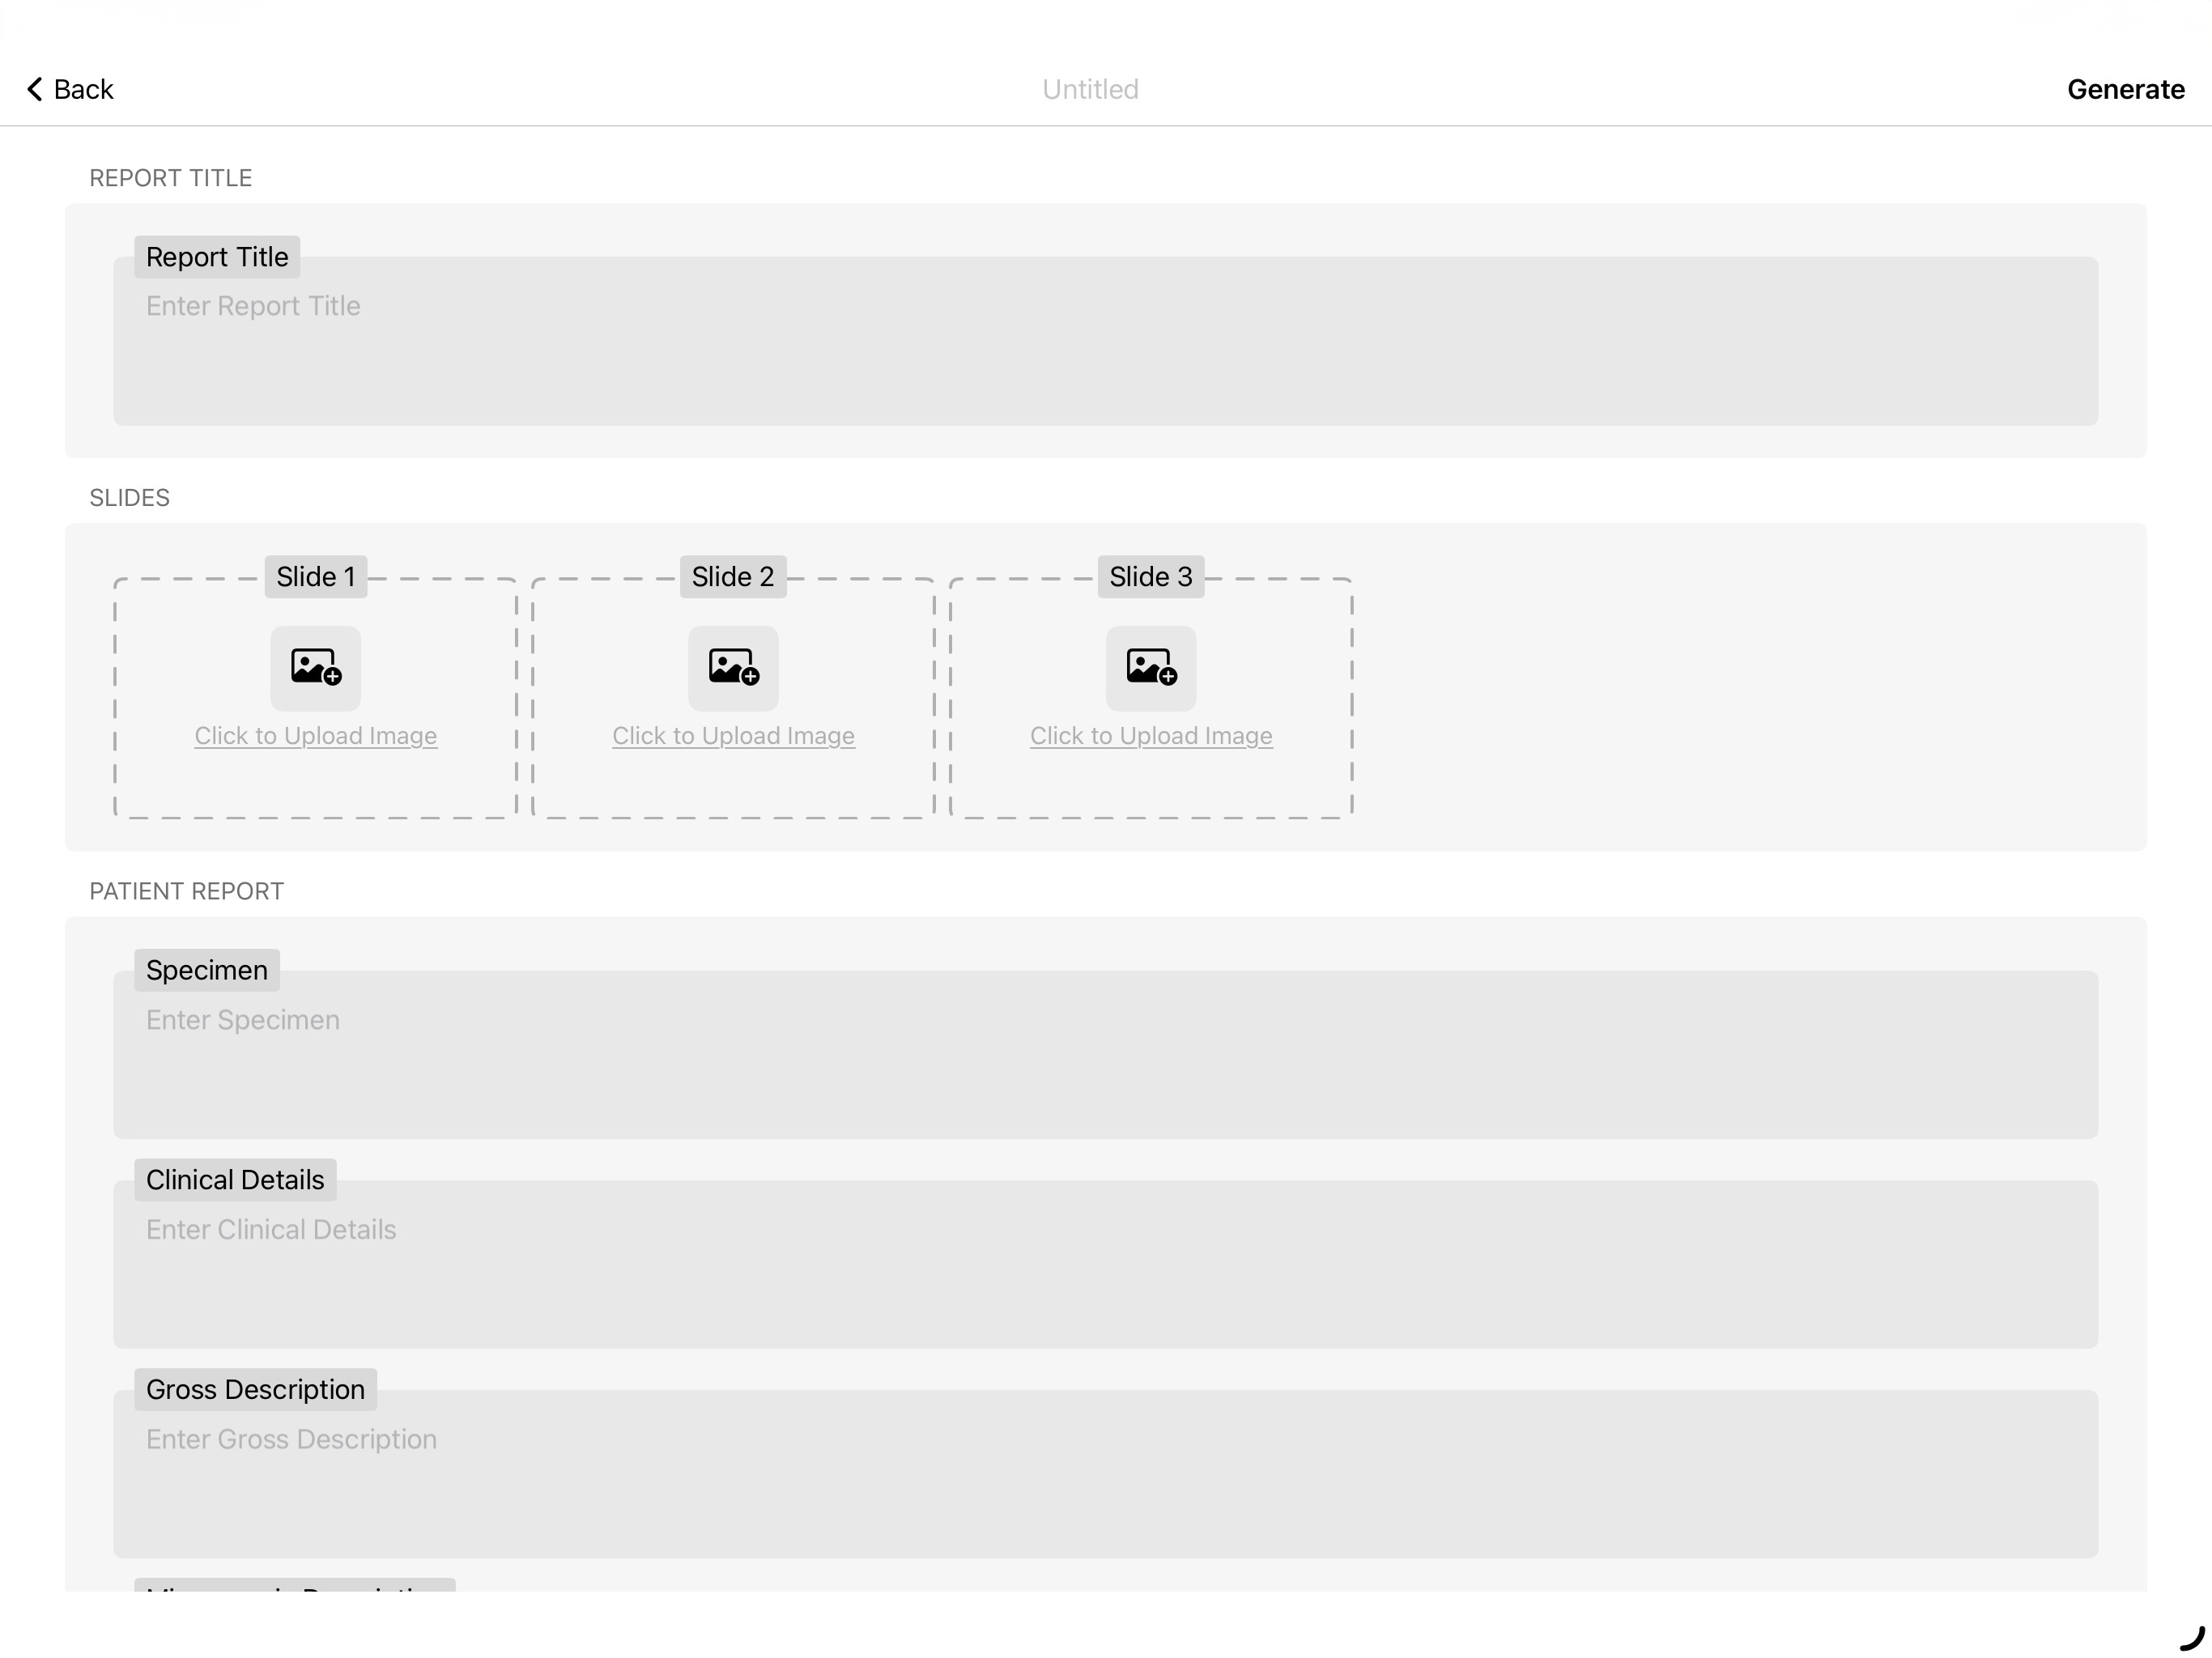
- At the top center is located the "Report Name" titled as "Untitled". Tap on the same to change the name of your Report.
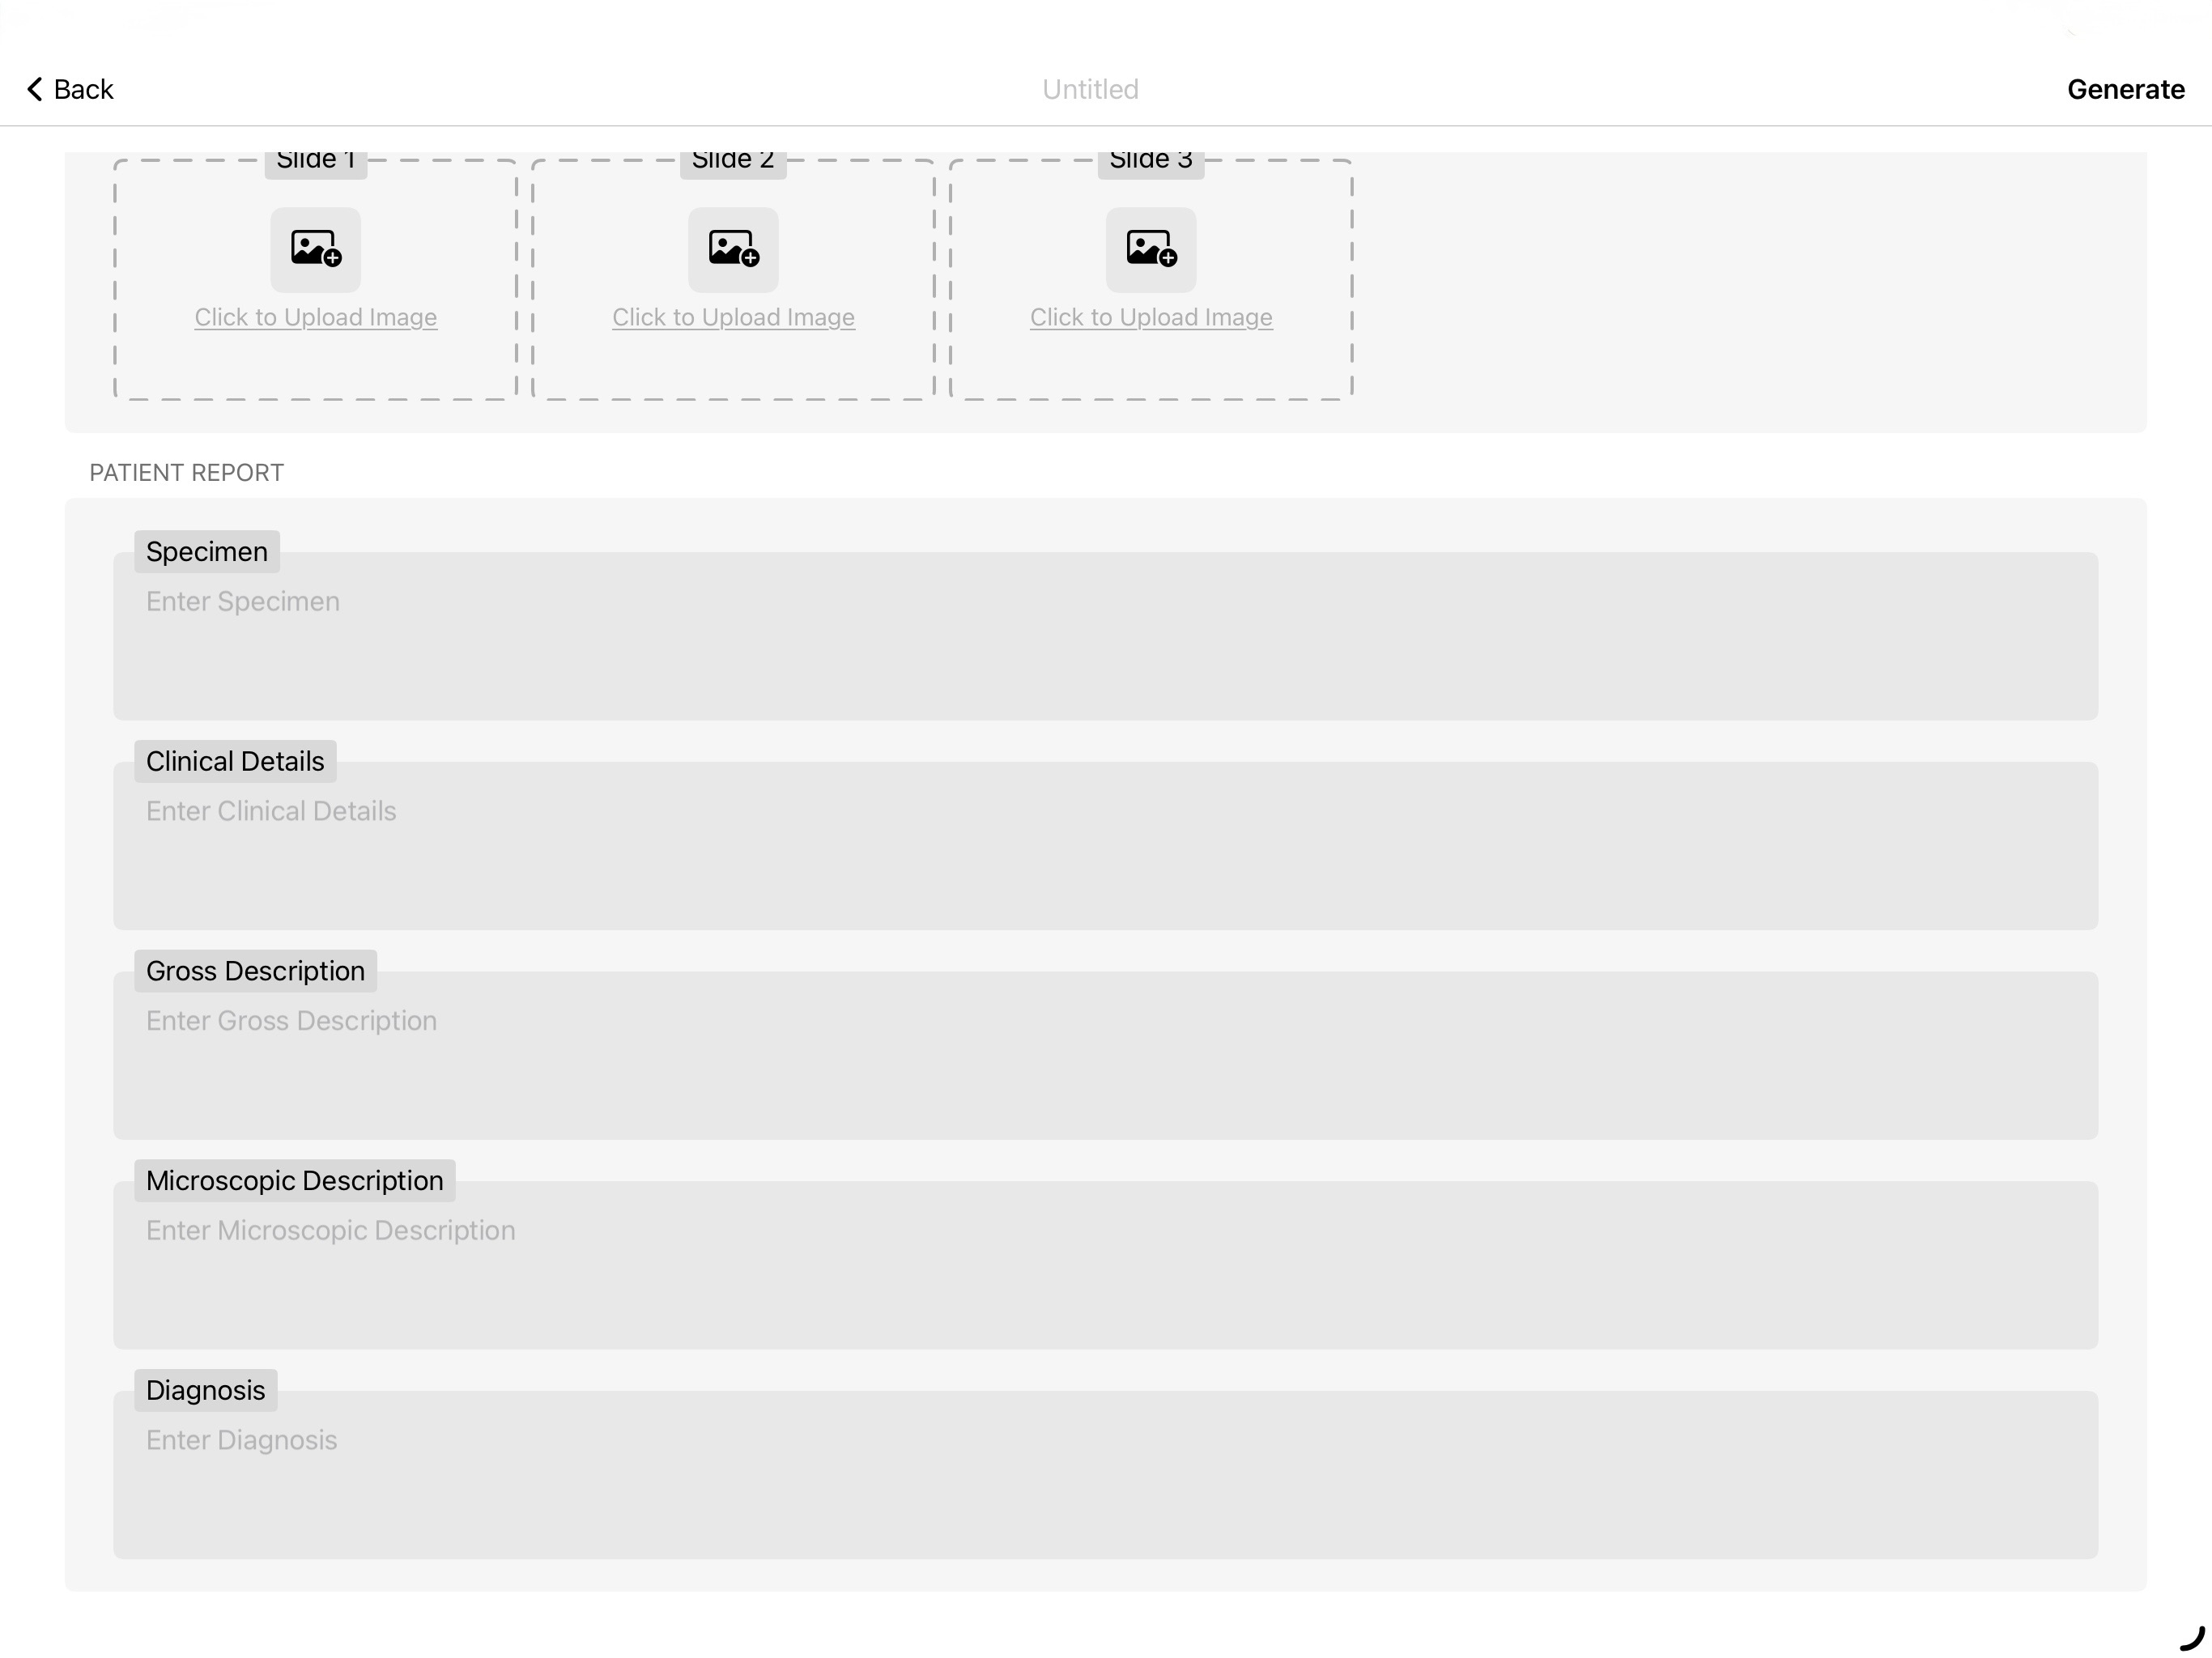
- Once the details and slides are added in tap on "Generate", on the top right corner to generate the report. (Figure 1.8)
|
Figure 10.5 |
Figure 10.5
|
|
Figure 10.5 |
Figure 10.5 |
Report Settings
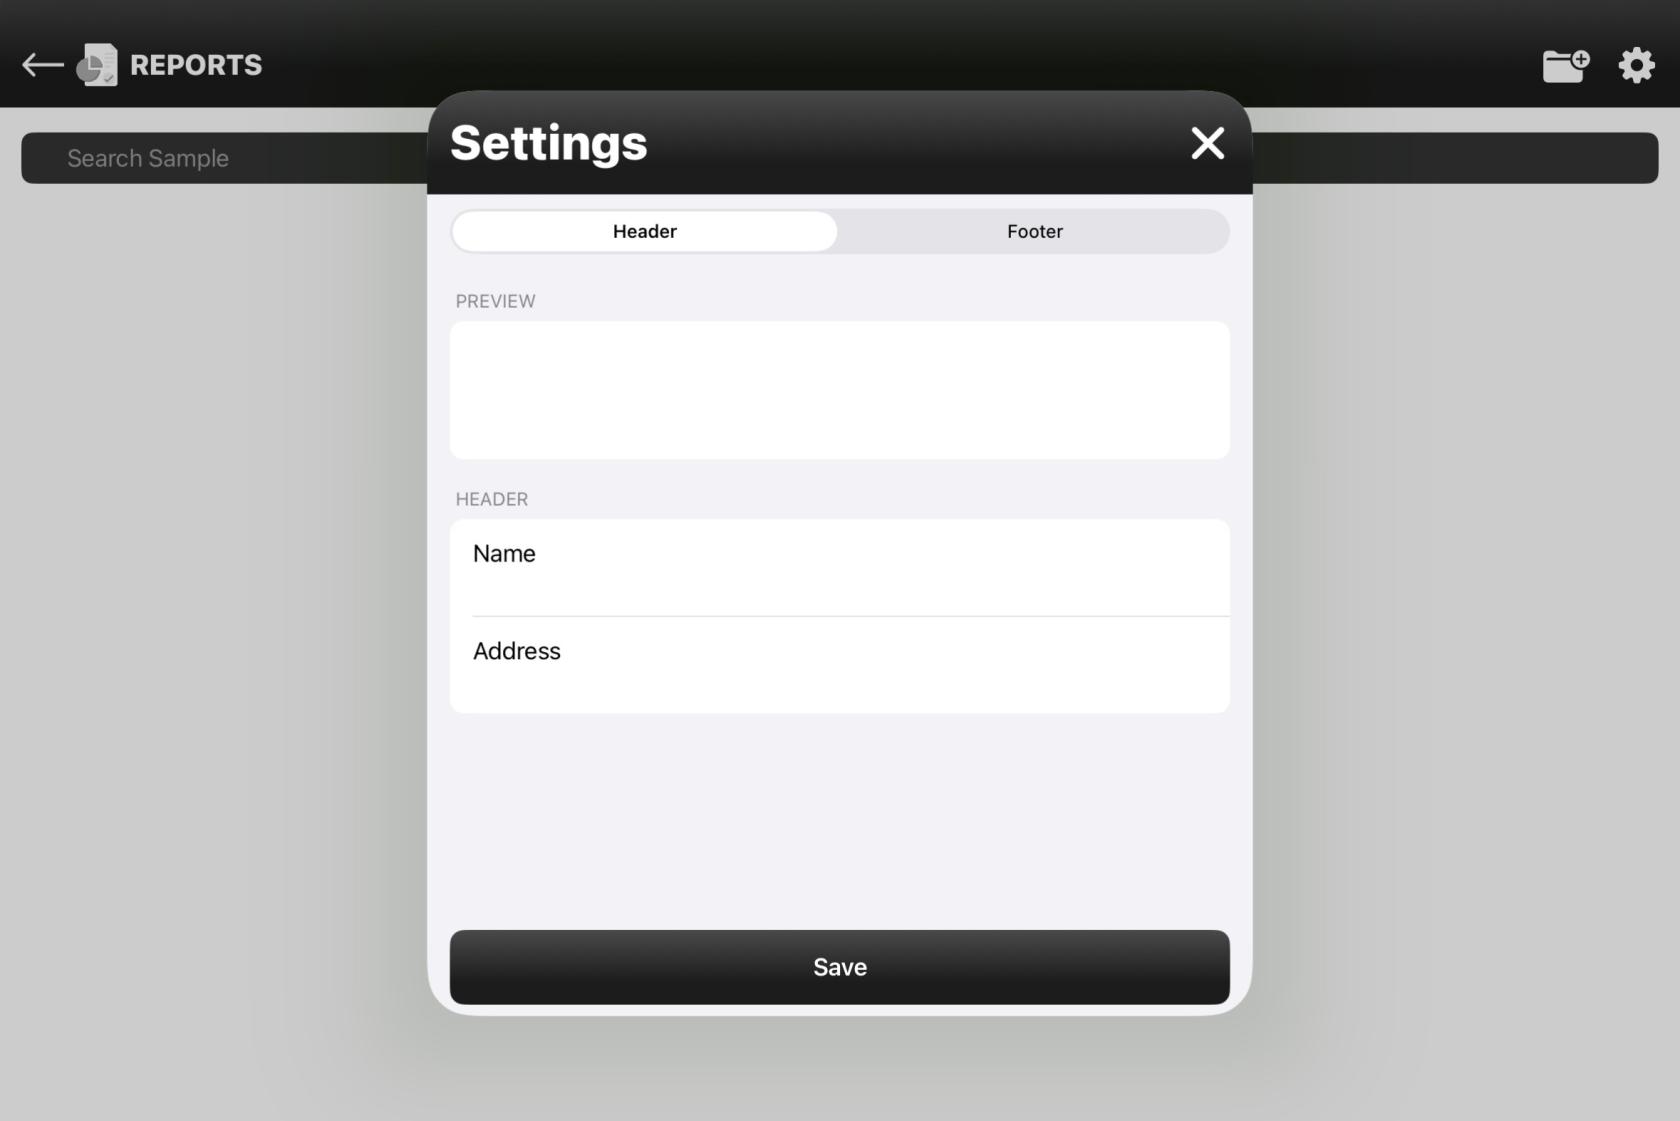
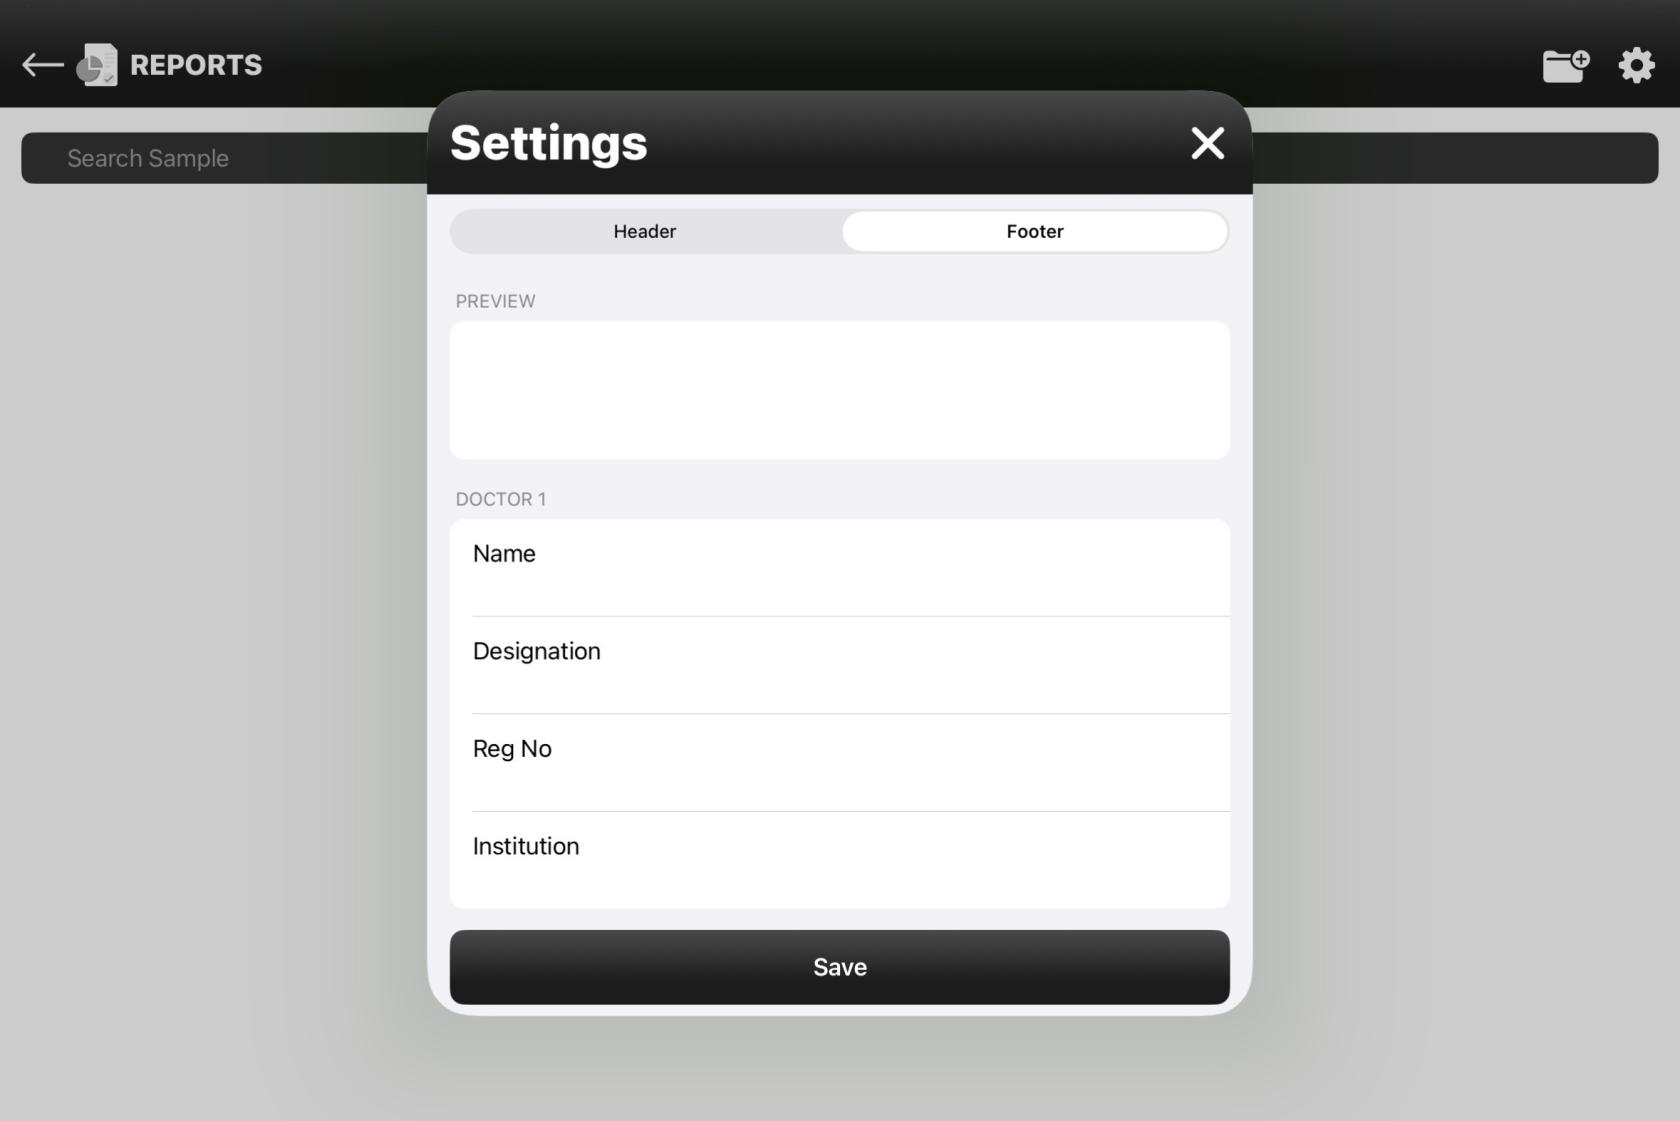
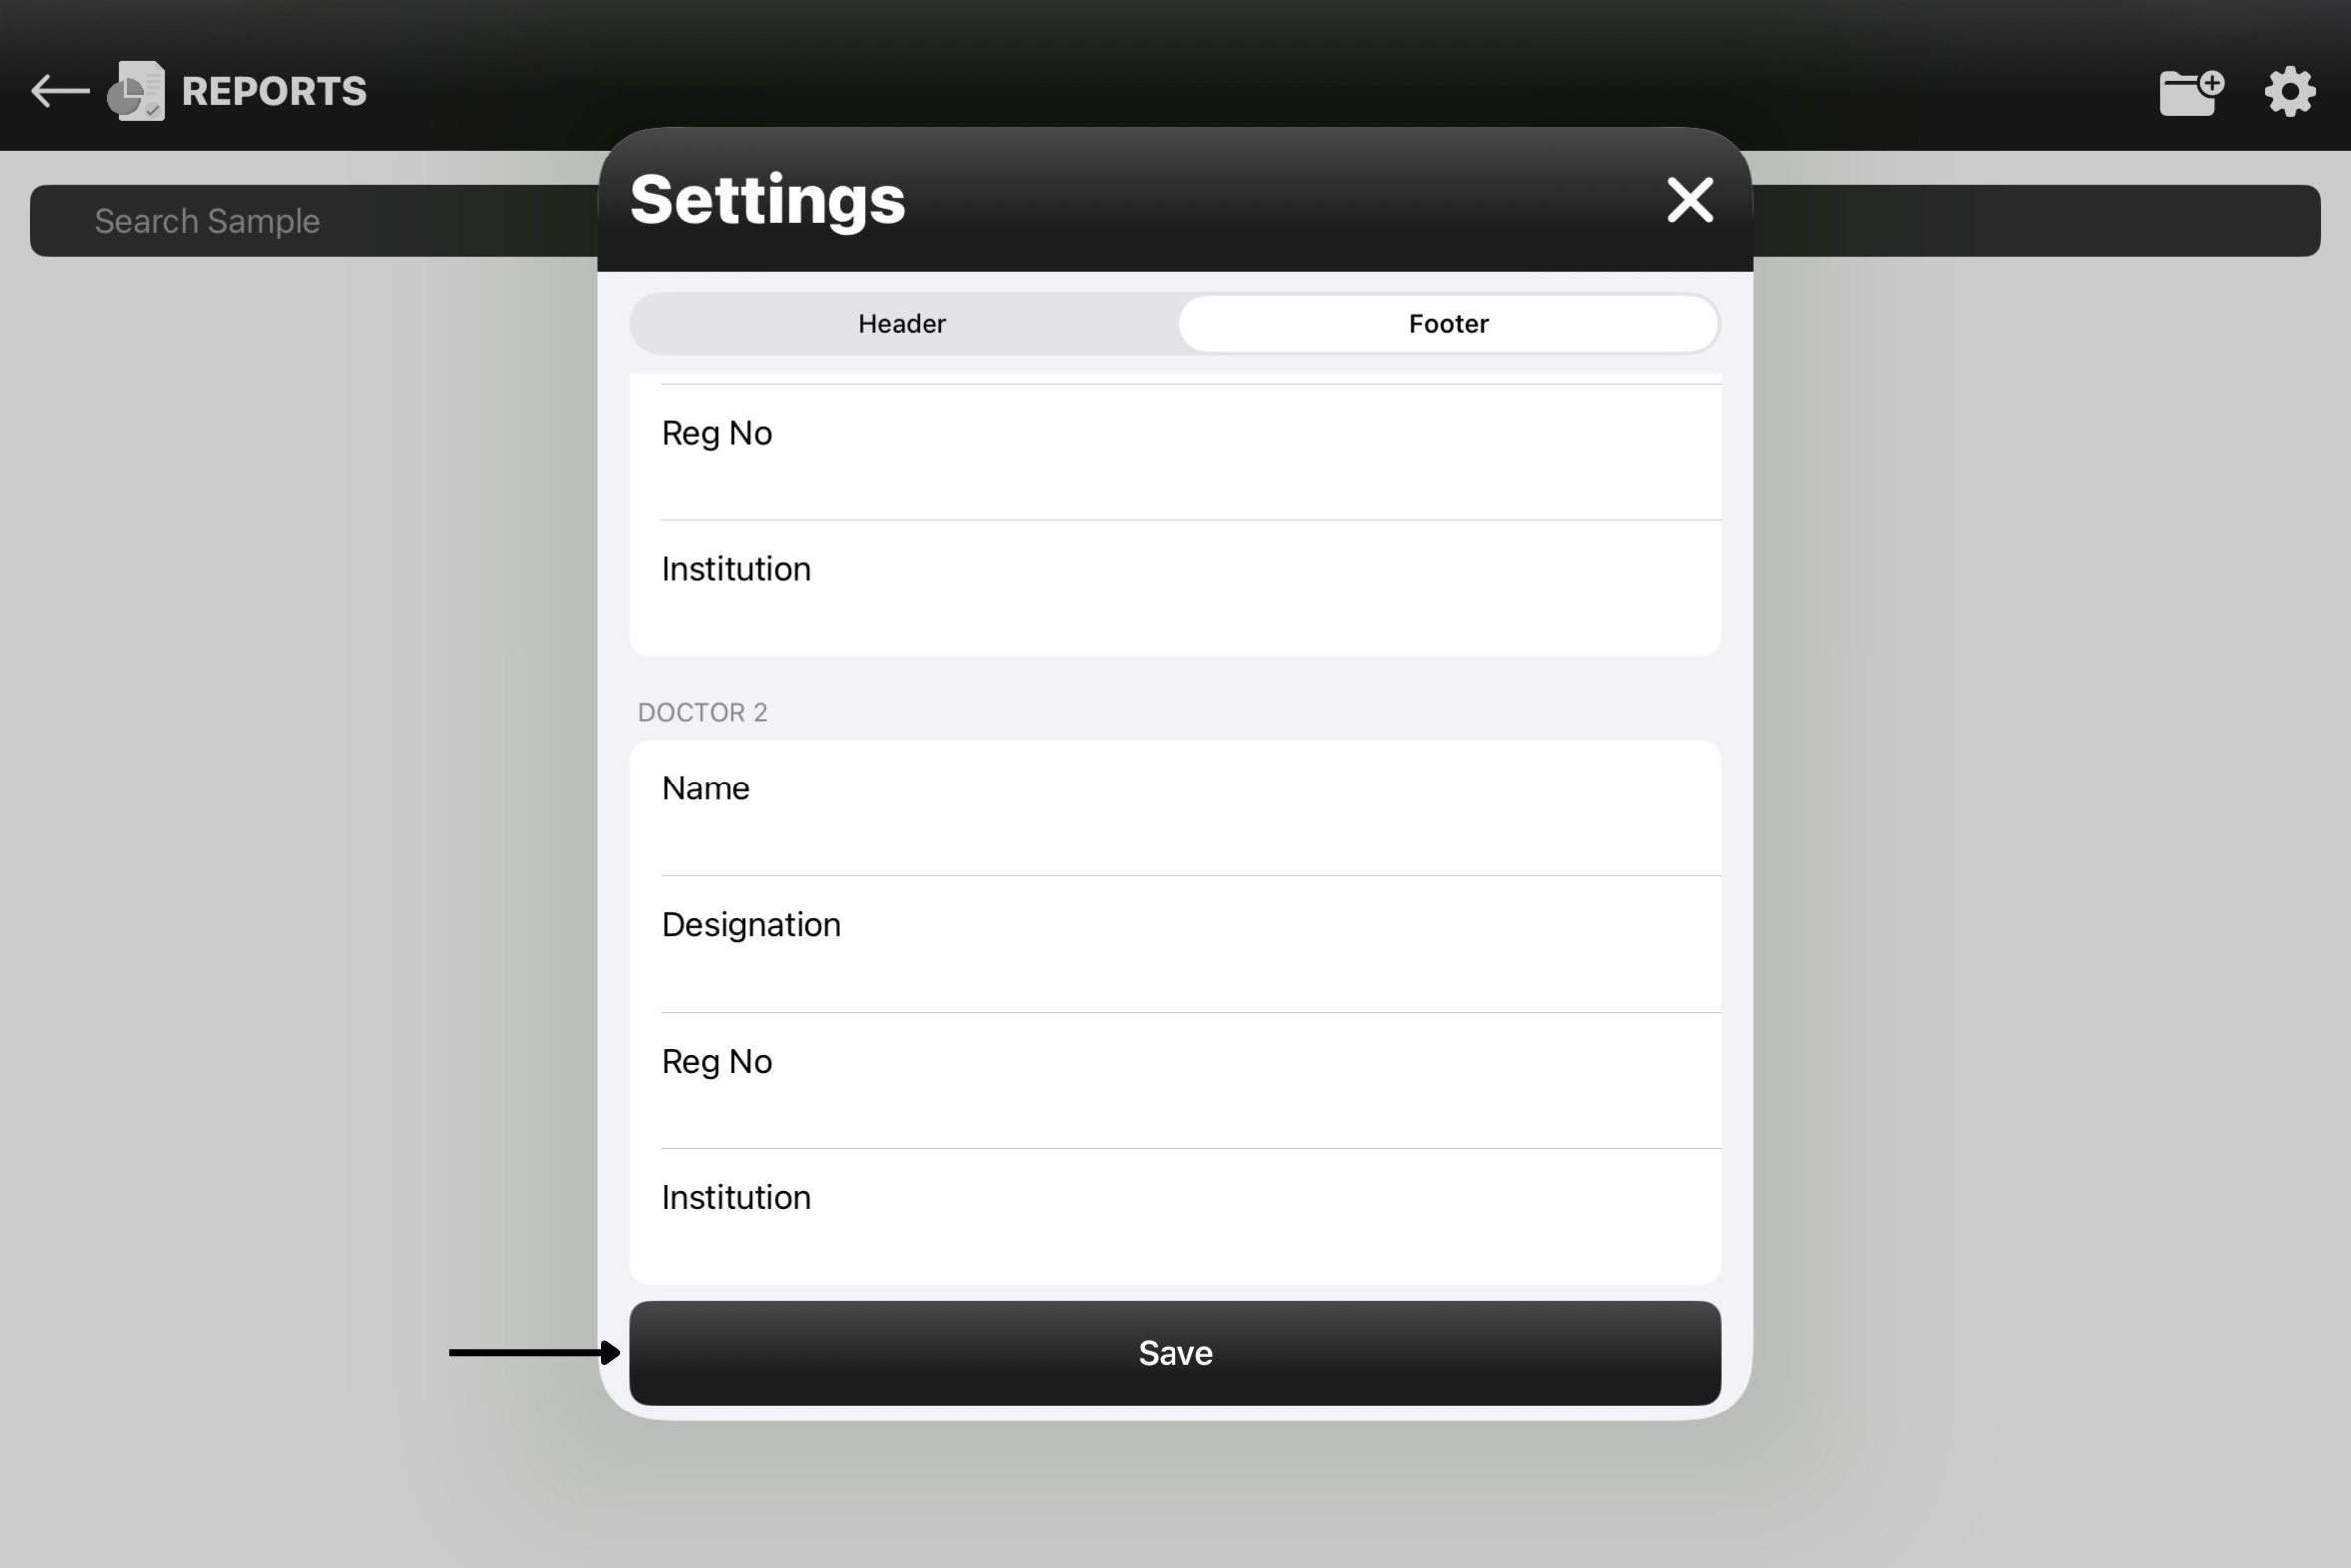
- The settings option has two features, the Header and the Footer for the report.
- Tap on the right of the heading subsection (e.g. Name) to add in the designated details.
- The details typed in the subsection will be shown at the top in the Preview column.
- These details will be added in the final report as Header and Footer.
- Once the Header and Footer details are added in tap on Save to save the details.
|
|
|
|
Figure 10.7 Footer |
Figure 10.8 Footer |
No comments to display
No comments to display