
Report
Create Report

Figure 1
Following are the steps to "Create a Report" -
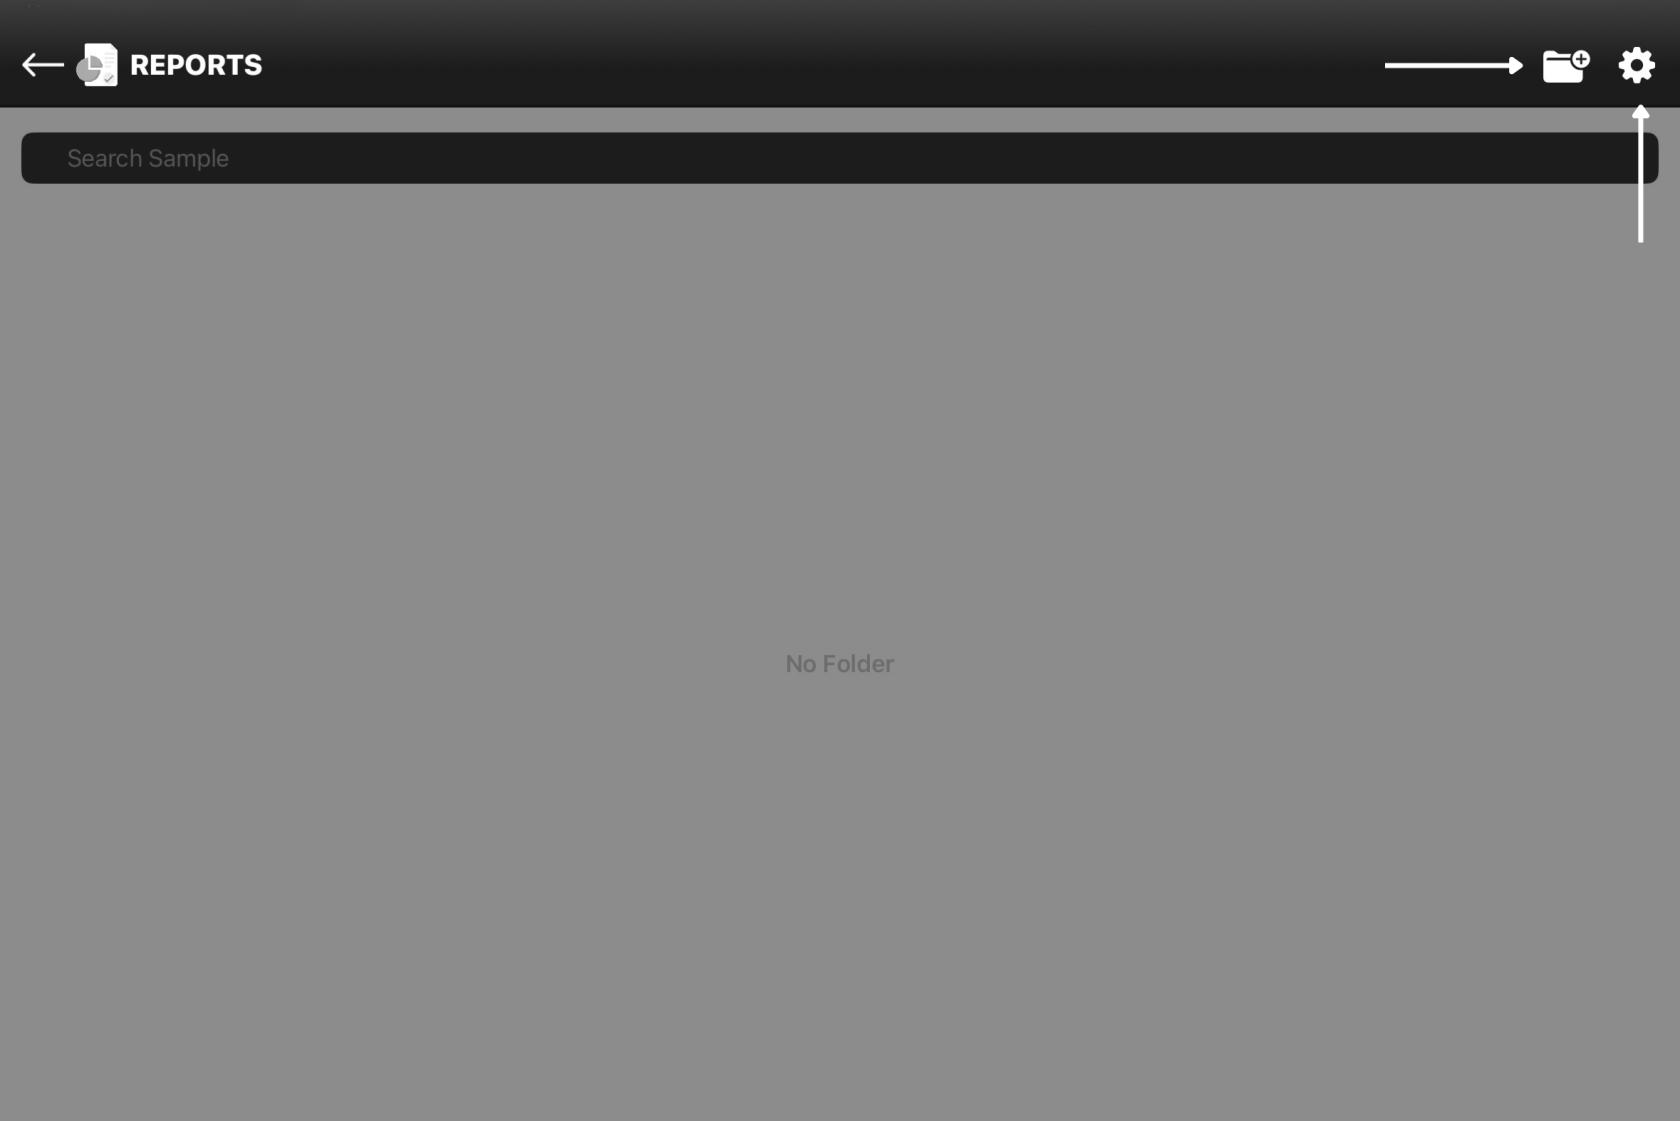
Once you tap on the the report icon at the top right corner,
Figure 1
1. Tap the Create Folder icon (folder with a + sign).
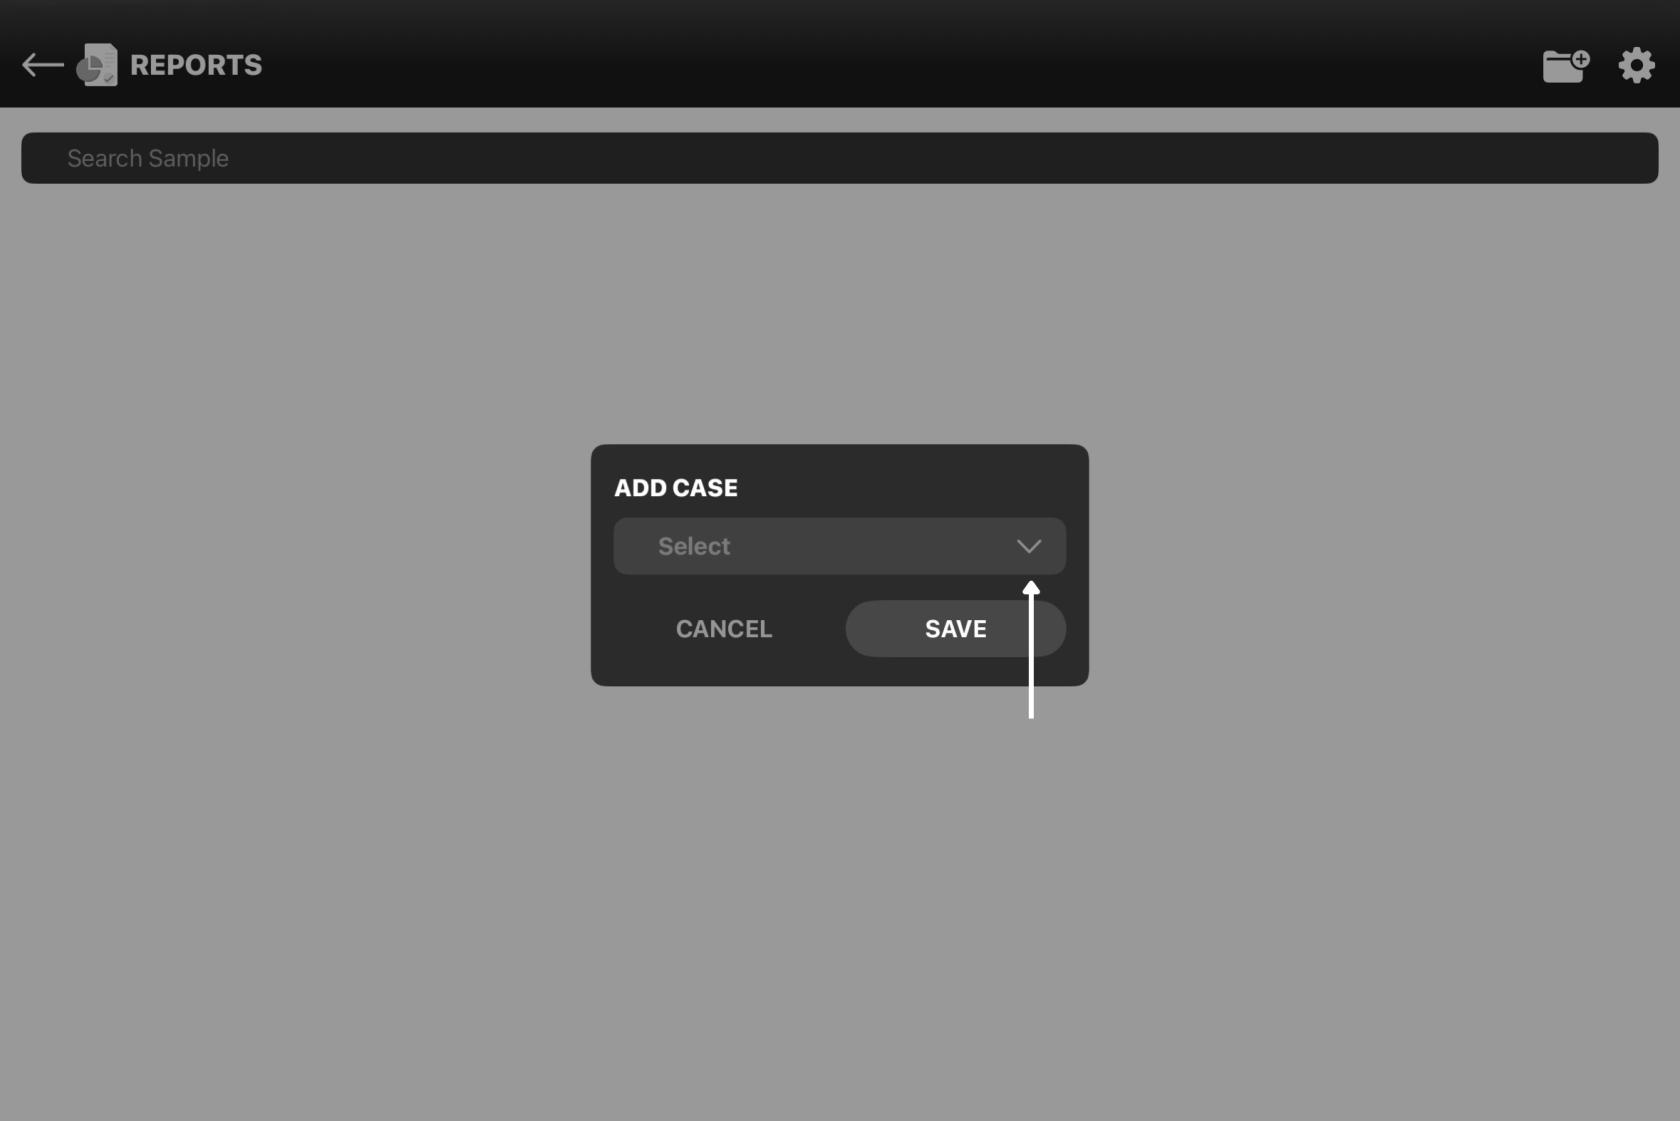
2. An Add Case dialog appears. Tap on the the dropdown button.
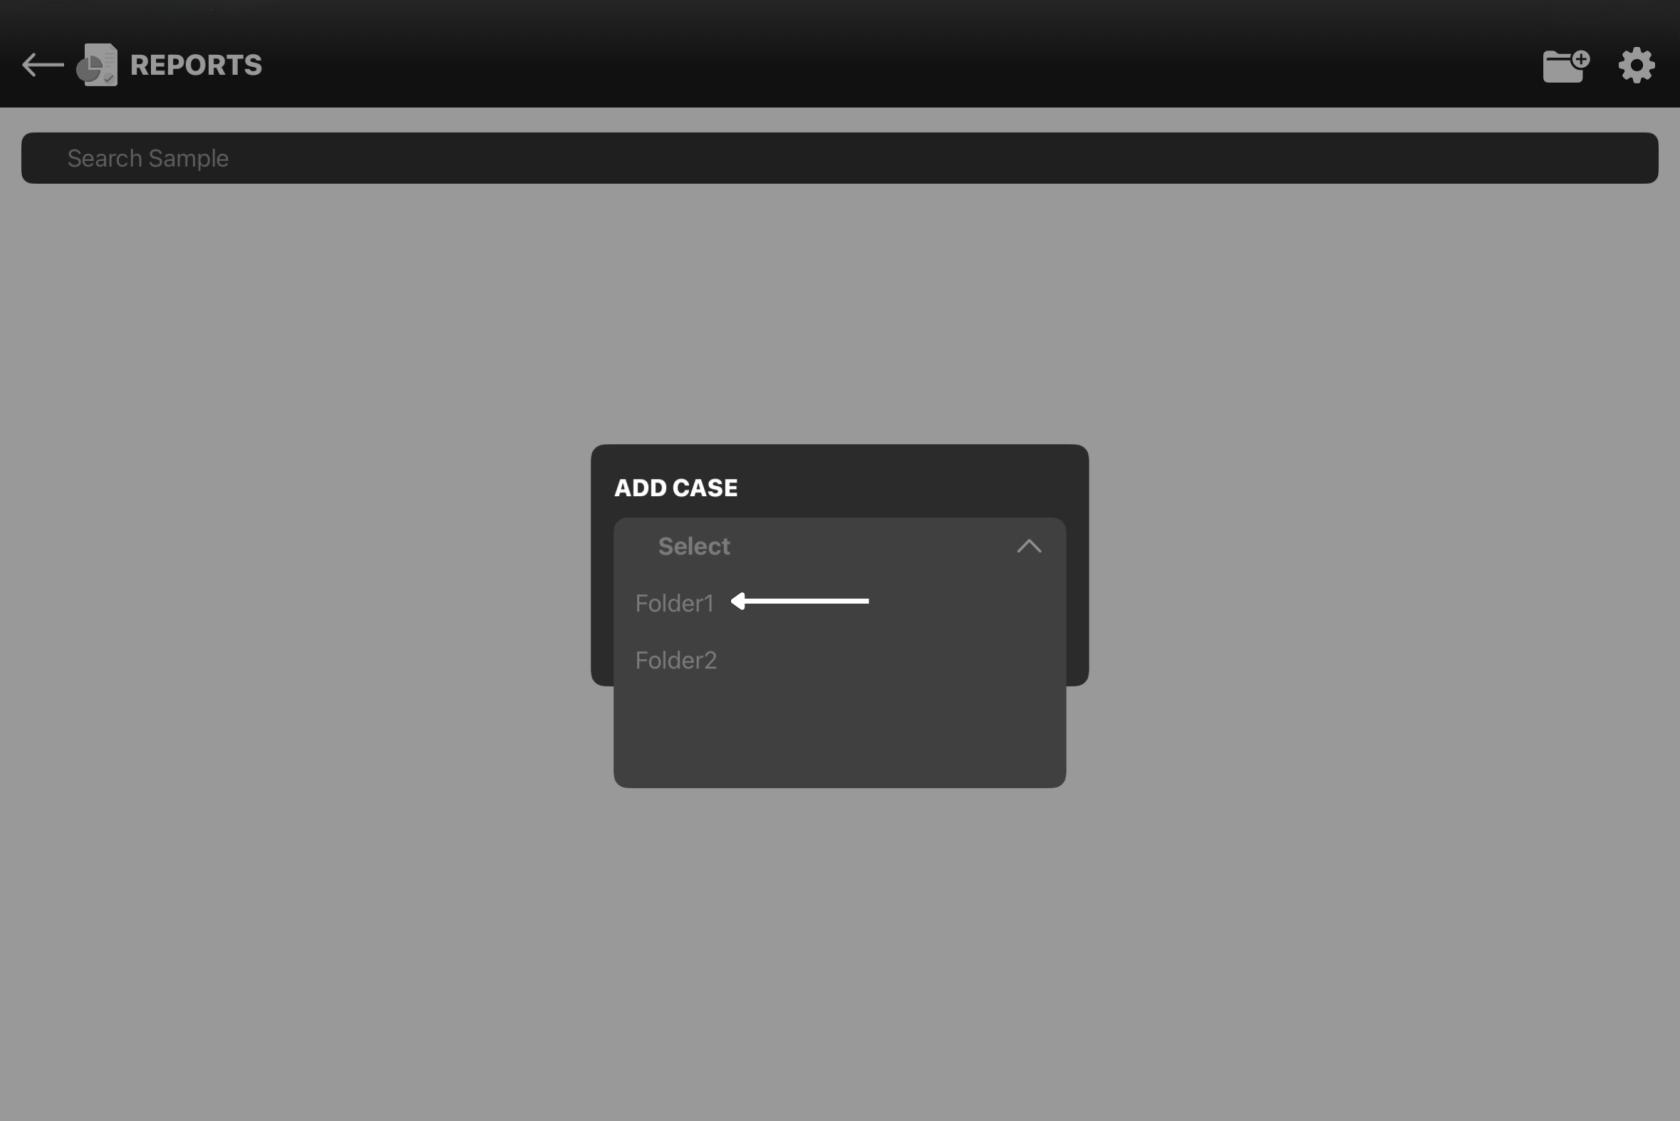
3. The dropdown gives a list of all the folders saved or created on the dashboard. Select the folder you wanna add and tap Save (Figure 2.4). The selected folder appears on the screen.
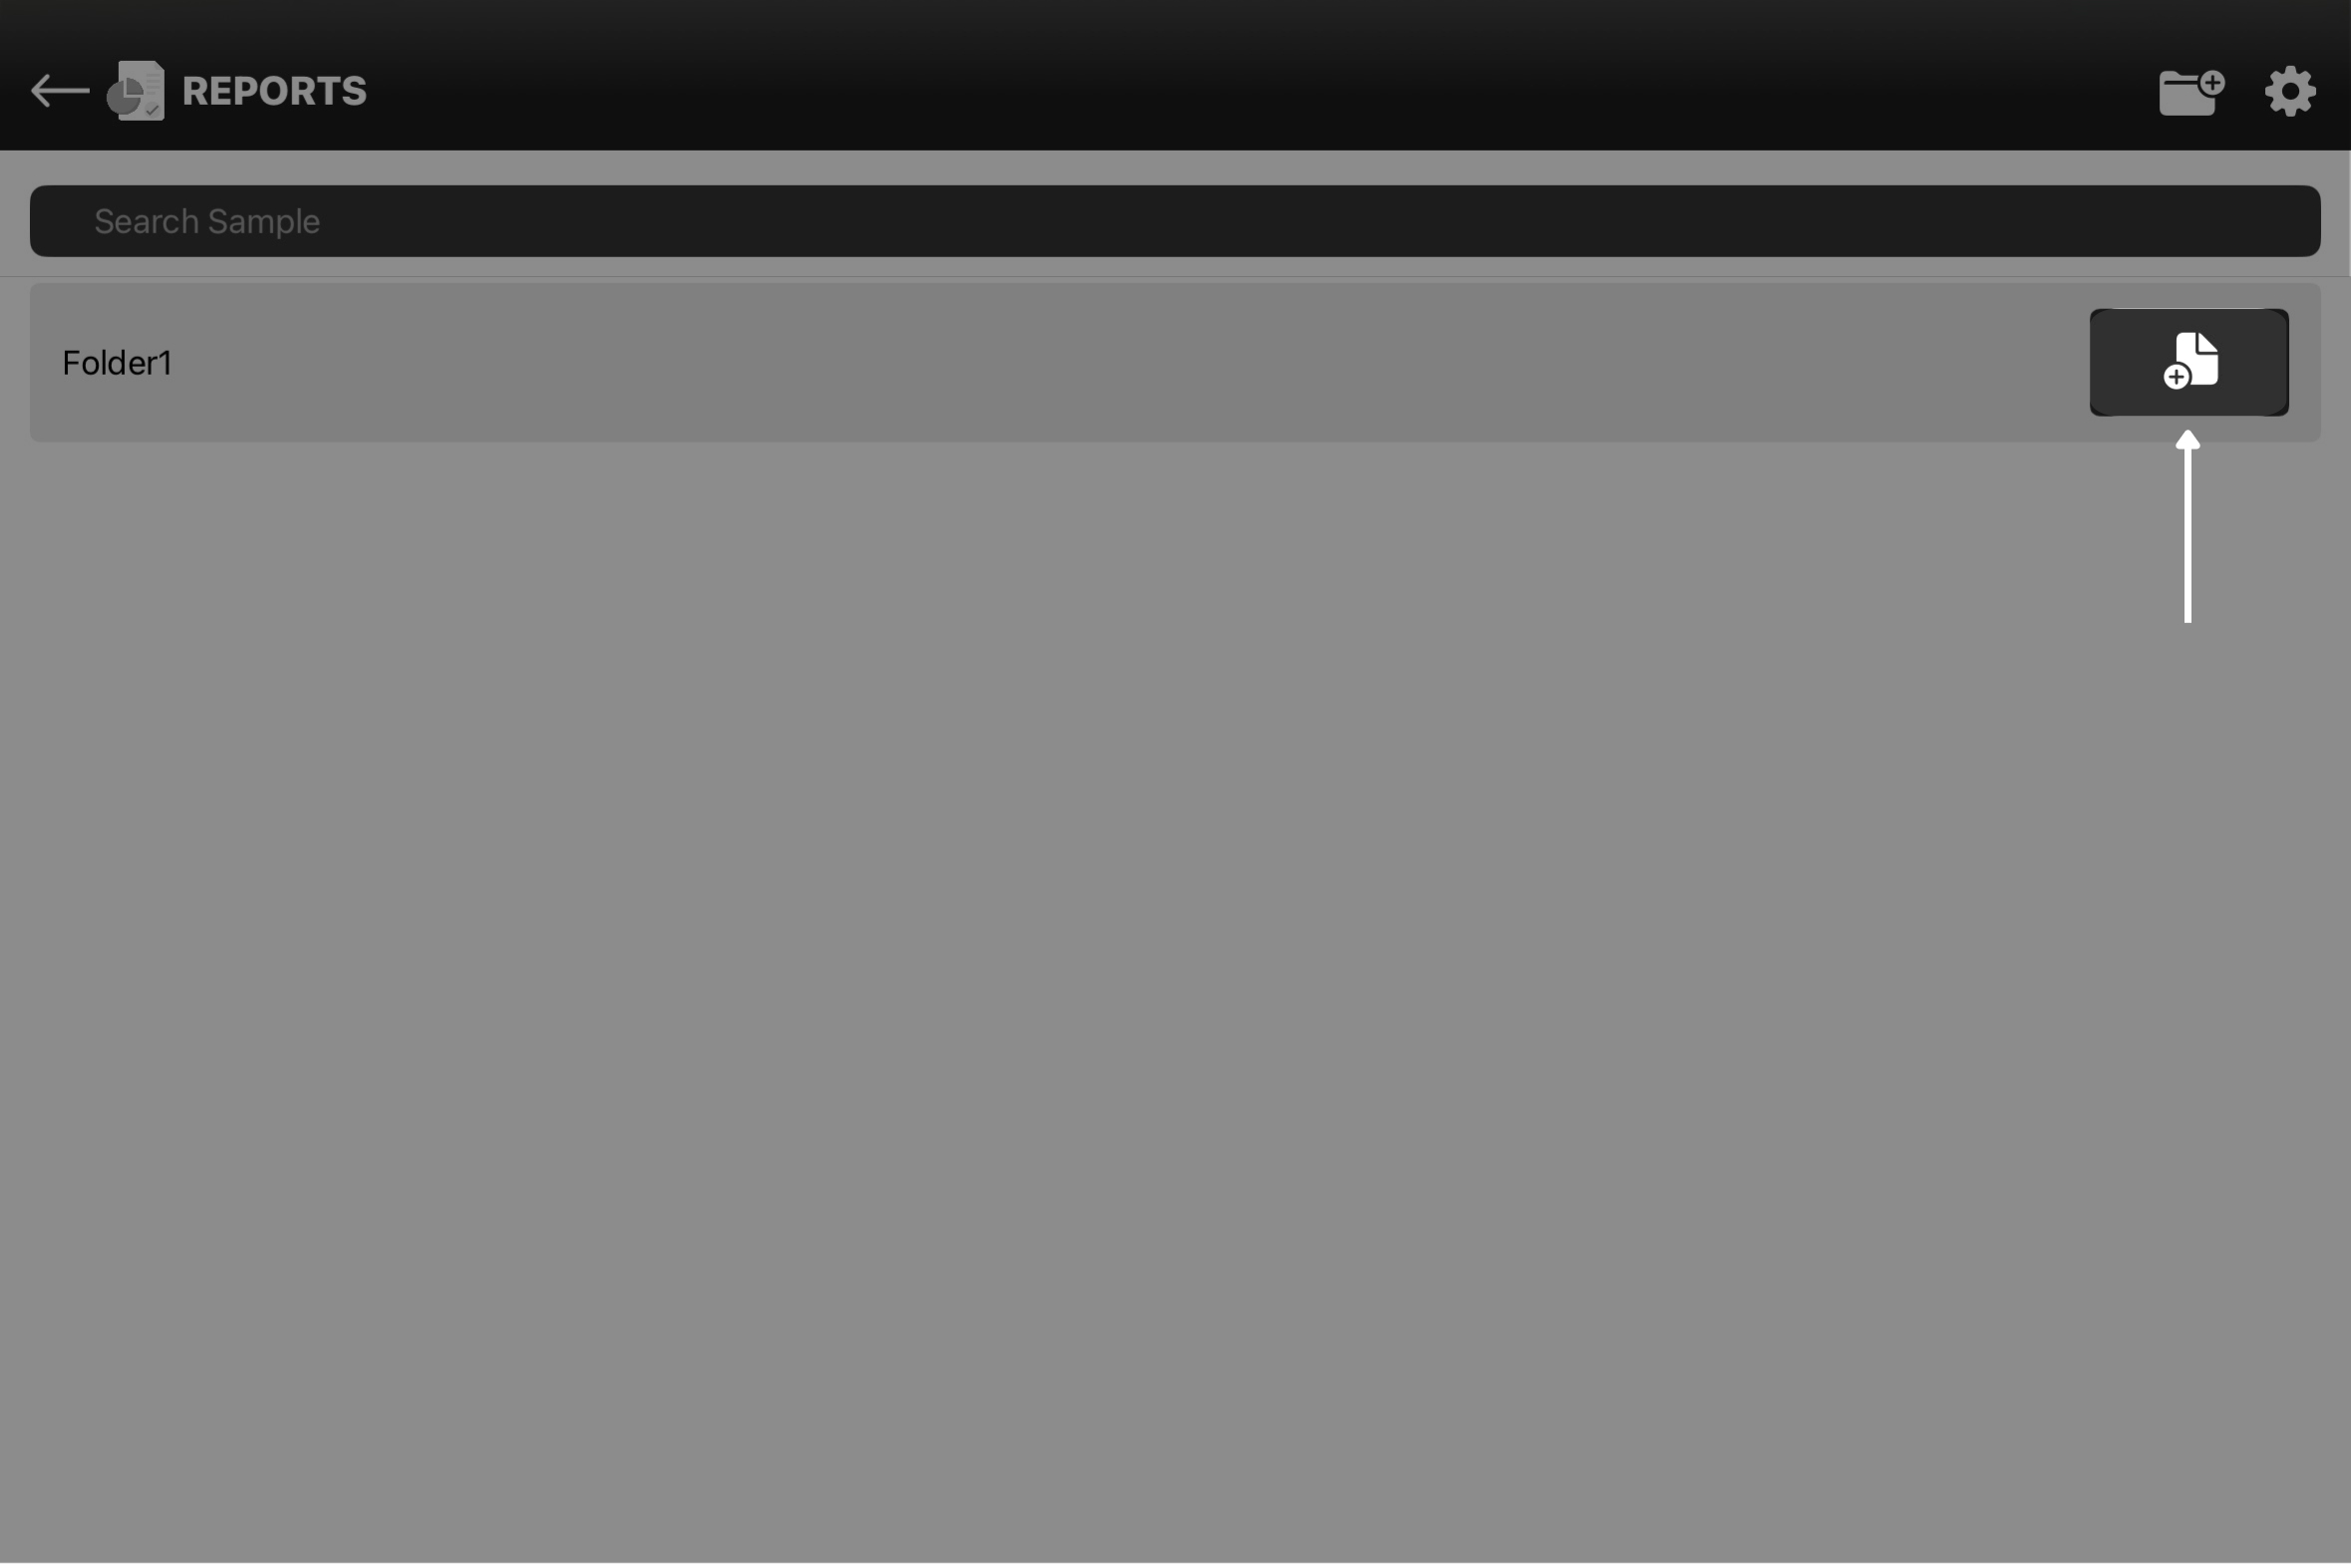
4. If the folder does not appear, swipe down on the grid to refresh.
|
Figure 1.2 |
Figure 1.3 |
|
Figure 1.4 |
Figure 1.5 |
Generate Report
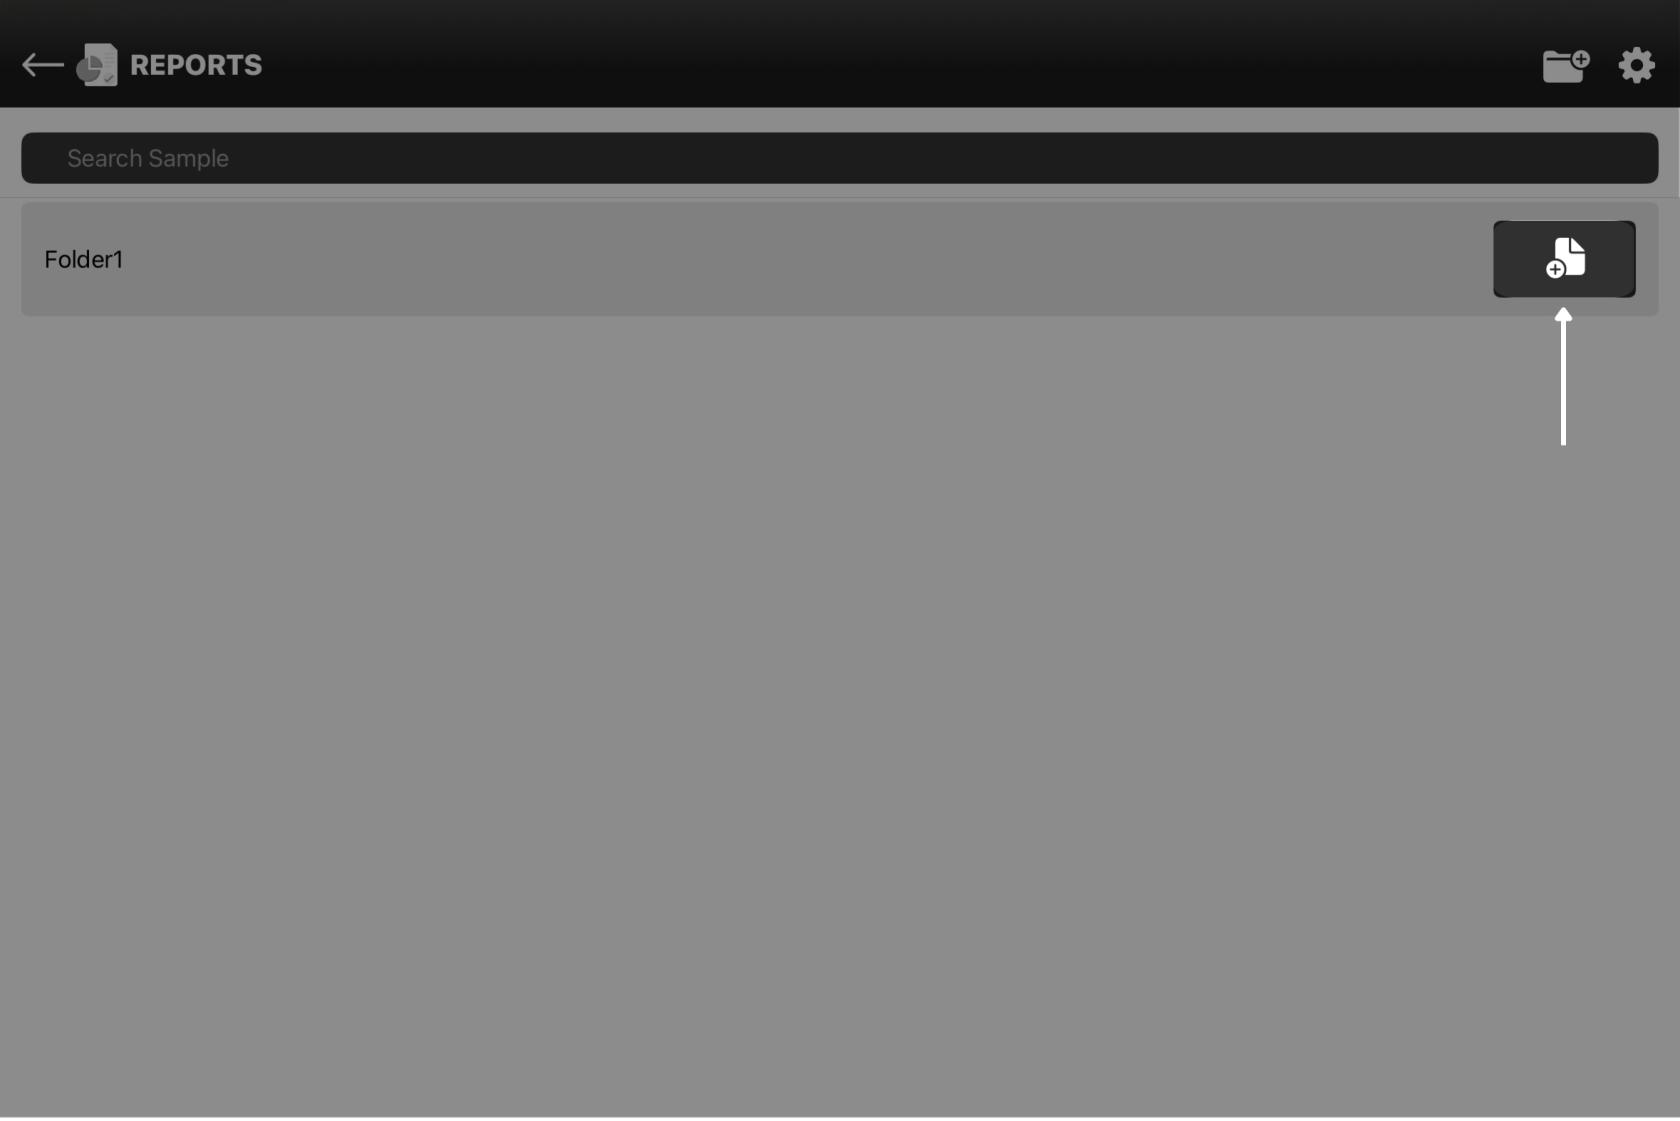
- 1. The new folder appears on the Report Page.
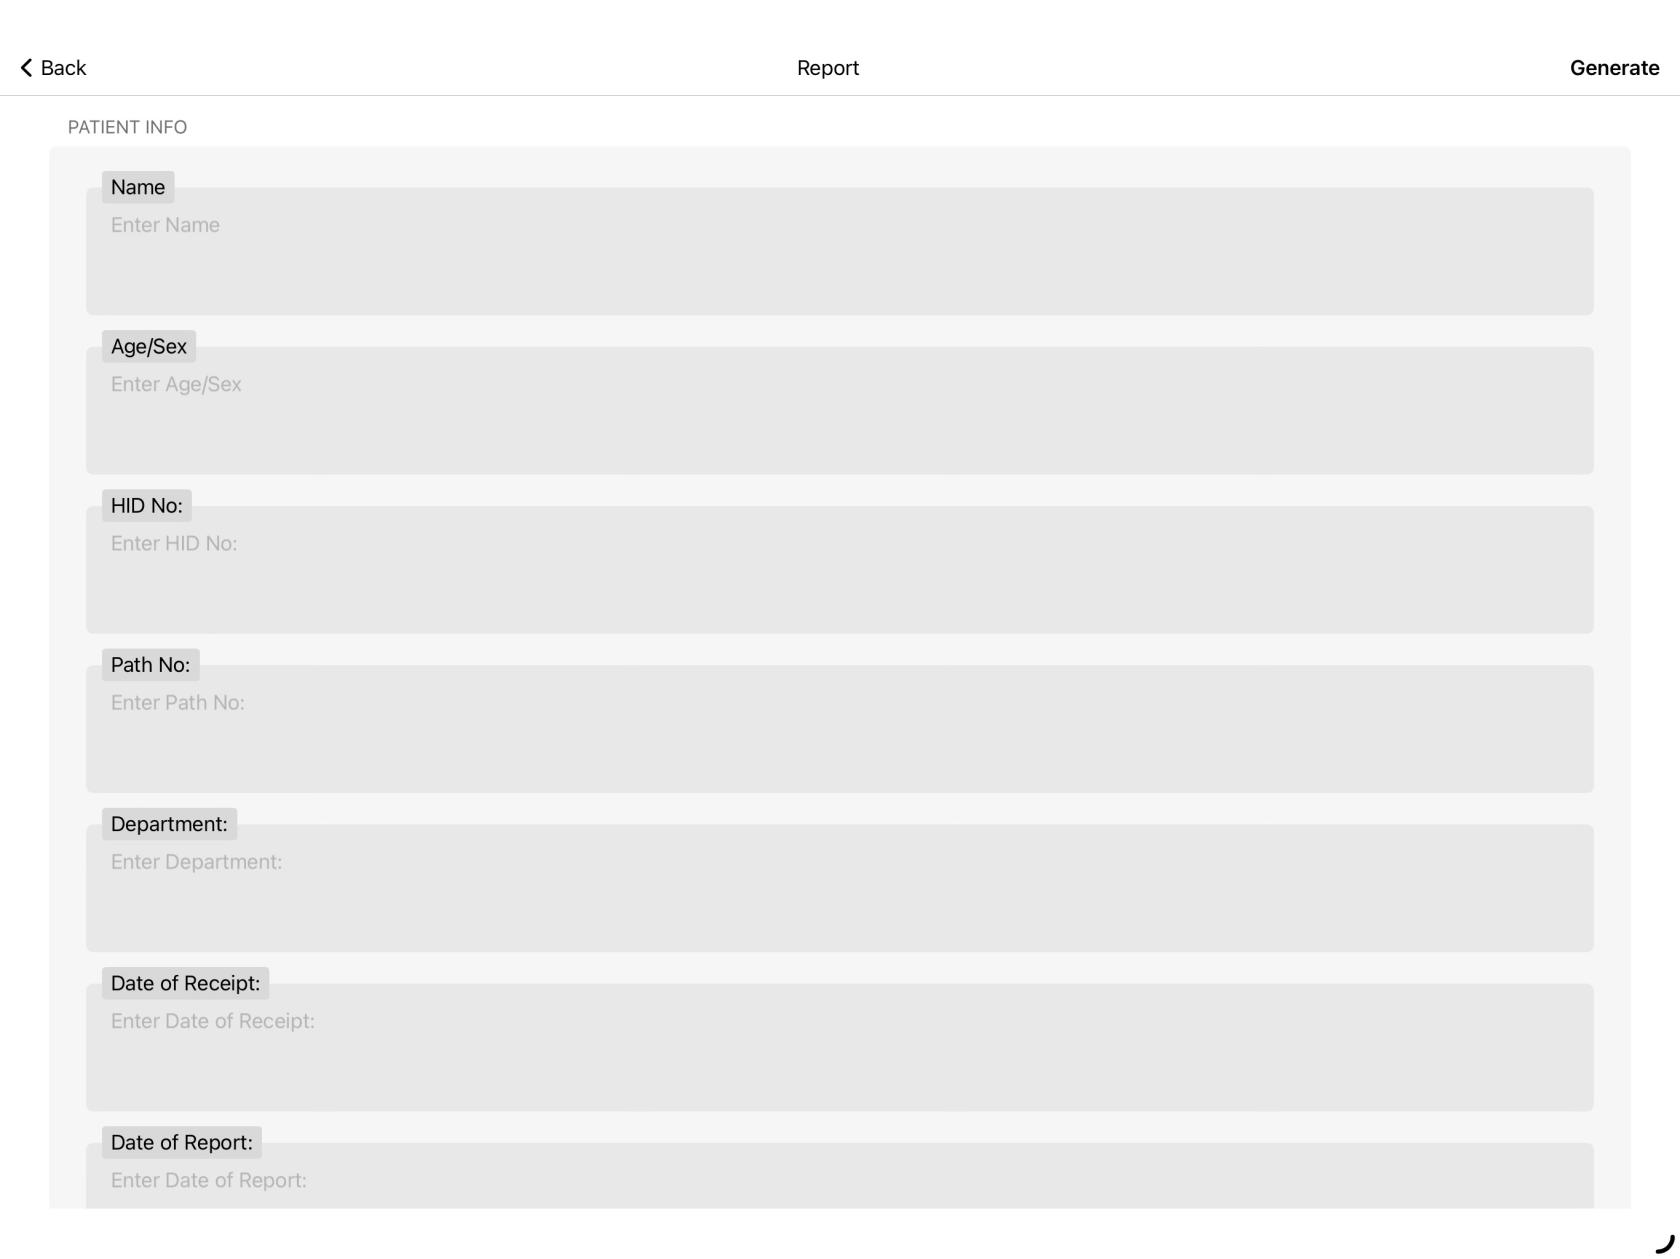
Tap on the icon located at the extreme right (folder with a + sign) - Add in details to generate your report (Figure 1.5).
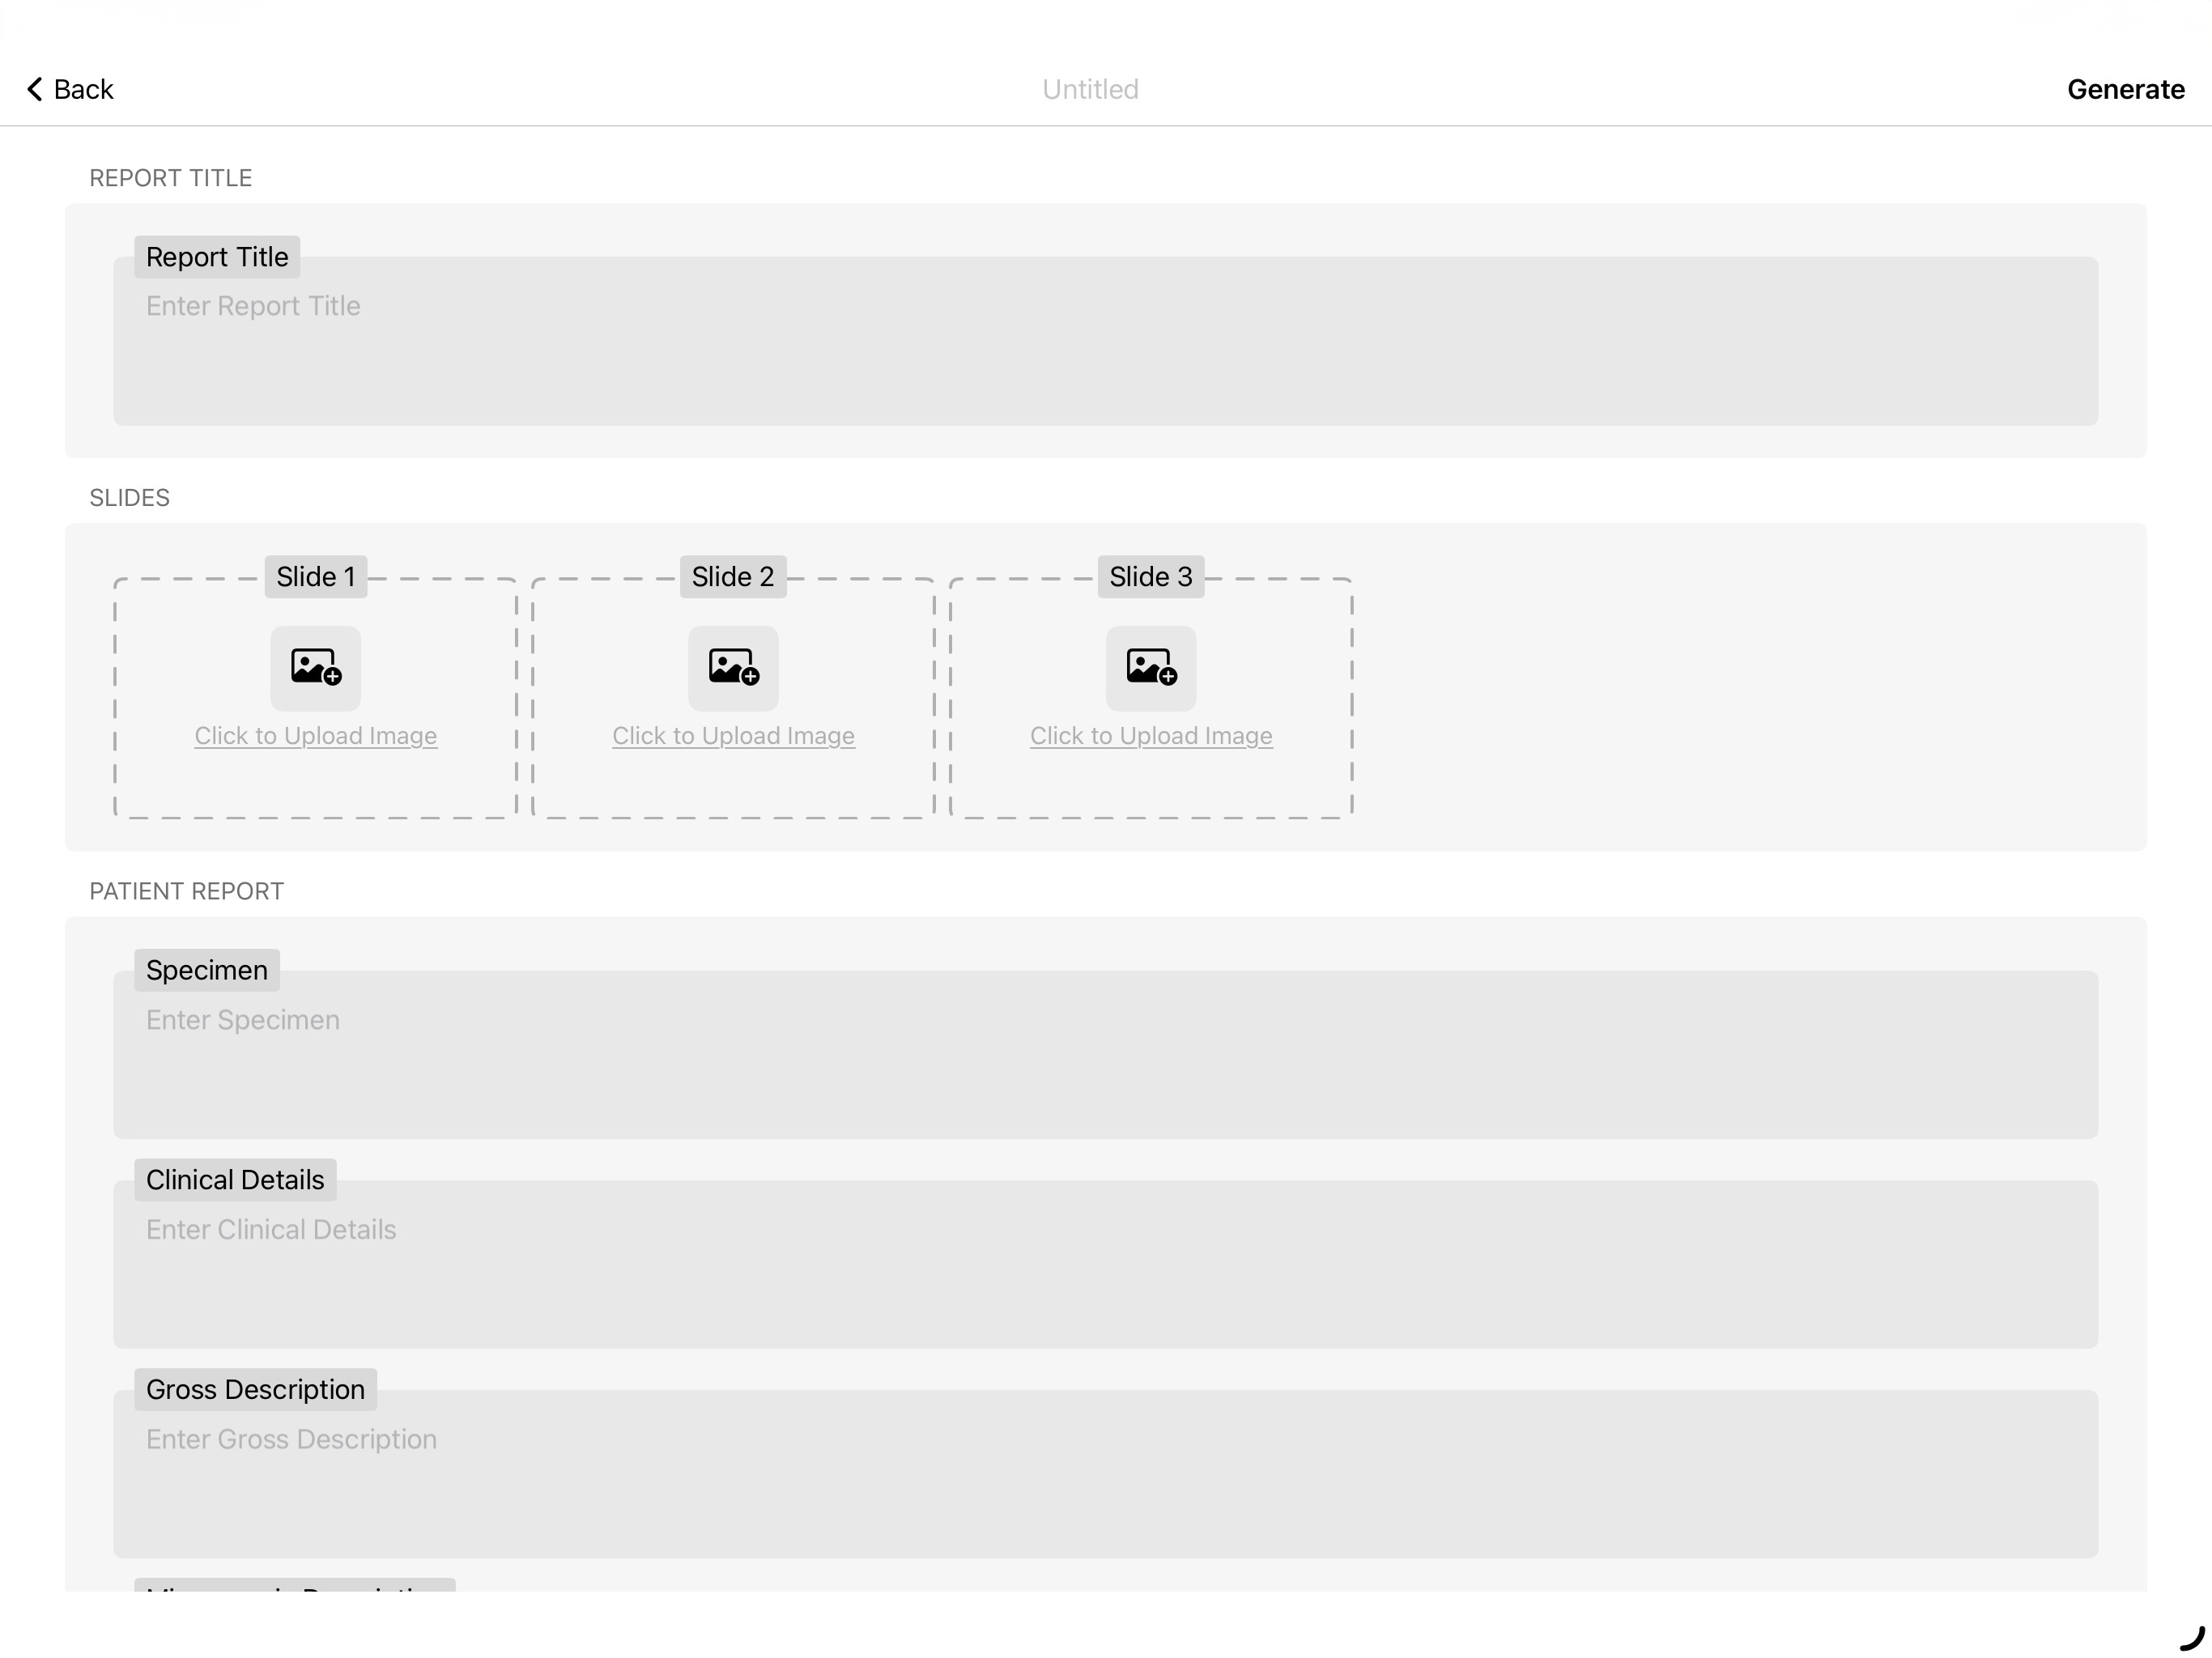
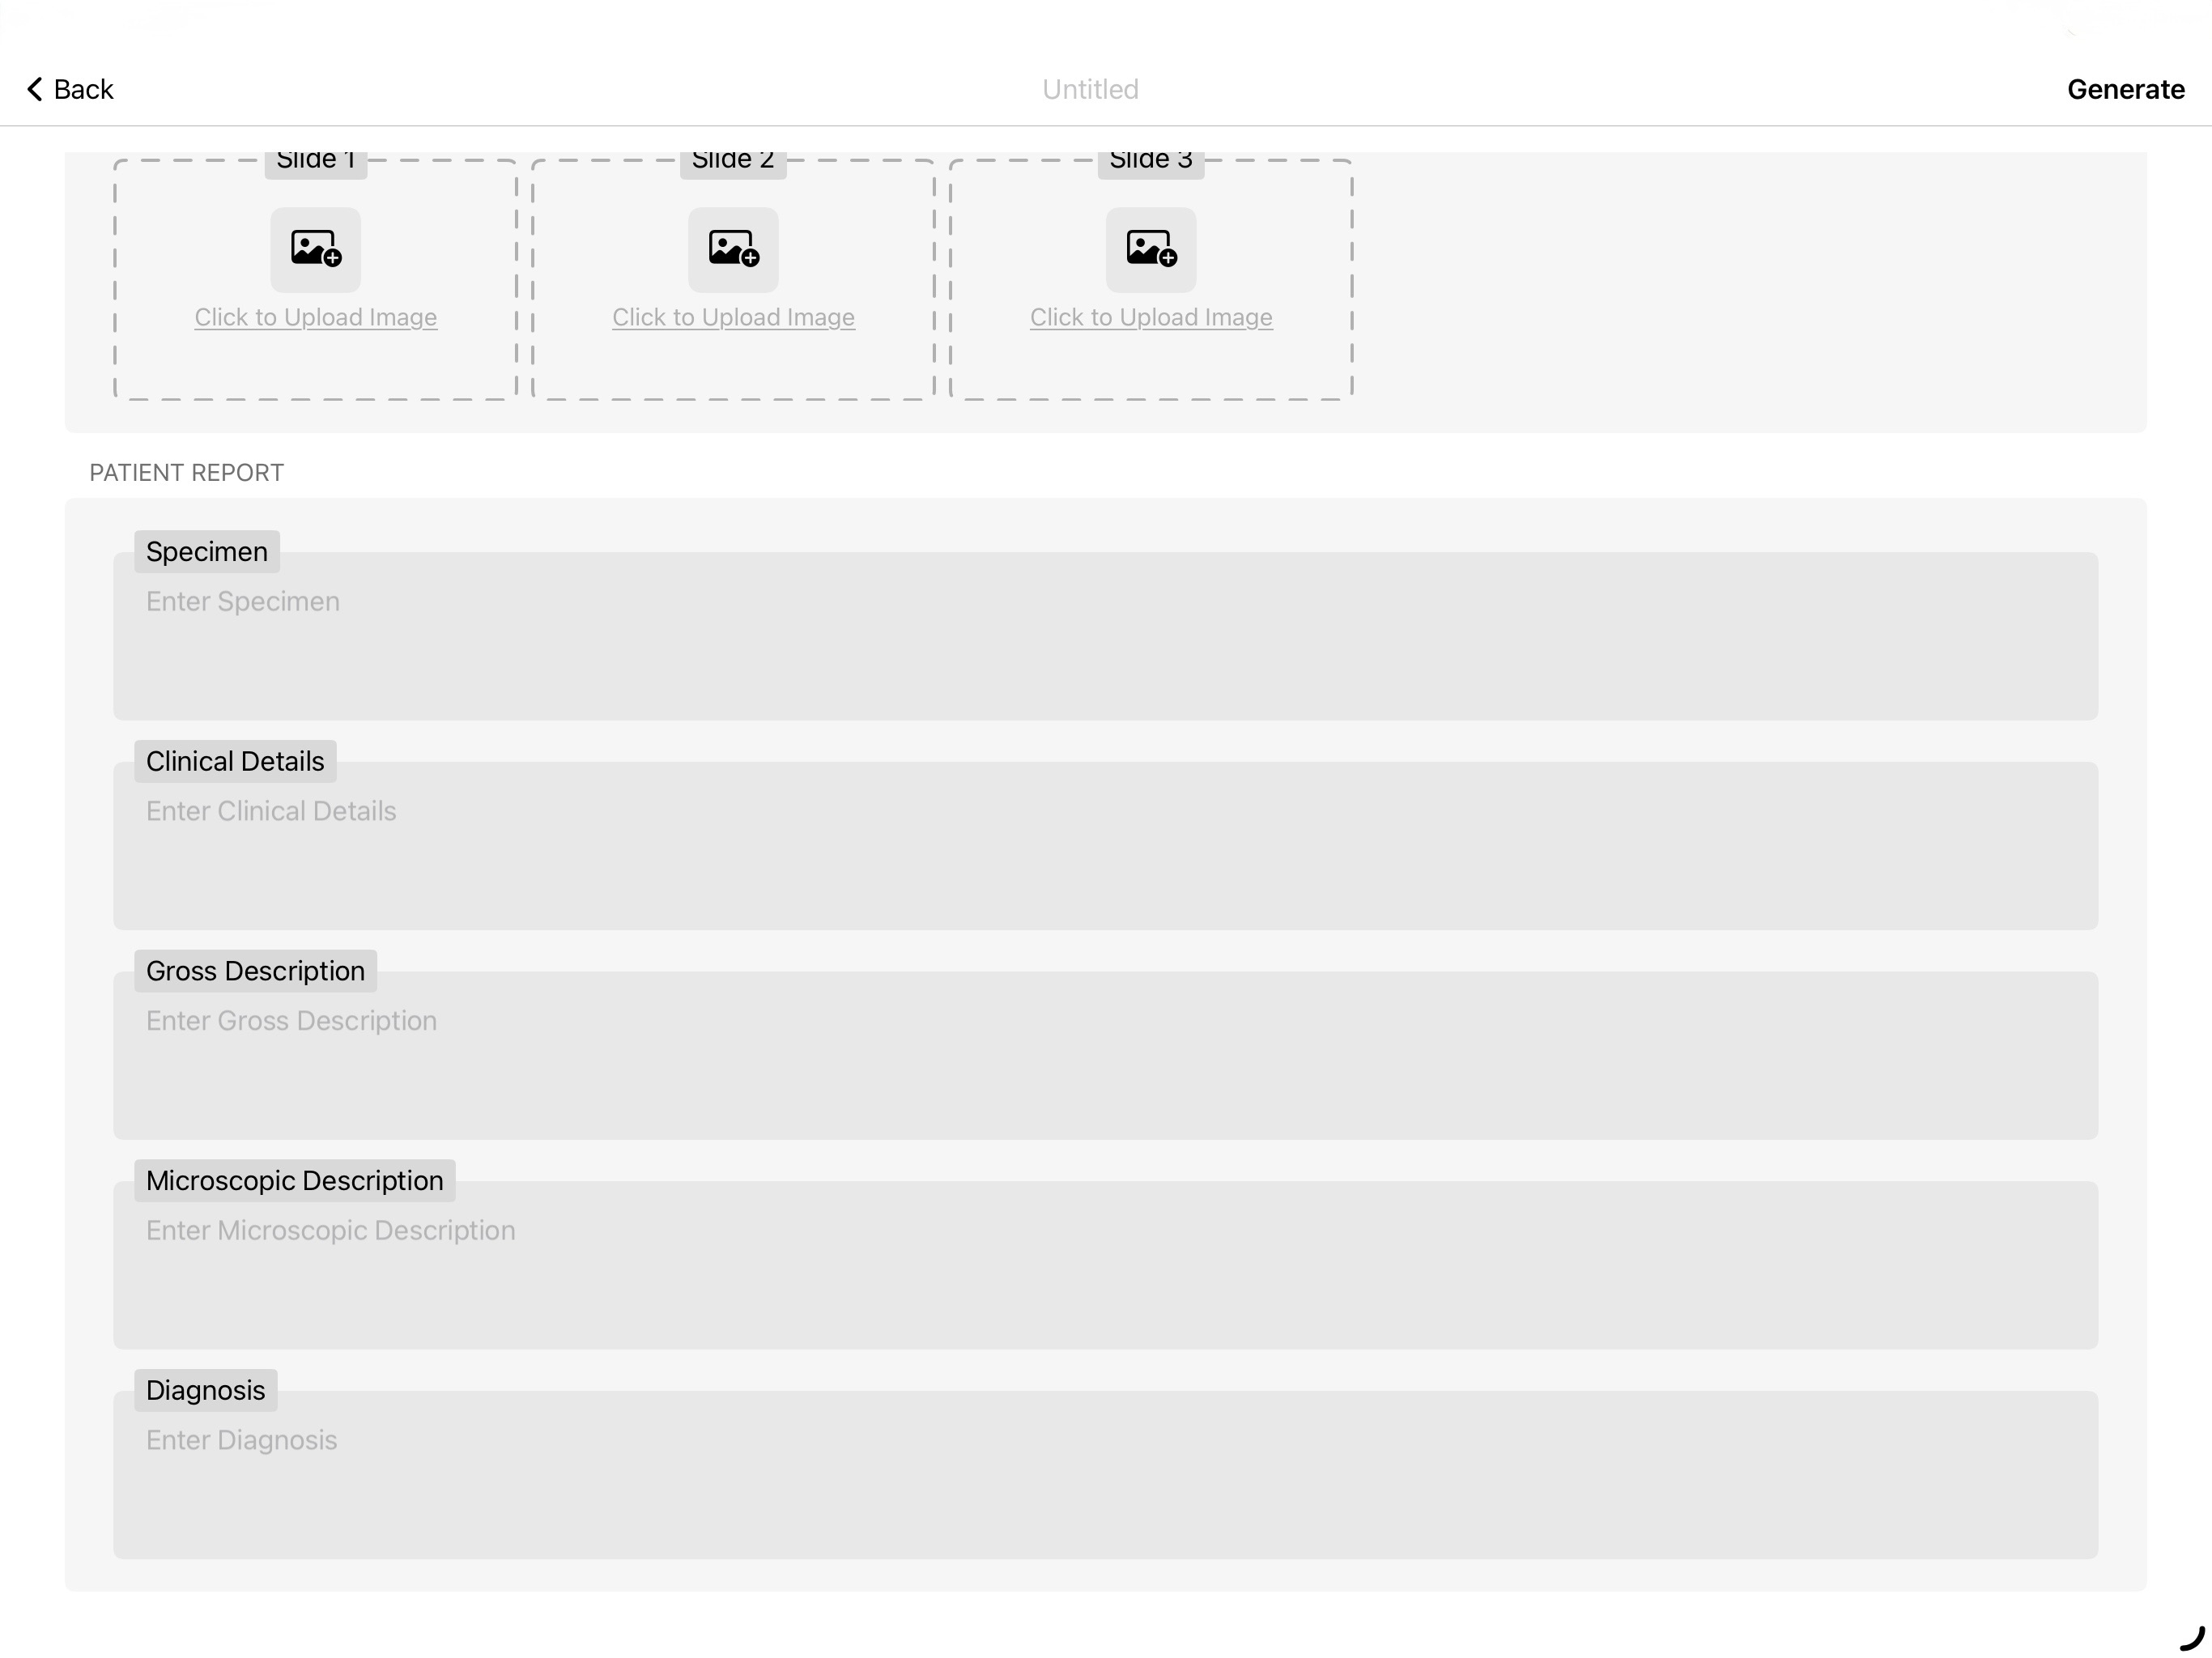
- At the top center is located the "Report Name" titled as "Untitled". Tap on the same to change the name of your Report.
Tap on "Generate" to generate the report. (Figure 1.8)
 |
|
|
|
|
Report Settings
1. The settings option has two features, the Header and the Footer for the report.
2. Tap on the right of the heading subsection (e.g. Name) to add in the designated details.
3. The details typed in the subsection will be shown at the top in the Preview column.
4. These details will be added in the final report as Header and Footer.
5. Once the Header and Footer details are added in tap on Save to save the details.
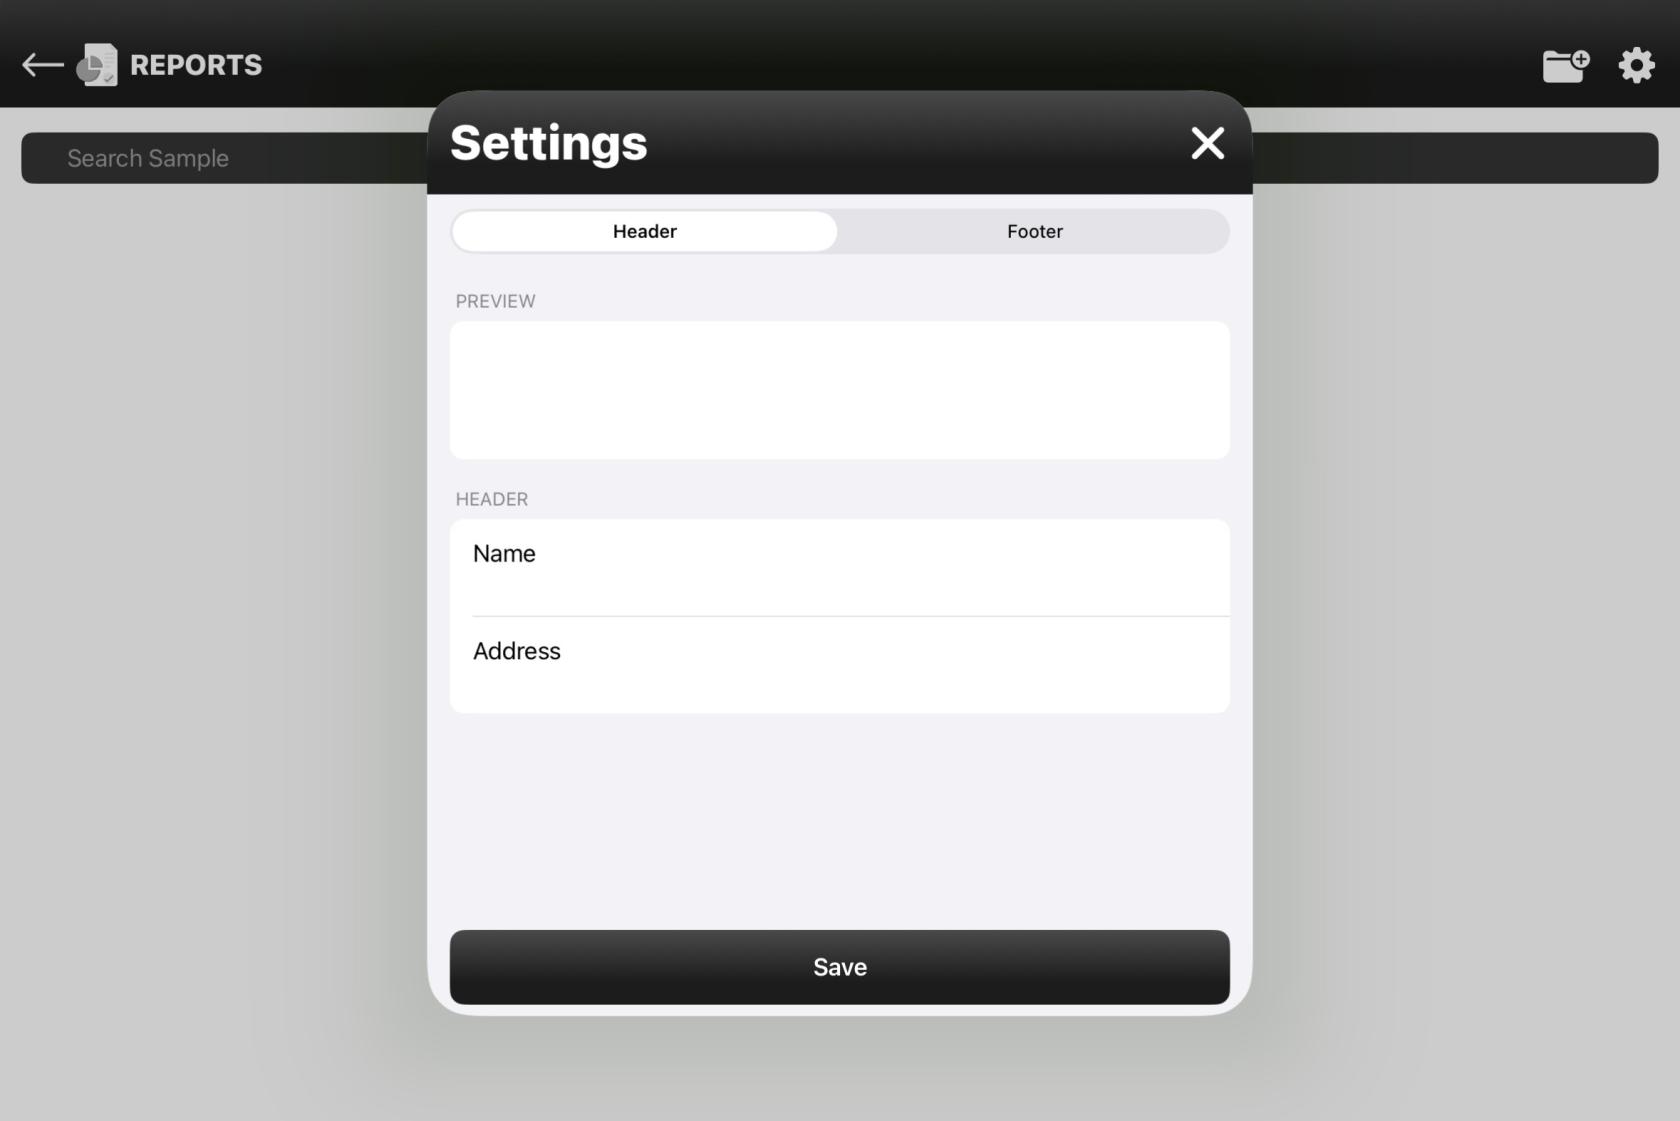
Figure 2.7 Header
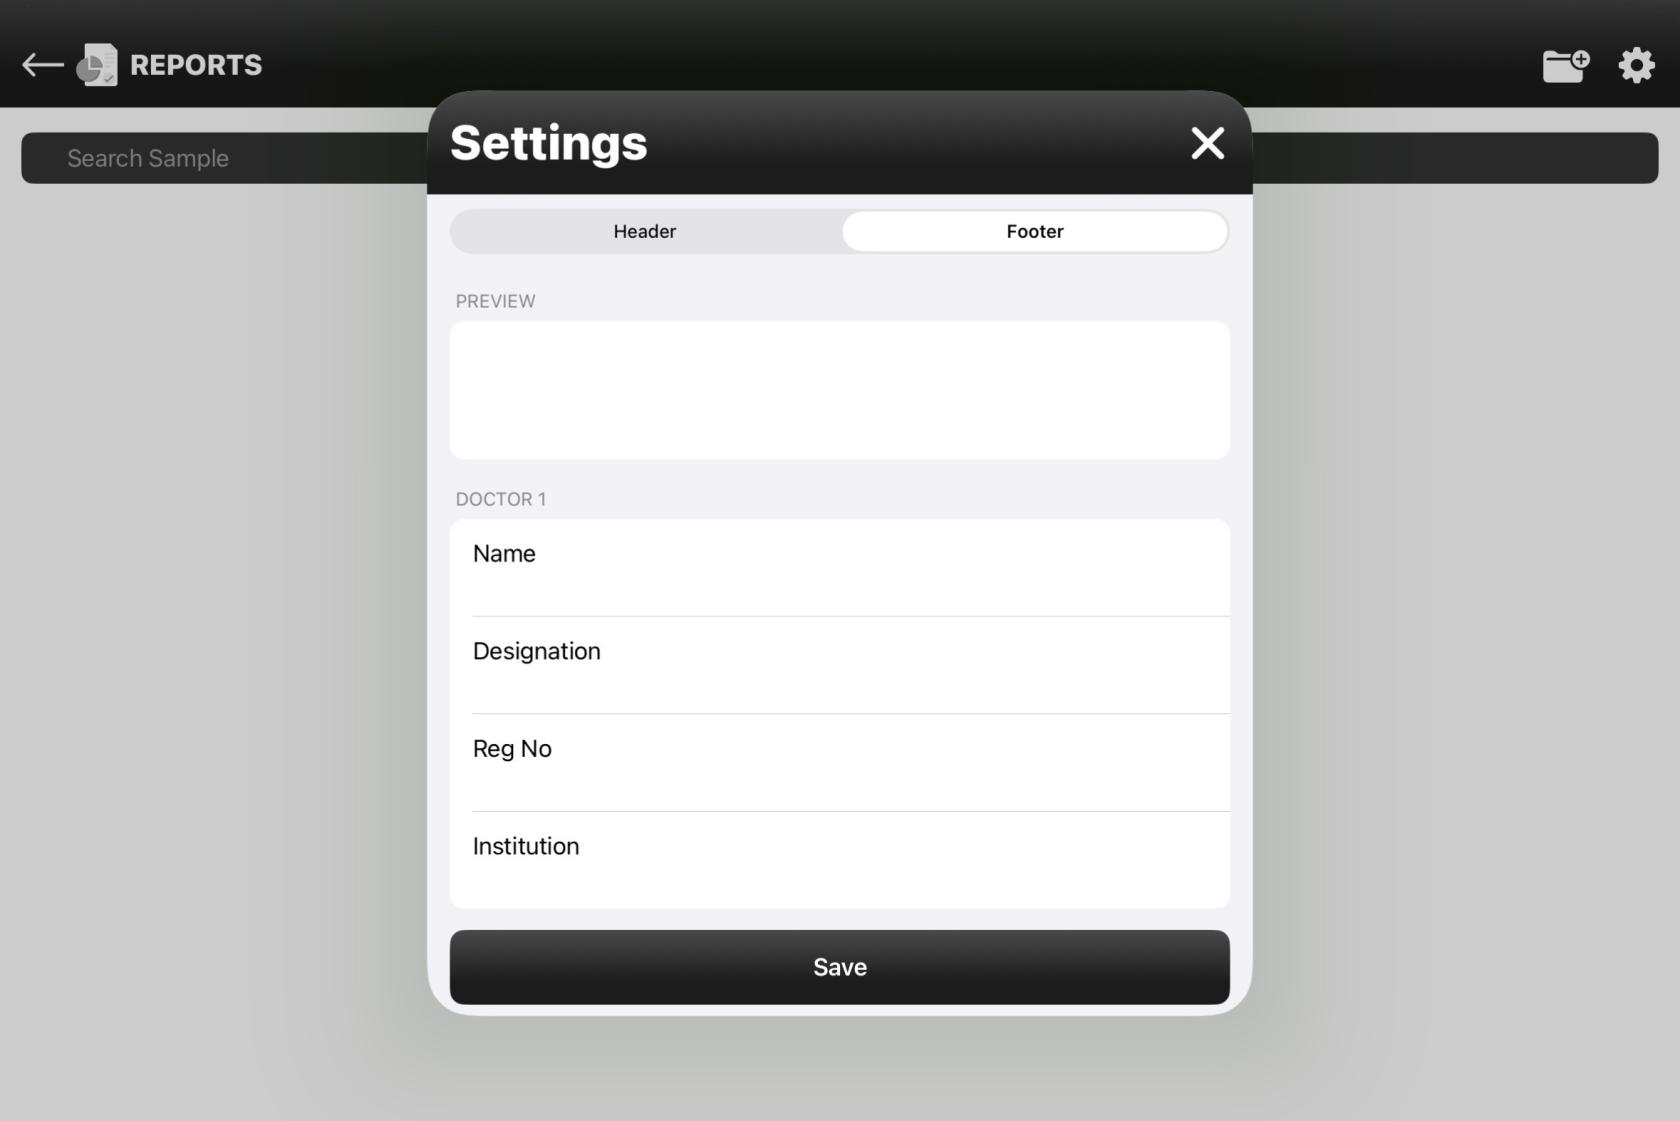
Figure 2.8 (A)Footer
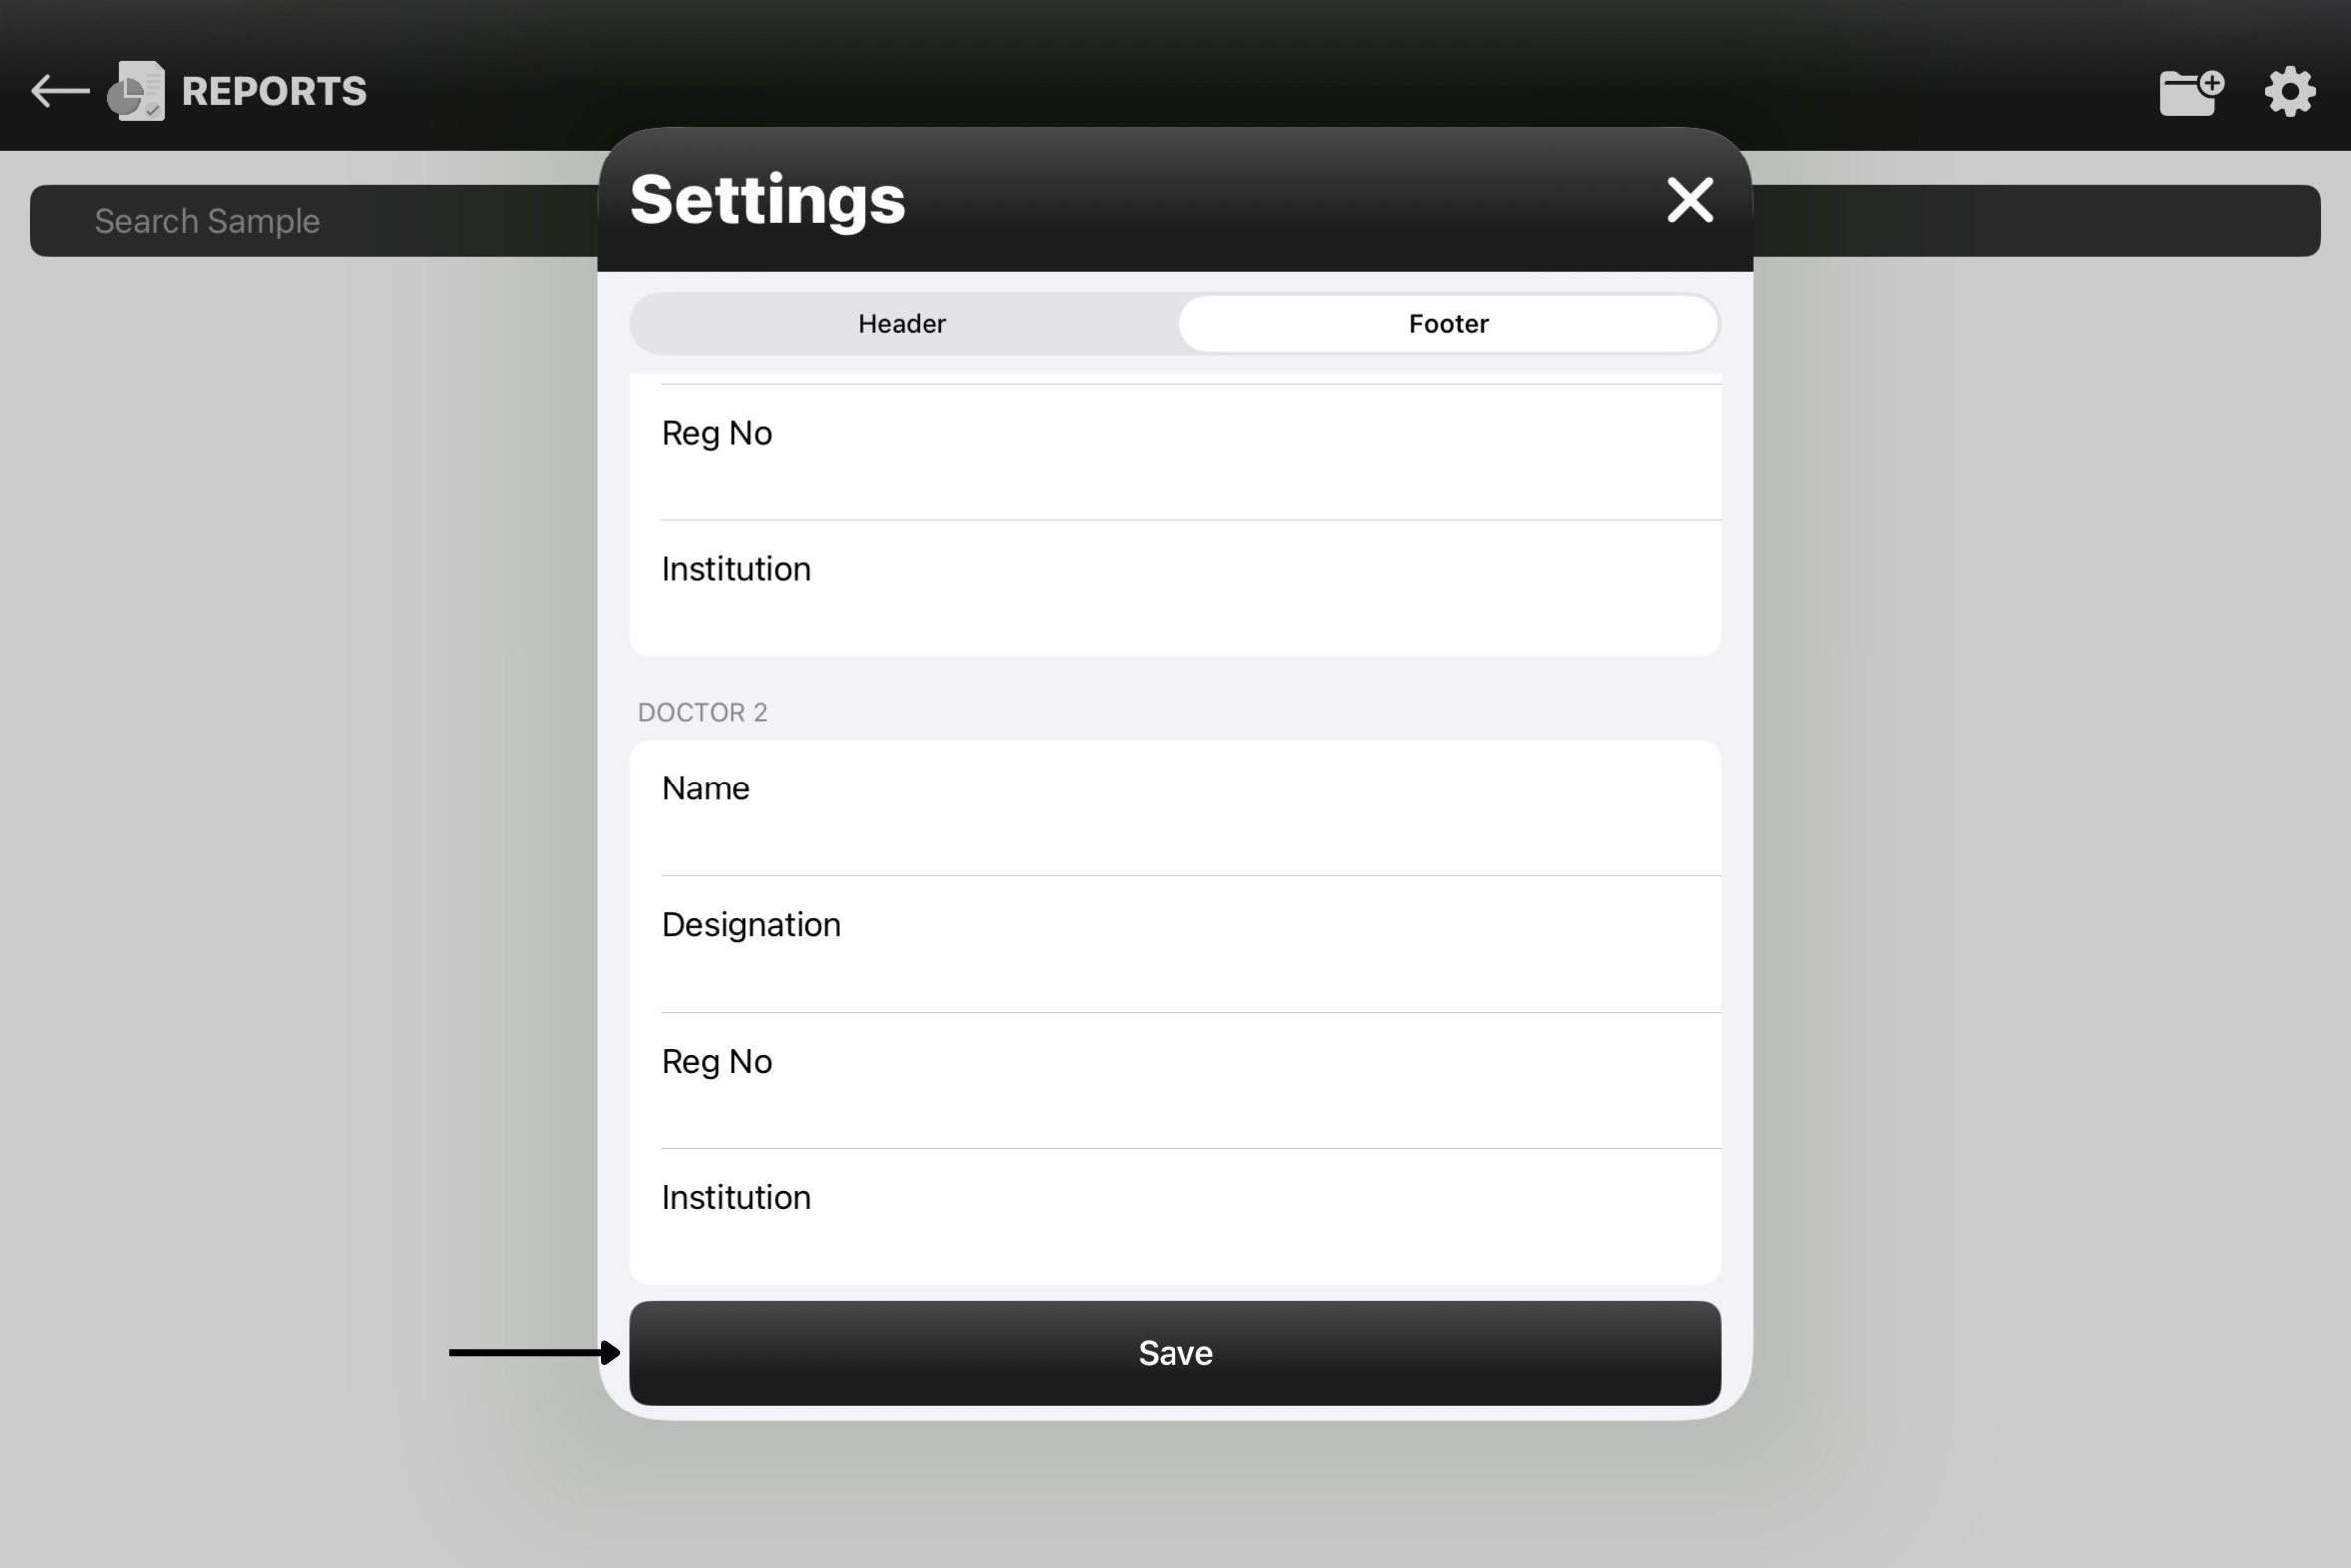
Figure 2.9 (A)Footer